Tear motor down or try a new headgasket?

sutor623

Rear Admiral
Joined
May 23, 2011
Messages
4,087
Hey guys, most of yall know I have been having issues with my'95 130hp. Finally figured out why the head wasnt reaching operating temp and fixed that. (water blockage on port side head.)

I have been wondering why the motor fails cylinder #1 and #3 drop test at idle. I suspected a past overheat because the thermostat housing was melted through when I changed it. I was thinking that I had a blown head gasket from the overheat. But this all puzzled me because compression in the motor is 130 across the board, and a leakdown test yielded under 10% loss on all cylinders.

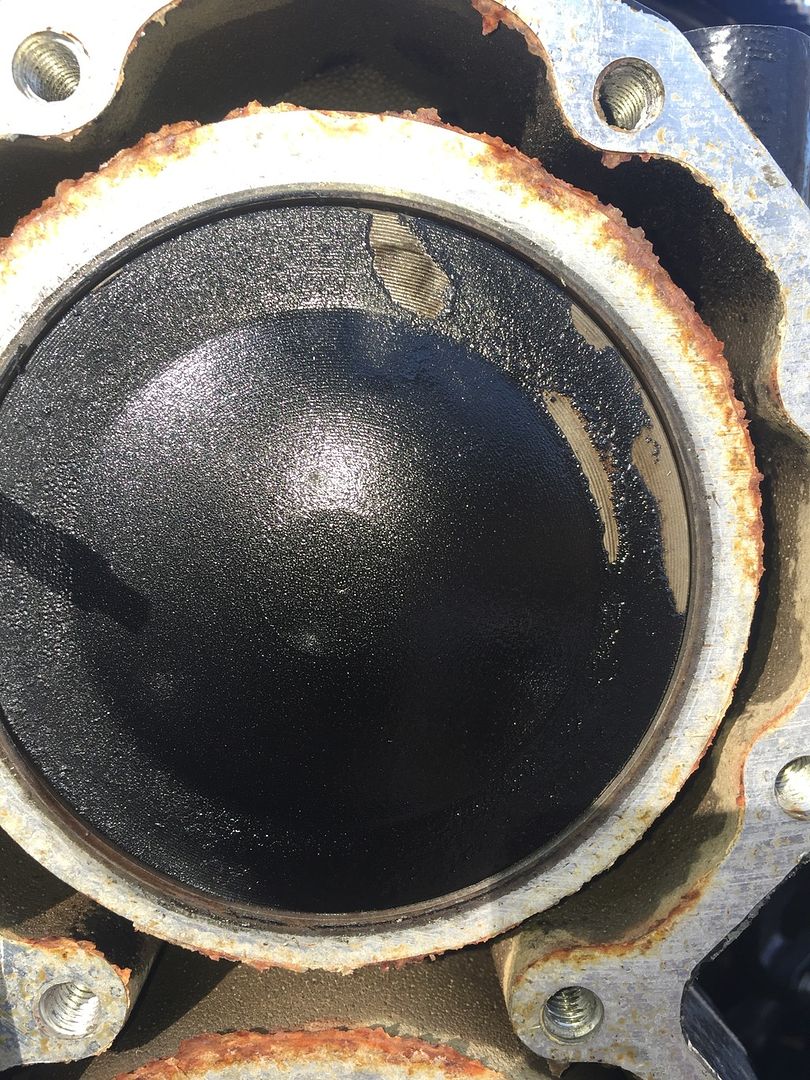
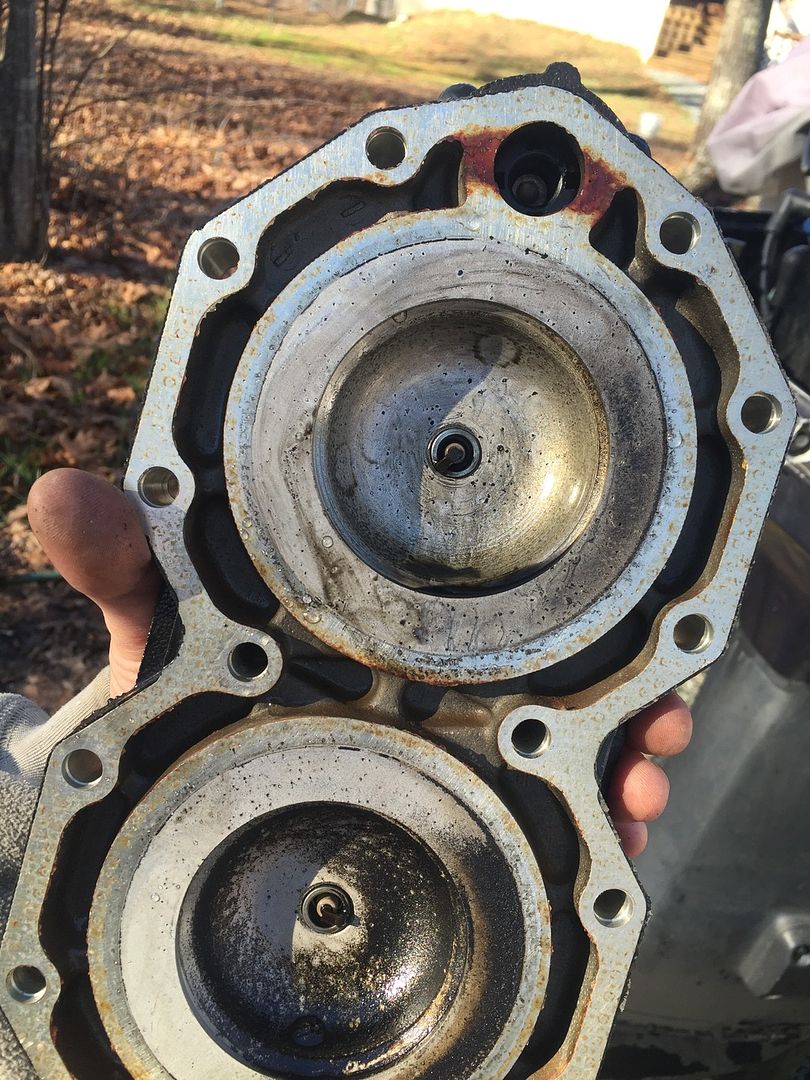
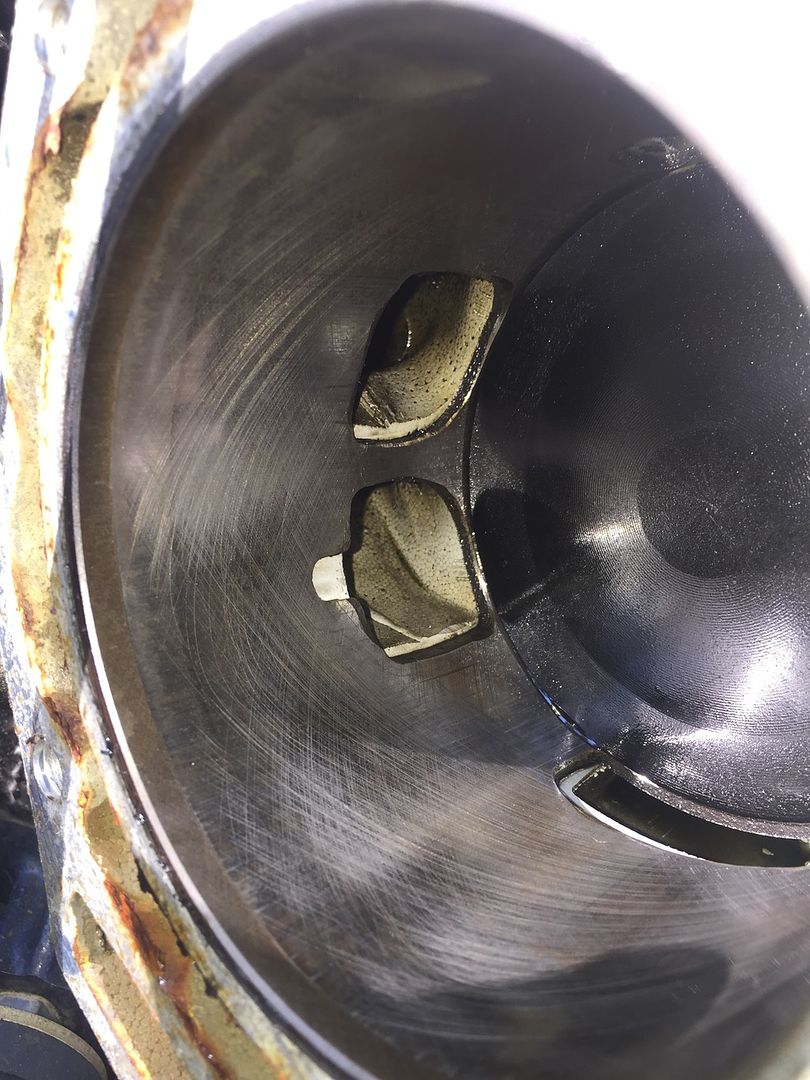
Does this look like water entry to you? It sure does to me. Looks like 1 is gettin it real good, and 3 is getting some also.


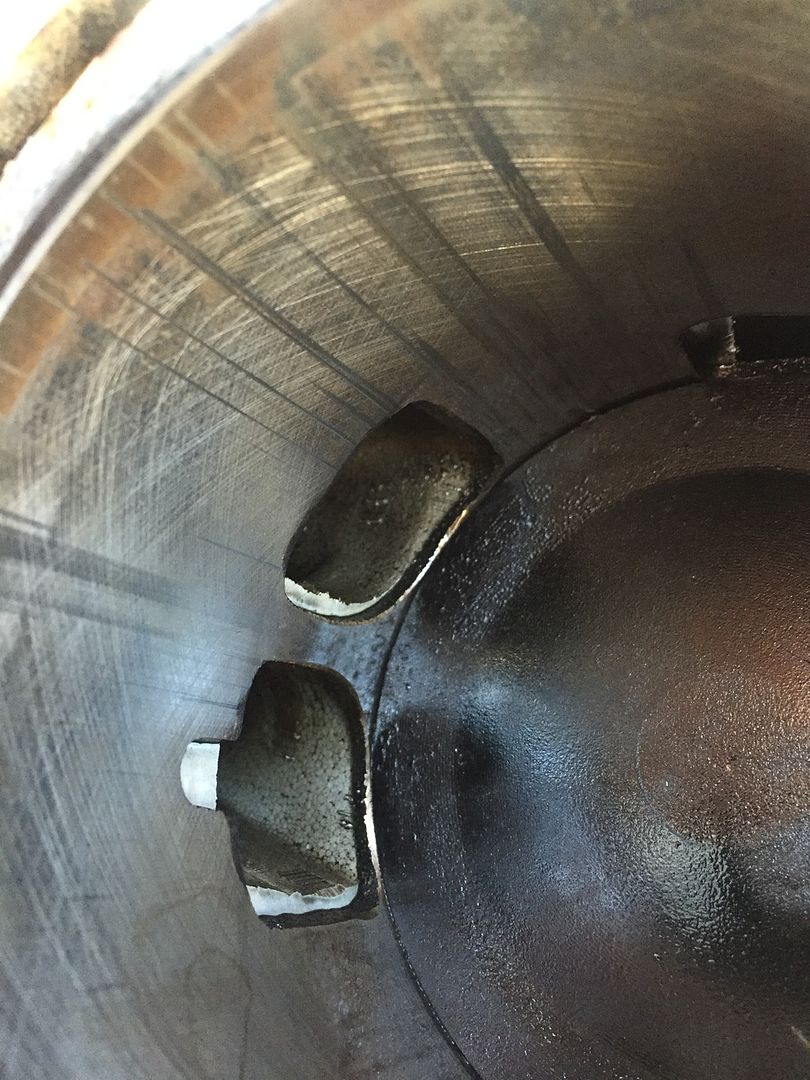
On another note, I have some scoring on #1 cylinder. It doesnt even look like it is through the hone in most spots. You cant feel it with your fingernail in most spots. But you can in two spots, ever so slightly.


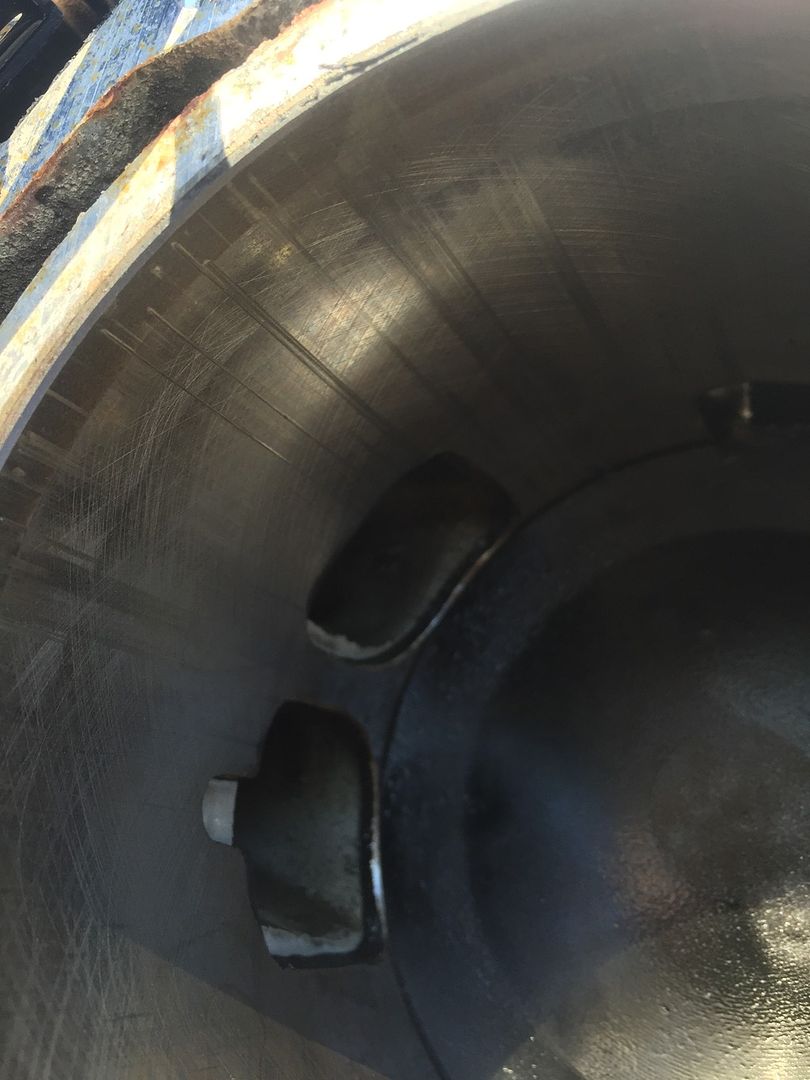
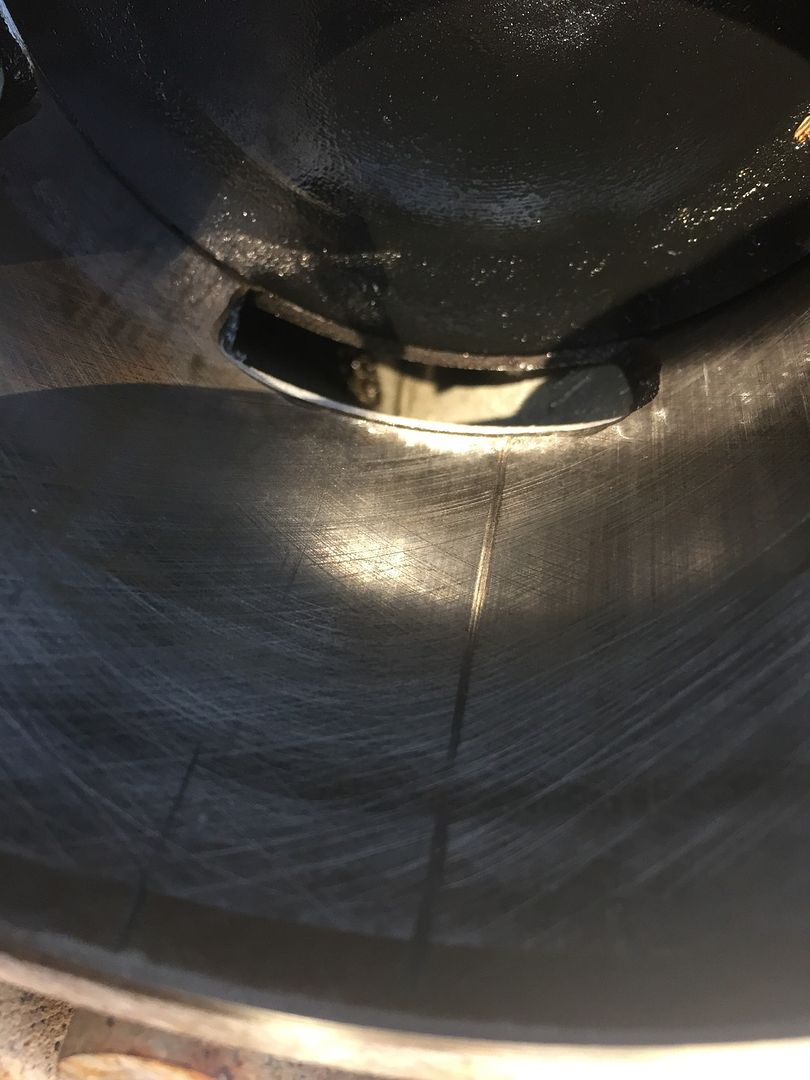
Here is cyl#3. It also fails the drop test, but not as much as 1. Very light scoring.


I have a new headgasket setting right in front of me. The motor has plenty of power to get on plane, mid range and full throttle. Only issue is hard starting and long warm up times. (Will NOT start in 30 degree weather unless its on the muffs.) I feel like most of the issues I am dealing with are from water in these two cylinders, but do not have experience on the wear of engines. Would you guys put the new headgasket on and see how it does, or is this a disaster waiting to happen? Remember, the cylinder holds good compression (Not that that is the tell all test.)
 
Last edited:

emdsapmgr

Supreme Mariner
Joined
Dec 9, 2005
Messages
11,551
Your upper head face looks pretty washed. No reason not to try a new head gasket. After running it a couple of times, re-torque the head gasket a second (final) time. Before you re-install the head, I'd run a machinist straight edge across the faces of the head and the block. Make sure nothing is warped due to a previous overheat. Possible that is the real problem.. and a new head gasket won't resolve that problem.
 

sutor623

Rear Admiral
Joined
May 23, 2011
Messages
4,087
I checked the head it doesn't seem warped. What should I use to clean it up? Should I use a fine grit sandpaper (500 grit) on a piece of glass to get all the rust/ old gasket off?
 

flyingscott

Fleet Admiral
Joined
Apr 8, 2014
Messages
7,988
Did you rebuild it looks like fresh hone marks just put a head gasket on it.
 

sutor623

Rear Admiral
Joined
May 23, 2011
Messages
4,087
Did you rebuild it looks like fresh hone marks just put a head gasket on it.


Nope not a fresh rebuild. Note the scoring on the top cylinder. I am just wondering how I am going to clean up and/or mill down the head if needed.
 

racerone

Supreme Mariner
Joined
Dec 28, 2013
Messages
36,260
A simple ( elbow grease required ) method that you can do at home.---Get a piece of glass that is flat.--Use some valve grinding compound and that glass and rub the cylinder head on it.------You will note that you get a dull finish on the ends and it will work to the middle.---Been that way on every cylinder head I have done.---All heads warp the same way !
 

sutor623

Rear Admiral
Joined
May 23, 2011
Messages
4,087
A simple ( elbow grease required ) method that you can do at home.---Get a piece of glass that is flat.--Use some valve grinding compound and that glass and rub the cylinder head on it.------You will note that you get a dull finish on the ends and it will work to the middle.---Been that way on every cylinder head I have done.---All heads warp the same way !


Thanks Racer. I noticed on this head that there is a tiny gap in the middle of the head when using a straight edge from end to end also.

I have heard that some people use granite scraps from old granite countertops. I used to install granite so I have plenty of those around. Think thatd be flat enough?? How long does it typically take to "mill" the head flat with this method?

Oh, also should I worry about the block mating surface being warped or is this a far less common occurrence?
 
Last edited:

racerone

Supreme Mariner
Joined
Dec 28, 2013
Messages
36,260
Flat granite works just as well.--After you are done you will say----" that was easy " ----or ---" that was quicker than driving to the machine shop twice "
 

sutor623

Rear Admiral
Joined
May 23, 2011
Messages
4,087
Flat granite works just as well.--After you are done you will say----" that was easy " ----or ---" that was quicker than driving to the machine shop twice "


Thanks Partner. Hopefully getting the water out of the two cylinders will make a big change. If not, Im sure I will be seeking your advice on a full teardown/rebuild!

Can I just use a parts cleaning solution to clean up the mating surfaces on the block?
 

sutor623

Rear Admiral
Joined
May 23, 2011
Messages
4,087
Maybe a stupid question, but do I need sandpaper also or just the compound?
 

sutor623

Rear Admiral
Joined
May 23, 2011
Messages
4,087
Bad news...............

Racer, I think you are on point my man. I was cleaning the piston head from all of the carbon deposits and getting ready to place the head to give her a whirl.
Found this. Little pieces of metal embedded and fused with the piston. I believe them to be aluminum.


Check out this gouge in the top of the piston!!


And look at these little bits of metal in the intake port. OUCH!!!!!


So here is the question. Are the crank seals that go around the crankshaft made of steel or aluminum? I believe these particles to be aluminum. This is scary because I have a funny feeling that these are parts of the block and not the crank sealing rings that Racer was talking about.

Either way, I had a funny feeling since I first ran this motor that she was on the verge of blowing up. Sure enough, my gut was right!!!

What years 120-140 hp blocks are compatible with this motor? I know from '88-'01 the 130's used my block. Hoping that I dont need another block, but Id like to know what to look for if I will end up needing one.
 

emdsapmgr

Supreme Mariner
Joined
Dec 9, 2005
Messages
11,551
The crank seal rings are a high tensile, heat treated metal. Unlikely these bits are from those seal rings. Now I'm wondering just what the lower part of the piston skirts look like. If it ever was a reman engine at some time, possible the bore was not machined correctly for the pistons? Maybe that's were the shavings are coming from. The cyl liner scuffing does happen and is not abnormal. Yours is much more than "normal". The vertical grooves in the liner become a problem the deeper they get. Some appear deep, others not so much. The deep ones permit combusted exhaust gas to go down the groove and will attack the sides of the rings and piston skirts, taking useful life out of the powerhead.
 

racerone

Supreme Mariner
Joined
Dec 28, 2013
Messages
36,260
????---When the seal rings break up into pieces they start chewing up the aluminum block.-----The seal rings are made of mallable iron.
 

sutor623

Rear Admiral
Joined
May 23, 2011
Messages
4,087
Thanks guys. So I am assuming that there is a good chance the section of this block that holds the seal rings are shot? Or could these particles be part of he piston skirt? I almost have the power head off. Hopefully that'll be my Black Friday project.
 

emdsapmgr

Supreme Mariner
Joined
Dec 9, 2005
Messages
11,551
You'll need to get the powerhead split and then assess what you find. Some pictures would be good.
 

sutor623

Rear Admiral
Joined
May 23, 2011
Messages
4,087
You'll need to get the powerhead split and then assess what you find. Some pictures would be good.


Thanks, Ill get some pics up as soon as I do that.

I am leaning toward getting a re-manufactured powerhead. I will have to send the block and heads out to get bored/honed (if it is even usable) as there are no good machine shops around here. Then factor in the price of a rebuild kit (I refuse to use old pistons and bearings). Also to get the crank inspected. The time is another issue because I have a 14 month old running around. All in all, I think doing the work myself may save me $1000 if I am lucky. I always end up spending way more time and $ than I estimate with things like this.................
 

emdsapmgr

Supreme Mariner
Joined
Dec 9, 2005
Messages
11,551
A reman powerhead would be an easy, but expensive, solution. I'd hope you could get it apart and see just what the issue is. Who knows, it might wind up being a cheap fix...If not-then pursue the reman powerhead...
 

sutor623

Rear Admiral
Joined
May 23, 2011
Messages
4,087
Can anyone tell me how to access the power head bolts? Do I take out the three screws that he the lower cover together?

I forgot my manual at work yesterday.......
 

emdsapmgr

Supreme Mariner
Joined
Dec 9, 2005
Messages
11,551
You'll need to remove the two covers (skirts) at the top of the midsection. Just below the lower cowling (tray). A few screws, some of which are accessed from the bottom, a couple accessed from the inside the lower cowling. Once those two are removed you will have access to the long bolts as well as the nuts that hold the powerhead to the exhaust adapter. Keep in mind you'll need to uncouple the shift rod, where it attaches just under the bottom carb. You can still get a good idea of how it goes together from the factory parts website: epc.brp.com
 
Top