Bringing neglected Johnson 90HP back to life.

JerryB1987

Seaman
Joined
Apr 19, 2015
Messages
62
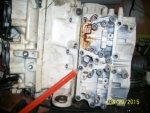
I have a boat that was given to me that has a 90 HP Johnson outboard. When I got it all the wires were disconnected and there was no battery. I found in the engine where the diagram shows to hook the positive lead but there is no indication or drawing in the manual I bought that shows the best place to hook the ground connection. Anyone have a picture where the best place to attach the ground would be? It was just laying in the splash well along with the positive so I don't know where it should be hooked to that will provide a good ground
 

Bosunsmate

Admiral
Joined
Apr 7, 2012
Messages
6,129
i just put it on any good sized bolt on the crankcase. I wire brush it and clean the hole threads too.
You could use the starter brackets bolts too if you wanted.
 

interalian

Commander
Joined
Jul 23, 2009
Messages
2,105
Most of the newer motors (post '70s) had stickers on the starter showing where the ground and positive cables connected. Look for a stud with a post and nut in the vicinity of the solenoid.
 

JerryB1987

Seaman
Joined
Apr 19, 2015
Messages
62
I will get the boat moved forward so I can take a picture of the other side later. The Model number is J90MLCRD, from looking online it indicates the M is a manual tilt, but this has a power tilt/trim on it. The PO passed away about 3 years ago and the boat was left outside uncovered. The gas and oil tanks are full and I can't get the oil drain plug off yet, the edges of the screwdriver slot are worn off so there is nothing to grab to turn it.

The flywheel can be turned by hand so at least it isn't totally seized. I was advised to replace the water pump so I have a kit for that. The drawing on the starter shows where to put the positive but not the negative and it doesn't want to line up to anything with the bend it has in it from years of being attached somewhere. I had found a purchased a repair manual to work on the motor, all the wires were disconnected, I was told he planned to rebuild the boat so must have started to dismantle it. The floor was rotted out but I just finished replacing it so it is time to get the wiring hooked back up and see what all has to be done to get the motor working.

IMG_20150419_095955690.jpg IMG_20150426_091218199.jpg IMG_20150830_060631238.jpg
 

AEROCOOK

Master Chief Petty Officer
Joined
Jul 28, 2004
Messages
872
As interalian said, look for a stud protruding from the block. Here's where the stud is located on my 1988 110.
 

Attachments

  • 000_0002.JPG
    000_0002.JPG
    228.6 KB · Views: 1

Bosunsmate

Admiral
Joined
Apr 7, 2012
Messages
6,129
Id squirt some oil in the cylinders and spin it for a few turns (via the starter) with the plugs out and their ht wires grounded before trying to start it so you get oil through to the bearings etc, then do a compression test.
If you have any signs of a misfire investigate immdiately as if they ae running lean these motors get hot and blow pistons. Also check the head temps, the starboard bank generally runs a bit hotter.
They are great robust motors so long as a few precautions are done (check the overheating horn works by grounding the tan wire to the block where it has a rubber sleeve by the head, key must be in the on position)
 

Bosunsmate

Admiral
Joined
Apr 7, 2012
Messages
6,129
You should be able to keep your hand on the heads for at least twenty seconds, they get cooler with more rpm as a pressure valve opens and floods the engne.
BTW the overheat horn only works if the sensor still functions, but they seem to have decent longevity, some people add a temperature sensor to the heads to back this system up
 

JerryB1987

Seaman
Joined
Apr 19, 2015
Messages
62
I haven't tried to start it yet as I need to rebuild the water pump. I did get the wiring sorted with your help and am happy the tilt works :) So far so good on the wiring in the boat
 

1983 ercoa 21'

Chief Petty Officer
Joined
Jan 12, 2014
Messages
632
You should also go through the fuel system inspecting all fuel lines connections and disassemble the carbs and cleaning them .
 

JerryB1987

Seaman
Joined
Apr 19, 2015
Messages
62
will do, the fuel lines definitely need a close look. The one running from the tank to the motor was really stiff, turning the motor a couple of times to get at the sides caused it to snap in two. The lines from the oil tank aren't hooked up either so have to go through the manual to find where they all hook in.
 

Bosunsmate

Admiral
Joined
Apr 7, 2012
Messages
6,129
Id keep the lower unit off while you run these tests. That way you dont have to bother about keeping the impeeler wet. Also you will then know if it stumbles only after you add water (ie a gasket leak).
You can also just put a hose into the inlet pipe while the LU is off and run it indefinitely that way.
I always do this after rebuilding them, i dont turn the water on until after 10-15 seconds or so.
 

Bosunsmate

Admiral
Joined
Apr 7, 2012
Messages
6,129
\ The lines from the oil tank aren't hooked up either so have to go through the manual to find where they all hook in.

Really?, it has an oil tank on it, the last one i rebuilt was premix, i wouldnt trust any automatic mixer from the 80s. I told my mate to run it at 50/1, his had a standard fuel pump
 

JerryB1987

Seaman
Joined
Apr 19, 2015
Messages
62
Wish I had seen the suggestion to leave the lower unit off for now before I bolted it all back in place :/

The Johnson uses their VRO system. I have read a little about some people bypassing the VRO and just mixing in the fuel tank but haven't looked closely at doing that. Here is the oil tank sitting next to the gas tank prior to starting the rebuild of the boat.

IMG_20150419_154551678.jpg

On another issue, anyone have any tips to make it easier to rehook the shift linkage. It is very hard to see under the motor much less insert any kind of tool to put the screw back in and get the rod lined up without completely blocking the light needed to see under there.
 

interalian

Commander
Joined
Jul 23, 2009
Messages
2,105
The linkage bolt is the worst piece of 'engineering' I've seen in years. Access is probably not so bad on the ones earlier that used a choke instead of primer - all those little hoses right in the way. All those hoses should be changed too - mine are all brittle.
 

Bosunsmate

Admiral
Joined
Apr 7, 2012
Messages
6,129
well if you havent got that bolt in id drop the LU again as it really is a much better way i find of doing a proper start up after a long break.
I use a magnetic pick up tool to get that screw in place and then i slip in the screwdriver.
I also disconnect the gear cable as without doing that it makes the problem multiple times more difficult
 

JerryB1987

Seaman
Joined
Apr 19, 2015
Messages
62
I took the lower unit off. When checking all the oil and fuel lines I found the oil in line to the VRO was snapped in two. With having seen suggestions to bypass the VRO and after talking to the mechanic at a local marina I did that rather than replace the broken line.

After replacing the fuel line and finding no leaks we tried starting the motor with a hose hooked to the water pickup where the lowed unit should have been. Water was coming out the indicator so everything looked good to start. After a couple of times trying to start the motor it fired off but was running at full throttle and seems to want to do that regardless of where the throttle is positioned though the linkage does move along with the lever at teh remote. I shut the key off immediately so I suppose it is possible the motor speed would have dropped but I didn't want to risk damage. Been many years since I worked on a motor so any ideas where to start would be appreciated.
 

Bosunsmate

Admiral
Joined
Apr 7, 2012
Messages
6,129
Check your timing base is turned back against the stop. Also a broken flywheel key can cause this as it throws out timing
 

JerryB1987

Seaman
Joined
Apr 19, 2015
Messages
62
Some pictures of my throttle linkage, been a loooooong time since school and so far the information in the repair manual isn't helping but this doesn't seem right to me ....


This is the "at rest" position of my linkage and is where it sits with the remote hooked up in the idle position, it does NOT rotate further counter-clockwise when hooked up. Note the cam follower is against the cam and the carburetor throttle plates are closed. The whit arrow shows the back part of the linkage is not against the stop and the red arrow shows the top rod off the back part of the throttle is against the stop. In other words the back part of the linkage is at full travel. I am sure this is wrong as the back part of the linkage never moves with the remotes cable operating the linkage.


With the remotes cable disconnected I can push the throttle counter-clockwise. It does not spring there on its own. In this position the white arrow shows the back part of the linkage is against its stop and the red arrow shows the upper rod has moved away from its stop;. Also the cam is not touching the cam follower to operate the carburetor plates. To me this seems like the idle position for this back part of the linkage. Here is a picture showing the gap between cam and cam follower when the linkage is pushed back.


Am I correct that the linkage should be in this more counter-clockwise position when at idle and if so how do I fix it since it doesn't spring back on its own?
 
Top