NAT1VE
Petty Officer 2nd Class
- Joined
- Aug 7, 2015
- Messages
- 116
Well today I changed out the Thermostats on my 79' Rude 115hp. I hope this helps others who need to replace theirs somewhere down the line. I tried my best to document as much as possible, but I was Han Solo today. If you can get another person it definitely will help a lot when you need to assemble the housing. one person to push on the housing and the other to thread the center bolt. Here it goes..
I did this with engine off the boat on the stand. unlock the hood, remove. Now head to the backside of the engine.


Next grab yourself a can of PB blast, DeepCreep or WD40. This is some stuff I had, but anything will help.

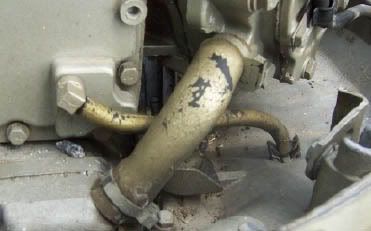
Disconnect hoses and Tell-tale. Not a must but a good time to inspect it for any blockage, mine was completely plugged.

Careful backing the housing out, the springs could go flying.


Inspect the passage ways for any blockage as well.


Now disassemble the housing, Remove old thermostats gasket material, o-rings and cork o-rings. Using razor blades or gasket scraper. My cork o-rings were completely deteriorated, they must have gone quite sometime ago..:blue: upon re-assembling the larger holes on the center housing face upwards!


I had to fast forward a little, but Assembly is just the reverse. I used Blue RTV to help the gaskets stick together as well used it on the engine block. Because I was alone I found that using small zip-ties to relieve some tension off the springs helped quite a bit. I clipped them with wire cutters right before I started threading the center bolt. Be sure to place the 2 end bolts in the housing before you tighten the housing to the block too. Tighten all the bolts and replace the hoses with fresh ones, I like to run a clear hose on the tell tale. Congratulations, the Thermostats are changed, and your engine is now much happier!


New Thermostats installed and no parts left on the bench, except old ones. Hope this helps! Cheers.

I did this with engine off the boat on the stand. unlock the hood, remove. Now head to the backside of the engine.
Next grab yourself a can of PB blast, DeepCreep or WD40. This is some stuff I had, but anything will help.
Disconnect hoses and Tell-tale. Not a must but a good time to inspect it for any blockage, mine was completely plugged.
Careful backing the housing out, the springs could go flying.
Inspect the passage ways for any blockage as well.
Now disassemble the housing, Remove old thermostats gasket material, o-rings and cork o-rings. Using razor blades or gasket scraper. My cork o-rings were completely deteriorated, they must have gone quite sometime ago..:blue: upon re-assembling the larger holes on the center housing face upwards!
I had to fast forward a little, but Assembly is just the reverse. I used Blue RTV to help the gaskets stick together as well used it on the engine block. Because I was alone I found that using small zip-ties to relieve some tension off the springs helped quite a bit. I clipped them with wire cutters right before I started threading the center bolt. Be sure to place the 2 end bolts in the housing before you tighten the housing to the block too. Tighten all the bolts and replace the hoses with fresh ones, I like to run a clear hose on the tell tale. Congratulations, the Thermostats are changed, and your engine is now much happier!
New Thermostats installed and no parts left on the bench, except old ones. Hope this helps! Cheers.
Last edited: