94 model 120hp force piston help

Pricey474

Cadet
Joined
Apr 25, 2016
Messages
16
Hi All I'm currently rebuilding my 120hp force and just wondering does anyone know what the factory piston to bore clearance is ? As I don't have a manual and would take a month of Sunday's to get one over to Australia. My machine shop fella says he needs this spec to fininish the honing after boring to 30 thou over ..using WSM +.30 cast pistons .
Best regards
Pricey
 

jerryjerry05

Supreme Mariner
Joined
May 7, 2008
Messages
17,927
Any reason using WSM pistons instead of Wiseco?
​Was wondering as I haven't used WSM.

Do they require a press and a cradle for assembly?

I know Wiseco don't.

I'll get my manual out and try to find the clearance.


Oh yea WELCOME!!!
 

pnwboat

Rear Admiral
Joined
Oct 8, 2007
Messages
4,251
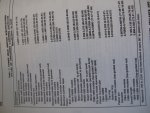
Here is a picture of the Power Head Service Specifications from my Clymer manual. It doesn't actually tell you what the piston to bore clearance is, but it does tell you what the standard bore size is 3.3750 - 3.3762 inches ( 85.73 - 85.76 mm). Standard Piston skirt size is (90? to pin bore) Major diameter 3.369-3.370 inches (85.57-85.60mm). Standard Piston skirt size is (parallel to pin bore) Minor diameter 3.367-30368 inches (85.52-85.55mm). So from what the manual indicates, it looks like there's about .006 inch (.1524mm) piston to bore clearance. The specs for the earlier smaller diameter pistons would indicate about .005 inch (.127mm) piston to bore clearance. I believe that some of the piston manufacturers actually state what the piston to bore clearance should be in the paper work that comes with the pistons.

Sorry about the sideways view. Tried everything to get it rotated properly but when I post it, it always comes out sideways.

IMG_3914.JPG
 

Pricey474

Cadet
Joined
Apr 25, 2016
Messages
16
Hi lads thank you both for your help , I've recently bought a rebuild kit from eBay after many phone calls and net searches in Australia I simply couldn't find much for force motors here and what I did find was very expensive so the eBay bay kit was the only option and it contains WSM pistons ,not quite sure how they go together yet as this is my first rebuild and the kit is still in transit from over there but they look similar to wiseco with the clip to hold the wrist pin not sure if they're are better or worse than wiseco as I found mixed reviews on both but I was warned by a supplier over here about wiseco Pistons being very touchy but I think it's all in the install and run in process .
Thanks pnw that's pretty close to what I thought mate
Cheers lads
 

jerryjerry05

Supreme Mariner
Joined
May 7, 2008
Messages
17,927
Sorry I didn't get back yesterday.(way too busy for an old guy)
​pnw posted what I was going to add.
 

Pricey474

Cadet
Joined
Apr 25, 2016
Messages
16
Hi just noticed another possible problem the old Pistons have a pressed wrist pin and the new ones are a floating wrist pin so I'm wondering if my old conrods are compatible?
 

pnwboat

Rear Admiral
Joined
Oct 8, 2007
Messages
4,251
As far as I know, there is only one type of connecting rod for your motor. The wrist pins that come with the Wiesco pistons (floating wrist pins) work fine with the existing connecting rods that originally had pressed pins. I would assume that the same would apply for the WSM pistons.
 

tommarvin

Ensign
Joined
Nov 22, 2015
Messages
999
Exactly, it's the conrods, that's why everybodys saying Wiesco pistons.
Another place to get a power head rebuild kit is WWW powerheadkit.com they have Wiesco pistons, if the WSM pistons don't fit the conrods.
You could sell the WSM pistions on e-bay
You can buy Wiesco pistons direct from Wiesco
 

jerryjerry05

Supreme Mariner
Joined
May 7, 2008
Messages
17,927
​Both types of piston will work with your rods.
Just make sure you use "bearing assy. grease" when installing.

The OEM need special tools to assemble.
 

Pricey474

Cadet
Joined
Apr 25, 2016
Messages
16
Thank you all for your input it's been a big help will let you all know how it comes together.
Cheers
Pricey
 

Pricey474

Cadet
Joined
Apr 25, 2016
Messages
16
Hi All the reassemble went great all back together now need to check the timing and from what I can find its 28 deg BTDC at WOT with plug leads grounded but my question is how do I get WOT in neutral? From what I've found online so far there is a neutral safety switch but I can seem to find one...
Regards
Pricey
 

Nordin

Commander
Joined
Jun 12, 2010
Messages
2,439
The neutral switch is located at the gear shift arm/cam and you have to short it out with a piece of wire or unscrew one wire and connect it to the other post at the switch.

Set the timing 28dgr at WOT runing it with the starter. This will give yoiu 30dgr when the engine is runing at WOT.
 

Pricey474

Cadet
Joined
Apr 25, 2016
Messages
16
Hi mate thanks for your response I noticed the switch your talking about in a video but mine doesn't seem to have anything like that all I can see is the cable driven linkage that activates the gearbox nothing electrical in that area at all.
Thanks again
 

jerryjerry05

Supreme Mariner
Joined
May 7, 2008
Messages
17,927
Pics of the tower shaft area??
​The 94 120 does have a Neutral Safety Switch.
You sure of the year?
It should have yellow with red or black trace wires to it.
Should be on the side where the fuel pump is.

But to get WOT in N you bypass the switch and go direct to the solenoid with a jumper to turn the motor.
Don't forget to turn the key on and have safety lanyard hooked. and the plugs out.

Nordin,
The later years they were using different timing specs.
What ignition system do you have?
Mercury flywheel the timing needs to be set at 32d to achieve 30d running.
This is different than the older Prestolite system.
 

Pricey474

Cadet
Joined
Apr 25, 2016
Messages
16
Hi Jerry thanks for your reply I am a bit sceptical of the year I think it may be a slightly later model it doesn't have a distributor so I'm guessing it's a CDI ignition system. Since my post the motor has been timed at 30 degrees BTDC at 5000rpm in water using a timing light ,it was a fairly big adjustment but as soon as mark was reached the engine seemed to run crisp , idled smoother and started much better. Still not sure that this is 100% correct but seems a major improvement. Will post some pics of this thing tomorrow to confirm year model and switch location as I'm fairly certain the year model is a bit off due to the fact the rebuild kit I purchased for a 94 had different exhaust plate gaskets had to buy a different gasket kit.
Thanks again
Pricey
 

jerryjerry05

Supreme Mariner
Joined
May 7, 2008
Messages
17,927
Post pics of the lower unit and shifter too.
The later models used Mercury shifters and the switch is in the shifter.
 
Top