How Do I remove the shift linkage on a Force 50 Model 507X7C Serial 2944

Mo1

Petty Officer 3rd Class
Joined
Dec 11, 2015
Messages
76
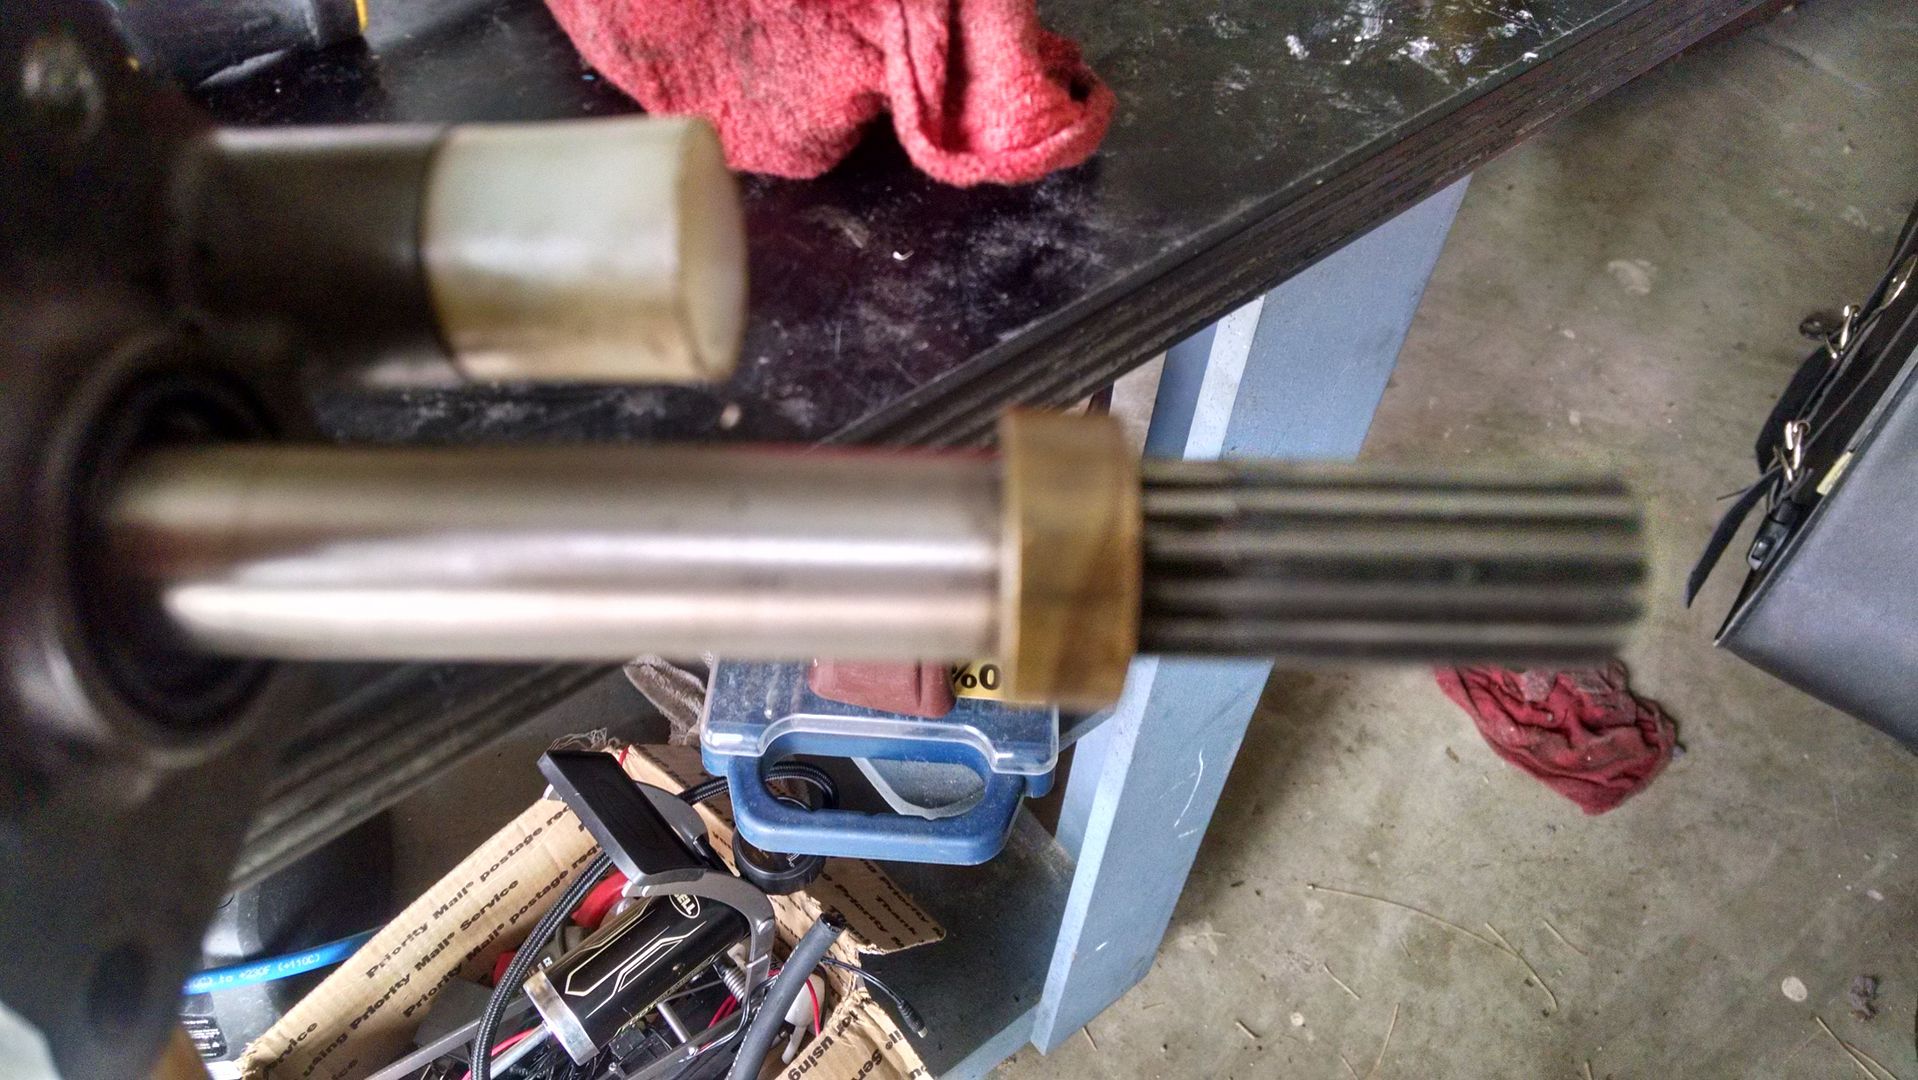
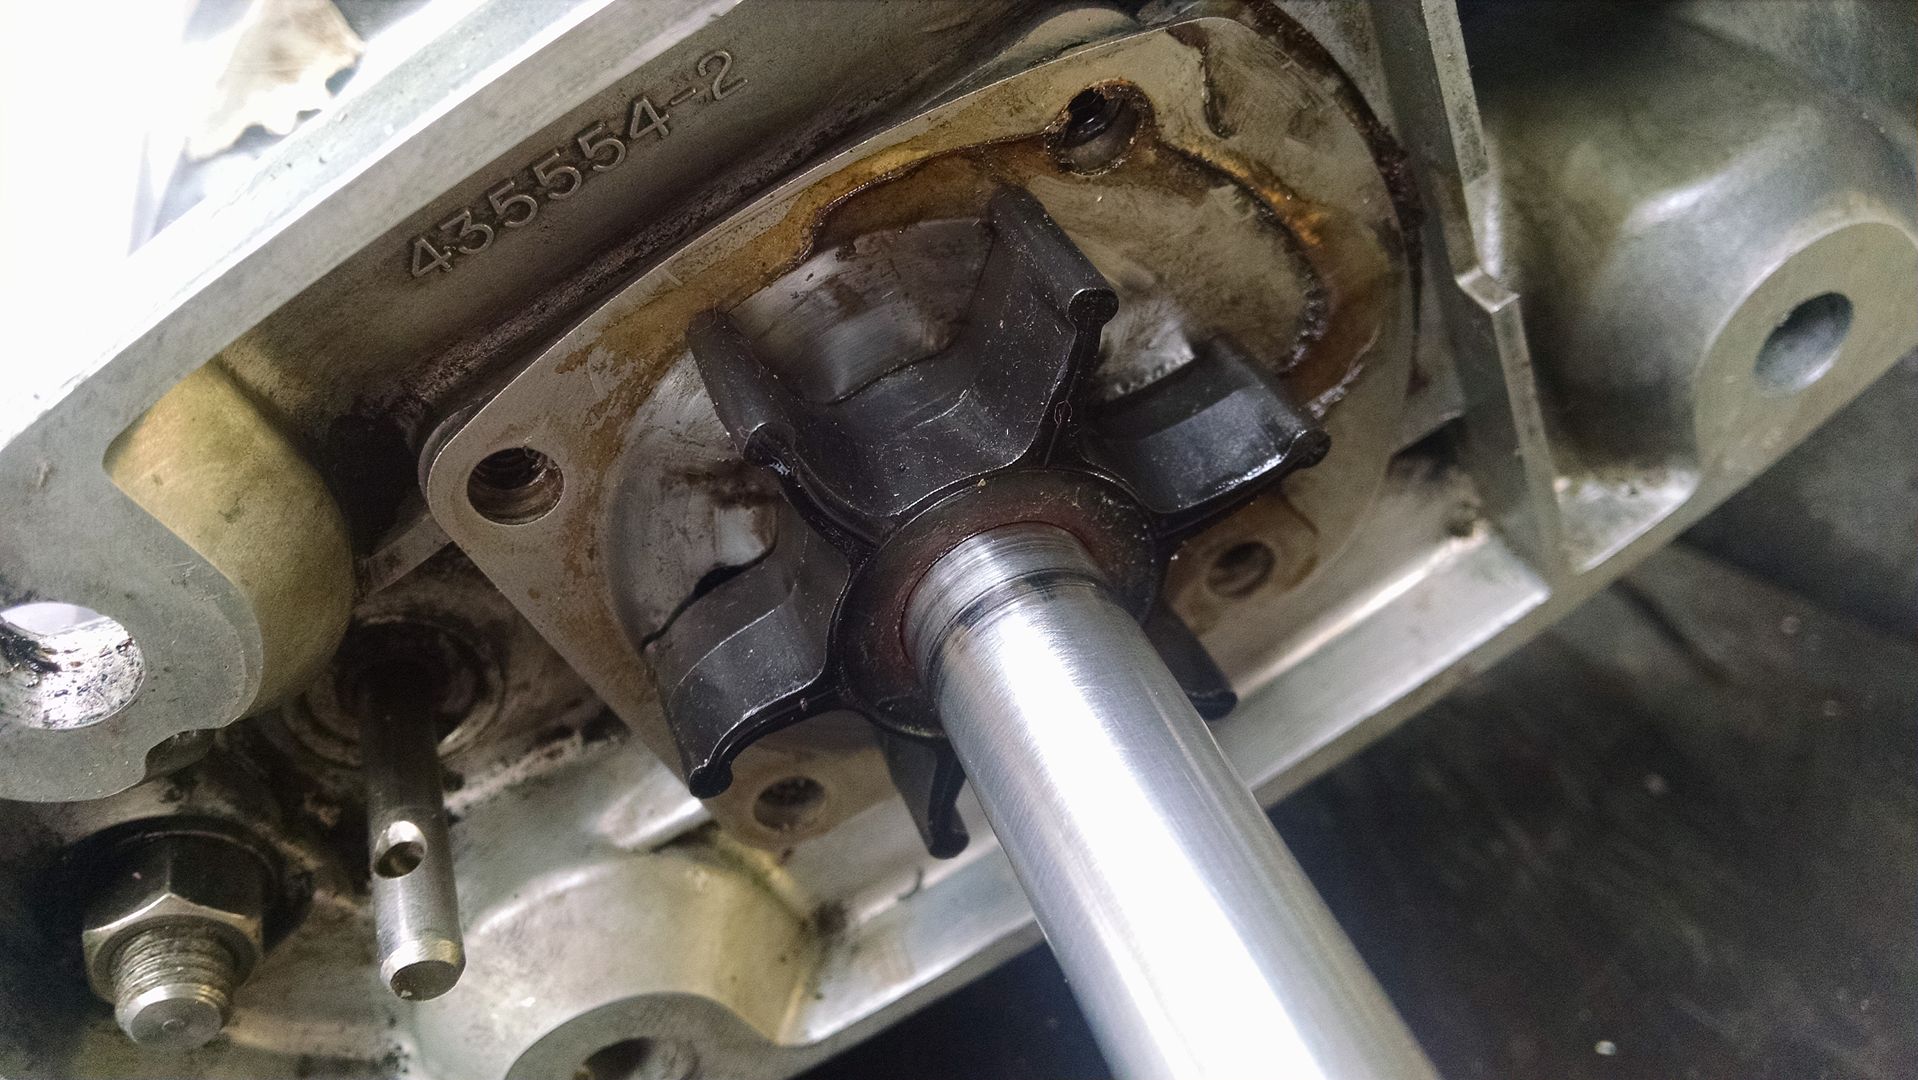
Hi Guys, New to the forum and this is my first boat. The boat started up but wasn't circulating water and the gear oil was milky. So I thought I would replace impeller and check seals. This model has like 4 different types of lower units and nor sure which one this is. I thought maybe the "c" in the model number meant it was the C type lower unit but the manual shows that one with 6 bolts holding the lower unit.

I removed the 4 bolts attaching the lower unit but cant find where to remove the shift linkage. Any help wold be appreciated
 

tommarvin

Ensign
Joined
Nov 22, 2015
Messages
999
I don't know, but on our 1988 force 125, the shift linkage rod comes up from the lower unit between the stern of the boat and the front of the lower unit into horizontal tube with a hole through it that a pin goes through to connect them with a very small cotter key that I lose every time, that holds the pin in. Hang tight,help will be soon, these guys are very good.
 

Frank Acampora

Supreme Mariner
Joined
Jan 19, 2007
Messages
12,004
Remove the six bolts holding the two lower cowl halves. Remove the right side half. Inside you will see a long hex coupler threaded onto both upper and lower shift rods. Crack the lock nut loose but don't change its setting. Now unscrew the hex coupler. The lock nut will tell you how far to re-thread the coupler when you attach the shift rods again. Remember: The coupler is left hand on one side and right hand on the other. When you re-install, you must push up on the lower shift rod so both rods enter the coupler the same amount.

If I remember correctly it will take two 7/16 open end wrenches to do it. The four 9/16 head bolts are the only ones that hold the lower unit. There are no hidden ones.
 
Last edited:

Mo1

Petty Officer 3rd Class
Joined
Dec 11, 2015
Messages
76
Awesome Thanks Frank and Tom. I figured that was the case but I didn't want to screw anything up. I'll keep you guys posted. Funny how I have the manual and it didn't explain that.
 

Mo1

Petty Officer 3rd Class
Joined
Dec 11, 2015
Messages
76
I dropped the lower unit today. The gear side had oil in it so I guess I need to replace the seals? I was going to remove the water pump but it looks like I need to remove the shift shaft. Is that right? I don't want to screw anything up. Its my first time working on an outboard engine sorry if I don't know the terminology or sound like a dweeb.

I was making a DIY pressure tester I have everything but having a hard time finding a fitting to put in the fill hole of the gear box. Any help is appreciated.
 

jerryjerry05

Supreme Mariner
Joined
May 7, 2008
Messages
17,926
Is there any water in the lower?
​Could be the oil and residue is just unburned oil/gas??
 

Mo1

Petty Officer 3rd Class
Joined
Dec 11, 2015
Messages
76
Yes there is Jerry. It was milky white but the boat has been sitting for a while last registered 2006. I just nought it. Hopefully it passes the pressure test.
 

Frank Acampora

Supreme Mariner
Joined
Jan 19, 2007
Messages
12,004
The fill and drain holes are standard 3/8 threaded. You can make a pressure fitting by drilling a soft bolt. If the shift rod swivels to the side you do not need to remove it--just push it out of the way . If it does not swivel then at the bottom shift rod there is a pin held with a very small cotter pin. remove them and the coupler will pull off the lower rod--it may take some force though.

There is a seal under the water pump. after you remove the water pump simply pull the drive shaft out of the lower unit. Pry out the old seal and tap in the new one. Be certain the casting is clean and not corroded so the new seal will do its job. Replace the two seals on the fill and drain. Remove the prop. remove the two Allen bolts holding the bearing carrier to the lower unit case. Tap the bearing carrier sideways a bit so the ears are sticking outside the case. Tap gently so you don't bend or break the ears. Now, alternately tapping on each ear work the bearing carrier out of the case. be careful because the prop shaft will want to come out too so push in on the prop shaft. By that year, the rear ball bearing was held firmly on the prop shaft BUT-- if it comes out in the bearing carrier, remove it. Pull the seal and replace it.

The shift rod seal may be loose and leaking. Sometimes it is possible to hammer it down slightly and tighten it so it seals again. Use an appropriately sized deep socket. If you need to remove it you must remove the shift rod and thread in an appropriately sized lag bolt. use the bolt to pull the seal. Tap in the new seal using an appropriately sized socket. Then set the drag by tapping so the shift rod slides smoothly with just a bit of drag--not too tight. Do this in steps because there is no going back if you get it too tight. The new seal goes in metal side up.
 

Mo1

Petty Officer 3rd Class
Joined
Dec 11, 2015
Messages
76
Thanks Frank for the explanation Frank. Ill go and pick up that bolt for the pressure gauge. I just read your post after I pulled the water pump. I had to remove the shift shaft rod.

I thought I had screwed up because as I was pulling the water pump off the drive shaft the shaft was coming with it. I put it back and it turns when I move the propeller. So Im actually supposed to completely remove it so that I can replace the seals below it?

So I do not remove this spline seal? I completely remove the shaft and pull the water pump out the other side?

Spline%20Seal_zpswm2beiru.jpg


Originally the boat was not pumping water the only thing coming out of the exhaust was this black liquid and not a big spray like Ive seen out force 50 exhaust.do. You were probably right Jerry maybe it was un burned fuel

The impeller looked good no memory or cracks.
Impellar_zpsmugmppwq.jpg


There was a plastic part inside the gear housing just sitting there not sure if its just supposed to sit there like that? Its at the end of this video


The other thing I noticed is the shaft didn't have a key it had a pin that matched up with a groove in the impeller
 

Frank Acampora

Supreme Mariner
Joined
Jan 19, 2007
Messages
12,004
That plastic piece is a screen that should push all the way down to the water inlet grooves. It prevents big chunks from being ingested but if you boat in clean water and never get near the bottom it is not absolutely necessary. While the drive shaft can be removed with no harm, you only need to pull it if you are changing the seal.

The brass collar and shaft seal will be tight on the shaft but it is way easier to assemble the water pump if you remove it and leave the drive shaft in the lower unit.. The impeller looks good but since you are replacing the seals and already have the pump off, replace it and save it for emergency use.

Yes, ALL Chrysler and Force 50 engines had the pin drive impeller. SOME {I don't know what year(s)** had a combination pin and key. The pin fit in the shaft and the key fit in the impeller groove.

The gears will not move out of position so after removing the drive shaft it can simply be slid back into position. Then, put on the bottom of the pump. Insert the drive pin and slide the impeller down over the shaft. Slide down the pump body. Lubricate the body and impeller with dish soap. As you push down the pump body rotate the shaft clockwise looking down. This will make it easier for the impeller blades to enter the body.

You can, but usually do not need to replace the pump body seal. The small ribs on the impeller do a good enough job of sealing the pump body. The impeller and pin actually locate the drive shaft but once the top spline seal is installed and the lower unit is attached to the engine the shaft will not move vertically anyway.
 
Last edited:

tommarvin

Ensign
Joined
Nov 22, 2015
Messages
999
You said in your first post, that you were not circulating water, the impeller looks plenty good, I was expecting worse, a set, worn at contact edge, why no circulating water ? Is the indicator water stream hole plugged ? Your sure the pin was keeping the impellor from slipping on the drive shaft , the water was turned on to the muffs? I'm new to this,but my gut is telling me, your impellor should be moving water. Its fun working on an outboard.
 
Last edited:

Mo1

Petty Officer 3rd Class
Joined
Dec 11, 2015
Messages
76
I really appreciate your help Frank. Hopefully I don't ruin the splines trying to remove the spline seal. If you turn the seal to try and take it off the shaft turns maybe I can tap them off.

I was wondering if that impeller was spinning too Tom. Im tempted to just clean everything up and put everything back if it passes the pressure test:D
 

Frank Acampora

Supreme Mariner
Joined
Jan 19, 2007
Messages
12,004
Don't turn it. Take a pliers and close it behind the seal collar. Then place the drive shaft on a hard surface and tap the pliers with a hammer to drive down the collar. The splines are the same size or very slightly smaller than the shaft. The collar will not ruin them coming off.

You know, it is quite easy to install the lower unit with the brass water tube not entered into the plastic adapter on the water pump. Check the white plastic adapter to see that the bottom is not clogged put water pressure on the brass tube to see that it is sealed up top and it has no corrosion holes in it. When you install the lower unit be absolutely certain that the water tube is engaged in the plastic adapter. If all this is OK and you still do not get any water you will first need to remove the head and check the water passages for sand Then, if they are clear you will need to remove the exhaust cover and check those passages for clogs. HINT: If you have the head with the clear plastic tube from exhaust tube to thermostat check the tube for water. If it does not show water flowing then the problem is before the head.

When installing the lower unit it is a bit more difficult than removing it. You need to line up the drive shaft and ensure that the splines are aligned. You also need to line up the shift rod and the water tube. It generally helps if you have an extra set of hands to turn the flywheel
 

Mo1

Petty Officer 3rd Class
Joined
Dec 11, 2015
Messages
76
Thanks all the tips Frank I'll make sure thats its all cleared up looking forward to working on it tomorrow
 

chieftaing

Cadet
Joined
May 24, 2015
Messages
21
I'm replacing seals on pretty much the same engine. To do the pressure test, i used one of those oil fill pump kits that has a metal fitting that screws into the lower fill hole & has poly tubing that pushes onto a pump top. I pulled the poly tube off the pump, found a brass fitting at Lowest that was the right size barb fitting & a schraeder valve. The barb fitting was 1/4 mpt, i got a 1/8 to 1/4 mpt bushing for the schraeder valve (got all at Lowest) & a 1/4 mpt coupler to connect them. I used a tire inflater from my air compressor so that i could meter in the 10 psi & watch the guage. Its nice because when u let go of the lever, it shows pressure on the dial. Sure enough, it got to 10 psi (carefully) & then slowly started dropping pressure. Pretty sure i heard a leak @ the prop seal, but i got the full seal kit & am replacing as many as i can, then recheck pressure!
 
Top