time for my winter project

Frank Acampora

Supreme Mariner
Joined
Jan 19, 2007
Messages
12,004
As far as I know, no Chrysler control box had a TNT switch in the handle. US marine did but not all boxes had them and Mercury boxes use a different control cable so they are not swappable.

Really, I have several boats with TNT. Two are on the dash and one is in the handle. I don't find any extra effort to use the dash switches and when the control handle switch gets damp while the boat is on the trailer it activates the TNT. That is a PIA. So I prefer the switch on the dash.
 

Arawak

Chief Petty Officer
Joined
Aug 27, 2010
Messages
486
What would be really nice is a switch on the motor....
 

Simple_Man

Petty Officer 1st Class
Joined
Sep 11, 2013
Messages
267
Thanks Frank and Arkwak I plan on adding a 2nd switch on or near the motor
 

Arawak

Chief Petty Officer
Joined
Aug 27, 2010
Messages
486
If you do, show pics please! That's on my TODO list.
 

Frank Acampora

Supreme Mariner
Joined
Jan 19, 2007
Messages
12,004
No Title

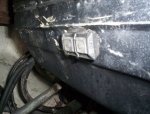
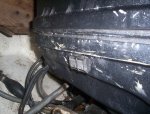
On the engine is real easy to do. Buy or salvage an Evinrude waterproof TNT switch from a V4 or V6 engine. Drill a mounting hole in a convenient location on the lower cowl. Connect red to a power source and wire the blue and green in parallel with the incoming blue and green signal wires.

Sorry, can not show actual wiring because it it too much of a PITA to remove winter cover and engine cowl. Force 150. I put switch there because previous owner had already drilled a hole.
 

Attachments

  • photo235009.jpg
    photo235009.jpg
    215.9 KB · Views: 0
  • photo235010.jpg
    photo235010.jpg
    203.4 KB · Views: 0
Last edited:

Simple_Man

Petty Officer 1st Class
Joined
Sep 11, 2013
Messages
267
No problem Frank I wouldn't want anyone to undo winter protection, just for a pic. On a bad note the project is on hold, as I broke my Hand. UGGGGGGGGGGG
 

Frank Acampora

Supreme Mariner
Joined
Jan 19, 2007
Messages
12,004
I did that once! No fun. I was speed skating--think Apollo Ono-- and hit a fellow, locking skate blades and knocking me to the ice at full speed. landed on my left hand and side. Broke the pinky metacarpal and bruised up the whole palm in addition to a really massive bruise on my left hip. Laid me up for a couple of days LOL
 

Simple_Man

Petty Officer 1st Class
Joined
Sep 11, 2013
Messages
267
It finally got here!!!!! Now for another ?????. How do I tell what type of oil is in it, and what type should I use. on the way to the garage to test it now. Oh yeah the model # on the transom bracket is 1201X92C if that helps.
 
Last edited:

Frank Acampora

Supreme Mariner
Joined
Jan 19, 2007
Messages
12,004
Clear to very light tan is hydraulic oil. Buy it at Pep Boys, NAPA or Tractor Supply etc. It does come in small 16 oz plastic squirt bottles. Darker tan is straight 30 weight oil. You know where to get that. Red is automatic transmission fluid. Although I don't remember any specific specification, I always use Dexrton or Dextron II (Chrysler cars of the 1970s-80s)
 

Simple_Man

Petty Officer 1st Class
Joined
Sep 11, 2013
Messages
267
Thanks reading the posts on which to use got confusing. On a good note, even with the broken hand I was able to test the unit today. Goes up, Goes down. although the rams seem to start at the same time and the tilt ram finishes last???? will post vid
 

Simple_Man

Petty Officer 1st Class
Joined
Sep 11, 2013
Messages
267
Yay the unit is in. Works like a champ and so far no leak down!!!!!! now for a new ?????? Do I have to remove the old reverse lock? It appears to be in the way.
 

Frank Acampora

Supreme Mariner
Joined
Jan 19, 2007
Messages
12,004
Yes, you must remove the reverse lock. On one side of the swivel yoke is a roll pin that holds the shaft for the reverse lock plate. Drive out this pin then drive out the shaft. Very likely the roll pin and shaft will be corroded in tight and will not move. If this is the case simply cut the shaft on either side of the lock plate.
 

Frank Acampora

Supreme Mariner
Joined
Jan 19, 2007
Messages
12,004
If you do need to cut the shaft use a Dremel with a cutting disc. The shaft is stainless and clearances are tight. A regular saw simply won't cut it.
 

Simple_Man

Petty Officer 1st Class
Joined
Sep 11, 2013
Messages
267
I got the roll pin out no problem. the shaft wont budge. I was thinking of drilling from both sides.
 

Frank Acampora

Supreme Mariner
Joined
Jan 19, 2007
Messages
12,004
If you absolutely want to try drilling go to the big box store and buy COBALT STEEL drill bits, not the Kobalt brand (tools which are not even worth stealing) The shaft itself is (I believe) 5/16 diameter. Start with a relatively small bit, say 1/8 and center it. Drill slow with a lot of pressure or you will melt the drill tip. After you get the hole started use the "pecking" method--that is, withdraw the bit and tap it back in firmly with the drill running. This generates a lot of pressure.

Personally I prefer DeWalt cobalt steel drill bits.
 

Simple_Man

Petty Officer 1st Class
Joined
Sep 11, 2013
Messages
267
Well Frank I tried "because I own a drill and Cobalt bits" Then I gave up and bought a grinder with a cutting wheel. Took less than 5 min. Going to leave it in the raised position over night to check for leak down. Now to figure out where to mount the relays??? Thanks again for all your help!!!!
 

Frank Acampora

Supreme Mariner
Joined
Jan 19, 2007
Messages
12,004
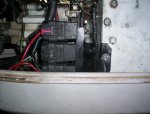
87 should be the black or blue Force. There should be two mounting tabs for the relays in front of the lower cowling just above where the battery cables come in. If I am wrong and there are no tabs you can use two of the exhaust cover bolts or you can fabricate a plate to attach to the tab on the terminal board and mount the relays there.

Connect the small ground wires and the large ground wires at the ground connection of the battery on the block. Drill a hole in the plastic entrance of the fuel line nad pass the motor wires through that. If you can not drill, sometimes it is possible to pass the motor cables through the same hole as the control cables. The last possibility and one I have used often is to pass the motor cables through the air intake on the bottom of the cowl. The heavy red relay wire connects to either the battery side of the starter solenoid OR if the terminal is not big enough then connect to the red terminal on the engine terminal board. The two fine wires (should be blue and green) are for signal from the switch.

If I remember, you do not have a switch in the control handle. You will need a single pole (or double pole if it is not available) MOM switch from Radio Shack. Center terminal is attached to a positive 12 volt source under the dash. BOTTOM terminal is attached to blue and TOP terminal to green. You can use any two different colors and since this is only signal to the relays 16 or 18 gauge wire is sufficient.

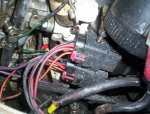
Operation is as follows: At rest both relays are default to ground. When you activate UP (blue wire) the up solenoid is activated to energize the heavy blue wire to the motor. The green wire is still at default ground so the motor turns in one direction. Activating the green wire leaves blue at default ground while green is positive. The motor spins in the opposite direction.
 
Last edited:

Frank Acampora

Supreme Mariner
Joined
Jan 19, 2007
Messages
12,004
No Title

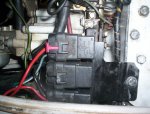
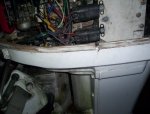
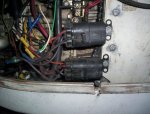
photo236346.jpg Here are three different methods I used to mount relays. Sorry about the size and quality of the photos but it was dark and crowded in the garage. These are actually custom made wiring from salvaged auto parts from a U-PULL-IT junkyard
 

Attachments

  • photo236347.JPG
    photo236347.JPG
    386.1 KB · Views: 1
  • photo236348.jpg
    photo236348.jpg
    236 KB · Views: 1
  • photo236349.jpg
    photo236349.jpg
    219.2 KB · Views: 1
  • photo236350.jpg
    photo236350.jpg
    228.8 KB · Views: 1
Last edited:
Top