Carpet to vinyl, finally getting to it.

lmuss53

Lieutenant Junior Grade
Joined
Sep 9, 2008
Messages
1,227


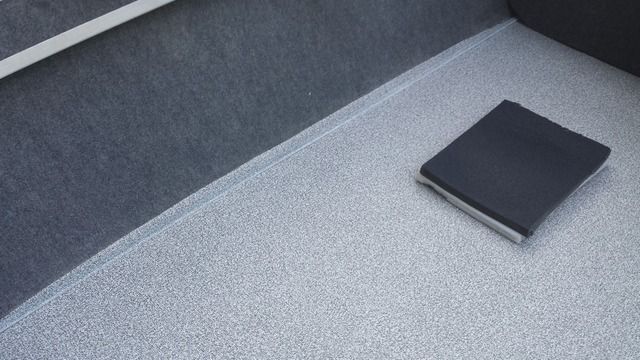
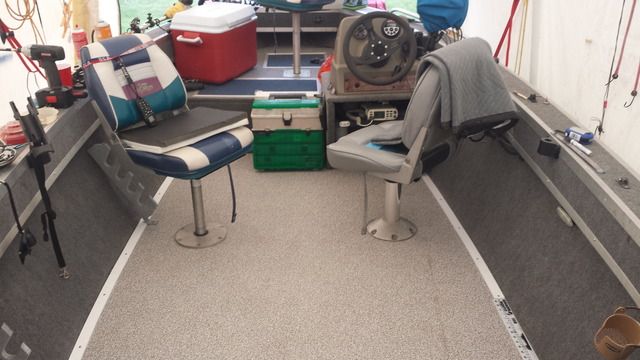
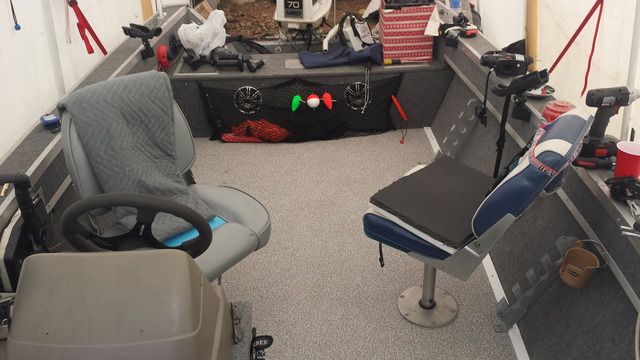
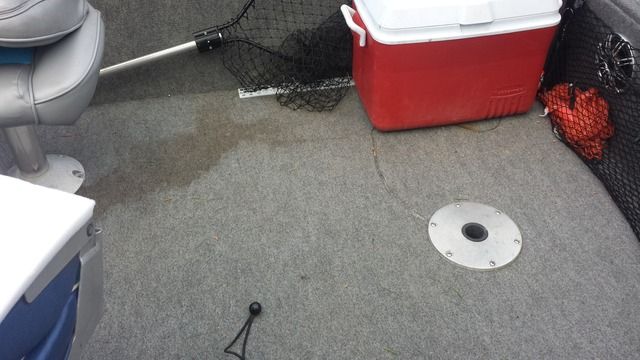
Here is the interior of my Sea Nymph 171 shortly after I finished the rehab about 3 years ago. I dumped a couple coffees in it and burned the carpet with a bad wire from a bait tank. I finally got around to buying the Nautolex vinyl to replace it and started tearing the old stuff out today.The floor was a little springy right in the area of the seat base, so a few months ago I cut a piece out and poured some foam, then put the seat base in to cover the hole. I don't like the seat base there so it will not go back in. I saved the cutout piece and put it back in today.


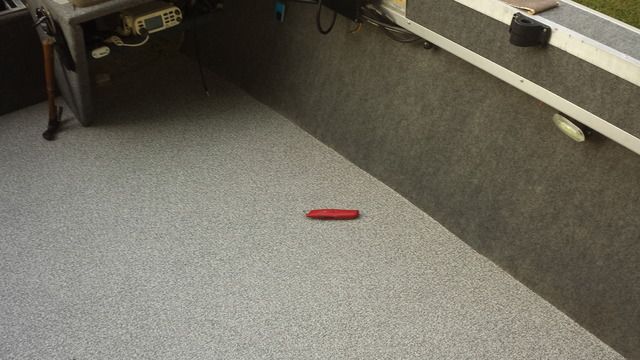
Here is the deck with the carpet out and just the left over hole from the foam pour. I cut two more holes today and poured more foam to finally get the solid floor back there I need. There is a 24 inch gap in the crossbeams there that made that area springy when you walked, the rest of the floor with 12 inch centers is solid as a .rock. The original foam made the floor solid there and the pool noodles were not doing the job.I poured new 3 lb. foam and now it's all solid. I used a series of small pours and when I knew the next one would hit the bottom of the deck, I poured a double portion and then I put the cutouts back in and screwed them down with a piece of 1X6. The result is a solid almost completely flush floor where the holes were, with the cutouts glued in solid by the foam coming up against them from the bottom. I will fill the gaps with an epoxy anchoring compound I have. The compound is designed to secure anchors in concrete. I got it from my work, because it had expired in May and they won't use it now. It is perfect for filling these gaps.


Third cap curing.
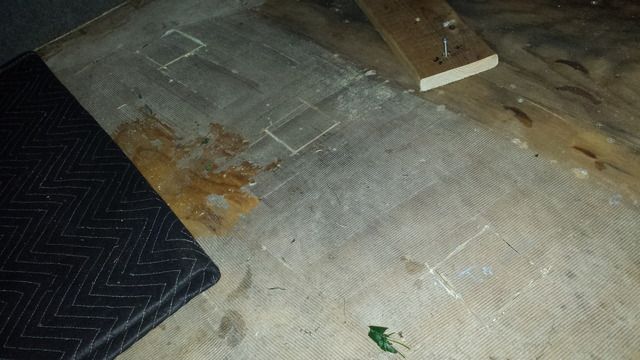


All three foam holes with the cutouts back in and solid.
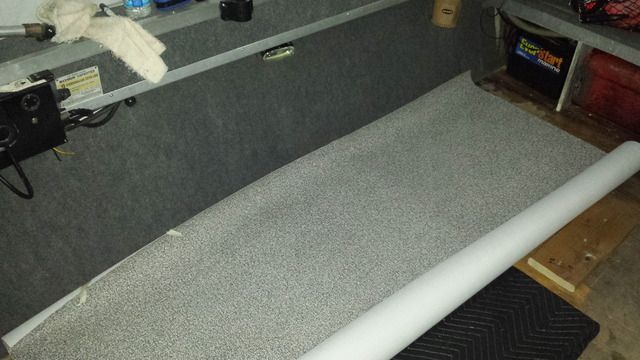


I couldn't help myself I had to open the vinyl and roll it out a little to see how the colors looked. It is lighter than it appears in the pic, I hope it looks good with the gray carpet.

I'll let everything sit and cure for a few days, the deck looks good after three years. I will probably hit the deck with a belt sander to make sure everything is smooth and level, hit the cutouts with a fresh coat of sealer, then start the vinyl install.

I also intend to pull the batteries and gas tank out of the stern and paint that whole area with some deck paint before I put anything back in.
 
Last edited:

jbcurt00

Moderator
Staff member
Joined
Oct 25, 2011
Messages
24,869
Nice looking Nautolex, what color gray is that?

I seem to remember a whole bunch of the SC fellas running into stocking issues for a light gray all last summer and most of the fall.... Everybody was out of stock....
 

lmuss53

Lieutenant Junior Grade
Joined
Sep 9, 2008
Messages
1,227
That is called "Shark Gray" it is going to be lighter than before, thats for sure. They had lots in stock, don't know if I can say where I got it though. Best price I found, by far.
 
Last edited:

jbcurt00

Moderator
Staff member
Joined
Oct 25, 2011
Messages
24,869
I'm pretty sure that was the low stock color last year. Across multiple vendors, i thought it must have been a production problem....

It'll wash down good, but may be brighter then your used too
 

gm280

Supreme Mariner
Joined
Jun 26, 2011
Messages
14,592
My only suggestion is to keep a close watch on the vinyl edges over the year. Because while vinyl will not absorb water and washes out nicely, water will get under the edges and stay there. And we all know what that can lead too. Carpet basically allows air to dry it out over time being porous materail. JMHO!
 

lmuss53

Lieutenant Junior Grade
Joined
Sep 9, 2008
Messages
1,227
Keeping the edges down is my biggest fear, I would have pulled everything out and wrapped the edges, but the deck is riveted down, I thinking I will use spray on headliner glue around the edges. If I could find something to use as a trim piece I would, but the angles are all wrong, I can't roll it down in at the edges because there is no gap most of the way around. I've been putting this job off just for this reason.

Any additional advice is welcomed.
 

jigngrub

Fleet Admiral
Joined
Mar 19, 2011
Messages
8,155
Keeping the edges down is my biggest fear, I would have pulled everything out and wrapped the edges, but the deck is riveted down, I thinking I will use spray on headliner glue around the edges. If I could find something to use as a trim piece I would, but the angles are all wrong, I can't roll it down in at the edges because there is no gap most of the way around. I've been putting this job off just for this reason.

Any additional advice is welcomed.

Headliner glue aint a gonna work, the Nautolex will curl at the edges bigger than snake snot!

If trim angle won't work, use flat metal to hold down the edges. Home Depot has flat stock aluminum in 8' lengths and in different widths and thicknesses. Find a width and thickness you like and use it.

Personally, I'd drill out the rivets and remove the deck and wrap the pieces individually... then reinstall with exposed fasteners. Trying to lay that vinyl over rivets is going to be a booger unless they're countersunk. And if you do lay the vinyl over the rivets and you ever have to take your decking up for repairs or renovations you'll have to ruin the Nautolex to get the deck up.
 

Grandad

Lieutenant Commander
Joined
Jun 7, 2011
Messages
1,504
Keeping the edges down is my biggest fear, I would have pulled everything out and wrapped the edges, but the deck is riveted down, I thinking I will use spray on headliner glue around the edges. If I could find something to use as a trim piece I would, but the angles are all wrong, I can't roll it down in at the edges because there is no gap most of the way around. I've been putting this job off just for this reason.

Any additional advice is welcomed.

My Nautolex has only been down about 3 years, but no problems so far. I considered putting aluminum trim around the edges and decided it really is not that practical. I felt that relatively thin flat aluminum strips couldn't possibly squeeze the vinyl tight to the plywood unless perhaps you install wood screws an inch apart. It also might interfere with re-mounting the original sidewalls. Add to that the fact that forward floor sections have curved edges that could not be accommodated by straight aluminum extrusions.

I just used SS staples spaced as close together as practical and hammered down tight. I'm convinced that staples hold better than flat aluminum strips. One potentially troublesome area is forward of the main sidewalls where staples would show and be unsightly. My boat has Nautolex wrapped 1/4" bent plywood that sheets the inside of the hull, so I made sure that there was lots of floor material up behind these such that if/when the flooring shrinks, there will still be coverage. That's how the original was installed by the Starcraft elves and lasted for 40 years on mine. The original did eventually pull away and bubbled in the corners ahead of the front seats, but even then was not unsightly. - Grandad
 

lmuss53

Lieutenant Junior Grade
Joined
Sep 9, 2008
Messages
1,227
I'm going to see the carpet and vinyl guy here in town tomorrow to see if he has anything to use as an edging here that won't look terrible, I think the narrowest thing I can get in the closest color match is the way to go.

The rivets are all countersunk and filled from the original rehab, one or two will need some attention. I agree it would be best to take it all up and wrap it but it would mean disassembling the entire boat. That is not happening right now, I've got fishing to do.

I know the old boy at the carpet store pretty well, he'll hook me up I bet, although I might have some 'splaining to do about coming in with a roll of vinyl for him to help me on. Kinda like bringing your own ham and eggs to the diner.
 

lmuss53

Lieutenant Junior Grade
Joined
Sep 9, 2008
Messages
1,227
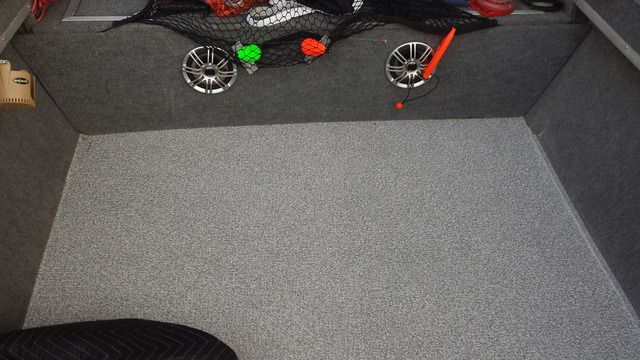
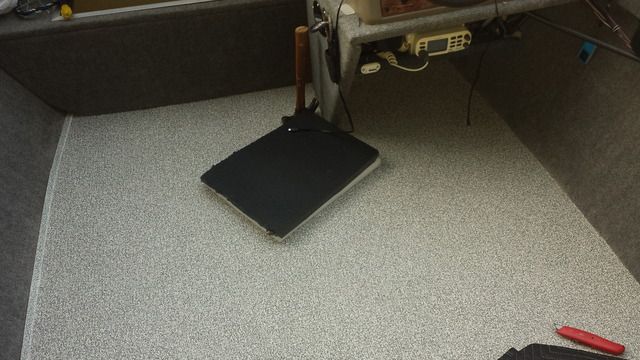
After a couple of filling and sanding sessions I got this deck ready for the Nautilex, sorry I didn't get a picture of the deck before I had the vinyl in and rolled out. I did get the plugs back down to smooth and flat, then knocked the biggest part of the old glue off, the floor was smooth, flat and clean before we put the vinyl or any fresh glue back in.

I put the vinyl back in on the clean deck and ran a couple screws down through the framing and vinyl in the forward locker to keep it from moving. I cut it a couple inches big all the way around and spread the glue under the forward section by lifting the vinyl from the rear and reaching in as best I could and getting the couple feet from the front deck back to the console down, smoothed and glued.

I rolled the rest of the vinyl forward and spread the glue and let it tack and rolled the vinyl out as I went. It took about 90 minutes rolling, smoothing and spreading as I went. I came back and re-glued everything all along the edges to make sure they are all down and glued real well.

The part I was worried most about was the actual cutting to size which went surprisingly well, I used the back of the utility knife to tuck everything in tight to the corner and then used the knife body to keep it in as I cut it.

I took an old concrete core sample that was under a downspout and cleaned it up real well and used it to roll the vinyl down all through the deck and especially along the edges.
.
I got some trim stuff at Lowes last night but I'm not sure I'll leave it in. It is a poly and saw dust composite that I wasn't sure of and now that I broke one piece just putting it in I really don't like it. I painted it and got a good match to the vinyl down to the rusto fleck paint but I think it will not stay in. They had some that was a little heavier and all PVC that I think I'll get a couple pieces of and paint, I'm not sure about that yet. The cuts came out nice enough to leave alone if the vinyl will stay down.


The trim is down in the right side of this picture, not on the left.


The trim broke there where it's a little crooked, but I left it in to keep the vinyl down til it dries good.


High tech roller, worked just fine.


All in all I'm happy with the result, the jury is still out on the trim and I'll post up again to show the finished job with the seats and everything else back in.
 
Last edited:

lmuss53

Lieutenant Junior Grade
Joined
Sep 9, 2008
Messages
1,227


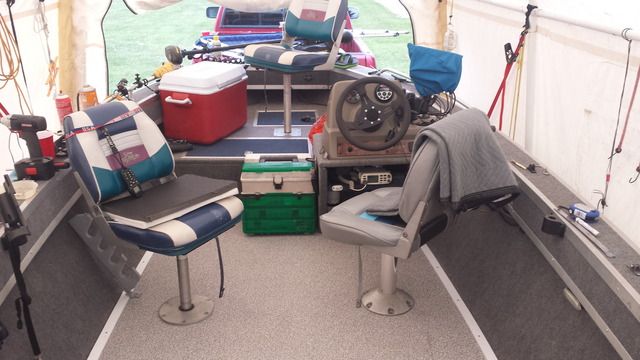
Calling this done, the streak there on the floor came right up with a product called Goo Gone.

I started out thinking I would wrap the trim in vinyl, but when we layed it in we liked the way the white looked between the two grays. The trim looks nice and the edges are trapped all the way around. I have a fish measuring stick/scale in the rear port corner, I've always put one of these down in that spot, it lets you lay a fish in the corner and get an instant measurement on it.

I've got enough decent old carpet now to do the hatch covers in the front, but naturally now I think the decks should be vinyl too. I probably have enough to do the bow, but not the stern deck. We'll see.
 
Last edited:
Top