kramerpage
Chief Petty Officer
- Joined
- Jul 26, 2010
- Messages
- 447
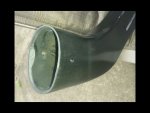
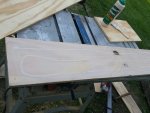
moisture meters can be very misleading on boats. If you have good dry gold shavings, you should be fine.
Was probly reading all the wet foam. I spent 89.00 bucks on that tool.


moisture meters can be very misleading on boats. If you have good dry gold shavings, you should be fine.


")
IMHO, I don't see why not!!!


Busy weekend!!! I'd bed em in Tiger Hair. Resin, Cabosil, and Glass Fibers.[/QUOTE
Thank you
I didn't mean it negatively btw. Just thought I was doing something wrong.
So when you say Tiger Hair. Do you mean evercoats trade name filler. Or are you saying make your own out of Resin, Cabosil, and Glass Fibers?
I currently have plenty of polly. 7 quarts of cabosil, and 5 quarts of 1/4 inch chopped strand. Do I need longer strands to make my own? If so How long. Thank you.
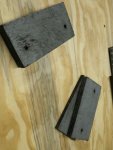
Make your own. Use scrap CSM and Tear it apart and then use scissors to cut into 1" strands/fibers. Mix the Resin and Cabosil first to a Creamy Peanut butter consistency then add 1% MEKP stir well and then ad the fibers. It'll be a TANK!!!!
Bump...did I do something wrong? Do I need to start a new post for questions?