1988 Sylvan Sea Monster 15 restoration

Slager

Petty Officer 2nd Class
Joined
Apr 30, 2014
Messages
189
Well, I brought the Sylvan Sea monster home from my Mom's house and am going to get it back in shape. I was just able to fit it in my garage, but had to do some manuvering by hand to push it in (90 degree turn from drive to garage and a neighbor has a fence in the way). Here she is:


The inside was quite a mess


I tore out the Live well, rod locker and floatation boxes so that I could pull the carpet up. The rivets fastening the deck were underneath the carpet.


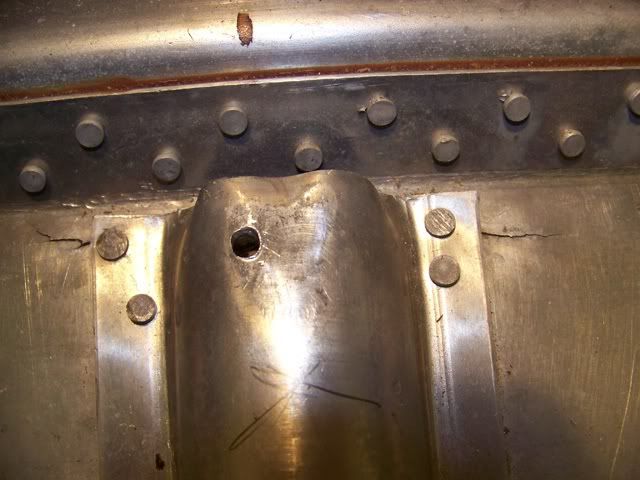
Then I removed the deck.
 

Slager

Petty Officer 2nd Class
Joined
Apr 30, 2014
Messages
189
Ok, now the questions...The two metal stringers held the foam in and supported the deck, but the main structural component is the pour foam. They were not riveted to anything and were just held in place by the foam. The main deck support was just the foam and the aluminum strips/plates you can see above. I'm planning on use XPS foam sheets to replace the pour foam.

How much extra support do you think I'll need to add since most of the deck was originally supported by foam? Should I just replace the pour foam with new pour foam?

I'm debating between epoxy or spar varnish to treat the new deck. Would epoxy be necessary since there isn't much under-deck support, or would varnish be adequate?
 

Woodonglass

Supreme Mariner
Joined
Dec 29, 2009
Messages
25,924
No doubt about it, epoxy is the best sealer for encapsulating plywood decking. Having said that, using Spar varnish will do the job, but just not as well and for as long as epoxy. It will be less expensive but when you consider the fact you will need to reapply it several times over the course of time, it may not be all that much less expensive and easier. A $70 gallon of epoxy will do about 2 coats on a 4 x 8 sheet of plywood. Those 2 coats will keep that plywood sealed for a LONG time. Using a Gallon of $40 Spar Varnish would not give the equivalent amount of protection. If you plan on keeping the boat covered when not in use and not abusing it to much then the Spar Varnish is a Good alternative. This is another alternative too...
 

Slager

Petty Officer 2nd Class
Joined
Apr 30, 2014
Messages
189
I removed the foam and stringers.I got lucky removing the foam from what I have seen of other threads. I used a saw and cut it from side to side and then grabbed it with the back of a hammer and pulled up a section. The other sections just came up as whole pieces.


Here it is all cleaned out.


Now I need to take it out side and spray out the hull, and do a leak check.

I also got the engine removed and put on a stand.
 

Slager

Petty Officer 2nd Class
Joined
Apr 30, 2014
Messages
189
It has been a busy couple weeks and I thought it would be good to post an update.

The major part of my time has been painting the boat. I used Self etch on the bare aluminum spots and then put two coats of Rustoleum clean metal primer over that. I decided to do roll and roll painting as described by Woodonglass, using the navy blue Rustoleum marine topside paint with the Majic hardener from TSC thined with acetone/mineral spirits. I had to use 5 coats of the top coat to get it to cover and there are a few small areas that you can still see primer bleed through if you look close. I think using a dark navy paint over a white primer was a mistake. I'm reasonably satisfied with the final result, but it isn't perfect. There is a decent amount of texture to the paint, but right now I'm not going to take the time to sand it smooth. Here is a picture:
 

Slager

Petty Officer 2nd Class
Joined
Apr 30, 2014
Messages
189
I also used Gluvit over all the rivets and seams. When I did a leak test, the only leak was around the keel guard, so I put a decent amount of gluvit in it to seal it up:


I got the transom glued together and cut and am just finishing up coating it in epoxy:


I've also cut and coated the deck in epoxy and started to install it:


I have a 24 V trolling motor for it, and the trolling and starting batteries used to be at the transom, but I'm thinking of moving the starting batteries to under the bow casting platform like this:


Do you think that will cause any problems? The boat always tended to feel a little back heavy before, so I'm hoping it will help that and require running less heavy guage wire.

I have also started to foam under the deck, but ran into a few problems. The center of the hull doesn't get foam and stays open for drainage, but I forgot to tape off all the gaps, so foam spilled into the center compartment, so I pulled up the deck again and dug out a chanel down the middle. I'm in the process of replacing the deck again and finishing filling the side compartments with foam.
 

Teamster

Lieutenant Commander
Joined
Nov 8, 2010
Messages
1,923
I would keep the starting battery in the back close to the engine,....Too much voltage drop on a run that long, And the heavy gauge cable would get expensive,..
The trolling motor batteries can be moved to the front,..
 

Slager

Petty Officer 2nd Class
Joined
Apr 30, 2014
Messages
189
I meant to say trolling batteries...I'm going to plan on putting them in the front and leaving the starting battery at the transom.
 

Watermann

Starmada Splash of the Year 2014
Joined
Jan 12, 2013
Messages
13,753
You're getting with it Slager, looks good from here! :thumb:

I'm interested in how the decking is attached or maybe isn't on the edges. The ply wasn't riveted to the rib ends originally? I see that the deck seems to be laying in the spray rail sort of. I know that Starcraft builds the Sylvan boat and I'm not familiar with your model in the sense of an SC counterpart.
 

Slager

Petty Officer 2nd Class
Joined
Apr 30, 2014
Messages
189
The plywood was originally riveted to the rib ends, but I couldn't get new rivets to hold, I had to drill the hole at exactly the right spot to get them to fit and they didn't want to grab. I tried #12 1-1/2" ss screws, but those pulled out too. I'm thinking the rod locker and live-well will hold the deck down enough. In the above picture, I havn't moved the middle piece into its final position yet, it rests on the ribs, not the spray rail.
 
Last edited:

Watermann

Starmada Splash of the Year 2014
Joined
Jan 12, 2013
Messages
13,753
The plywood was originally riveted to the rib ends, but I couldn't get new rivets to hold, I had to drill the hole at exactly the right spot to get them to fit and they didn't want to grab. I tried #12 1-1/2" ss screws, but those pulled out too. I'm thinking the rod locker and live-well will hold the deck down enough. In the above picture, I havn't moved the middle piece into its final position yet, it rests on the ribs, not the spray rail.

Your decking looks to be regular exterior 5 layer 3/4". What were the blind rivets that you tried to use? You don't have to exactly hit the old holes,new ones in a little different location works fine, screws would never stay tight for long.

Just so you're informed about your decisions, by design these type of boats relay on the deck to be a very important part of their structural integrity, not just something to stand on. Everything ties together in a way that supports the hull. Without that support I'm afraid stress cracks will form sooner or later at the rib ends as they flex against nothing but the bottom which is 26 year old .090 aluminum. We all like to see these seasoned boats rebuilt safe and the right way. :)
 

Slager

Petty Officer 2nd Class
Joined
Apr 30, 2014
Messages
189
I put in 1/2 inch plywood which was the same as the original, but it is just the exterior grade stuff, not marine. Thanks for the concern, I would rather do a bit more now than have cracking later. I tried 3/16 by 5/8 blind rivets. Should I try some longer rivets or try and drill holes nearer to the end of the ribs so that maybe the 5/8 length will be enough?
 

Watermann

Starmada Splash of the Year 2014
Joined
Jan 12, 2013
Messages
13,753
The large flange rivets I used on my 1/2" decking, sealed with vinyl were measured in 100ths. So it goes 1/2" ply .500 + .080 ribs + fudge room .020 = .600 and you could add even a bit more for any covering/sealing too. For the minimum grip range on large flange 3/16" blind all AL rivets you would need them with a grip range of .626 - .875. The 5/8" rivets you used would have been .625 before even setting them so you can see why they wouldn't grab and hold. Below is the link where I get mine but the shipping is high if you don't figure out everything you'll need and make a larger order.

Large flange all aluminum blind rivets
 

Watermann

Starmada Splash of the Year 2014
Joined
Jan 12, 2013
Messages
13,753
Thought I would give you a look at what I'm referring to.

100_3354Reduced.jpg
 

Slager

Petty Officer 2nd Class
Joined
Apr 30, 2014
Messages
189
I was able to find a local place with aluminum rivets with a 3/4-1" grip range. $3.66 for 20 rivets, can't beat that! I tried a couple and they worked for the couple I tried. I'll try the rest tomorrow.
 

Slager

Petty Officer 2nd Class
Joined
Apr 30, 2014
Messages
189
Its cold and rainy today, so time for an update.

First, as I previously mentioned, I let the pour foam run into the center chamber between the stringers, which would block drainage, so I pulled up the deck and cut a channel down the middle. I used a screw drive to poke under each rib to make sure water could get through.


Then I reattached the deck, using the 5/8" grip rivets down the middle and the 3/4-1" grip rivets to attach to the ribs. To finish the pour foam, I had to order another 16 lb pour foam kit, because of the foam I wasted down the middle. I had originally ordered 2 16 lb kits. Then I used epoxy to seal the edges of the holes I cut to pour foam.

To cover up the holes, I reused the aluminum plates that were used by the manufacturer. I used contact cement to hold them down.

I painted the inside of the boat using battle ship gray Rustoleum topside paint. My technique had improved quite a bit since doing the outside, and it turned out great. There is still some roller texture in the paint, but it is much less noticeable than the texture on the outside.

I also started reassembling the transom, but it is still in process.
 

bonz_d

Vice Admiral
Joined
Apr 22, 2008
Messages
5,274
Looks to be coming along very nicely. I had wondered just what that Rusto Blue looked like and now I've seen it. Have been thinking of using a Flag Blue on mine. What roller did you use on this?
 

Slager

Petty Officer 2nd Class
Joined
Apr 30, 2014
Messages
189
I've also been spending quite a bit of time covering pieces in carpet. I decided to use Weldwood contact cement instead of carpet glue. I started with doing all the smaller pieces and I was so happy with how it was working that I decided to do the main deck with contact cement too. I rolled up half, applied contact cement to the deck and carpet with a roller and brush, and waited for it to tack up. Then, I placed pieces of wood for the carpet to temporarily rest on. I had a helper slowly pull the wood out while I smoothed the carpet down by hand.


The contact cement was a bit tricky on such a big piece of carpet, but I was able to get it. The biggest difficulty was that it kept wanting to stick to itself and when I first started I was getting some wrinkles, so I quickly pulled it back up before it had fully grabbed and put it back down. If anyone else wants to do their carpet this way, I would recommend using 2 more pieces of wood than I had, and you want to remove the center ones first and slowly press the center down and then work to the sides. After the carpet was down, I went over the whole surface with a roller. The whole process took about 1.5 hours. And you will definitely need an extra set of hands or two.

I was really happy with the final results:


Slager

Petty Officer 2nd Class
Joined
Apr 30, 2014
Messages
189
I used the 6 inch Wiz rollers that Lowes caries. In these pictures, the gray looks like a light blue, but it is the battle ship gray.
 
Top