Re-redoing the Ugly Duck, my 18ft aluminum Sylvan

sublauxation

Lieutenant
Joined
Oct 13, 2008
Messages
1,317
I bought this as an empty hull and unfortunatley redid it BEFORE finding IBoats (hence her name the Ugly Duck). A couple years ago I removed the splashwell and added a casting platform which was great but I need another seat for the kids. In round 2 I'm starting over completely and adding a bench seat to the back casting deck that folds down flat. I've got the hull almost completely stripped out and am still in the planning stages but I have a couple questions I've been pondering. I'll add pictures when I can take them.

I'm using 3/4 ACX plywood for the deck and will probably epoxy it.

How do you guys recommend attaching the ply to the ribs and stringers ?
I read on another forum where somebodyattached theirs with 5200 and he swears by it. Thoughts on that? I know it's good stuff but that doesn't sound good to me, it seems it would take some of the structural component out. That said, having been done 2x there are quite a few holes already in the ribs along the outside.

What are your thoughts on carpet? Will I notice a difference between 16 and 20 oz? I'm thinking about doing the deck in 20 and sides in 16 to save a couple bucks.

This will probably be a long process with lots of questions, all and any help is appreciated along the way!
 

henleyhale

Petty Officer 2nd Class
Joined
Oct 5, 2013
Messages
136
Ive always attached my deck down with stainless wood screws, ive seen guys use galvanized and some use coated, but id slap em if they went to put it in my boat, that being said, pretty sure most builders just use as cheap as they can find cuz when i got to them they are so rotten and rusted out they are just a nub in a rotten piece of what used to be a stringer.
 

Georgesalmon

Lieutenant Commander
Joined
Apr 14, 2012
Messages
1,793
Stainless steel sheet metal screws. Or blind pop rivets. Screws will loosen over time from vibration and heating and cooling. So will pop rivets. You can tighten screws, you have to replace pop rivets. Your choice. 5200 will not work for this.
 

sublauxation

Lieutenant
Joined
Oct 13, 2008
Messages
1,317
Any size recommendations? Where can I get a decent stainless screw? The ones I used on the underside of my deck last time stripped out really easily and they were just being screwed into wood. Maybe it's because they were pan head screws, I'd imagine sheet metal screws by nature would be stronger.
 

Georgesalmon

Lieutenant Commander
Joined
Apr 14, 2012
Messages
1,793
For sizes I'd go with #10 or #12 screws, 3/16" rivets. Source them on line I guess. We have Fleet Farm around here that has a pretty good selection though not cheap.
 

64osby

Admiral
Joined
Jul 28, 2009
Messages
6,799
5200 is basically permanent, not a good choice for decking. Round 3 may be just a few years away. :watermelon:

We need pics of the ugly duck.:)
 

sublauxation

Lieutenant
Joined
Oct 13, 2008
Messages
1,317
I'll post pics this weekend. I've got most of the rest of the inside out but most every screw head stripped out so I've cut some off and drilled out others. It can never be easy can it! I found some square drive stainless sheet metal screws online, will those be better than the Philips heads?

Any thoughts on screw length? Going through 3/4 ply and 2 layers of carpet would 1 1/4 be too short? That should give just shy of 1/2 inch bite into the aluminum. I'm adding another bilge bump but I'm not sure it would keep up with a couple dozen screws through the outer skin.

There are some popped rivets attaching the 2 center stringers to the ribs. I can push the old ones out but would it be better to drill out a bigger hole and just add bigger rivets?

I'll explain the "Ugly Duck". My colorblind dad started the remodel without me. In round 1 he painted it tan with a silver stripe and laid down red carpet. My first reaction, "that looks like an ugly duck", the name stuck. A couple years ago I tied to a friend's shoreline on a narrow lake with lots of wake boarders and didn't notice the pipe he pounded in to keep his shoreline timbers in place. The resulting damage gave me an excuse to repaint it, only they paint guy messed up the color match and instead of silver he made a brownish/purplish/silver color. My kids renamed her "Winnie the ......" as it's a weird Pooh color. On a positive note the guy who "matched" the paint laughed when he saw the finished product and felt so bad he refunded me for the paint.
 

sublauxation

Lieutenant
Joined
Oct 13, 2008
Messages
1,317
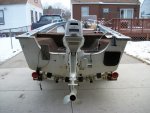
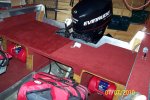
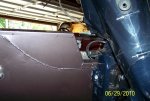
The first pic isn't my boat but it's exactly what the back started as: The rest are the results of the last remodel when it was repainted. I reshaped the transom, removed the splashwell and added the casting platform. With 3 kids I need another seat so this time I'm planning to add a bench seat that folds flat into the new back deck and I'll also add the walk through windshield I found.ud2.jpg
 
Last edited:

lmuss53

Lieutenant Junior Grade
Joined
Sep 9, 2008
Messages
1,227
I used 3/16 rivets to attach my decking and #12 x 1 1/4 Sharx screws to attach my casting decks and other panels. I won't post the link, but do a google for Sharx, best price was Jamestown Distributors.

I'm thinking of going to a 50hp motor on my Sea Nymph, is that a 60 on your boat? If it is, how does it get the 18 foot hull around?

I really like what you did on your transom, I wish I'd have left myself some place for a kicker on the transom. I have the same transom as you had originally and had to put a kicker bracket on, it is a PITA.
 
Last edited:

sublauxation

Lieutenant
Joined
Oct 13, 2008
Messages
1,317
The boat is rated for a 135 and that's a 90 on back. It pushes it along really well, with just me and 1 kid on flat water I get 44 mph gps which is more than I expected and more than I need. I had a kicker bracket but it was a PITA. The 90 trolls a bit fast but I can always drag a drift sock, although that too is a PITA.

I raised the sides on the transom because without the splashwell it looked kind of scary. I'm glad I did because I'm raising the deck up to the top of it this time.

Did you rivet through the carpet or carpet over the rivets? If you carpeted after how did you keep the carpet from coming up on the edges?
 

64osby

Admiral
Joined
Jul 28, 2009
Messages
6,799
You could use some aluminum trim strips to hold down the edges.
 

lmuss53

Lieutenant Junior Grade
Joined
Sep 9, 2008
Messages
1,227
We riveted the deck down first,and cut the decking with a small gap at the edges and rolled the carpet down around the edges. We used the deck glue on the carpet and deck then used headliner spray glue all around the edges when we rolled them down in. This is the third year for the deck and the carpet is tight and smooth.

We also used a #10 stainless flathead screw with the tapered neck below the head. We carpeted the casting decks and panels first and screwed them down with these screws. We ran the heads down through the carpet and they disappeared almost completely. I have had to pull one out on occasion and you have to hunt to find them. Granted this leaves a path for moisture infiltration, but this boat is under cover all the time when not in the water

I had an "OH S**T" moment with a siezed filter pump in a bait tank with no fuse and ended up with a snaky burn on the deck so I will eventually pull the carpet back up and replace it with a piece of vinyl. I'll find out how well the carpet is down then. I intend to pull it up, cut a couple holes to pour some more foam, reseal it and put down a piece of vinyl in the very bottom deck of the boat..

Thanks for the motor information. I've got it in my head to swap the motors on my boats to give the pontoon a little more zip. I'm afraid if I do though I'll just end up with two slugs.
 

sublauxation

Lieutenant
Joined
Oct 13, 2008
Messages
1,317
Please tell me the reward of redoing a boat is worth it!

I hadn't had much free time but this weekend got around to removing the carpet from the sides. I started with the adhesive remover recommended by the flooring guys and after too many hours of little success I bought the Zinsser Adhesive Remover Gel. It's still no treat but it defintily works better. Hopefully after next weekend the carpet and all it's glue will be gone!
 

sublauxation

Lieutenant
Joined
Oct 13, 2008
Messages
1,317
I finally got all my carpet and glue out and looking to start cutting wood for the deck. The old one was screwed through the ribs and most have 2 holes in them already. I'm afraid that I'll have a hard time attaching my deck back down to them. Can I rivet down a piece of 1/16 or 1/8 inch aluminum flat stock about 1" wide to the ribs and just screw the deck boards down to that aluminum strip?
 

GA_Boater

Honorary Moderator Emeritus
Joined
May 24, 2011
Messages
49,038
A couple of guys have added the strips on the rib ends. After two deck replacements the rib ends turn to swiss cheese and the strips give something for the fasteners.
 

sublauxation

Lieutenant
Joined
Oct 13, 2008
Messages
1,317
Good to hear! Do you think 1/16 would be enough or should I go with 1/8? A couple rivets per rib or would 1 be enough?
 

sublauxation

Lieutenant
Joined
Oct 13, 2008
Messages
1,317
Well, last summer was busy as my father in law bought a new cabin and I spent most of my time working on it. A couple weeks ago I finally got back to the boat. I got most of the deck cut and put my kid to work varnishing so it's almost starting to look like a boat again! I'll have more questions coming up so any help/advice is appreciated.

I also got a good start on the consoles and will add pics. I don't want to carpet the dash part and top so I was thinking about using Epoxy on them. Any thoughts on how that will hold up? I was at a hobby store and the guy highly recommended Klass Kote. They use the stuff on pool liners so it must be good, and they say it will stick to plywood. I also considered wrapping in vinyl but worry about ripping it. Any other options?

Also, way back I remember EZ used 3m 5200 instead of screws to attach his deck to the ribs/stringers. What would you guys think about 5200 on the ribs that have more holes in them and screw to every other rib?
 

Woodonglass

Supreme Mariner
Joined
Dec 29, 2009
Messages
25,924
If I'm not mistaken Klass Kote is a two part epoxy paint used by RC modelers to paint their RC Planes etc...I guess it would work plastic parts for your boat.
 
Top