Vintage AlumaCraft semi-v boat restore

Itsogood

Seaman
Joined
Apr 21, 2015
Messages
57
Also need to get the tools to hammer them into place.... Harbor Freight will be getting another visit soon... haha.
 

Itsogood

Seaman
Joined
Apr 21, 2015
Messages
57
Hmmm.... just got my first promotion here... I am now a Seaman Apprentice... Wonders never cease... haha.
 

Itsogood

Seaman
Joined
Apr 21, 2015
Messages
57
Rivets are sort of a specialized task but very cheap to get into, air hammer, 3/16" rivet set brazier head, 3/16" dia brazier head rivets 2117 alloy for structural repairs. The length you need is the tricky part, need to see what your fastening together first to offer a suggestion there.
Thanks for this post goes out to Watermann when I first got on here. I will have to figure out where I am needing rivets and show you guys some pics to get suggestions on what size I need for them. I already know of a few missing in the bow area towards the bottom of the boat but I am sure there will be more than that when I do a thorough inspection of the hull. Thanks Watermann.
 

Itsogood

Seaman
Joined
Apr 21, 2015
Messages
57
Hmm. I see I need to figure out how you guys do the quoting from previous posts and have it in the box with the blue surround. Someone out there be able to tell me how you do that please? I posted a comment in the previous post that Watermann had related to me and was hoping if you copy and paste it would be automatic but I guess that wasn't the case.
 

Itsogood

Seaman
Joined
Apr 21, 2015
Messages
57
No Title

In this pic you can clearly see the bracket for the rear running lights on the left side. The one on the right isn't as clear to see but it is visible. If you look you can see the area where the rear seat used to be and it lines up with the brackets that are there. The pics on the AlumaCraft website for the models they made show the lights coming just behind the backrest of the rear seat. The other models of AlumaCraft don't have the lights mounted here... there is only one and it is farther back on the right side. So this must be a Flying C I have.
 

Attachments

  • photo219541.jpg
    photo219541.jpg
    12.1 KB · Views: 0

jbcurt00

Moderator
Staff member
Joined
Oct 25, 2011
Messages
24,863
Lights were installed by the selling dealer, so where ever whoever put them on put them, is where the lights went....
 

jbcurt00

Moderator
Staff member
Joined
Oct 25, 2011
Messages
24,863
Hmm. I see I need to figure out how you guys do the quoting from previous posts and have it in the box with the blue surround. Someone out there be able to tell me how you do that please? I posted a comment in the previous post that Watermann had related to me and was hoping if you copy and paste it would be automatic but I guess that wasn't the case.
At the bottom right corner of a post theres a quite button. Click that and it auto starts a reply for you w the requested post qouted in your reply. Also notice that the Post Reply button at the top left corner of page of posts has changed colors.

If you want to reply to several different questions in multiple posts, click quote under all the posts you want to quote. After you click the last reply you want to quote, click the Post Reply button that changed colors at the top left of a page. A reply will auto fill w the requested posts all quoted. Respond to them by typing a response under each quotes post...
 

Itsogood

Seaman
Joined
Apr 21, 2015
Messages
57
Cool thanks JB. I see the quote button and now I get how that's done. I just went out to my boat and took a wire brush to the knee brace and there were a few numbers/letters there. They are NF392.... Any thoughts on what those numbers mean in relation to what boat I have here JB? You are so into these and seem to have the touch for figuring out what the stamp on these knee braces mean. I looked at the top side of the transom area and I don't see anything there like you showed in a post of an AlumaCraft boat in someone else's thread. Hopefully you will be able to discern what my numbers/letters mean. Thanks again for paying attention to my thread and coming to my rescue with all these questions.
 

Itsogood

Seaman
Joined
Apr 21, 2015
Messages
57
Oh and on the lights, are you saying that the placement of the brackets behind the back seat position, doesn't really mean that the lights were placed there like in the pictures on the web page you gave me to go and look at of all the models of the drawings they had posted way back then. So maybe this isn't the Flying C after all... Dang.... I will someday know what model I have... I love the thread were everyone is talking about how the boat is just hovering and the guys legs are not lining up and how the one guy posted about it being the man's son instead of his wife who looked like Ronald McDonald... haha. I do have to agree with the guy thinking it looked like Ronald McDonald even tho I agree with you and thought it was the man's wife before he said that tho. That stuff was toooo funny.
 

Itsogood

Seaman
Joined
Apr 21, 2015
Messages
57
Sorry about posting in the other outdated threads.... I WILL get the hang of this stuff JB.
 

jbcurt00

Moderator
Staff member
Joined
Oct 25, 2011
Messages
24,863
No worries, posting to old topics happens....

The light location wont ID it as a Flying C, but doesnt mean it isnt.

NF### means something to Alumacraft, so they will be able to tell you what boat and year. Email them today and you'll probably get a response Tues am.

They have great CustServ

Besides, those ads and brochures are artists renderings, so the boats may be slightly different then they appear in the ad. Esp boats that have changed hands several times. Most tin boat owners arent too concerned w drilling umpteen holes in a boat above the waterline... and some below the waterline :facepalm:
 

Itsogood

Seaman
Joined
Apr 21, 2015
Messages
57
Sent a message to AlumaCraft telling the stamp info I found on my kneebrace. Hope to hear back from them soon as to what model I have. Has anyone heard from Lloyd Lautner lately? I also messaged him to see if he is still making the leather washers for the TN and HD model Johnson carbs and haven't heard anything back from him for a while. Hope he is still making them.
 

Itsogood

Seaman
Joined
Apr 21, 2015
Messages
57
Has anyone ever used the welding rods you can buy at Harbor Freight for fixing holes in the aluminum? I bought some and want to try them out. I need to fix a few holes that are in the side of my boat. I watched the videos on youtube about it and it appears that with a propane torch you can heat up the surrounding area and get these things to melt into the aluminum and fix a pretty good size hole. I have one that is already backed up by another piece of aluminum on the inside. I want to fill it in so it is even on the outside. It is oval and about 1 1/4 X 2". Would it be better to cut this out rectangle shape and redo it with a patch or is anyone familiar with these welding sticks to know if that would work better?? I was also considering doing a patch with bondo or something but I am hoping to polish the aluminum and leave the hull completely bare and polish her up every few years... I think that would be very time consuming and might want to abandon that idea and paint her up tho... still on the fence about all that. Any ideas or suggestions would be welcome at this point.
 

Itsogood

Seaman
Joined
Apr 21, 2015
Messages
57
Hi Guys, I got the answer from Alumacraft customer service and they confirmed what I thought as follows:


Thank you for contacting Alumacraft customer service. Your boat is a Flying C model serial number 392 was built in 1958. This boat was built from 1957 until 1959, there were approximately 355 total units of this model produced.

Your model has the 15" transom, there was also a 20" Flying C model. That model was produced from 1958 until 1959, and there were 51 total units built. I have attached our picture from our 1958 catalog featuring your boat to this email for you.

Thanks,
Alumacraft Customer Service Support


It was right about the 15" transom, that's what my boat has. So my boat is from 1958 and was graduated from a class of 355 total units. Makes me wonder how many others are out there surviving in the jungle.
 

Itsogood

Seaman
Joined
Apr 21, 2015
Messages
57
Worked on her a bit yesterday and did a bit more polishing on the hull. Found a little better method of doing it but it is still very slow going to do this. Will try to get some pics up of the progress on that in the next few days. Going to be pretty busy today. It does look really cool and would love to have it looking that way on the outside... but to do all that work on the inside definitely aint gonna happen. I will paint that when I get the stripping done. The inside is painted a really uuuuggglllyyy
PINK. YUCK. As for the outside you can see yourself in the polished finish. Not quite as good as a mirror .... but almost.
 

jbcurt00

Moderator
Staff member
Joined
Oct 25, 2011
Messages
24,863
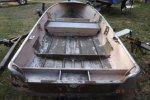
Good news @confirming its a Flying C

About those 'welding' rods, there is very little middle ground, people either love them and its a great product or they hate it and couldnt get even marginal results.

Perhaps its a prep or use problem w those that arent satisfied, but if so, what did they do wrong or what could they have done better... hard to say remotely via the internet. I dont think the rods are terribly expensive, you might try using them on something else 1st, see how it goes, then decide.....
 
Last edited:

Itsogood

Seaman
Joined
Apr 21, 2015
Messages
57
Wow, that's funny JB! I guess there are a lot of things in this world that go that direction... either ya love it or ya hate it. Well I bought some at Harbor Freight so I guess soon I will be going to join one of those parties. Hope it's the love em one. Still need to go out and get a good propane burner. I understand map gas is probably better even tho it really isn't map gas any more... at least I heard it's that way in CT. So whatever it is they sell as map gas is supposed to burn at the same temp as the old map gas did.... All that stuff is rather confusing to me. Guess time will tell as I will be looking for this stuff as soon as I get a good paycheck under my belt... haha.
 

Itsogood

Seaman
Joined
Apr 21, 2015
Messages
57
Came home with some new tools to work on the tinny. Now have a pneumatic hammer to work on the rivets so I will have to try to figure out the web site JB and others talk about on here to be able to order some of those solid rivets talked about. Also got a new paint gun and some things to go with it from Harbor Freight. I will have to start my journey on learning how to use that and how to mix paint, thinners, hardners and stuff like that to be able to get some paint on the inside of the AlumaCraft. Now have almost 30 antique outboards that I will be asking some questions about. Made a steal of a deal from someone who was moving and bought him out.... cheap. So I now have an Elto... I think it's a Pal... not sure yet and a Zephyr..... read a funny story about a guy who hates these... He says a lot of the guys from AOMCI dug into him pretty hard about his page about why he hates them so much.... cool read there. I like mine so far but it has a stuck piston ... or 4... not sure yet.... bought two cans of PB Blaster to hopefully get them unstuck.... the list of stuff I got is crazy. Had about 15 before finding the guy I got the deal from and now it's almost 30... YIKES.. got my work cut out for me on these. But I love em all and can't wait to find the time to get each one up and running. Some already do but not too well.... need to locate carb kits and get spark checked and coils, points.... man what was I thinkin..... haha.
 

Itsogood

Seaman
Joined
Apr 21, 2015
Messages
57
Thanks for that JB. Went to the website and trying to figure out which brazier heads to buy. I think figure out that I figured out the part about needing the 3/16 ones but not sure which ones from there. These will be in the hull and I only need a dozen or so. Do they sell them in such a small quantity? From there not sure on the length. The hull is pretty thick in the area where I will need to be installing the new ones. I can see a few that only are one sided because one side has popped off. So I figure on knocking them out and replacing them. From what I read in another thread about the size on the shank of them it sounded like buying them too big was the mind set there.... you can always drill and then clean up the burrs if your rivets are a bit too big... does that sound right? The other thing I'm not sure of is the head diameter. Do you guys think the size that is in the hull now is best or should I maybe go with the next size up because it is my first attempt at doing this. Not sure if I am overthinking that idea and I should just stay with what is already there. Then not sure what size I need because they go with the decimal equation on their sizing list instead of what I know from measuring with a ruler and coming up with the fraction instead of the decimal.... I'm terrible at math and would probably screw that up anyway. They list a 3/16 with a .469 and one with a .390 etc. and not sure how to figure out which ones are correct to what I need.
On another note, I have been polishing more on the hull and will be posting some updated pix on that soon... just too busy right now to find time to get that done. Thanks for the help.... you guys are always great with that.
Tony
 
Top