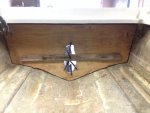
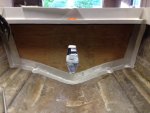
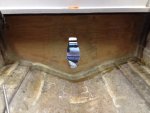
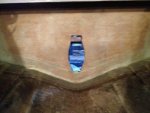
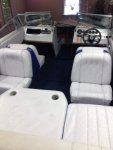
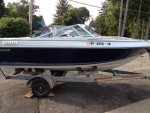
1986 Four Winns Freedom 160 Restore need advice!!

zool

Captain
Joined
Aug 19, 2012
Messages
3,432
You should be fine planning off the 1/2 piece, sand it flat, and continue on..shoot for 2-2/8 including inner and outer skin..
 

Woodonglass

Supreme Mariner
Joined
Dec 29, 2009
Messages
25,924
I agree with Zool. A finished transom thickness of 2 1/4" That's ready for the outdrive to be installed would be the optimum Thickness!!!
 

Lost in Translation

Seaman Apprentice
Joined
Mar 30, 2015
Messages
44
Zool & Wood,

Thanks for the help I sanded it down so I am at 2 1/8 right now without glass. I coated one side with resin and will do the other side tomorrow. Next step is to PB it in and I plan on using Woods tip of 1/2 holes for resin rivets. What is a good mixture ratio for resin to cabosil? Also do you think a mixture of one QT is enough to use to PB the transom in place?

Again thanks for the I would be lost with out the help of Iboats geniuses :first:
 

zool

Captain
Joined
Aug 19, 2012
Messages
3,432
Zool & Wood,

Thanks for the help I sanded it down so I am at 2 1/8 right now without glass. I coated one side with resin and will do the other side tomorrow. Next step is to PB it in and I plan on using Woods tip of 1/2 holes for resin rivets. What is a good mixture ratio for resin to cabosil? Also do you think a mixture of one QT is enough to use to PB the transom in place?

Again thanks for the I would be lost with out the help of Iboats geniuses :first:

2 1/8 without the inner and outer glass?...that still may be too thick, you don't want to go over 2 1/4 including both inner and outer skin...the outer skin must be at least a 1/4 and the inner will be at least 1/8. to 1/4..

A 1/2 inch notched tile trowel works good to butter the transom wood, gives a good amount of pb, with room for it to spread....you can start with the quart, and have another quart ready, but un catalyzed, that way if you need it, its all ready prepped.
 

Lost in Translation

Seaman Apprentice
Joined
Mar 30, 2015
Messages
44
Found my answer on ratio on USC website :encouragement: but still wondering how much to make to glue the transom in. Sorry for the newbie questions just don't want to run into problems again like my massive transom haha [SIZE=-1]For thickening, we recommend our [/SIZE][SIZE=-1]Aerosil/Cabosil[/SIZE][SIZE=-1]. To achieve a mayonnaise like consistency follow these guidelines.[/SIZE]
[SIZE=-1]1 Gallon mixed epoxy to 1 Gallon of Aerosil-Cabosil
To make a consistency like peanut butter
1 Gallon mixed epoxy to 2 Gallon of Aerosil-Cabosil[/SIZE]

[SIZE=-1]Note: adding 1 gallon of Aerosil-Cabosil to 1 gallon of epoxy will not yield 2 gallons of putty. The filler will only add about 5% volume to the mixed epoxy.[/SIZE]
 

Lost in Translation

Seaman Apprentice
Joined
Mar 30, 2015
Messages
44
2 1/8 without the inner and outer glass?...that still may be too thick, you don't want to go over 2 1/4 including both inner and outer skin...the outer skin must be at least a 1/4 and the inner will be at least 1/8. to 1/4..

A 1/2 inch notched tile trowel works good to butter the transom wood, gives a good amount of pb, with room for it to spread....you can start with the quart, and have another quart ready, but un catalyzed, that way if you need it, its all ready prepped.

Zool,

Yes I am at 2 1/8 without glass. You said inner and outer skin..... Do I use fiberglass on the side that meets up with the transom skin so fiberglass both sides of my wood? I thought I just glue it in and do my seams and outer side. :frusty: guess I need to slow down and do some more research
 

zool

Captain
Joined
Aug 19, 2012
Messages
3,432
The outer skin is already there, its your hull, measure that, then add your total wood thickness, then add another 1/4" for the new inner skin you will be covering the inner transom with and the pb left as glue..that equals the total thickness, and shouldn't be more than 2 1/4" and not more than 1/8 deviation around the keyhole. If you need to do some fairing, incase the parallelism is off more than 1/8, that adds more...so if you remove the entire 1/2" smaller piece, that leaves roughly 1 1/2" of wood, , then 1/4-3/8 for the hull thickness around the keyhole, another 1/4 for the new inner glass, and 1/8th for the pb glue between the wood and outer skin...and a little room for fairing.

Your doing fine, im just hammering this point cuz its mucho importante....it would be a shame to get all the way to the drive install, and have steering arm clearance issues...or weak transom shield bolts.
 
Last edited:

Woodonglass

Supreme Mariner
Joined
Dec 29, 2009
Messages
25,924
Totally 100% agree ^^^. Slow down Take your time and even if you have to fabricate a NEW wood transom core, it would be better to do it now than to have to jack around with it after it's all installed. Flatness and Paralleism is critical for an I/O install. It'll pay off big time later soooo take your time and get it right NOW!!!! If you're gunna use the "Rivet Holes" then make sure and put some extra PB at the hole areas so it will goosh out when you clamp it down. Like Zool says, I'd mix 3 quarts of resin and cabosil (usually 1 1/2 qts of cabosil per qt of resin, maybe a bit more and about 1/4 cup of 1/4" Chopped Strand) WITHOUT hardener so they'd be ready to go and then add the hardener and stir for 45 secs as you need them. 3 qts should get you close.
 

NicoPags

Petty Officer 1st Class
Joined
Mar 24, 2014
Messages
217
Goodluck Lost, you're doing fine. Just understand Woodongalss and Zools advice is damn near priceless at this stage. This to me is the motherstage. The longevity of this vessel will be determined here.
 

Lost in Translation

Seaman Apprentice
Joined
Mar 30, 2015
Messages
44
Hey everyone thanks for all the help and words of wisdom. After my day of frustration:frusty: yesterday I cam home today and used a planner and brought the middle section down to be even with the 2 - 3/4 in pieces. Now it is 1 3/8 in and my outer skin is 3/8. So I should be all set now. I coated the back with resin to sit overnight. Tomorrow I will do the other side and Thursday the transom will be going in. I will post some pictures tomorrow of the piece that almost became expensive fire wood haha.

Zool, THANKS AGAIN for dealing with my inexperience in this. Without you I wouldn't be as far as I am and would be as my name puts it LOST

Outer skin 3/8 inch
Glue 1/8 inch
Wood 1 3/8
Inner skin 1/4

TOTAL 2 1/8 :peace:
 

zool

Captain
Joined
Aug 19, 2012
Messages
3,432
Glad to help with what I can!...just paying forward is all...

2 1/8 sounds perfect......carry on soldier ;)
 

Lost in Translation

Seaman Apprentice
Joined
Mar 30, 2015
Messages
44
Houston, we have INSTALLATION :drum:

So since last time I was able to get 1 layer of 17oz on the front and let it cure overnight. Today I mixed up some PB alittle over 2 QTs and glued in the transom. I still need to do my fillets on the edges but I must say it looks good even if some want to say different haha.

Weekend plan get all my edges filled and do an 4" overlap then an 6-8" overlay. Then one more full layer of 17oz over the whole thing. After that is the start of the hard part my stringers and motor mounts.
Transom IN.JPG
 

zool

Captain
Joined
Aug 19, 2012
Messages
3,432
Nice fit lost!..looks good, are u sure you got enough even clamping with just one board, and the tie downs?...it looks like it should be fine as long as the outer skin is flat. congrats!.
 

Lost in Translation

Seaman Apprentice
Joined
Mar 30, 2015
Messages
44
Thanks Zool.... As far as the clamping I have another board that runs across the outside on the top connected to the 2 tie downs, 4 clamps around the keyhole and a lower board on the outside and the one you see on the inside clamped together through the keyhole. It seems to be good as I had some oozing out all the holes on the outside. Also the keyhole is pinched together with no gaps. We will see tomorrow when I come home from work when I take everything off.
 

Lost in Translation

Seaman Apprentice
Joined
Mar 30, 2015
Messages
44
Transom 1st layup is in....Tomorrow 2nd coat goes in then 1 more full layer on the whole thing. On the 1st layer I went 4 in on transom and 4 in on hull. I was thinking 6 and 6 on the next pass does this sound good enough?

transom 1st layup.JPG transom 1st layup glued.JPG
 

zool

Captain
Joined
Aug 19, 2012
Messages
3,432
I usually go 4-6 inch overlap of 1st lam...to get a good bite...2" overlap Is good if your doing 3-4 lams...and following Wests progressively smaller layers on top of each other.,

The glassing so far looks good tho, keep it up ;)
 

Lost in Translation

Seaman Apprentice
Joined
Mar 30, 2015
Messages
44
Last layer of transom is on and dry. TRANSOM is complete and it came in a little under 2" may go over it with a layer of epoxy to thicken it up and get rid of the texture from the fiberglass. Anyways time to move on to the stringers. On a side note I plan on painting the transom and the bilge white with either bilge paint or I have read rustoleum any opinions on this?

transom COMPLETE.JPG
 

Lost in Translation

Seaman Apprentice
Joined
Mar 30, 2015
Messages
44
Been a week and I have gotten a lot done. I have my two outer stringers PB'd in and working on the inner stringers and cross members now. I will take some pictures tomorrow and upload them.
 

Lost in Translation

Seaman Apprentice
Joined
Mar 30, 2015
Messages
44
So..... It seems I got too busy working on the boat to post updates but here is the best update of them all. After 3 months of work she is in the water. No longer dry docked but sitting in the river now floating :laugh:. She took a dip on July 3rd just in time for the fireworks this past weekend. Runs great and had her up to 34MPH. Next is a new prop 12 3/4 by 21.

I want to thank everyone who has helped me along the way especially ZOOL.:yo: I did take more pictures of the process which I can supply if anyone would like to see.

Total damage - $2,758.98
Total Time - April 3rd - July 3rd
Man hours --- Who knows!!!!! but the wife said she has seen me more often as I am not in the garage anymore. (shhh till I buy another one to do)


IMG_1855.JPG IMG_1856.JPG
 

Attachments

  • IMG_1855.JPG
    IMG_1855.JPG
    78.6 KB · Views: 0

Mark72233

Ensign
Joined
Jul 11, 2014
Messages
926
Lost, Congrats on the SPLASH that was quick work :clap2:. She is looking good and another boat done right in time for the 4th of July, I am so jealous. One day I will be there, I hope :becky:
 
Top