92 Glasstream 190 SE - 5.0 to 5.7 swap

Antax

Seaman
Joined
Apr 23, 2012
Messages
61
If this is in the wrong place please move it.

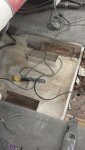
I been lurking around the site for a while absorbing information. And there was a LOT of information to absorb! I purchased a 92 Glasstream 190 SE last fall from a gentleman who's son had not winterized it correctly the previous year and had busted the block. I went to look at the 22 year old boat expecting the worse. What I found was a shock. The gentleman had only owned the boat for 2 years and the person he bought it from had purchased it new in 92. Turns out the original owner was a doctor and kept the boat stored in a slip at the local lake and had the boat stored on a lift during the winter. The boat was all original, even the seats and upholstery.

This would be the first boat I have ever owned. Being a long time engine builder the busted block was no problem. 20141227_180404.jpg 20141227_180511.jpg 20141227_180329.jpg
 

Antax

Seaman
Joined
Apr 23, 2012
Messages
61
For the engine swap I found a 350 (5.7L for you younger gents) in a salvage yard that was in a 1995 GMC van. Understanding that a boat needs low end torque instead of horsepower I figure this would be just what I needed.

20150104_152829.jpg

First thing I did was pull a compression check just to verify the rotating assembly was in good shape and strip the engine down to the long block. Whenever you buy a used engine ALWAYS pull a compression check. The salvage yard I bought the engine from also had gave a 30 day warranty for $30. Thats cheap insurance.

Nothing else was going to be used from the engine. Even the valve covers and oil pan were taken off. I also took off the windage tray since the boat had a longer windage tray on it. To do this I also had to swap 2 of the main cap studs and torque them back down the the 75 ft lbs.

And this is where the long block will live for the next 2 months while it was being rebuilt. It was winter and I work slowly lol
20150117_140648.jpg

I also pulled the heads off just to check the cylinder walls and to replace the valve stems seals. I mean its a 20 year old engine and I'm sure the seals are hardened by now, and they were. Most of the seal had already cam apart. A lesson learned from a 289 I built for a 66 Mustang, even a small piece of valve stem seal can seize up an oil pump.

And yes thats a lawnmower engine in the background. Previous owner ran it out of oil and trashed the engine. I like engine projects. Bet you won't see many Systems Administrators that can build a big block Dodge :)
20150325_193501.jpg

By this time I hadn't been to worried about taking pictures. It was a simple tear down and pretty much everything I was taking off wasn't going to be used anyway but before and during the tear down of the boat engine I took hundreds lol Did I mention this was my first boat?
 

Antax

Seaman
Joined
Apr 23, 2012
Messages
61
On to the boat engine which had this big thing sitting on top of it that looked like a giant octopus with hoses going everywhere.

20150314_122652.jpg

Before I pulled the engine I took pictures from every angle I could find, front, back, sides, underneath. I mean thats what cell phones are for right? Mainly I took pictures of where the hoses and wiring harness attached. It also came in handy when I was trying to remember where and how the brackets went and even what kind of bolt was in each spot. You can NEVER take enough pictures.

The manifolds on both sides were also cracked so after some researching and personal knowledge I decided to have them welded. Now before I start getting messages about "Oh the insides could be cracked!", yes I know and at this time I'm taking that chance.

After I got the engine out I noticed someone had tried a failed attempt to repair the heat exchanger. Much to my delight I found out later the heat exchanger was all copper and when it had froze it simply busted the solder loose and I was able to clean it up and solder it back together.

If you'll also notice the harmonic balancer on the 5.0 is smaller than it is on the 5.7. The bracket for the water pump had a little over an 1/8" of clearance which should be plenty but the bolt holes on the heat exchanger had to be notched a little to get enough clearance for the hose.
20150315_162949.jpg
 
Last edited:

Antax

Seaman
Joined
Apr 23, 2012
Messages
61
Now during the engine build I kept wondering, what exactly is the difference between a "marine" engine and a car/truck engine? What I found out is simple, head gaskets. Thats pretty much it. Even the newer engines in the trucks and vans already come with brass freeze plugs and you only needed marine head gaskets if your going to salt water.
My choice was a small Chevy gasket set, double roller timing chain and new high volume oil pump. Total cost ~$170 (I could have done without the timing chain and used the oil pump from the 5.0 but again it was cheap insurance). I'm in Tennessee and salt water is a loong way away. I also bought a couple cans of engine paint at the local parts store so you could add another $9 to that total. Now keep in mind I already had all the tools to do the jobs but you cant count the cost of a good tool. A good tool will pay for itself many, many times over.
But lets not get to indepth into engine building. That is a project all its own. You can also spends thousands on an engine if you want. My brothers crate engines in his dirt track cars are $12,000 each and that's just the long block.

Anyway where were we?

Since I was going to repaint the engine everything that was going to go back on the engine got a wire brush and/or a sandblasting along with a degreaser and a pressure washer. I cleaned the heads while I had them tore apart installing the new seals.

The painted project...
20150329_122101.jpg

Yeah that's a lot of orange. I didn't like all of the silver but I left the accessories silver so it didn't look to bad.

If you look at the crank shaft pulley you may be able to see how much bigger the balancer is on the 350 than it was on the 305. Things got a little close but nothing a die grinder couldn't fix.

20150329_170425.jpg

This is where I'm at right now. Thanks to the pictures I was able to keep the wiring harness in the right place and remember where everything hooked up to. Should have the manifolds back this week. I won't be able to drop it back in the boat until next week because of the holiday but I've waited this long.
 
Last edited:

Woodonglass

Supreme Mariner
Joined
Dec 29, 2009
Messages
25,924
Last edited:

Antax

Seaman
Joined
Apr 23, 2012
Messages
61
Wasn't able to do much last night. Finished connecting the wiring harness, putting on the belts and installing the fuel filter/separator. Pulled the boat out of the garage and pressure washed the engine bay. I forgot to take pics of the before but lets just say it was pretty oily. Not sure if the old engine had an oil leak or they just drained the oil into the engine bay instead of siphoning the oil out of the dipstick tube like they were suppose to.

That reminds me, could anyone recommend a decent oil change pump? I plan on changing the oil after the first outing. The first oil will collect all of the "trash" that may have gotten left behind from the build.

20150402_073126.jpg
 

Antax

Seaman
Joined
Apr 23, 2012
Messages
61
Maybe I shouldn't have made to general of a statement and I'm sure the there may be more differences with the newer marine engines. With respect to the accessories such as the starter, and alternator, yes they've been plasti-coated and sealed and I would never recommend replacing the alternator, starter etc. with one that hasnt been coated for use in a marine environment. I hope I don't lead others to believe you should use non-coated/sealed parts on a marine engine. That's why I reused the marine accessories on the donor engine. Btw, the power steering pump is exactly the same as a standard Chevy power steering pump with the exception of the cap. The marine cap has an extra flap about half way down the stem. Most likely to keep the fluid "in check".

There are certain other aspects that shouldn't be overlooked as you mention, such as the carburetor and fuel pump. These 2 have vent lines connecting them to keep fuel fumes from collecting in the engine compartment and vent themselves down the intake. Like I said I stripped the old engine down to the long block and scrapped everything on the replacement engine. On another interesting note the marine distributor was the exact same thing that I pulled from the donor engine, just cleaner.

When I refer to the engine my emphasis is more towards the long block and that's the reason I chose to pull a truck engine, low end torque. An engine from a Camaro or Vette would have been a disaster as they wouldn't supply the low end needed in a boat. You wouldn't install a high horsepower engine from a hot rod in a truck and expect it to pull a 10,000 load either.

I have read the pages you posted over and over again along with other specs pertaining to casting numbers, cam specs and intakes before I started this project. I'm not one to just jump into a project without a plan.

It's interesting that the one page says "The biggest difference is that marine engine cylinder blocks are based on heavier-duty truck blocks, replete with four-bolt main bearing support of the crankshaft instead of just two". Someone should have told Yamaha that and I have a $100 bill that says your Mercuiser is a 2 bolt main too. The engine that came out was a standard 305 small block with the exact same casting numbers found in a 86-9? Chevy half ton truck, 2 bolt mains with a one piece rear main seal. No heavier built than any other engine running around. Its also not surprising that the links you posted are from sites that sell marine engines. Just saying :)
 

Woodonglass

Supreme Mariner
Joined
Dec 29, 2009
Messages
25,924
Marine Water Pump? ALL the electrical Wiring/Connections?? The camshaft is ground to different specifications, most often to maximize low end torque instead of high rpm horsepower. Valve overlap (the time when both intake and exhaust valve are open) is shortened in order to minimize the chance of water being sucked out of the exhaust and into the combustion chamber. Has this been done on your engine? I'm REALLY not trying to "Yank your Chain" as much as I'm concerned for the safety of you and your passengers. I/O boats once that motor cover goes down really can become very dangerous. The fumes under that cover can cause catastrophic things to happen even with real McCoy Marine engines. I'm just wanting to point out that when you close that cover you want to ensure that you've done everything possible on the safety side of things. Explosions and fire on a boat is NOT pleasant!!!:eek::blue:

This Statement pretty much says it all when trying to put a Car Engine in a Boat...

Keep in mind a car only uses about 15 of its one or 200 horsepower to sustain a speed of 55 mph (rpm = horsepower). Conversely, a boat is always under load. Its marine cycle can be compared to hitching a 10,000 pound boat and trailer on the bumper of a car and trying to climb the Rocky Mountains at 80 miles an hour. "

But like I always say...It's your boat and you are free to do with it as you see fit!!!;)
 
Last edited:

Antax

Seaman
Joined
Apr 23, 2012
Messages
61
You've never seen me drive have you? lol I'm the guy that will hitch a 10,000 pound boat and trailer to the bumper and climb the Rocky Mountains at 80 miles per hour. :) We're running a 64 Ford 2 Ton truck now with a 292 hauling 16,000 pounds of round bales of hay.

I understand your statement about the fumes. Thats why I'm using the intake, carb, fuel pump and wiring harness off of the original engine. I only used the long block.

I love discussions like these. There's always something to be learned.
 

PatinIdaho

Chief Petty Officer
Joined
Oct 7, 2014
Messages
405
I also have read a bit on this subject.
Its my understanding the "Block and heads" excluding the accessories(alternator and such) Is more or less a truck engine.
The main difference is to my understanding marine 305 and 350 chev engines have minor changes this includes.
Brass freeze plugs.
Low speed high torque cam. RV cam style. Makes it torque from just off idle to around 5500 rpm. I have read a few posts that the cam in a used replacement truck engine had the same numbers stamped on it as did the boat engine cam.
Better head gaskets that do not corrode in salt water. If fresh water only, car head gaskets work fine.
There is no advantage between 2 bolt or 4 bolt block under 450hp
Water pumps with ceramic seals are for salt water corrosion protection. Fresh water only a car water pump is fine but you will need to block off the extra ports.
Marine intake manifold has less vacuum ports then a auto intake. Either can be used by just blocking off the extra ports.
We all know not to use a car parts such as Alternator, Fuel pump, Starter, Vacuum style dizzy, Carburetor.

You can totally rebuild one with quality parts for about $1,200 including machine work if you are capable of doing the assembly work your self.
 
Last edited:

Bondo

Moderator
Staff member
Joined
Apr 17, 2002
Messages
70,525
You've never seen me drive have you? lol I'm the guy that will hitch a 10,000 pound boat and trailer to the bumper and climb the Rocky Mountains at 80 miles per hour. :) We're running a 64 Ford 2 Ton truck now with a 292 hauling 16,000 pounds of round bales of hay.

I understand your statement about the fumes. Thats why I'm using the intake, carb, fuel pump and wiring harness off of the original engine. I only used the long block.

I love discussions like these. There's always something to be learned.

Ayuh,..... It sure sounds like you've got a solid handle on what makes a motor, a Marine motor,....

After readin' through this, the only point that's slightly off-base is the plastic coated electrical stuff,...
Plastic coatin' is irrelevant,...

Electrical components must be Ignition Protected,...
ei; Screens to protect the alternator, 'n distributor, 'n the extra plate inside a marine rated starter,....

Outside coatin's or paint don't matter, except for rust protection,....

'n to be quite honest with the Cam thing,....
Standard production automotive, 'n pickup truck cams are just Fine, power from idle to 5000 rpms,...
It's the Hot-Rod cams that cause trouble in a Marine motor,...
 

Antax

Seaman
Joined
Apr 23, 2012
Messages
61
Got the manifolds back last week. They brazed up the cracks pretty good. Hopefully the insides aren't cracked. Still need to clean them up and give them a coat of paint. Wonder how long the paint will last on these lol

I'm thinking of swapping sides with them so the brazing is on the backside. Both sides are the same, same castings and same part numbers. If I swap sides it would "hide" the brazing job a little. Thoughts?

20150407_210056.jpg
 

Antax

Seaman
Joined
Apr 23, 2012
Messages
61
Something for the fiberglass guys. The motor mount lag bolts are stripped. I'm not surprised. The stringers are solid. From tapping on the mounts it sounds like the sides are solid. The wood on the top is still there just soft.

My thoughts are to cut the top off of the mounts.
Clean/cut out the wood till it's solid.
Replace old wood with new wood coated in resin.
Recover the mount with fiberglass.

Fiberglass is new territory for me. Anyone have better ideas?
 

JASinIL2006

Vice Admiral
Joined
Feb 10, 2012
Messages
5,546
I'd drill some test holes lower on your motor mounts to make sure the wood is solid down there. (I don't believe the 'tap test' is all that valid.) if the shaving come out light and dry, you're good and you can fill the holes with 3M 5200.

If the shavings are dark and/or wet, you have bigger problems.
 

Mark72233

Ensign
Joined
Jul 11, 2014
Messages
926
JASin is right on target. I have twin Merc I/Os. The motor mounts front and rear. The front mount is pretty big and was solid as a rock. Two 500lb engines sat on it and the whole thing was solid with no movement. I tapped and banged on it and felt very confident that when I cut it loose from the hull I was wasting time and resources. The fiberglass around the motor mount was very thick and turned out the wood inside was mush on one side and the other side was close behind. Except for just cutting them out and replacing the Core sample method is the only other way. I also saw where someone took the type of bore drill you use to cut door knob holes in doors. They just went deep enough to remove a round fiberglass section and allowed excellent access to look at and poke at the wood underneath. If it was good they just fiberglassed over it. I did this on one of my main stringers and found it appeared intact but I decided since I had already removed most of the stringers and all of the bulkheads and transom way was I trying to save 6 feet of old stringers with wood that had been there for 42 years. I am glad I did because there was rot in several places at the bottom where the hull met the stringer. I would have taken a few years but the stringer would have turned to mush also.
 

Antax

Seaman
Joined
Apr 23, 2012
Messages
61
Thank you gentlemen

I'll drill a few pilot holes in the stringers to check them out. I have read some places where they were injecting a type of resin into the wood and letting it setup but to me this sounds like a temporary solution.

So is this a standard way of repairing the engine beds? Cut the top off, clean out all of the wood and replace the wood and reglass the top or should the entire engine bed be removed, including the sides, all the way down to the hull? My thinking is that since the original connection to the hull isn't cracked then cutting the entire bed loose from the hull and recreating it would make it weaker than just cutting off the top and "refilling" it.

On another note, about the wood. I have some 3/4 inch 9 ply birch left over from a speaker enclosure my son and I built for his truck or should i get some exterior grade 3/4 inch plywood? I'm not sure the birch will soak up the resin or does that even matter?

I know this engine is going to weight around 800-900 lbs with the manifolds and accessories and I want it secured as best as possible.


Antax

Seaman
Joined
Apr 23, 2012
Messages
61
I drilled a few small holes in the stringers and the bit went in solid and came out with some nice yellow looking dust. So looks like my stringers are in good shape.

When I went to drill into the engine beds the bit went in pretty solid but when I pulled the bit out it was pretty much what I had expected. Especially from the starboard side. It seems for some odd reason someone cut the corner off of the engine bed. At first I thought it was for clearance but there's nothing on the engine in the way so who knows. The bit came out with wet, dark dust. So after a lot of pictures and measuring to make sure everything goes back in the right spot, let the cutting began.

20150409_194133.jpg

20150409_194127.jpg
The rot is at least a couple years old. Some of the wood was still solid and I actually had to saw it into to get it out. The pile is only about half. The rest is in my shop vac. I'm going to cut the top lip off of the engine bed and build new wooden block and resin is back into the beds. Then recover it with fiberglass and gelcoat it. I haven't cut the top off of the port side yet. I'm betting it may not be quite as bad since it didn't have the notch cut off of it but who knows.
 

Antax

Seaman
Joined
Apr 23, 2012
Messages
61
I have all of the rot cut out. Like I said when it comes to fiberglass this is new territory to me. There was thin spot in the fiberglass between the bed and the stringer and the stinger got a little damp in one spot. Got it all cut back to dry wood.

Should I cut/grind away all of the engine bed all the way down to the hull?
I have read where some have used cast in studs for the engine mounts instead of the lag bolts (see link). I have to say I like the idea of having a better sealed up engine bed and a steel thread but somewhat afraid of it. Would this be something worth looking into or should I just stick with the lag bolts?

20150411_150048.jpg
 

Attachments

  • 20150411_150048.jpg
    20150411_150048.jpg
    29.4 KB · Views: 1
Top