Replacing multiple rivets in a seam

pckeen

Commander
Joined
Jun 20, 2012
Messages
2,067
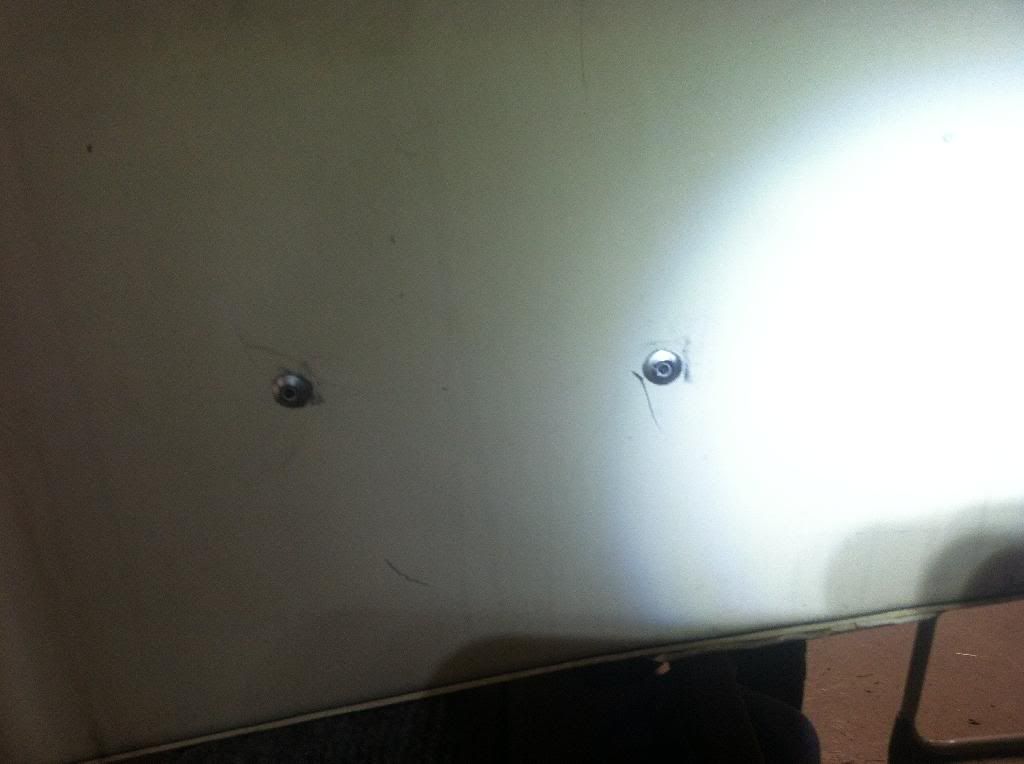
I picked up a 14' Lund tinny yesterday for next to nothing. I wanted a small boat I could throw on top of a camper when heading out with the kids. The PO advised that it leaks, and he has run what looks like asphalt tar down several seams. It looks to me as well, as if someone has tried to repeatedly rebuck rivets along some of the seams. Inside, the boat seems to be in great shape.

I have no real cash invested in this, and don't want to put a bunch of money into it, but I replaced some rivets in my current mini-restoration using an air hammer and a sledgehammer as backing bar - seemed to work fairly well. I will be ordering a solid rivet gun, as the air hammer isn't really precise enough for this type of work.

I'm either going to resell this, or do a seam repair, which will involve replacing most of the rivets on a couple of seams within the boat. When I drilled out rivets using an electric drill, each rivet took several minutes to do. I know have an air drill, which will run at higher RPMs.

So I'm looking for a couple of pieces of advice:
1. What is the fastest way to drill out rivets (type of drill, size of bit, type of bit) - and how long should this really take?
2. How should I drill out and replace the rivets - I remember seeing someone on here say 'don't drill them all out'
3. How much time will there be involved in replacing 6 feet of rivets in a seam?
 

g0nef1sshn

Lieutenant
Joined
Feb 24, 2015
Messages
1,291
I havnt put new rivets in, but ive taken a few out. I used a bit just bigger than the rivet head, i didnt drill through the rivet, but let the bit take the head off the rivet and punch the rest out. I did this on accessories not the hull. I know its good to do a few practice rivets on scrap layin around before goin at it too.

The more knowledgeable people here might be able to link you to a thread that shows someone doing what your asking.
 

fmjnax

Chief Petty Officer
Joined
Jul 21, 2011
Messages
457
I've never worked on a tinny, but I've done my fair share of rivets. Just as stated above, I use a bit about the size of the head and let it break the head free (and the head/ring usually ends up staying on the bit). Then I use a punch and hammer to pop the rest out. Sometimes it doesn't cooperate and I have to go to a bit the size of the rivet and drill it out completely, but that's probably no more than 10% of the time.
 

Tnstratofam

Commander
Joined
Aug 18, 2013
Messages
2,679
What I've done is use a chisel to knock the head of the rivet off from the outside.


Drill out whats left of the rivet from the outside. ( I used a 3/16 inch bit for mine )


Leaving a clean whole for the new rivet.


Then install the new rivet coated with 3m5200


This has worked well for me. However if I were doing an entire seam I would either do the rivets one at a time or use clecos to hold the seam together as I repaired it.
 
Last edited:

Tnstratofam

Commander
Joined
Aug 18, 2013
Messages
2,679
By knocking the head off I could see what size drill bit would be just big enough to finish removing the rivet without oversizing the hole. Also the rivets I used were closed end blind rivets with aluminum mandrels so I could complete the repairs and not have them turn rusty over time. Almost all of the rivet repairs on my SS were below the water line, and they were leak free all summer.
 

gm280

Supreme Mariner
Joined
Jun 26, 2011
Messages
14,590
If you are going to remove an entire panel of its rivets, buy a Clecos installation pliers tool and clecos and use them to hold things together before switching over to the riveting installation procedures. As you remove the rivets, install a clecos about every three or four holes along the way. They use them on aircraft repairs and it makes such work a lot easier. But what you are talking about is easily doable and really not the hard either. Also use hardened aluminum rivets. they will hold up a lot better then soft rivets... JMHO!
 

pckeen

Commander
Joined
Jun 20, 2012
Messages
2,067
Thanks. I'm planning on using solid rivets, not closed end blind rivets, so the heads won't simply fall off. I will have easy access to both sides of the rivet.
 

jigngrub

Fleet Admiral
Joined
Mar 19, 2011
Messages
8,155
I personally would Gluvit or Coat-it the seam first and see if that fixes it. Leaky seams are where those 2 products really shine.
 

Corjen1

Lieutenant Junior Grade
Joined
Aug 24, 2013
Messages
1,237
From an airplane mechanic....rivets are sized by length and shank diameter...
1/16
#51 (0.067)
0.062
0.072
3/32
#40 (0.098)
0.093
0.103
1/8
#30 (0.128)
0.125
0.135
5/32
#21 (0.159)
#20 (0.161)
0.156
0.171
3/16
#11 (0.191)
#10 (0.194)
0.187
0.202
7/32
#1 (0.228)
0.218
0.233
1/4
F (0.257)
0.250
0.265
9/32
L (0.290)
0.281
0.296
5/16
0 (0.316)
0.312
0.327
11/32
S (0.348)
0.343
0.358
3/8
V (0.377)
0.375
0.390
13/32
Z (0.413)
0.406
0.421
1/16
0.022
3/32
0.032
1/8
0.042
5/32
0.052
3/16
0.062
7/32 **
0.072
1/4
0.083
9/32 **
0.093
5/16
0.104
11/32 **
0.114
3/8
0.125
13/32 **
0.135
** Indicates oversize replacements
table2.gif
1/16
0.081
0.025
0.040
3/32
0.122
0.038
0.050
1/8
0.163
0.050
0.070
5/32
0.203
0.062
0.092
3/16
0.244
0.075
0.105
7/32 **
0.285
0.087
0.110
1/4
0.325
0.100
0.130
9/32 **
0.365
0.113
0.140
5/16
0.406
0.125
0.158
11/32 **
0.450
0.137
0.170
3/8
0.488
0.150
0.190
13/32 **
0.530
0.165
0.200

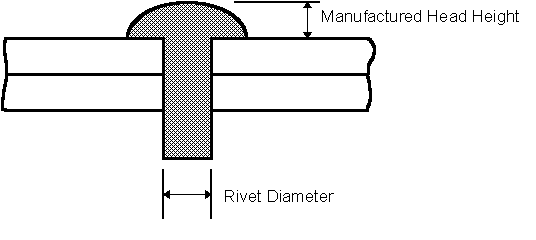
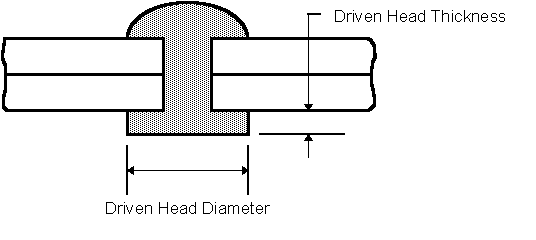
So thats a lot of numbers.....typically a "shop head is 1.5 x the diameter of the rivet shank which ="s your rivet/hole size....

table3.gif

Never take all out in a given seam....skip no more than every other one.....the base aluminum will start to separate between rivets if you do...at least in an aircraft world!!!!

Hope this helps....here is a great guide for rivets.....

http://www.engineersedge.com/rivet_application.htm
 
Last edited:

Mikeopsycho

Senior Chief Petty Officer
Joined
Feb 6, 2014
Messages
738
Interesting info here. Pckeen, I hope you don't mind my jumping in with a dumb question, but how are solid rivets installed? What tools are used? I've only ever installed blind rivets.
 

PatinIdaho

Chief Petty Officer
Joined
Oct 7, 2014
Messages
405
Generally with a air powered "Rivet Gun" works and looks just like a air chisel but may not hit hard enough I dunno. and you need a proper size set on the manufactured head. To form the Driven head you need a "Steel bucking bar" to form the Driven head. Personally i prefer a Titanium bucking bar.
You can also substitute using a Regular hammer and proper set to drive the rivet manufactured head.
On a boat i would imagine it will take 2 people to install solid rivets
 

jigngrub

Fleet Admiral
Joined
Mar 19, 2011
Messages
8,155
I'd like to add that a lot of times when a seam in an aluminum boat is leaking it's because the gasket material in the seam has broken down and degraded and replacing rivets won't fix the leak unless you take the seam apart and install new gasket material. This is why I suggested using Gluvit or Coat-it in post #8. the thin runny epoxy resin will seep into the seam and fill it sealing off any leaks instead of replacing the gasket.
 

Watermann

Starmada Splash of the Year 2014
Joined
Jan 12, 2013
Messages
13,753
Peter as you know from my Chief thread, I've driven in 100's of rivets both blind and solids. I would like to see some pics of the seams on your new tinny.

For removal of the rivets I use the same size drill bit as the rivet and it's best to use a nice new pilot point rather than digging out some bit that's been used on steel and is dull.

You may notice that shearing off the head leaves a very tight stuck rivet shaft that when you try to drive it out the inner seam material will start bending rather than the bucktail end popping out like you would hope. I don't trust myself with a steel chisel along the side of a boat.

Most seam rivets are 3/16" diameter, I prefer the brazier head. You would most likely need 3/8" maybe 7/16" in length and I would get the 2117T4 hardness over the 1100. You will need a rivet set the same diameter as the rivet you're setting 3/16". An air hammer is fine with the rivet set, that's what I use with a bucking bar. Needed or not all the below the water line rivets I set are sealed with 5200. I but my rivets at rivetsonline but their shipping is high.

As far as how long it will take is how good you get at the removal as the rivet setting takes about 3 seconds.
 

pckeen

Commander
Joined
Jun 20, 2012
Messages
2,067
Thanks Water - I'm going to use Gluvit on this, but I'll do what I can to repair the rivets first. I ran into a boat repair guy when I was trying to purchase solid rivets - he said leak test by filling the boat with water, as it is easier this way to trace the problem to a specific rivet. He said don't bother with replacing an entire seam, as the work will be far too extensive - and he suggested replacing not just any leaking rivets, but also the two around them, as often when one goes, the others will begin to vibrate and have pressure put on them becuase the weak rivet isn't doing its job any longer.

Interesting info here. Pckeen, I hope you don't mind my jumping in with a dumb question, but how are solid rivets installed? What tools are used? I've only ever installed blind rivets.

I'm no expert, but what I've found out is: center punch the head, drill into the head using a sharp drill bit, just deep enough to get through the head. Knock the head off by putting a center punch in the hole and popping the head off; pop the rest of the rivet out using the punch; Insert your new solid rivet into the hole; use a rivet gun with rivet set / hammer and rivet set on the outside of the boat, with another person holding a bucking bar (basically a smooth lump of steel) against the rivet on the inside, and hit the rivet until the inside piece flattens and tightens the joint.

There are a few youtube videos and guides on this. It's relatively easy to do, but like anything, requires practice.
 
Top