Formula 27PC Transom Work

Status
Not open for further replies.

alldodge

Moderator
Staff member
Joined
Mar 8, 2009
Messages
40,582
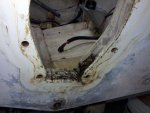
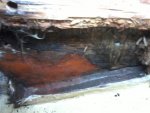
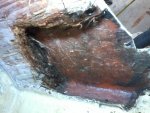
Well started with a couple anode holes needing a bit of work and now it appears I'll need to rebuild part of the bottom of the transom. Pulling the transom assembly off noticed all of the bolts had rust but the bottom stud on the starboard side was showing more then the others. When cleaning the holes out with a wire brush some of the wood started to move. Started chipping away in the bottom corner and found the wood under the surface was a bit soft.
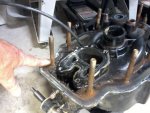
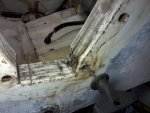
Photo396.jpg

Photo397.jpg

Photo398.jpg

Going to cut away some of the glass on the inside and see what I find. Hope it doesn't go to far. In the pic above it looks like the seal may have started to leak due to the discoloration in the bottom right corner
 

tpenfield

Moderator
Staff member
Joined
Jul 18, 2011
Messages
17,621
Yup, looks fairly early in the progression. You could do some test holes around the transom and hit it with a low cost moisture meter just to see if the moisture is localized or has spread significantly. I did that sort of thing with my recent bulkhead replacement . . . which gave me an idea of how to scope out the repair.

Ethylene Glycol is like chemotherapy for wood rot situations, so you could always use some of that to ward off the propagation. It seems that the boat manufacturers never seal up the keyhole well enough after cutting it. Every year, I spray a little bit of EG around the exposed areas of the transom key hole, just to prevent the wood from rotting.
 

Woodonglass

Supreme Mariner
Joined
Dec 29, 2009
Messages
25,924
Based on your other Thread and now this one, I'd be dishonest if I didn't say that I believe you need to seriously consider replacing your transom. It seems quite evident now that it in fact it has been water compromised to the extent that these quick temporary fixes are only that and will only delay the inevitable. Unless you plan on only keeping the boat for 2-3 more years and then scrapping her, I'd highly recommend a total rebuild. But hey, it's your boat and your decision.;)
 

alldodge

Moderator
Staff member
Joined
Mar 8, 2009
Messages
40,582
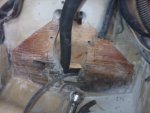
Well it worst then I was thinking, and fhhuber was pretty close with his assumptions in my anode thread. Appears so far the moisture has not gone above the second transom bolt hole from the bottom. The right side of the pic (port side of transom) looks to have the most damage down low around where the anode came in.

Photo399.jpg


Photo400.jpg

Unable to get to the other side of the stringers due to the design of inside. Formula boxed the area in to hold the sector drive to raise/low the hatch and to hold the PS pump on the starboard side.

Would pilot holes into the stringer on each side be advisable to check for moisture?

Other then dig and cutting out the wood, have any suggestions for the way to go?
 

tpenfield

Moderator
Staff member
Joined
Jul 18, 2011
Messages
17,621
Well it worst then I was thinking, and fhhuber was pretty close with his assumptions in my anode thread. Appears so far the moisture has not gone above the second transom bolt hole from the bottom. The right side of the pic (port side of transom) looks to have the most damage down low around where the anode came in.


Unable to get to the other side of the stringers due to the design of inside. Formula boxed the area in to hold the sector drive to raise/low the hatch and to hold the PS pump on the starboard side.

Would pilot holes into the stringer on each side be advisable to check for moisture?

Other then dig and cutting out the wood, have any suggestions for the way to go?

You can do some test holes in the stringer for sure, but one thing to note. Formula typically glasses the transom before they lay in the stringer system, so there should be no wood-to-wood contact of the transom to the engine stringers.

If you find a fairly high moisture content with a contact meter in the stringers, it may be coming from the bulkhead just forward of the engine.
 

tpenfield

Moderator
Staff member
Joined
Jul 18, 2011
Messages
17,621
Although this may be worse that you thought, it does not look too bad . . .
 

alldodge

Moderator
Staff member
Joined
Mar 8, 2009
Messages
40,582
You can do some test holes in the stringer for sure, but one thing to note. Formula typically glasses the transom before they lay in the stringer system, so there should be no wood-to-wood contact of the transom to the engine stringers.

If you find a fairly high moisture content with a contact meter in the stringers, it may be coming from the bulkhead just forward of the engine.

I heard that to and I'm sure hope it was done on this one.

Haven't done must glass work at all. Hoping I can get away without doing a full transom rebuild if the rot does not go above the second hole from the bottom. My thought would be to cut the wood out to the stringer on each side. Cut to fit and glass it, then sand down so the new piece will slide in place. Put resin on the back and sides then put the new piece in place and let dry.

Next cut blocks of wood (maybe 2x8 or 2x10) and glass matt them with several layers from the stringers to the new transom piece. Once dry then sand, and lay glass matt across the full length of the new transom section and build up to even level. Then sand and paint.
 

tpenfield

Moderator
Staff member
Joined
Jul 18, 2011
Messages
17,621
Sounds like a good plan. In the meantime, you can use the exposed wood surfaces to draw the moisture out of the transom by heating it, etc.

Regardless, you will want to use 'chemotherapy' on the old wood that remains, as that will tend to rot or dry rot, and that is what WoG is referring to in terms of a full rebuild. you may spend the next month or two dealing with the transom and allowing time for it to dry and then the EG to soak in a dry as well.
 

alldodge

Moderator
Staff member
Joined
Mar 8, 2009
Messages
40,582
Ordered a moisture meter and installed a squirrel cage blower in the inside. I'll let it run for a day or so and dig out the loose stuff. Have a small space heater I can install on low if air doesn't bring it down.

Got to thinking about the 2x8 and 2x10 blocks. Figure I want the blocks to handle the load against the stringers after it's done, but may have a space issue on the starboard side with the starter. Will need to check into it a bit farther
 

Woodonglass

Supreme Mariner
Joined
Dec 29, 2009
Messages
25,924
I don't ever think "Scabbing" in portions of a transom is a good idea. Attempting to ensure that ALL of the Rot has been removed in order to ensure that it does not continue to decay is optimistic at best. That's MY opinion. Just ME!! You'll spend almost as much time and effort in doing this as you would in doing a total replacement. Again, It's your boat and your decision. Again, I'll state that you should base your decision on safety, structural integrity, length of ownership and what you will be doing with the boat when you're done with it. The next owner upon disclosure of the kinds of repairs done, may not be to accepting of a partial transom repair. I'm just sayin...:rolleyes:

I would for sure do core samples of the stringers and motor mounts!!;)
 

tpenfield

Moderator
Staff member
Joined
Jul 18, 2011
Messages
17,621
I don't think that you have to do anything excessive with extra wood in the transom repair area. Just a good bonding surface on the new and old wood as well as the glass surfaces on the transom and stringer areas. Then double and triple on the glassing. I'd be worried about extra wood support down in that area may cause an interference problem when you put it all back together. The strength of it all will be in the glass and the bonding it has to the old surfaces. I would go with VE resin. I believe that Formula uses Ashland chemical - AME 5000 resin.
 

alldodge

Moderator
Staff member
Joined
Mar 8, 2009
Messages
40,582
I don't ever think "Scabbing" in portions of a transom is a good idea. Attempting to ensure that ALL of the Rot has been removed in order to ensure that it does not continue to decay is optimistic at best. That's MY opinion. Just ME!! You'll spend almost as much time and effort in doing this as you would in doing a total replacement. Again, It's your boat and your decision. Again, I'll state that you should base your decision on safety, structural integrity, length of ownership and what you will be doing with the boat when you're done with it. The next owner upon disclosure of the kinds of repairs done, may not be to accepting of a partial transom repair. I'm just sayin...:rolleyes:

I would for sure do core samples of the stringers and motor mounts!!;)

Appreciate your opinion very much as before I have never done this, but there have been a lot of things in the category until I did it the first time. Don't really like the scabbing part my self, but the pic posted does not have the dimensions on it, so here is what I'm thinking:

From the second hole up down to the bottom of the Vee is about 6 inches. From the bottom of the second hole over to the stringer is about 3 to 3 1/2 inches up from the bottom. The rest of the wood under the opening of the transom hole was just glassed to the bottom of the hull. The stringer is 11 1/4 inch high, this is telling me I should have 7 inches or so of solid structure, if it is solid. If it is solid except for the bottom 3 inches which goes in behind the stringer, then I figure it should be pretty strong if I can get all of the damp wood out.

Looking at the entire transom that would take a bunch to replace it all. Plan on keeping the boat a long time and don't want to just patch it, I want it fixed. I'll get it dried out and work done and then ask for opinions.
 
Last edited:

alldodge

Moderator
Staff member
Joined
Mar 8, 2009
Messages
40,582
I don't think that you have to do anything excessive with extra wood in the transom repair area. Just a good bonding surface on the new and old wood as well as the glass surfaces on the transom and stringer areas. Then double and triple on the glassing. I'd be worried about extra wood support down in that area may cause an interference problem when you put it all back together. The strength of it all will be in the glass and the bonding it has to the old surfaces. I would go with VE resin. I believe that Formula uses Ashland chemical - AME 5000 resin.

Will get some of that on order
 

alldodge

Moderator
Staff member
Joined
Mar 8, 2009
Messages
40,582
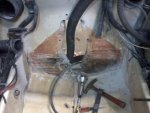
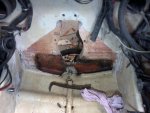
Thought the starboard side would be the worst but turns out it's the port is. Dug all the way until was hitting some solid wood. Port side is at the stringer and it had a little bit of water in the bottom. There is a gap between the bottom glass and wood so guess that's why I found a bit of water. From what I can see it looks pretty solid. There is I think 3-layers of plywood which were screwed together and then glassed.

Photo401.jpg
Port side, wood next to exterior glass is still stuck on pretty good.
Photo402.jpg

Starboard side
Photo403.jpg

Going to keep trying to dry it out.
 

tpenfield

Moderator
Staff member
Joined
Jul 18, 2011
Messages
17,621
You work fast :thumb: The drying time will be measured in weeks, perhaps, but with enough heat it should dry out.

Formula lifts the stringer and bulkhead structure up off of the hull slightly (like 1/2") before tabbing it to the hull to avoid hard spots on the hull. Not sure if they also do that on the transom, but it sounds like it from your description.

The more 'blonde' wood that you can get to, the better.

Out of curiosity, you could drill a small (1/4") hole at the base of the engine mount stringers where it meets the hull and just an inch or 2 forward of the transom to see if you get any water from there.

Once you get your moisture meter, you can drill a number of test holes and plot out graphically where the moisture exists in the structure. I found that helpful on my boat . . . probably did about 8 test holes and then filled them w/ gelcoat afterwards.
 

alldodge

Moderator
Staff member
Joined
Mar 8, 2009
Messages
40,582
Drilled a couple holes on the stringers close and down low next to the transom. The wood that came out is blond and appears dry, don't have the moisture meter yet but I think I can at least smile a little. :)

Since the port side is so close to the stringer do you think it would be best to cut out the back side of the stringer (just glass). Cut out just enough to give some room to get the new wood in behind it? Could do the same with the other side, and use over lapping pieces of plywood and then glass over everything, or am I over thinking it?
 

tpenfield

Moderator
Staff member
Joined
Jul 18, 2011
Messages
17,621
Drilled a couple holes on the stringers close and down low next to the transom. The wood that came out is blond and appears dry, don't have the moisture meter yet but I think I can at least smile a little. :)

Since the port side is so close to the stringer do you think it would be best to cut out the back side of the stringer (just glass). Cut out just enough to give some room to get the new wood in behind it? Could do the same with the other side, and use over lapping pieces of plywood and then glass over everything, or am I over thinking it?


A real judgement call, and hard to say without seeing it first hand.

Sort of depends on how solid and clean the wood appears around where the transom meets the stringers. I see from your Engine Rebuild thread, that you do have transom access on both sides of the engine mount stringers. So, you could clear out more wood and go past the stringer/transom joint in order to get into better wood. If you cut into the stringers in order to gain access, then the repair gets more complicated, as you would need to rebuild and re-bond the butt end of the stringers to the transom.

I would do it, if you think the end result will be better. If it ends up that you are just removing more solid wood, then maybe not.

Just my opinion, based on what I can tell from the pics, etc.
 

alldodge

Moderator
Staff member
Joined
Mar 8, 2009
Messages
40,582
A real judgement call, and hard to say without seeing it first hand.

Sort of depends on how solid and clean the wood appears around where the transom meets the stringers. I see from your Engine Rebuild thread, that you do have transom access on both sides of the engine mount stringers. So, you could clear out more wood and go past the stringer/transom joint in order to get into better wood. If you cut into the stringers in order to gain access, then the repair gets more complicated, as you would need to rebuild and re-bond the butt end of the stringers to the transom.

I would do it, if you think the end result will be better. If it ends up that you are just removing more solid wood, then maybe not.

Just my opinion, based on what I can tell from the pics, etc.

I cannot get to the other side of the stringer at the back. Formula boxed the very end and installed the hatch lift on one side and the power steering pump on the other. Would a straight butt joint be the way to go or do a 45 degree or something else?
 

jc55

Senior Chief Petty Officer
Joined
Nov 3, 2006
Messages
665
fetch


With all due respect, This starboard side pic is very, very bad....very high. The black wood towards the rear skin of the transom is completely dry rotted. The "V" in your bilge is not very steep which suggests that the damage level could go deep behind the stringer towards the starboard side of the hull.

I was here, just weeks ago. Core samples can be very deceiving sometimes. Do you have a larger, bird's eye view of transom area? I would be in the full replacement camp. Hoping for the best for you. Looks like you do some really thorough tear out work.
 

alldodge

Moderator
Staff member
Joined
Mar 8, 2009
Messages
40,582
fetch


With all due respect, This starboard side pic is very, very bad....very high. The black wood towards the rear skin of the transom is completely dry rotted. The "V" in your bilge is not very steep which suggests that the damage level could go deep behind the stringer towards the starboard side of the hull.

I was here, just weeks ago. Core samples can be very deceiving sometimes. Do you have a larger, bird's eye view of transom area? I would be in the full replacement camp. Hoping for the best for you. Looks like you do some really thorough tear out work.

I dug it out until I started hitting hard stuff which then was very difficult to chip away. I still plan to cut further up and to the sides with a saw of some kind. Hoping to keep going until I see good wood all around. Need to figure out how to cut away behind the stringers. Look forward to all the input I can get on how to do this so it will last. If I have to cut the back of the boat open I will, but sure hoping I won't need to do it
 
Status
Not open for further replies.
Top