88 Bayliner Trophy 1710 - wet foam and ...?

Status
Not open for further replies.

Arawak

Chief Petty Officer
Joined
Aug 27, 2010
Messages
486
Welcome Yarney!

So, inspired by the hatch above, my dad build me this:

IMG_20150403_152657.jpg


Couldn't find a suitable piano hinge, so he went with strap hinges. It's baltic birch, which I'll epoxy over and then paint white.

IMG_20150403_152809.jpg


IMG_20150403_152922.jpg
 

alldodge

Moderator
Staff member
Joined
Mar 8, 2009
Messages
40,721
Looking great, the doing great work appears to run in the family
 

Arawak

Chief Petty Officer
Joined
Aug 27, 2010
Messages
486
I spent the morning glassing in the first of three bulkheads.
IMG_20150403_150247.jpg


This one does not go all the way across, because I'm moving the tank forward. But the tub rests on it so I need to have something in place there. The missing piece will go 9 inches foreward where the tank ends.

There will be another bulkhead aft of the tank:

IMG_20150403_121438.jpg


I think I'll have one where the junior stringers end as well. Original Bayliner only had the two, but I like the third up towards the bow.
 
Last edited:

Arawak

Chief Petty Officer
Joined
Aug 27, 2010
Messages
486
Back when I was working on the aborted Chrysler 118 conversion I bought 5 gallons of 5lb foam that never got used. I dug out the pails today, and mixed up a very small batch to see if it works. Voila!

IMG_20150403_114945.jpg


IMG_20150403_115117.jpg


That's some solid stuff! I'd probably go with 2lb if I was buying it for this project, but no point letting it go to waste. This will definitely be the most solid Bayliner on the water!
 
Last edited:

Mikeopsycho

Senior Chief Petty Officer
Joined
Feb 6, 2014
Messages
738
Looking great! I like the hatch your Dad built, and the strap hinges give it a nice nautical look. Good thing the 5lb foam you have on hand is still good, that ought to save you a few bucks. Really nice work so far!
 

ahmincha

Lieutenant Commander
Joined
Jul 21, 2012
Messages
1,512
On my cc rebuild I used 4lb I'm thinking you will not want to fall on your deck its not going to give HaHa
 

Arawak

Chief Petty Officer
Joined
Aug 27, 2010
Messages
486
Thanks guys. I did a little math and my 5 gallons will give me 22.5 cubic feet of foam, I think I will need about 12-15, so should be good.
 

Arawak

Chief Petty Officer
Joined
Aug 27, 2010
Messages
486
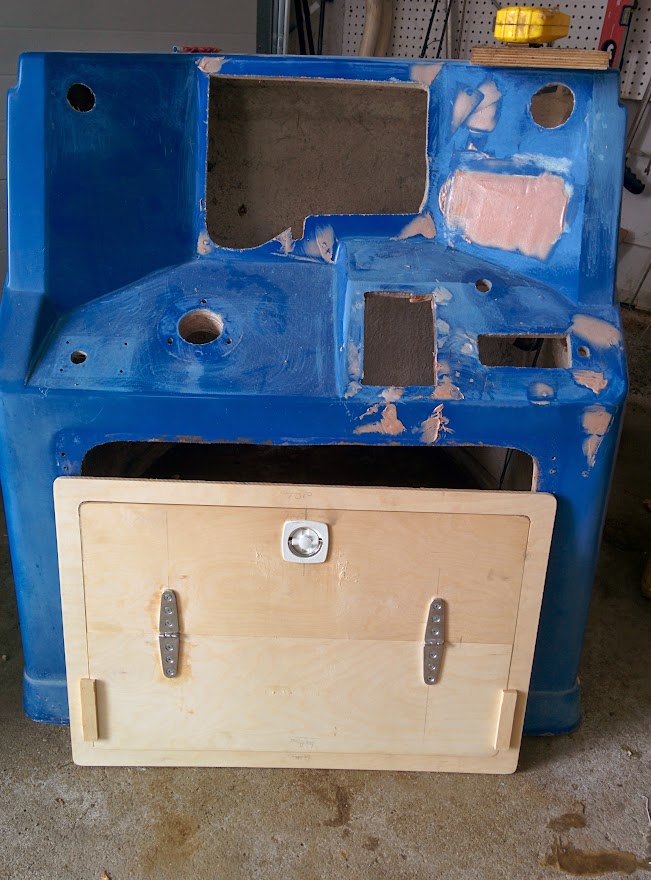
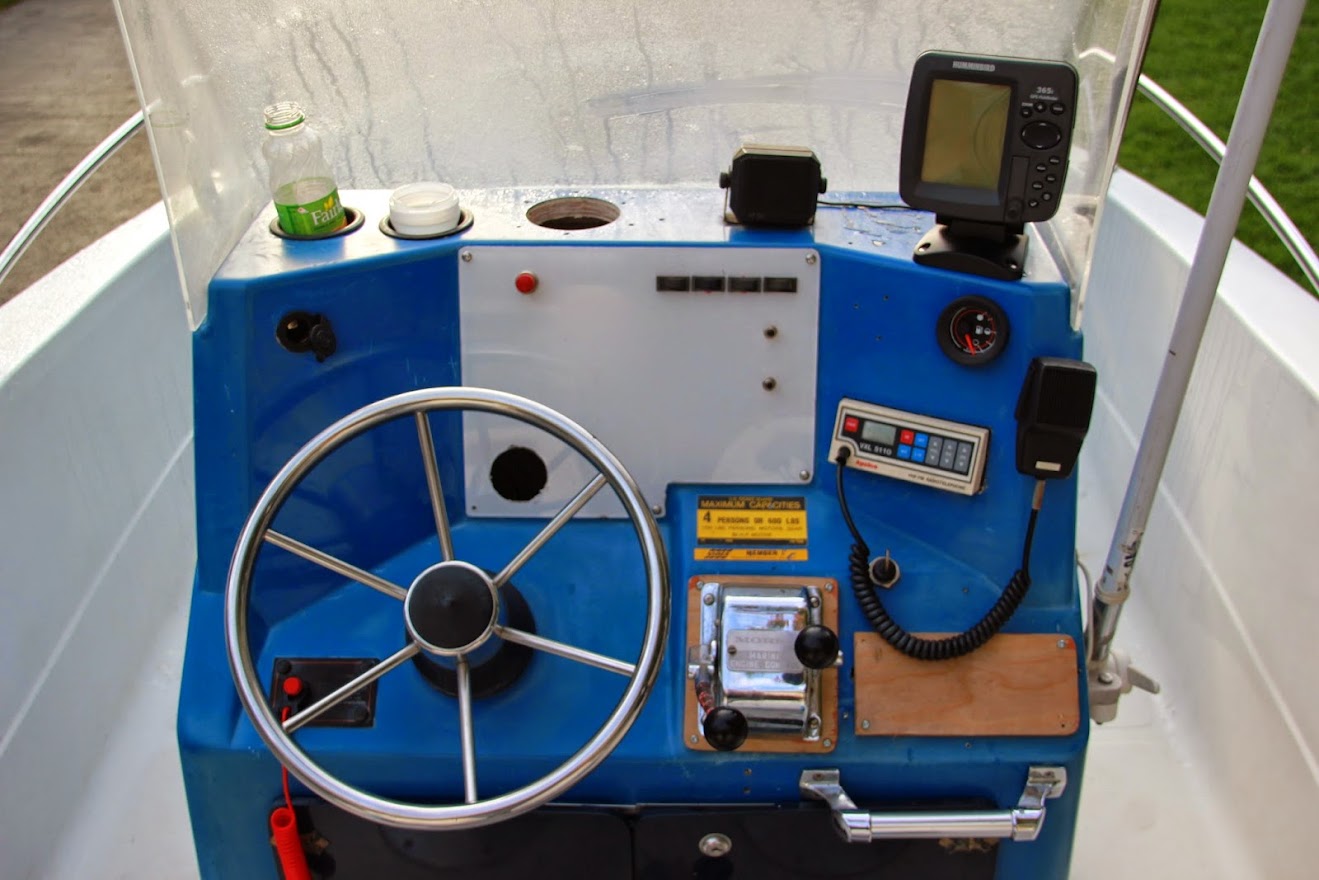
Ok, looking for some thoughts. Starting to work on the console. Below is what it was.

The VHF and its speaker is gone, replaced with with a new GX1700 . Note sure whether to flush mount it (maybe bottom right, where the wood is) or to mount it on top. Or flush mount it where the fuel gauge is. Apparently it needs to be at least 3 ft away from the antenna (which I can mount on either side).

I think the fishfinder will stay where it is, but tempted to flush mount that. Problem is, I'm a gadget guy, and could totally see myself getting a better one in a year or two. Another possibility is to mount it on its swivel bracket where the VHF currently is.

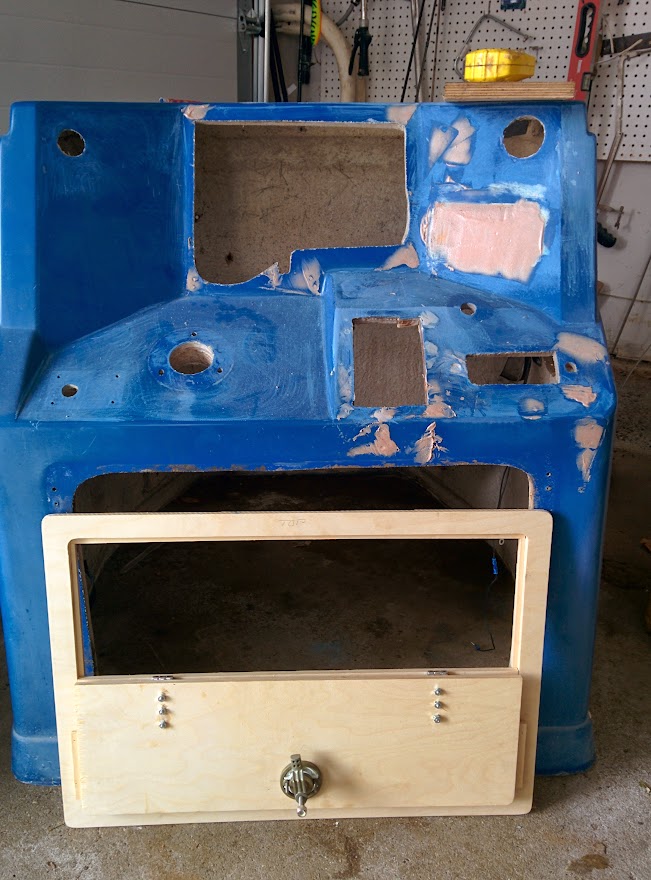
The BUPP (big ugly plastic panel) is definitely going away. Thinking I'll fill the bottom half of that space and have a MNPP (much nicer plastic panel) with the tach and fuel gauge in it, with room for a future project display panel.

I want cup holders. But the ones that are there are too close to the windshield to put a man-sized coffee in. So they'll need to be moved, or re-thought.

I bought a 5-way switch panel that I'm thinking would go where the current power adapter plug is, or where the fuel gauge is.

Anyone have advice?

IMG_2474.JPG
 

Arawak

Chief Petty Officer
Joined
Aug 27, 2010
Messages
486
Awesome, thanks for for the input. Never considered how the mic cable was kinda in the way there... thinking I'll mount it at the bottom to remove that problem. Also keeps it as far away from the antenna as possible, if I mount that on the other side.
 

Arawak

Chief Petty Officer
Joined
Aug 27, 2010
Messages
486
Just discovered this glove box made by teak isle. It's 12.5" across, which means it will just fit where my white plastic panel is right now. It means the gauges would all have to go on the right side, where the fuel gauge is right now, but that's not bad.

13770-50281_zm.jpg
 

Arawak

Chief Petty Officer
Joined
Aug 27, 2010
Messages
486
Ok, bulkheads are glassed in. Here's a photo just before I glassed the rear ones.

IMG_20150413_175947.jpg


Originally the boat had only two bulkheads. I felt it needed one forward too.
 

Arawak

Chief Petty Officer
Joined
Aug 27, 2010
Messages
486
In other news, I submerged the top half of the 5lb foam I poured in water and kept it submerged for 5 hrs. Weighed it before and after, and there was no gain in weight after, even with the cut edge.
 

Arawak

Chief Petty Officer
Joined
Aug 27, 2010
Messages
486
Earlier this week I glassed the fuel tank after wire brushing it and smearing some epoxy + microfibres into the areas where there was some minor pitting. 6oz woven fabric + epoxy on the bottom and sides. I figure this should seal it and prevent any further pitting. No photos since you can't really see the glass.

I also glassed a strip of 6" wide 1708 tape along the bottom of the bilge mainly to seal it up but also to add a little more thickness.

Tonight I put the half pipe that isolates the fuel tank coffin from the bilge in place, ran a fillet along the seam, and then put two layers of 12oz biaxial 8" tape over it. The coffin should be pretty well sealed and there should be a little extra (but probably not needed rigidity along that section.


IMG_20150418_202542.jpg

So that brings us to here:

IMG_20150418_202617.jpg


Tune in next week when I cover the tank with vapour barrier and pour some foam along the bottom, so that the tank rests perfectly on a bed of foam but (hopefully) could still be removed.
 

Arawak

Chief Petty Officer
Joined
Aug 27, 2010
Messages
486
Got the tops of the foam compartments cut today. And, I started doing some foaming. I wrapped the tank in vapour barrier plastic, poured foam along the bottom of the coffin, and set the tank in place. After each pour had set, I pulled the tank + plastic away to investigate. Worked pretty well... I'm about half done but the tank now rests on perfectly formed 5lb foam, but it's not foamed in place. I really don't expect to have to do anything with it again, but if I did I won't have to cut the tank or the boat apart to do it.

I did a few pours in some of the boxes to see how it goes. Didn't want to get the tops glued on and holes cut and then discover things don't work as I expect.

Sorry, no photos... Tuesday night I'll be there again to glue the tops on, and I'll take some photos then.
 

Arawak

Chief Petty Officer
Joined
Aug 27, 2010
Messages
486
IMG_20150425_122633.jpg


Getting closer. Underneath the tank is foamed to cradle the tank. Partially foamed most of the bigger chambers to get a feel for it. Two of them were done, and yesterday before I left all the tops were on and holes cut. I'm worried I won't have enough foam so I've added bit of pink foam to the mix. This was one of my experiments and it worked pretty well.

Today I'll go back and finish the foaming.
 
Status
Not open for further replies.
Top