1991 StarCraft Islander 221v - with 4.3 v6 i/o conversion to bracket and total resto

Rich11304

Petty Officer 2nd Class
Joined
Sep 9, 2010
Messages
189
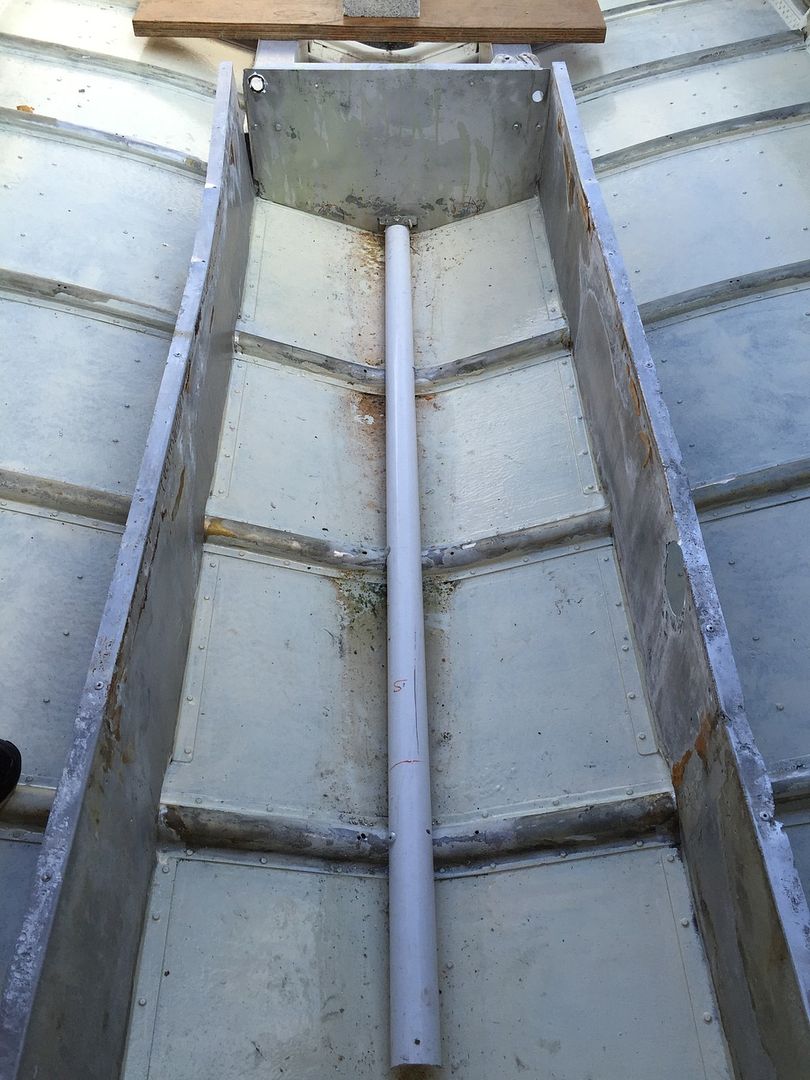
Jb. I don't think I touched anything. I'm not very god with that photobucket stuff. I'll try to post new photos and see how it goes. I had a new 50 gal tank made. I epoxied it with three coats. I added side tabs to be able to secure it to the stringers. Originally the tank was foamed in which caused salt water to get trapped. This time around I cut a PVC pipe in half and riveted it on the stringers.
 

Rich11304

Petty Officer 2nd Class
Joined
Sep 9, 2010
Messages
189
After that, I reinstalled the new plank that will support the tank. It's a piece of marine plywood that I expoxied and also covered with SteelFlex. Btw, I'm using my new pneumatic 1/4" pop riveter from Harbor Freight. Very solid.
 

Rich11304

Petty Officer 2nd Class
Joined
Sep 9, 2010
Messages
189
After that, I had to squeeze solid rivets on the corners of the stringers to attach the back part. Did it with my son Bryan. The solid rivets 3/16 were bought at Grainger. I glued strips of outdoor carpets from HD to protect plank from tank.
 

Rich11304

Petty Officer 2nd Class
Joined
Sep 9, 2010
Messages
189
I reinforced the port stringer with new aluminum riveted to the sides. That area looked like Swiss cheese.
 

Rich11304

Petty Officer 2nd Class
Joined
Sep 9, 2010
Messages
189
Next I reinstalled the tank, using the tabs that were riveted to the stringers.
 

Rich11304

Petty Officer 2nd Class
Joined
Sep 9, 2010
Messages
189
I also had to rivet the brackets on the inside of the stringers that will support the floor. As you can see, I had to cut where the the tabs would have interfered.
 

Rich11304

Petty Officer 2nd Class
Joined
Sep 9, 2010
Messages
189

The original floor board that went over the tank was kiln dried pressure treated plywood. I removed the floor vinyl that was covering it. I let it dry, sanded it. After that I covered it with epoxy and SteelFlex for good measure.
 
Last edited:

Watermann

Starmada Splash of the Year 2014
Joined
Jan 12, 2013
Messages
13,753
Looking good Rich, nice to see the forward progress :thumb:
 

Rich11304

Petty Officer 2nd Class
Joined
Sep 9, 2010
Messages
189
Waterman, it's nice to get back to it. The weather has cool down some. The transom was installed.
 

Rich11304

Petty Officer 2nd Class
Joined
Sep 9, 2010
Messages
189
As you can see, the rail was also reinstalled. First, I installed a new one that didn't have the little ridge in the back. It turned out that the little ridge in the back offset the angle of the transom. I had to drill out the solid rivets. Look for a new piece with ridge. Couldn't find it. Had to straight it out and coaxed the old one back in shape. The warp in the back is still visible. I'm hoping once the bracket is bolted it will be a little better.
 

Rich11304

Petty Officer 2nd Class
Joined
Sep 9, 2010
Messages
189
The floor was also reinstalled. I'm moving the batteries forward. My two batteries will be installed right in front of the gas tank.
 

Watermann

Starmada Splash of the Year 2014
Joined
Jan 12, 2013
Messages
13,753
Transom looks great Rich, I remember your unique process... that's what I call a meaty sandwich!
 

Rich11304

Petty Officer 2nd Class
Joined
Sep 9, 2010
Messages
189
Waterman - Yes, I went a little overboard but I will feel safer when I bolt a 225 HP on the bracket. Today, I ordered Goodyear fuel hoses, 7ft of 1 1/2 ($6.80 a ft) and 7ft of 5/8 ($3.60) for the fuel vent. $76 with delivery. For the floor, I'm going with 1/2 MDO.
 
Last edited:

GA_Boater

Honorary Moderator Emeritus
Joined
May 24, 2011
Messages
49,038
Rich - I haven't looked in on your thread in a while. Are you planning on adding knee braces to help support the motor?
 

Rich11304

Petty Officer 2nd Class
Joined
Sep 9, 2010
Messages
189
GABoater - I have to make a subfloor support to the portion were the I/O engine was. It will be anchored to the transom. I'll make a knee bracket on each side.
 

Rich11304

Petty Officer 2nd Class
Joined
Sep 9, 2010
Messages
189
Today, I finally worked on floor support around the area where engine used to be. I repositioned the support brackets so that I have a nice space for below deck storage as I saw on a 1995 Islander 220v.
 

Pcolafisher

Petty Officer 2nd Class
Joined
Jun 26, 2013
Messages
188
Rich, I’ve been lurking and watching. Really happy to see you back at it. I have a 1986 Islander sitting in the driveway as a proposed retirement project. Instead, I’ve been working on everything but and now the trailer springs and links have rusted through. Just seven years of waiting for me. However my grandsons are now old enough to give meaningful assistance. Now if I can keep from breaking my back again... Do you think your Islander can handle 225 HP? Mine has a 140 Rude and flew when I last used it in 12.
Cheers
 
Top