1983 Invader Floor Repair Support Needed - Take 2

PitaBoat22

Petty Officer 2nd Class
Joined
Jun 20, 2009
Messages
148
Over the last couple of days, I rebuilt my stringers and finished up two bulkheads, coated everything in resin and bedded it all in PB. Also picked up 2x2s that will serve as cleats and coated them in resin. Recorded a video update, but still trying to work out the kinks with the new camera so I can get it posted. In the meantime, here are just a few pics of where I left off earlier today. Let me know what you all think of the fillets. At this point I am considering adding to them so they extend further up the sides of the stringers and provide a softer transition for the glass from stringer to hull. Then again, maybe they're fine.

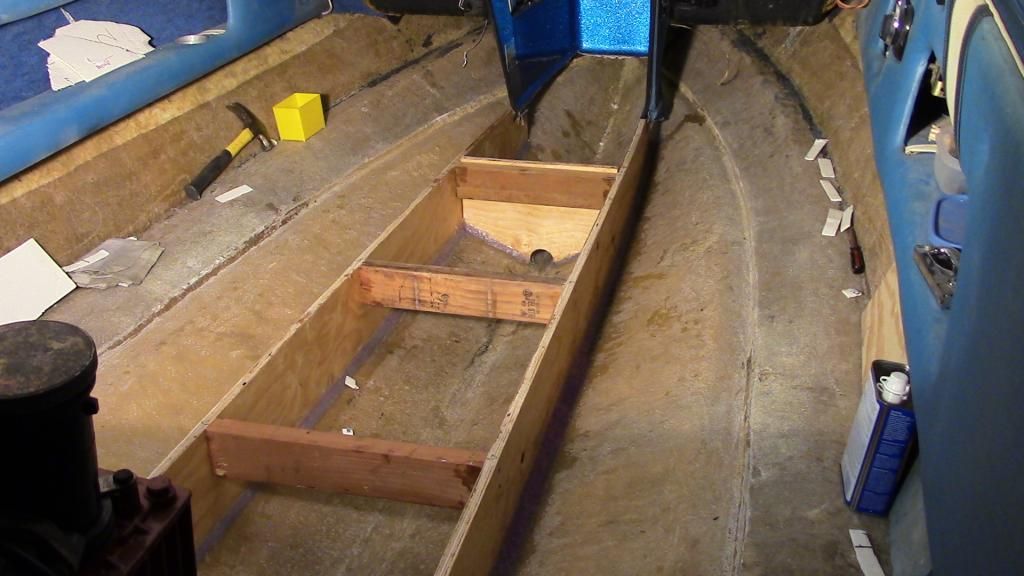
Used temporary spacers to keep the stringers positioned correctly. Will remove spacers before cutting them to height.
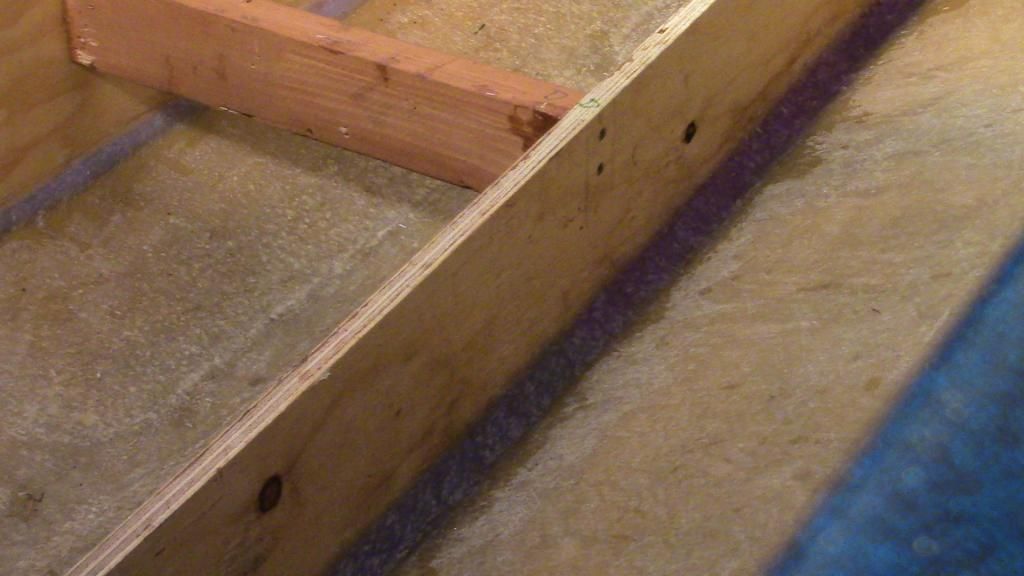
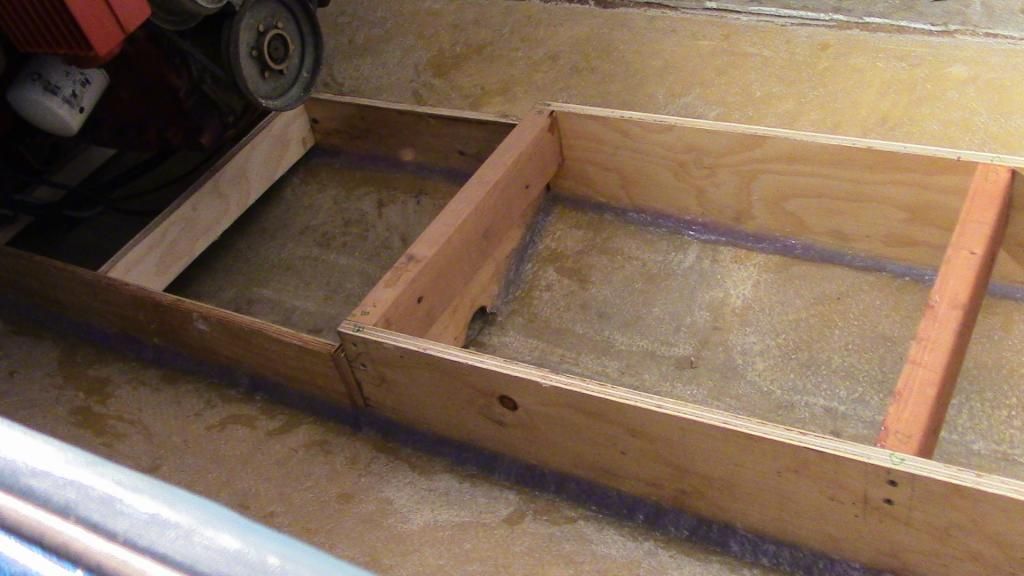

Close up of my PB


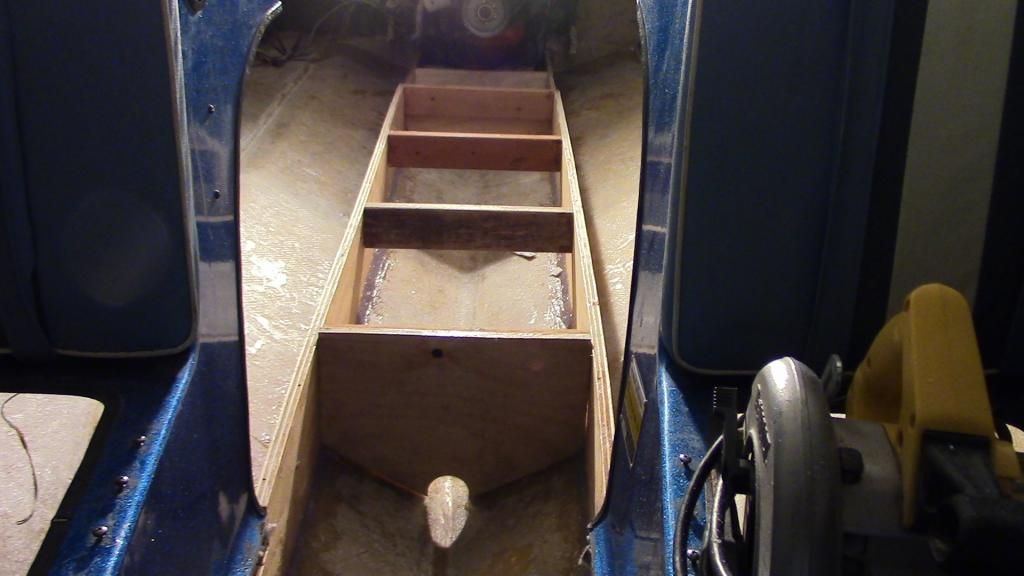
Rear stringer box is already cut to height.


View from front looking to rear
 

Rickmerrill

Senior Chief Petty Officer
Joined
Mar 13, 2014
Messages
686
All looks great and everything is so neat and clean! Those fillets look fine as is. When I was crying about using up so much resin Wood mentioned most of us use way too much PB for our fillets so I cut way down on the fillet size and no problems. I think smoothness counts for a lot on fillets, maybe even more than size. Again, great job! Have a happy holiday.
 

PitaBoat22

Petty Officer 2nd Class
Joined
Jun 20, 2009
Messages
148
Thanks RM. I was hoping someone would say exactly that! Once everything cures real well, I am going to check the smoothness factor. I think I did alright but also anticipate some areas that will likely need a little help.

Video update is also now posted....and I need to be a little more animated in these things. I look WAY to serious!

https://www.youtube.com/channel/UCNf...GB0AlkTszgdXGg
 
Last edited:

PitaBoat22

Petty Officer 2nd Class
Joined
Jun 20, 2009
Messages
148
Checked on the smoothness factor of my fillets and they needed a bit of work. So, I used a large spoon, kept dipping it in lacquer thinner and used it to spread a thinner top layer of resin over the fillets. This really helped to make the fillets smooth which should make the glassing process easier.
 

Woodonglass

Supreme Mariner
Joined
Dec 29, 2009
Messages
25,924
From what I can see, the fillets are just fine. If they're smooth then the glass should transition just fine.
 

Woodonglass

Supreme Mariner
Joined
Dec 29, 2009
Messages
25,924
One of these from the Dollar Store will Really help with the filleting...
88212-722.jpg
 

PitaBoat22

Petty Officer 2nd Class
Joined
Jun 20, 2009
Messages
148
I used a spoon from the community sink at work.....so it didn't even cost me a dollar! Ha!! That said, Betty does make a mean fillet spoon! 22 degrees here this morning, so no glassing or PB work happening today.
 

Woodonglass

Supreme Mariner
Joined
Dec 29, 2009
Messages
25,924
Well, Alrighty Then!!! It really doesn't take all that much of a fillet to transition the glass. As long as it's not a square corner the glass will bend around the corner just fine. Scissors makes it even easier. Yes, it's ok to cut it too!!!!:D
 

PitaBoat22

Petty Officer 2nd Class
Joined
Jun 20, 2009
Messages
148
Started glassing today. A few recommendations. ONE: Get a box of latex gloves so you can switch them out as you go. Using your hands to mix and spread resin while also using them to position pieces of fiberglass results in very messy hands. TWO: Cut and dry fit your pieces of fiberglass prior to mixing your resin. This is what I did and it was very helpful. THREE: Don't mess with the spongy rollers to spread the resin. Instead, get the ones that are fuzzy with really no sponginess to them at all. I tried a yellow spongey one first and it was terrible.

A few pics after finishing with two layers of 1700. You can see the pencil line that indicates the height at which I need to cut the stringers.


Last edited:

PitaBoat22

Petty Officer 2nd Class
Joined
Jun 20, 2009
Messages
148
Here you can see the jig I used to determine the height at which I need to cut the stringers. The jig was originally 45 inches in length so I could determine the necessary height for the stringers at the widest part of the boat. I continually cut pieces off of each end as I moved the jig toward the front end of the boat. I placed a piece of quarter-inch foam board under each end between the jig and the hull to account for the spacing that will exist between the hull as the deck once installed.


PitaBoat22

Petty Officer 2nd Class
Joined
Jun 20, 2009
Messages
148
Cut my stringers and bulkheads to height. Not exactly straight cuts, but they'll do just fine. Laid keel pieces in place and used PB for fillets all around the edges. Decided to use CSM to cap the stringers and bulkheads. Not sure just how that's going to turn out given the well-documented challenges with trying to cap 3/4 inch stringers. Also laid CSM over the two keel pieces, which was more successful than the capping efforts. I will give it all a good chance to solidify and will take and post pics near the end of the week. QUESTION: Is capping the stringers and bulkheads with CSM sufficient or should I go over the CSM with 1700? I think Woodonglass says CSM is sufficient.

Next steps. Install cleats along stringers and bulkheads where necessary and start working on the deck template.
 

Rickmerrill

Senior Chief Petty Officer
Joined
Mar 13, 2014
Messages
686
That is my understanding, just cap the stringers with CSM to provide waterproofing. You're right it was a challenge and I had to do some rework to get it lay down right everywhere and get all of the bubbles out. I had to do some patches to some bad spots to get everything nice and watertight.
 

Woodonglass

Supreme Mariner
Joined
Dec 29, 2009
Messages
25,924
TIP: When capping your stringers with CSM it's really important to get the CSM loose. Do this by tugging, pulling, bending, rolling etc... Get those fibers loosey goosey. You want them to really be able to roll over the edges and stay there. 3" strips should be ample for 3/4" stringers. Lay em on top of the stringer and then dry stretch em over the tops. Don't be afraid to be a bit rough. Like I said you want em loose.;)
 

PitaBoat22

Petty Officer 2nd Class
Joined
Jun 20, 2009
Messages
148
Well would you take a look at that! Fitted the first piece of the new deck today. Once I get the other piece fitted, I will get the cleats cut and attached to the stringers and then work on attaching the hinges for the engine housing to the deck. There are a few postings about this latter process earlier in this string. I will be sure to share the real work via pics as I go. Have to say it's getting a bit exciting - and very nice to stand on a deck again.

 
Top