1959 Lone Star El Dorado "Project Texas Tornado" - Winner 2016 Resto SOTY Award

64osby

Admiral
Joined
Jul 28, 2009
Messages
6,799
Search engines are great when they work. This one has been on and off for a while, but was working last night.
 

Watermann

Starmada Splash of the Year 2014
Joined
Jan 12, 2013
Messages
13,753
Trailer looks great, nothing better than solid and polished!

On the solid rivets, I didn't notice mention of the hardness. 1100's are super soft 99% AL and IMO are not to be used in structural applications on the boat. I use the 2117 alloy rivets for structural parts but 1100's are fine for patches and other non structural uses.
 

Luke000

Restoration Forum Splash of the Year 2016
Joined
Aug 19, 2013
Messages
346
64- Thanks for those links! A lot of them I have already looked at but i did send off an email to 3 of them about their engines! I am going to keep my eyes open for one on CL, ebay, surplus auctions etc. I even have a scout in the chicago area keeping his eyes out for me :D I am still set on one that has power trim after seeing it on my last project and my last (first) personal boat having a Evinrude 85 electricshift V-4 W/O power trim/tilt, that was a BEAST to lift (especially when I was 14)

On the solid rivets, I didn't notice mention of the hardness. 1100's are super soft 99% AL and IMO are not to be used in structural applications on the boat. I use the 2117 alloy rivets for structural parts but 1100's are fine for patches and other non structural uses.
Don't worry, I ordered up the hard 2117T4 guys this morning, I did not want to fool around with 1100 series on this boat- only the best for my baby! Turns out the two metallurgy classes I am in/ took were good for something!
 

Luke000

Restoration Forum Splash of the Year 2016
Joined
Aug 19, 2013
Messages
346
Picked up my 200 rivets from Jay-Cee sales (rivetsonline) from their warehouse, all I can say is that is A LOT of rivets in one place! quick and easy to deal with, would definitely recommend them to someone needing more than a few rivets of any sort.

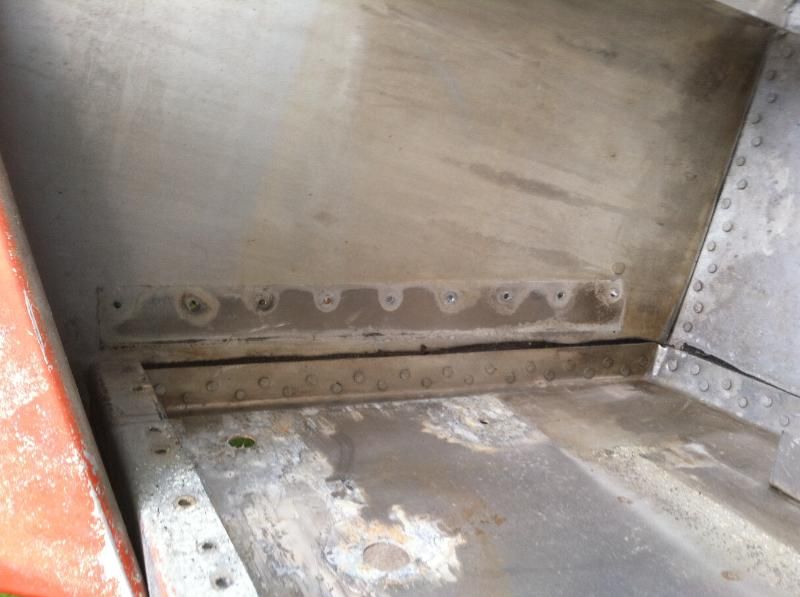
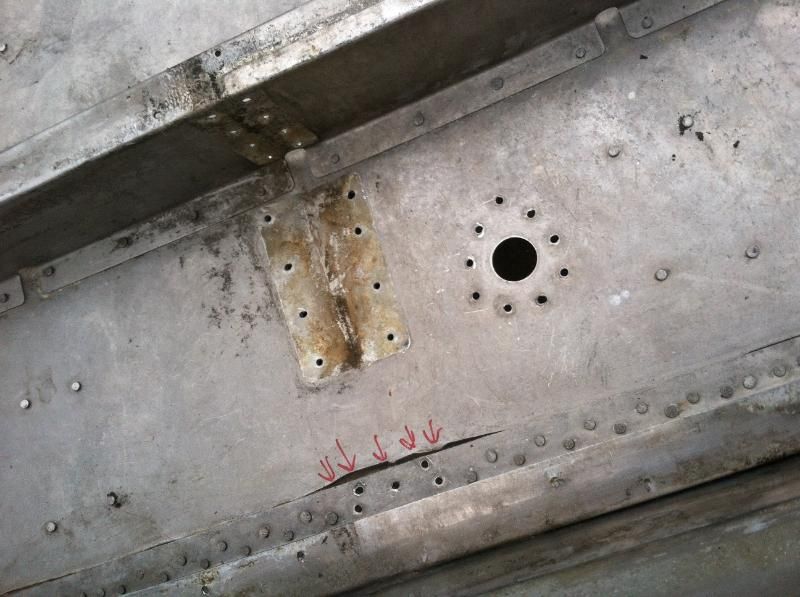
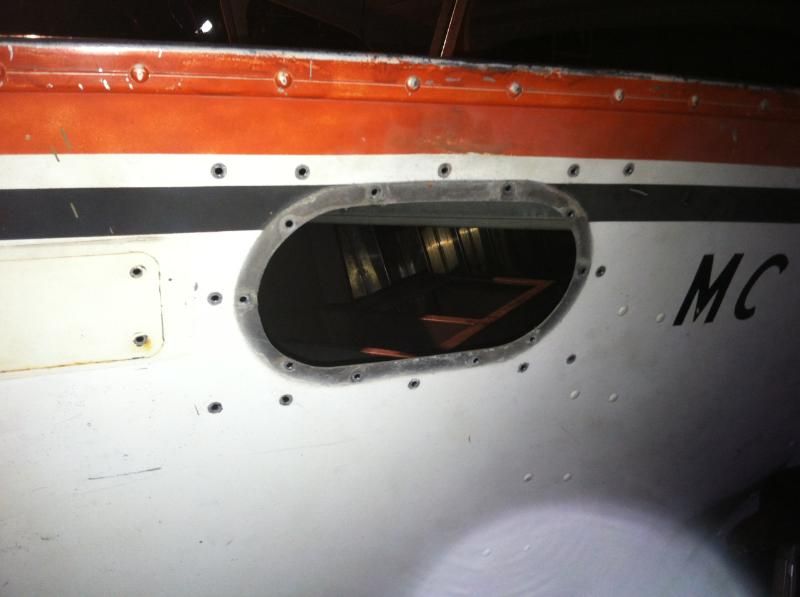
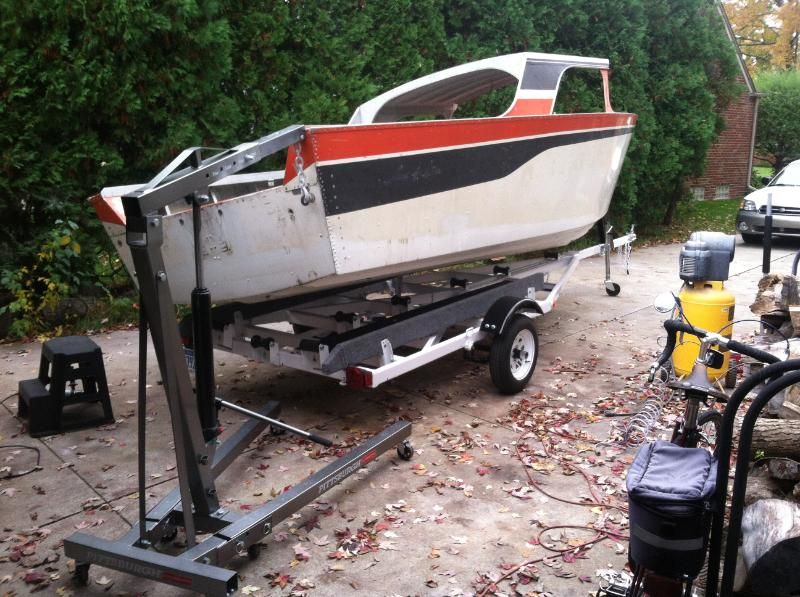
Today I rolled the boat out into the driveway and started drilling and hammering away at old rivets that needed to come out for one reason or another, a few were stating to rot away and could have started to cause leaks or corrosion to the surrounding metal, some were holding pieces like the port holes, windshield bracket, drain, and transom board in so those all needed to some out, some had come out and the PO had replaced them with bolts, nuts and silicone :rolleyes:- those came out too and will be set for replacing. All in all, 120 were drilled out today and I am sick of drilling! A fair ammount of the rivets were on the underside of the boat so I needed to get the boat in the air and my cherry picker came to the rescue.


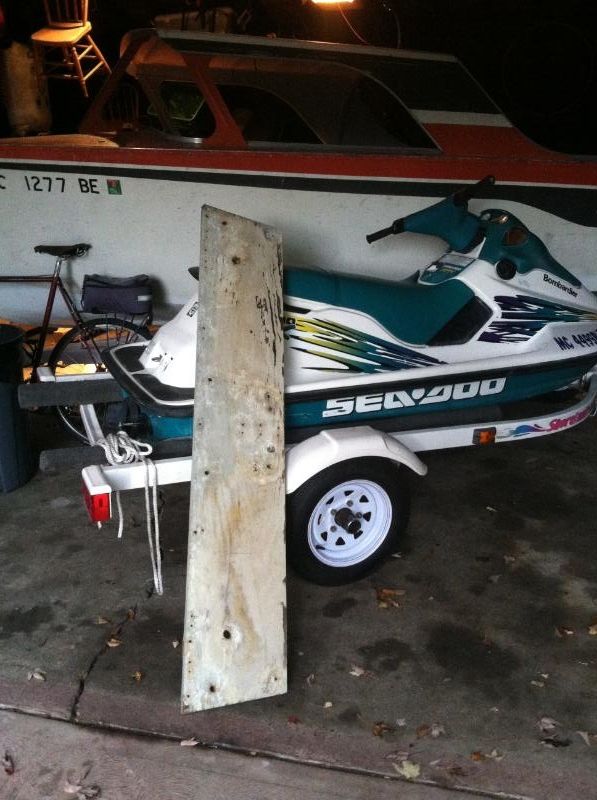
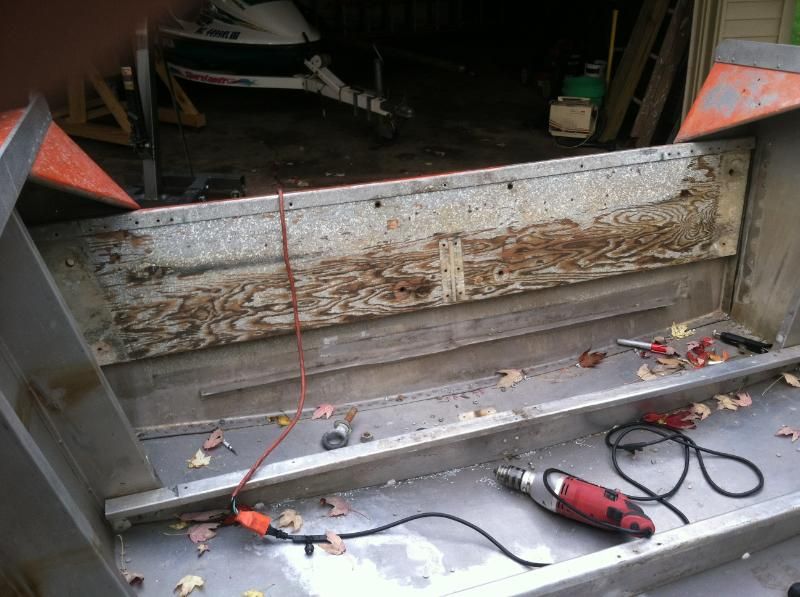
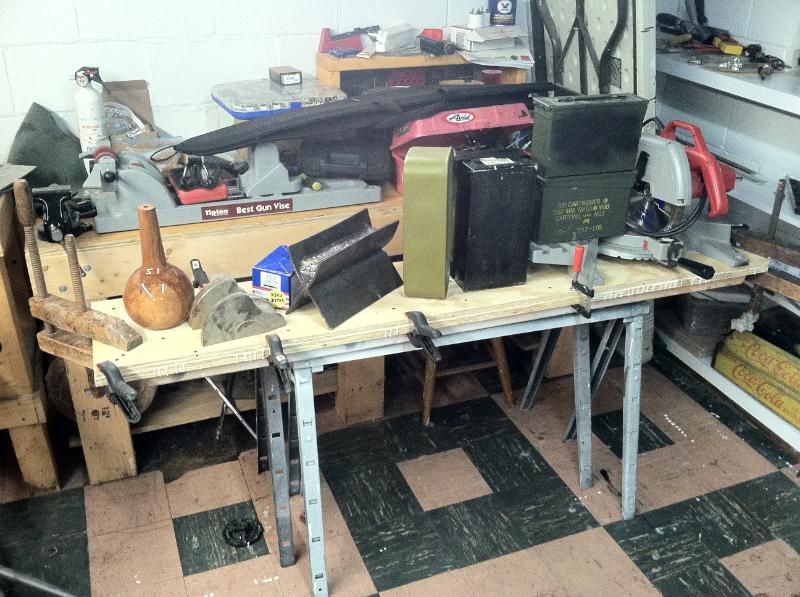
The transom came out easilly, It was in suprisingly good condition and so was the aluminum it was butted up against, there was a little surface oxidation but no horrible pitting. Does anyone know of a good way to neutralize the oxidation that is there so it will not spread once I put a new board in?


Woodonglass

Supreme Mariner
Joined
Dec 29, 2009
Messages
25,924
Just clean it really well with a 50/50 White Vinegar and Water solution and then give it a couple of coats of Automotive Clear Coat and you'll be good to go.!!!
 

Tnstratofam

Commander
Joined
Aug 18, 2013
Messages
2,679
Moving right along I see. Nice second set of hands using the cherry picker to lift the boat. That's what back yard boat building is all about using what you have to accomplish what you need. When I redid my transom in my Starcraft I sanded the metal with a scotch brite pad, then primered it with self etching primer. Then I hit it with a couple of coats of spray paint. My transom skin had just a slight bit of pitting, but not enough to worry about. If you do find any deep pitting most tin heads ( like me :tinfoil3:) use jb weld to fill in the pits then primer.
 

classiccat

"Captain" + Starmada Splash Of The Year 2020
Joined
Dec 20, 2010
Messages
3,405
Excellent work on patching this baby up!

Drilling out the old rivets is quite a chore.

I resorted to coring-out the old rivets and using a wood chisel to pop-off the bucktails & sometimes the heads. You get much cleaner holes this way...but it doesn't look like you had any problems. Very nice work.

I used about 1000 1100 rivets in my ate-up rig...I'll let you know in a decade-or-2 whether or not they're too soft. The fact that 2117-T4 is alloyed with Cu and Iron gave me the skeevies :lol: I'm sure they'll be fine as long as you set them properly.
 

Luke000

Restoration Forum Splash of the Year 2016
Joined
Aug 19, 2013
Messages
346
Thanks everyone for the tips!

Now is the part of the project where I am going to ask a lot of questions about fiberglass resins and glues and such. I tried to do a search on this site but I quickly got overwhelmed with all of the great info! I am going to have to laminate up a new transom board to 1-3/4", I am looking at two 3/4 pieces and a 1/4 piece, OR two 1/2 and a 3/4. First: What is the proper procedure and adhesive for laminating them together? Second: What should I use to seal the wood before I install it? I know there are different types of epoxies. This is a stand alone board that will get bolted into place once it is done.

PS- I am %110 sure that I need a 1-3/4" thick, the transom skin and all the braces measure at 1-3/4, and so doe the wood under the braces measure the same. It does look like the board has expanded to 1-7/8 in the centers between braces.
 

classiccat

"Captain" + Starmada Splash Of The Year 2020
Joined
Dec 20, 2010
Messages
3,405
Get the knee brace set then measure the gap....this is the most unforgiving yet critical dimensions.

There are many ways to laminate your transom.

I laminated using cabosil / epoxy mixed to mayo consistency...spread with a notched spreader.

Pay close attention to any warpage in the ply; you want the distortion in each board to counteract each other. I first marked allvof the through-holes...then predrilled where deck screws can go. Then when its go-time with the screws, lightly clamp around where you are about to screw and drive the screws home. Move the clamps out to the next screw location..etc. etc. Etc.

Other guys have used waterproof gorilla glue with success...im sure they'll jump on for the step-by-step!
 

Tnstratofam

Commander
Joined
Aug 18, 2013
Messages
2,679
I used Tightbond III waterproof glue and clamped my wood together. Then sealed it with spar varnish. My transom rebuild is in my sig. Lots of tin guys seal theirs with epoxy. CC is right your knee brace is where you have the least give when installing your transom wood.
 

Watermann

Starmada Splash of the Year 2014
Joined
Jan 12, 2013
Messages
13,753
Nice bit of work you got done on the ole gal!

The transom skin, here is what I'v done to kill the AL plague. Wheel it clean, Using Heinz special vinegar cleaning solution in a spray bottle I soak the skin a couple of times and then using the wheel while it's wet go over the surface again. Then I rinse with fresh water and look for anything remaining that looks like corrosion and with a SS toothbrush root it out while spraying with the cleaner. Once dry if there's pitting, I skin it with Marine Tex and fill any unneeded holes or dings on the outside. Then sand smooth when it's cured. Next it get's SE primer and 2 coats of regular primer. After dry time I shoot 2 coats of paint.

You see how long that barely painted transom wood held up, now imagine it primered, painted and 3 coats of spar to top it off. That's what I did with my SN's transom. The Chief was just primered and shot with 3 coats of tractor paint since it won't be in the sun ever. I've used Gorilla glue and titebond III which are both the same type of glue. If you're dead sure on the transom being that thick 1-3/4" just remember all of the laminating and sealing steps do add thickness to the overall transom when it's ready to go back in. I would not use 1/4" ply for anything, rather 2 x 1/2" and 1 - 3/4" but I would bet 2 x 3/4" would be just fine and make reassembly go way smooth with maybe an 1/8" play when all said and done. It sucks big time to have to force things together and gouge up all the nicely sealed wood.
 

Luke000

Restoration Forum Splash of the Year 2016
Joined
Aug 19, 2013
Messages
346
I am going to pick up some 3/4 and 1/2 plywood today as well as some glue. And possibly start laminating the board! What is the best way to clamp it? I have read about screwing the boards together but I am not completely clear about that process. The other question I have is: Do I want to do all 3 of the pieces at once or do two and then glue the third when the first two are dry?
 

Watermann

Starmada Splash of the Year 2014
Joined
Jan 12, 2013
Messages
13,753
I would glue together all 3 pieces at the same time, the glue has a long enough open time. You're transom wood is pretty short compared to say an IO so you should be able to clamp edges and weight down the center with batteries or other similar heavy objects. If your material has any warping though it may be necessary to offset that warpage and use screws. Some guys use SS screws and leave them in while sealing over them afterward and others remove them and fill the holes, it's up to you. I used lag bolts where I knew I was cutting the transom down or where the holes would be for the splashwell drains and then removed them after drying.
 

Luke000

Restoration Forum Splash of the Year 2016
Joined
Aug 19, 2013
Messages
346
I got the boards glued today, I measured everything and it still looked closer to 1-3/4 but not quite. So I decided to do only 2- "3/4" pieces and see how it goes from there and I can do something to make up for a little bit of play if need be. I used Titebond III for the glue. I used a combo of about a dozen 1-1/4 screws and whatever I could find that was heavy, including about a couple thousand rounds of ammo :usa2:


Pre glue pieces:


About as exciting as watching paint dry....
transomdry_zps5ded4f10.jpg
 
Last edited:

Watermann

Starmada Splash of the Year 2014
Joined
Jan 12, 2013
Messages
13,753
What's exciting is the rebuilding stage of the project!

Actually the Titebond I used was this one which is the same as Gorilla glue.


Luke000

Restoration Forum Splash of the Year 2016
Joined
Aug 19, 2013
Messages
346
What's exciting is the rebuilding stage of the project!

Actually the Titebond I used was this one which is the same as Gorilla glue.

Oops, well Titebond III is what I used. Still a waterproof glue, and I don't think there is any way short of an oxy-fuel torch this thing is coming apart :lol:

By far the best part of the project, the rebuild, lots of decisions I have ahead of me.
 

Tnstratofam

Commander
Joined
Aug 18, 2013
Messages
2,679
I used titebond III and my transom turned out good. It's been in since May, and we've used it quite a bit this year. No problems with the new transom at all. I think you'll be fine.


Woodonglass

Supreme Mariner
Joined
Dec 29, 2009
Messages
25,924
Just an FYI on the Polyurethane Glues like Gorilla glue and the Titebond Poly, during the cure process they expand and foam up a bit. This foaming action does create miniscule air pockets in the lamination which IMHO is not as good as the bond you get with the PVA alphatic resins such as Titebond III. Also as the polyurethane glue ages it has a tendency to crystalize. I'm gunna stick with the TBIII ;):D
 

Watermann

Starmada Splash of the Year 2014
Joined
Jan 12, 2013
Messages
13,753
Yeah you're way good for sure, with either glue the ply lamination would fail before the glue joint. I've used both types of glue. I fabbed up some monster thick motor mounts for the chief, soaked them with spar, shrouded with 080 AL and SS screws I hope the tiny bubbles don't let my 4.3 LX fall out the bottom!

 
Top