1988 Star Craft PM160 Restore

jondevos

Cadet
Joined
Apr 2, 2011
Messages
22
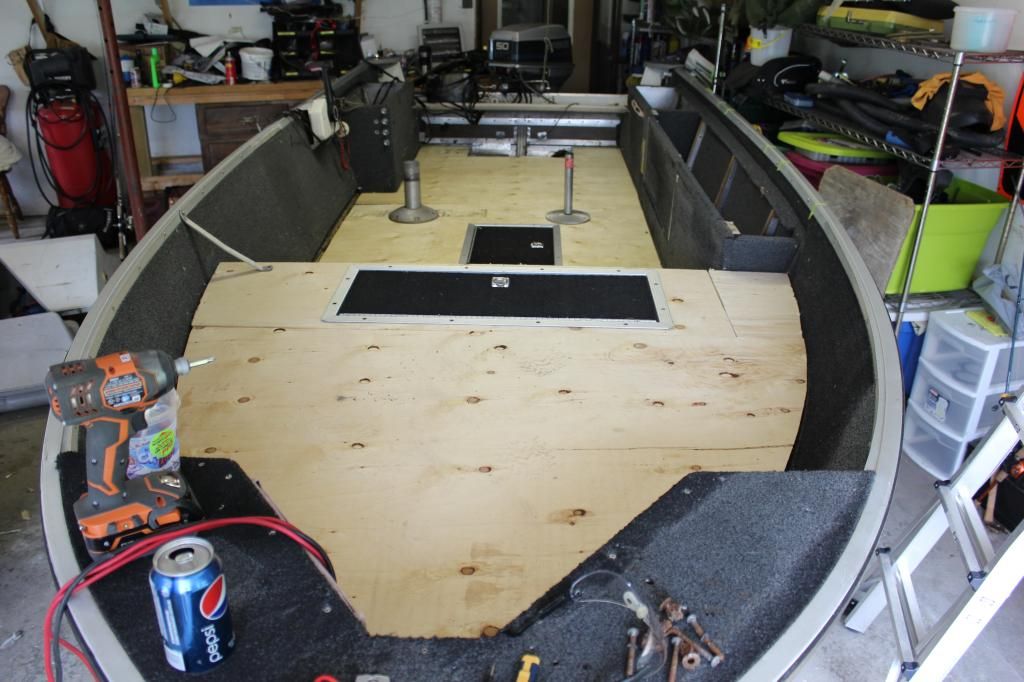
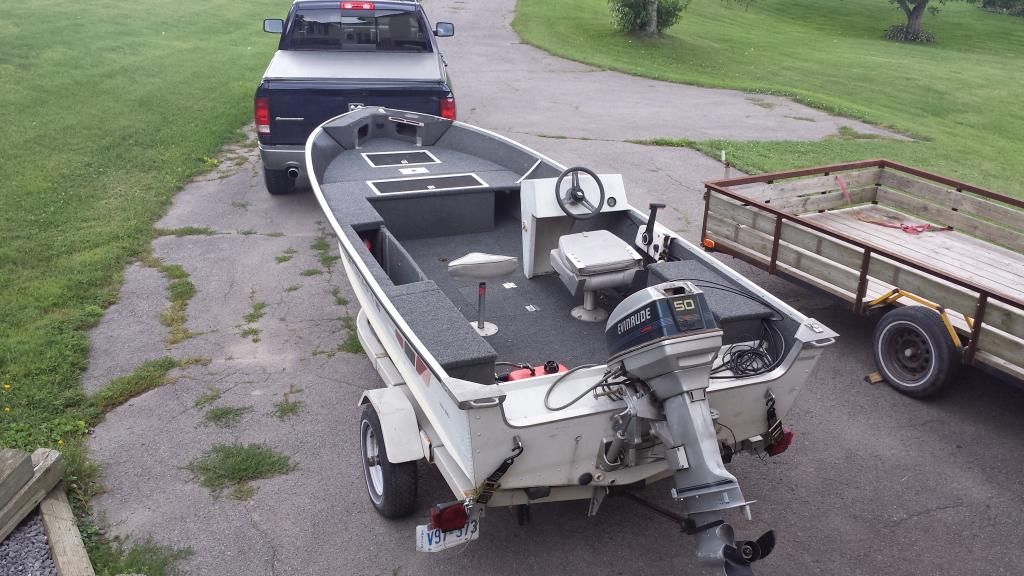
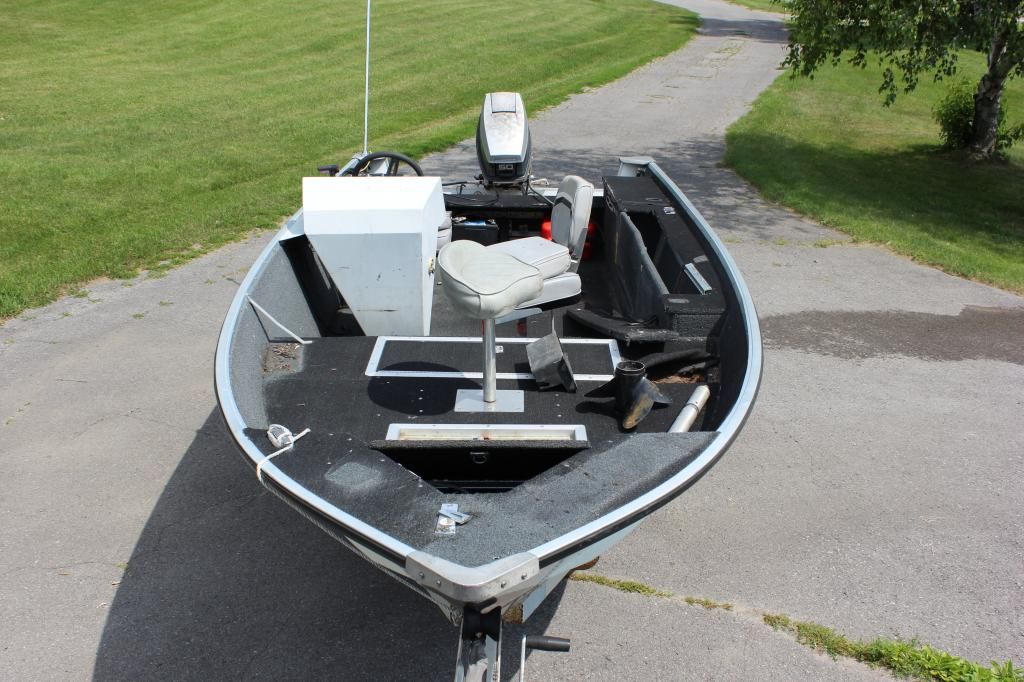
Hello Everyone. My name is Jon and I am from Ontario Canada. After trolling iboats for quite a while I am finally working on my own restore and figured i'd post my progress here for others as well as for any help I may find myself in need of. The search function has given me a lot of information and I am thankful for it. I took it out for a test run to make sure everything was working ok and then started the tear down right away the same day. I am impressed with the performance of the 50 horse with this boat. I did not have my gps but will get a gps speed once the rebuild is done. The plan is to remove anything that is rotten and keep anything that is in good shape to keep the cost down. I have a goal of completing this restore for the most part over the next 3 weeks.

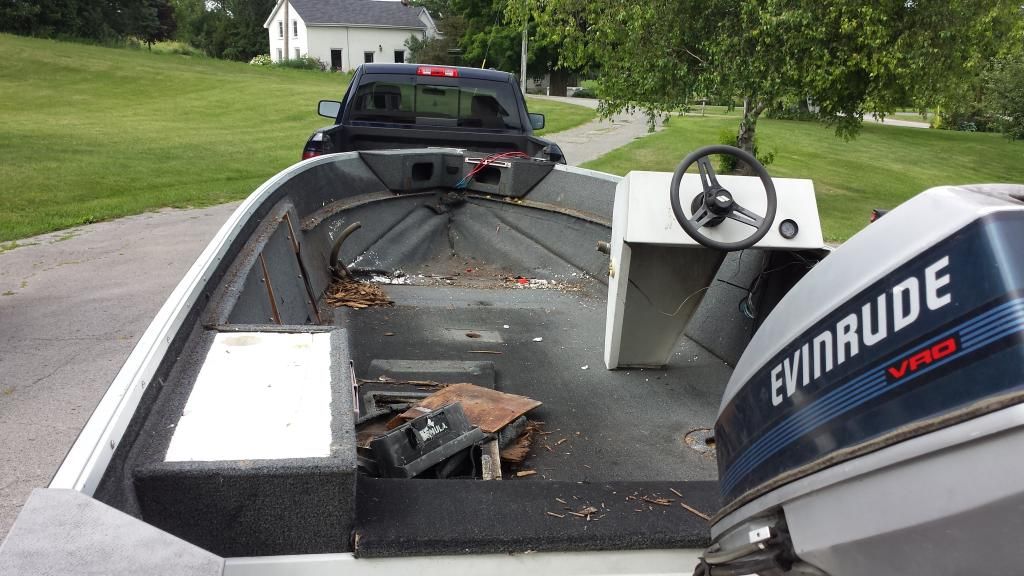
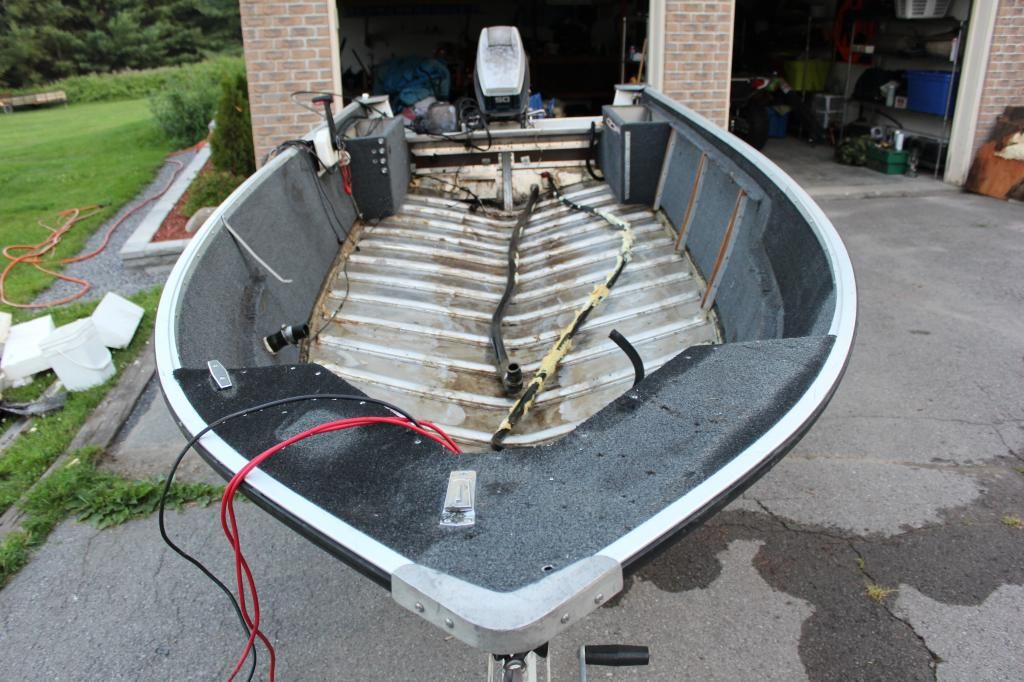
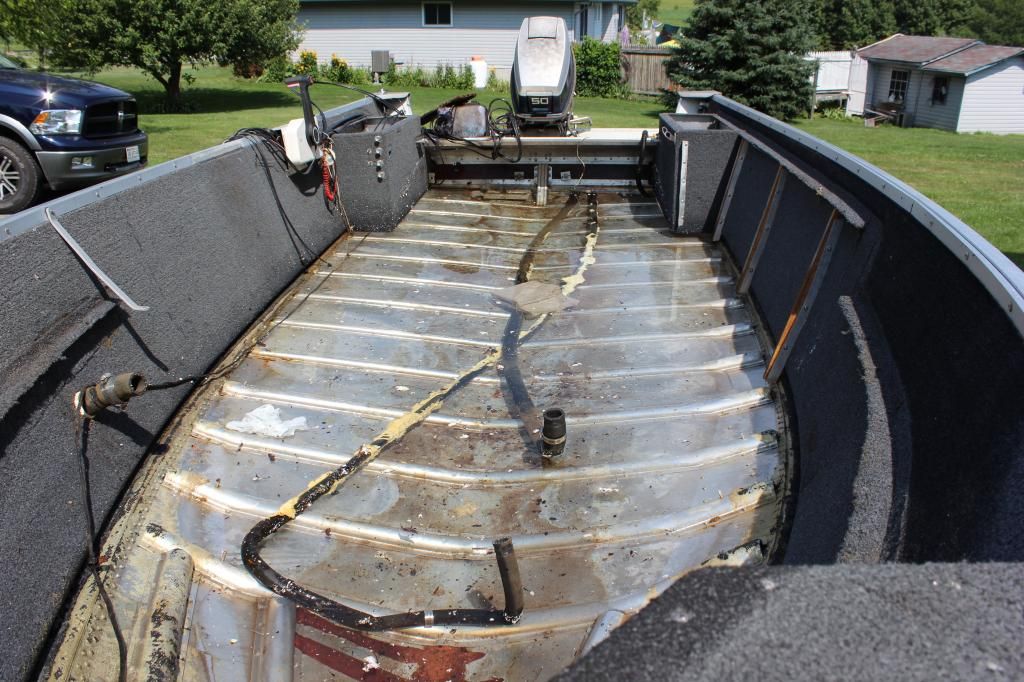
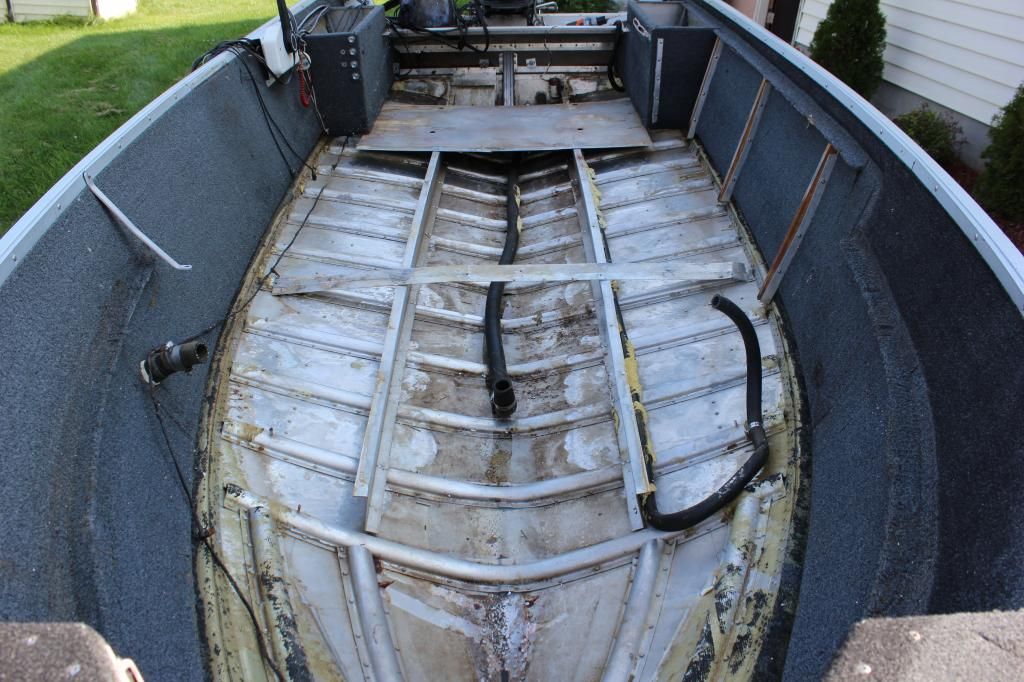
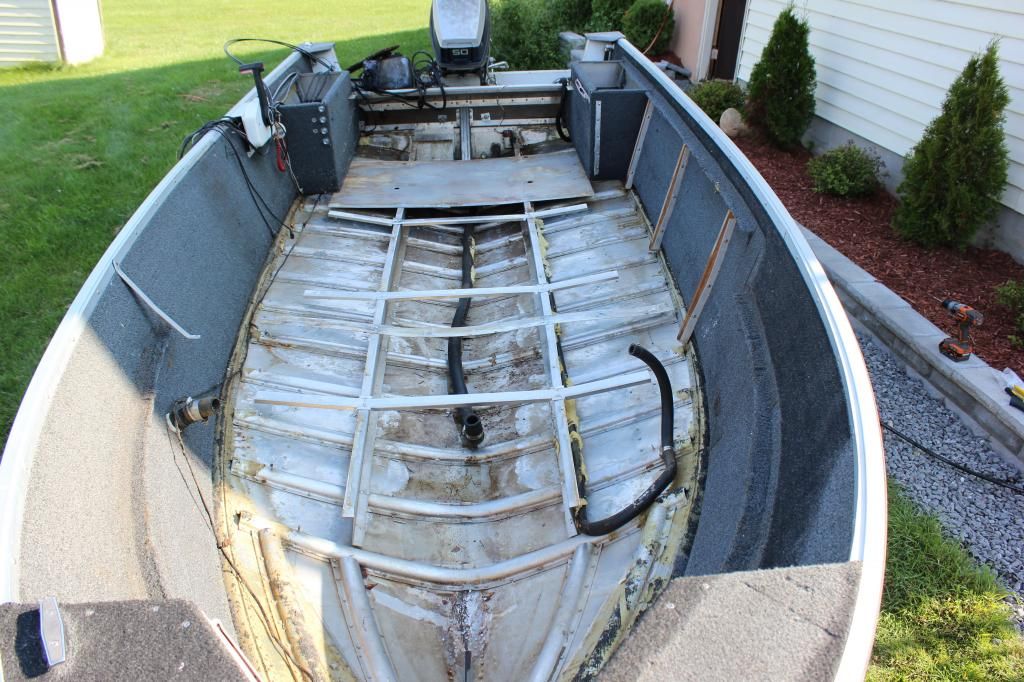
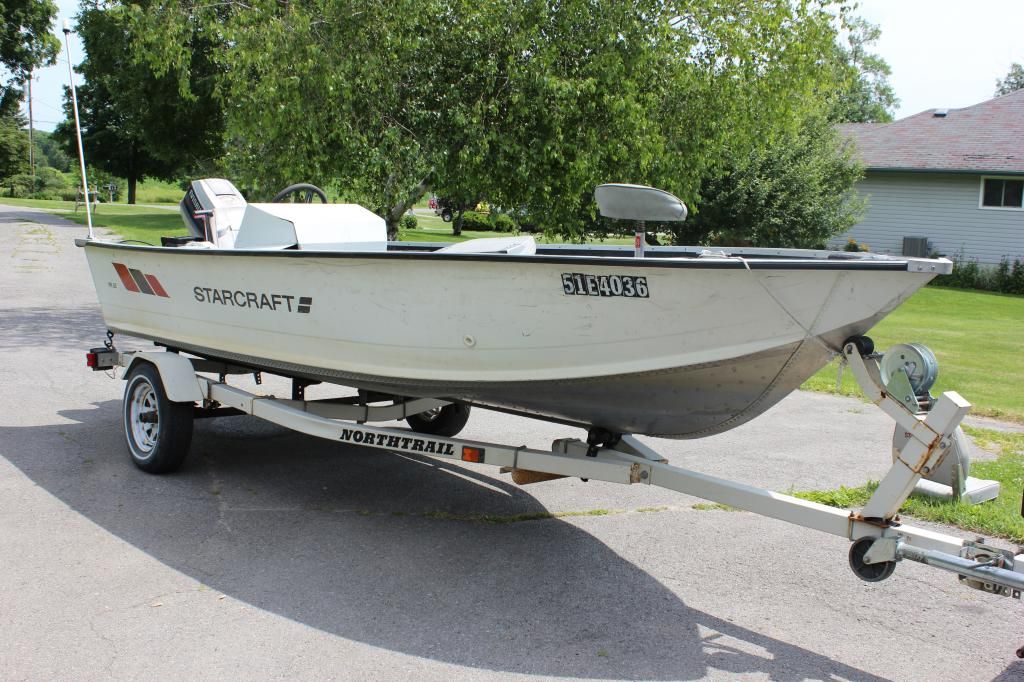
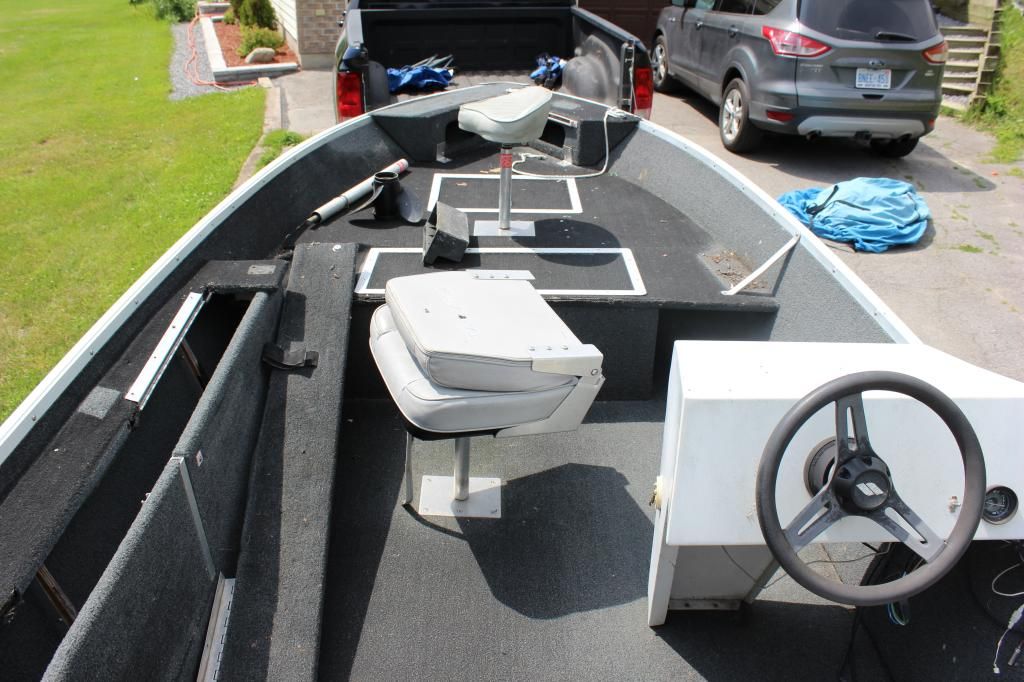
If anyone has any questions, comments, or suggestions please don't hesitate to throw them out there. That is after all the reason for this forum is it not. Well without any further wait, here she is after I picked it up on Saturday July 19th 2014.


IMG_0851_zpsa935e68c.jpg

IMG_0829_zps9ce92b5f.jpg

IMG_0844_zpsd1d13672.jpg

IMG_0841_zpse346e325.jpg


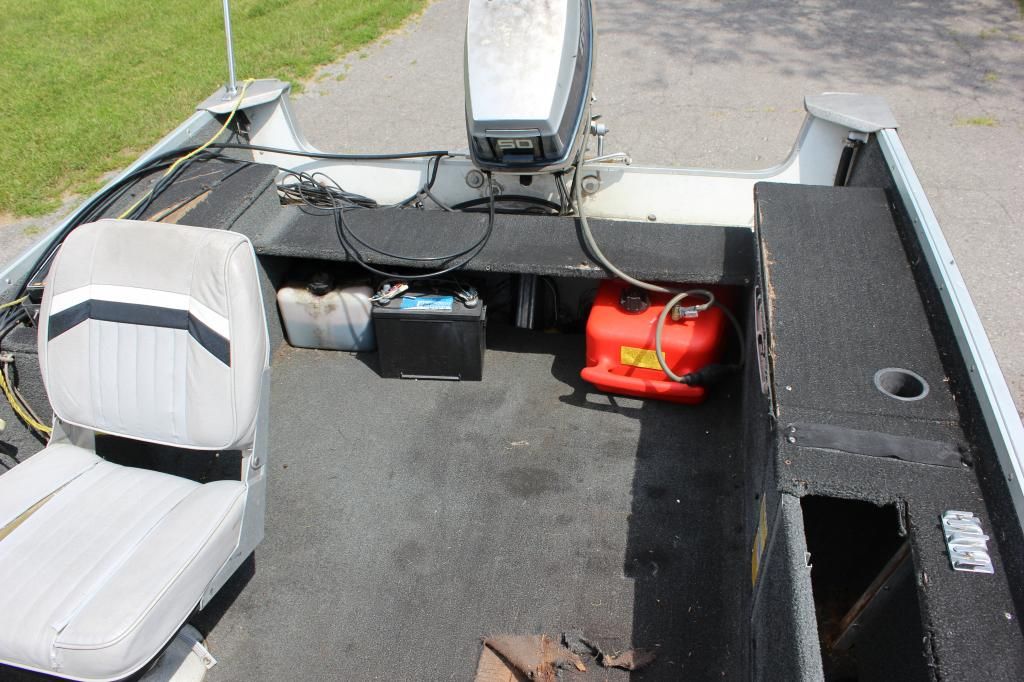
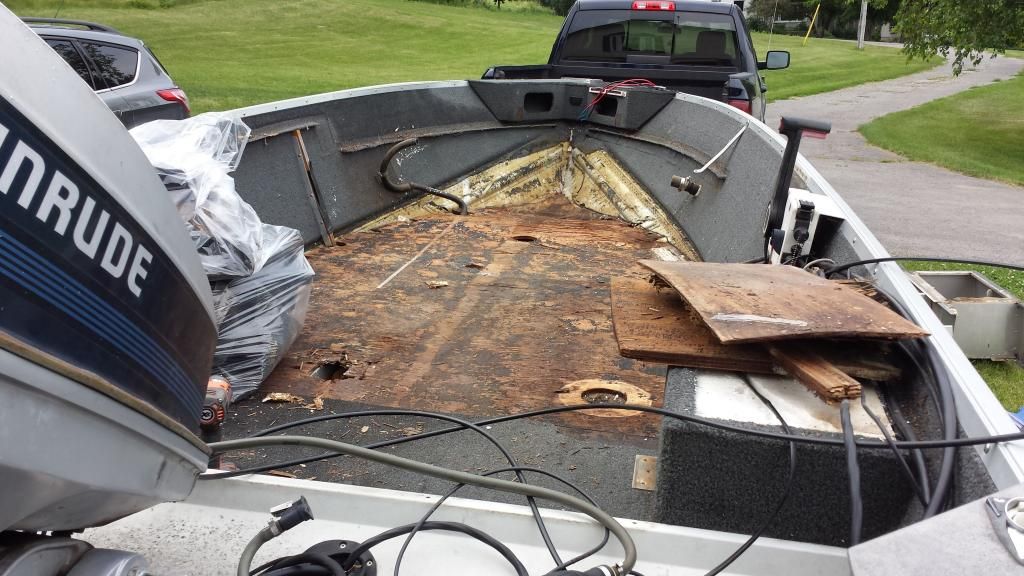
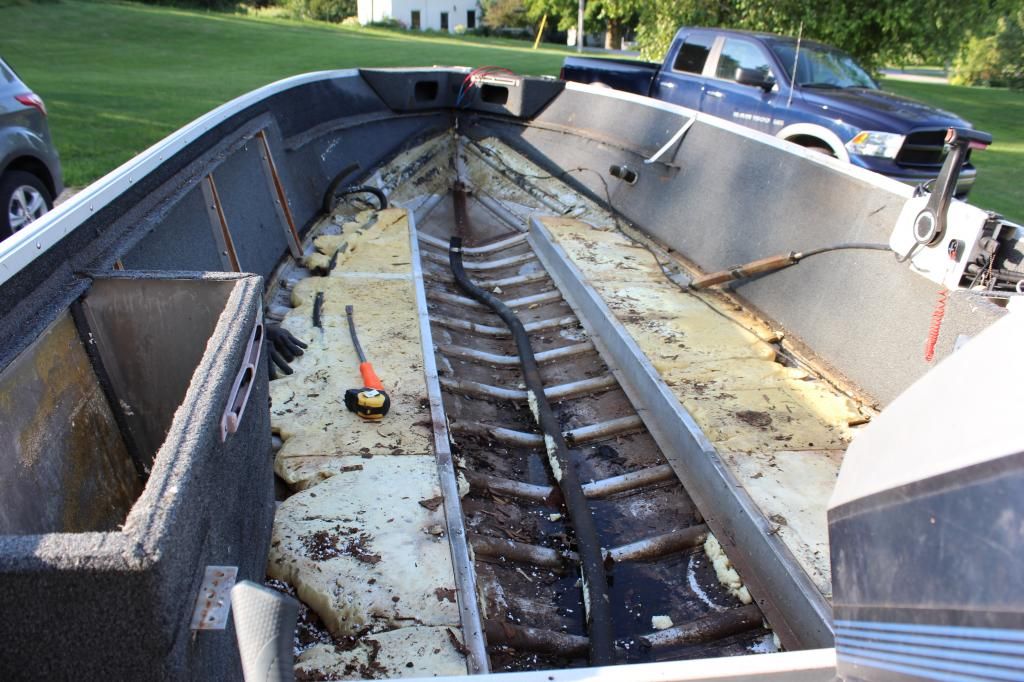
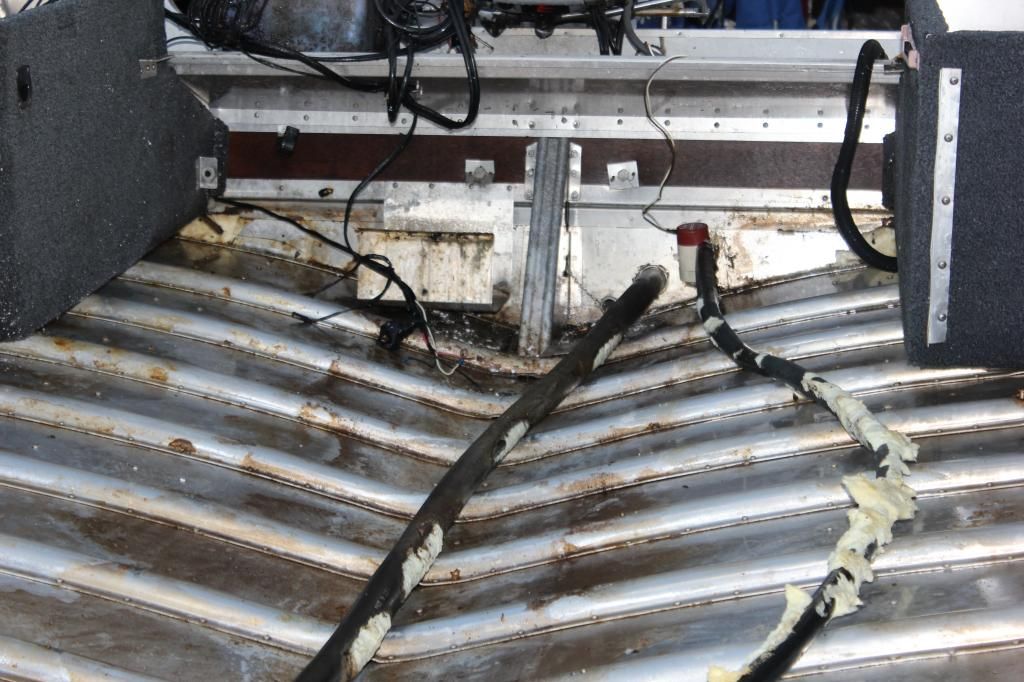
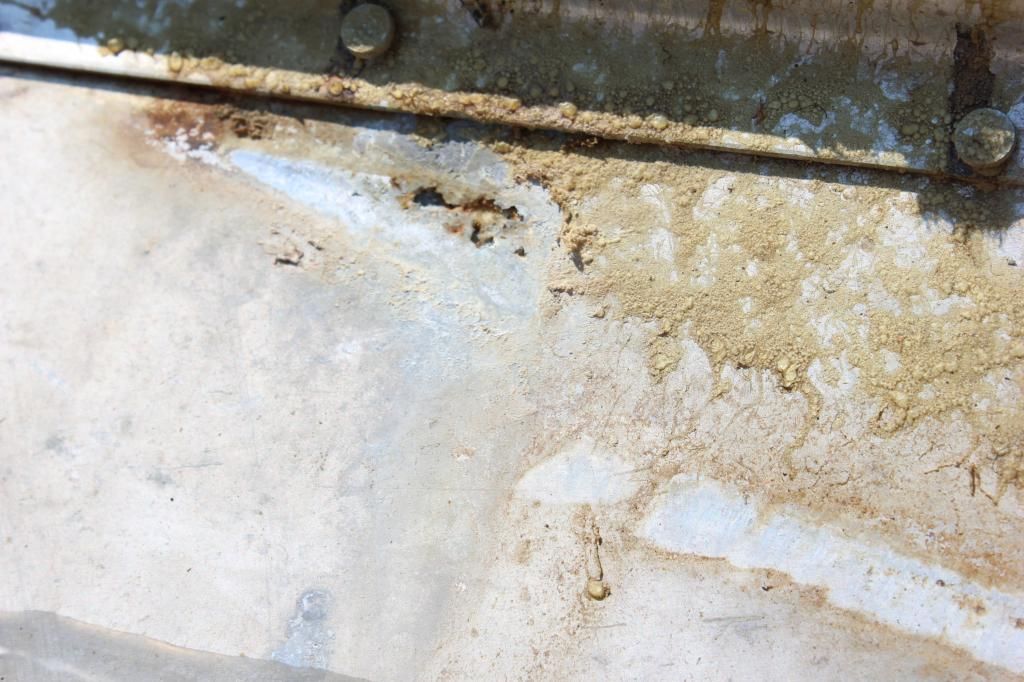
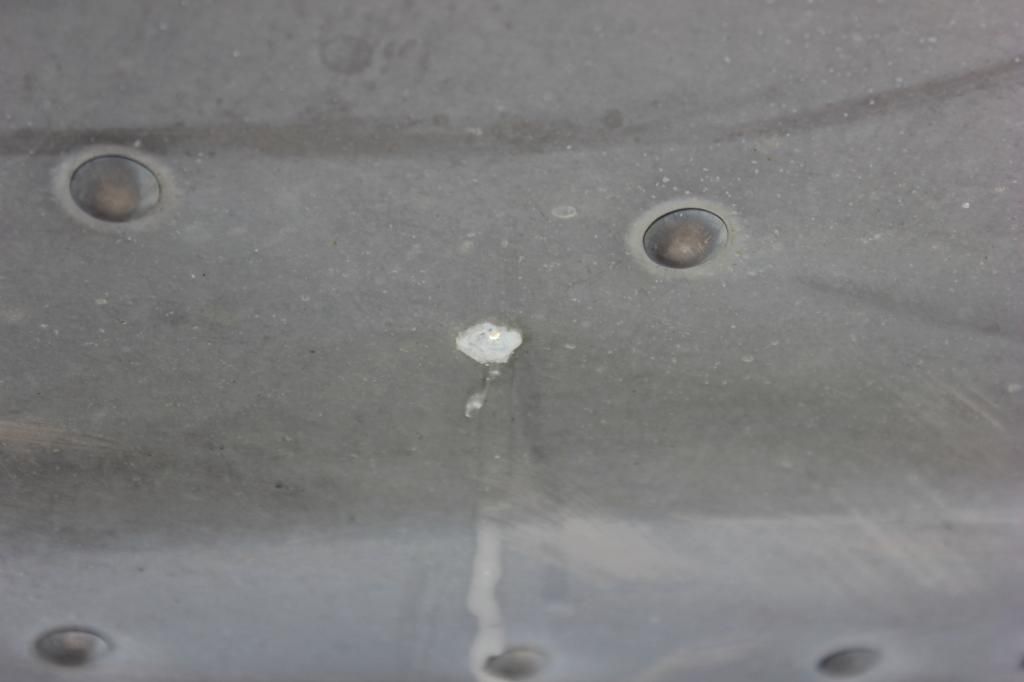
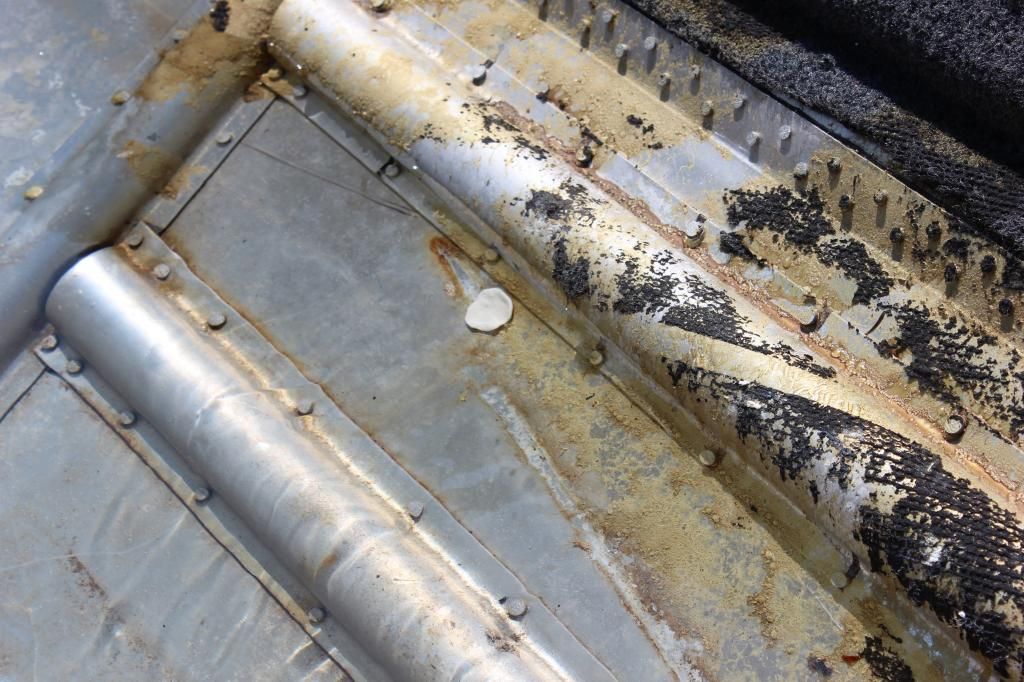
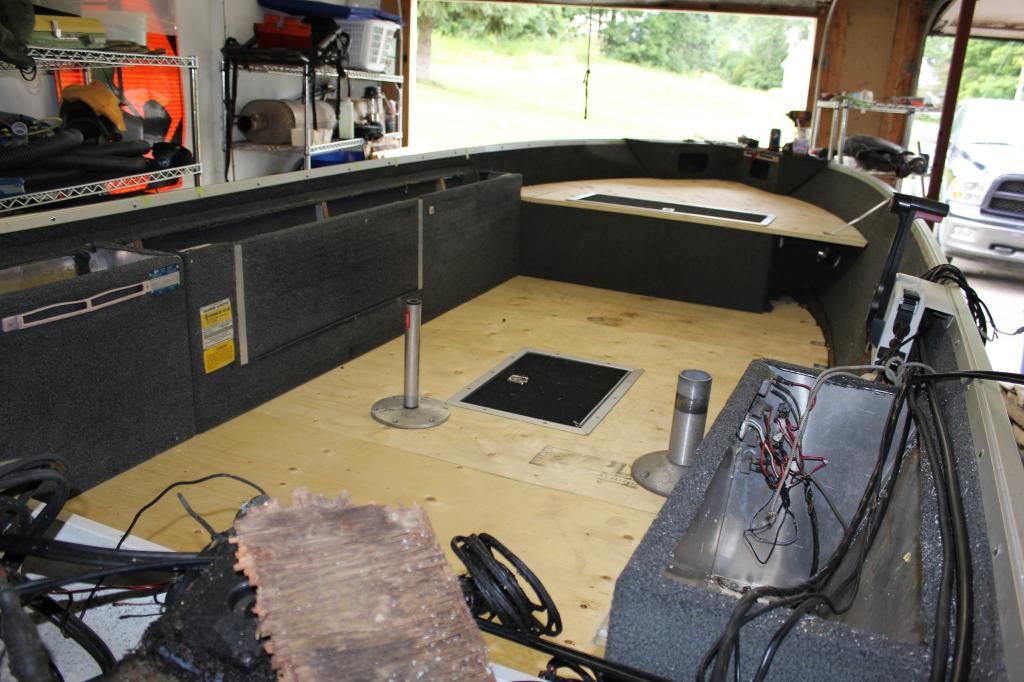
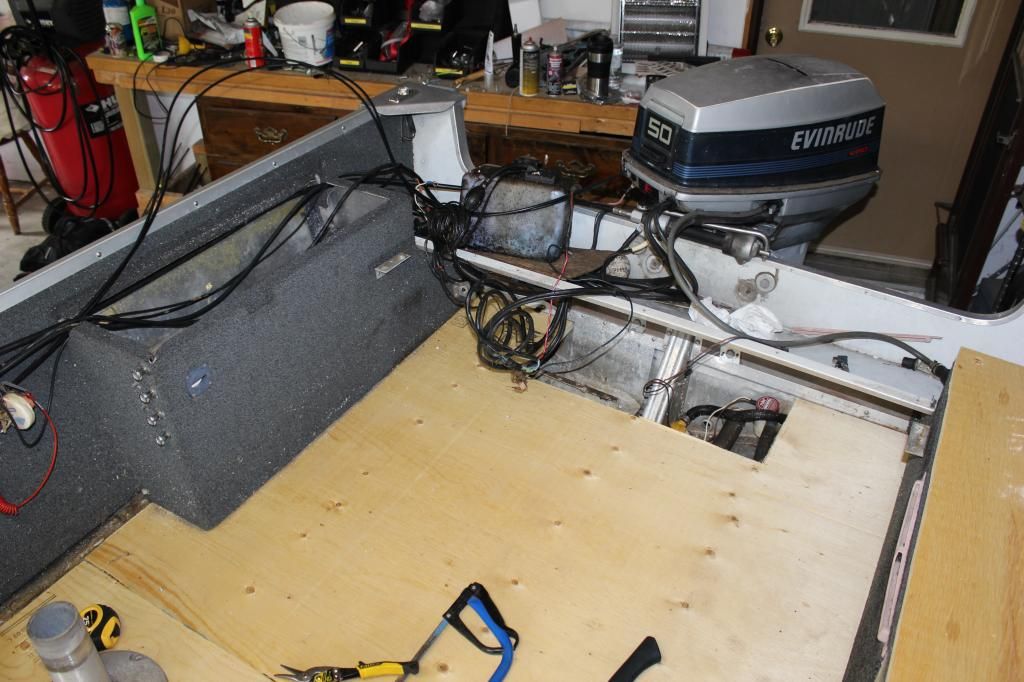
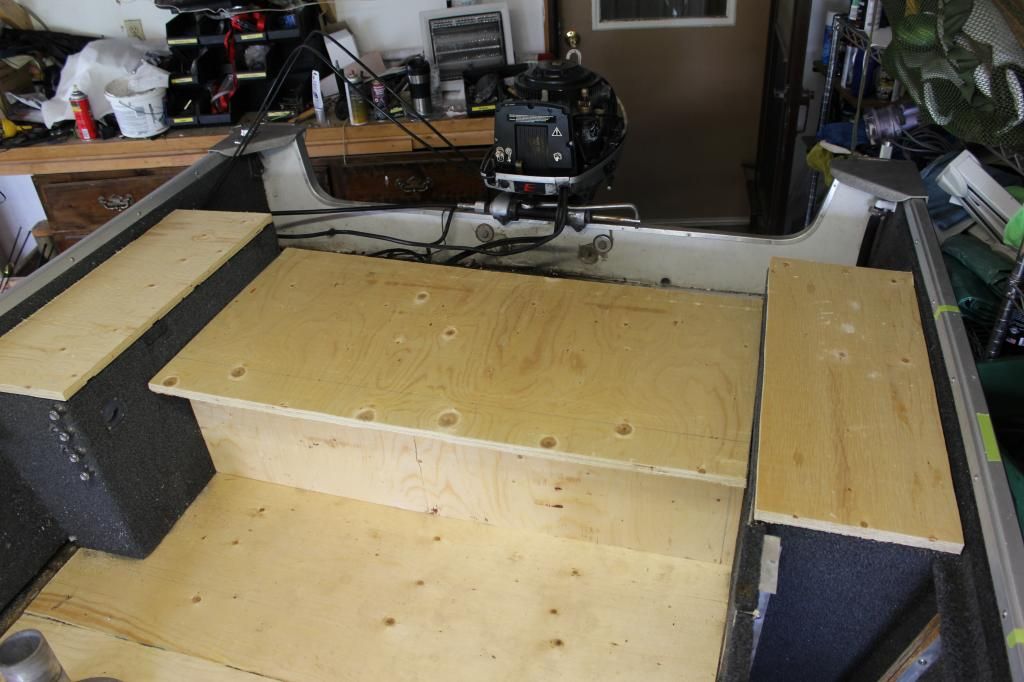
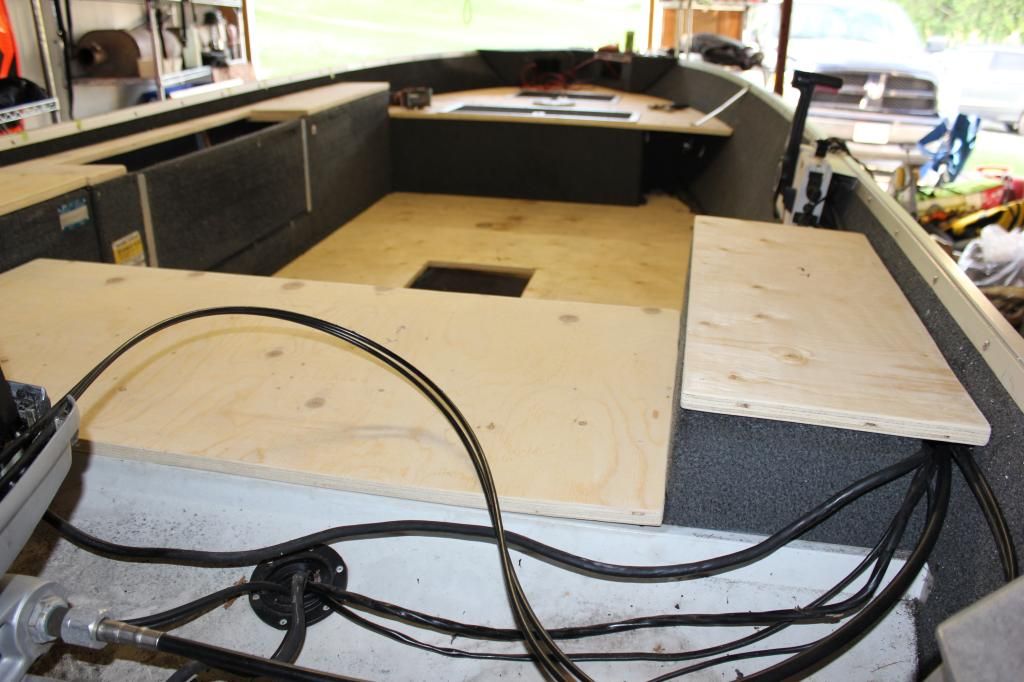
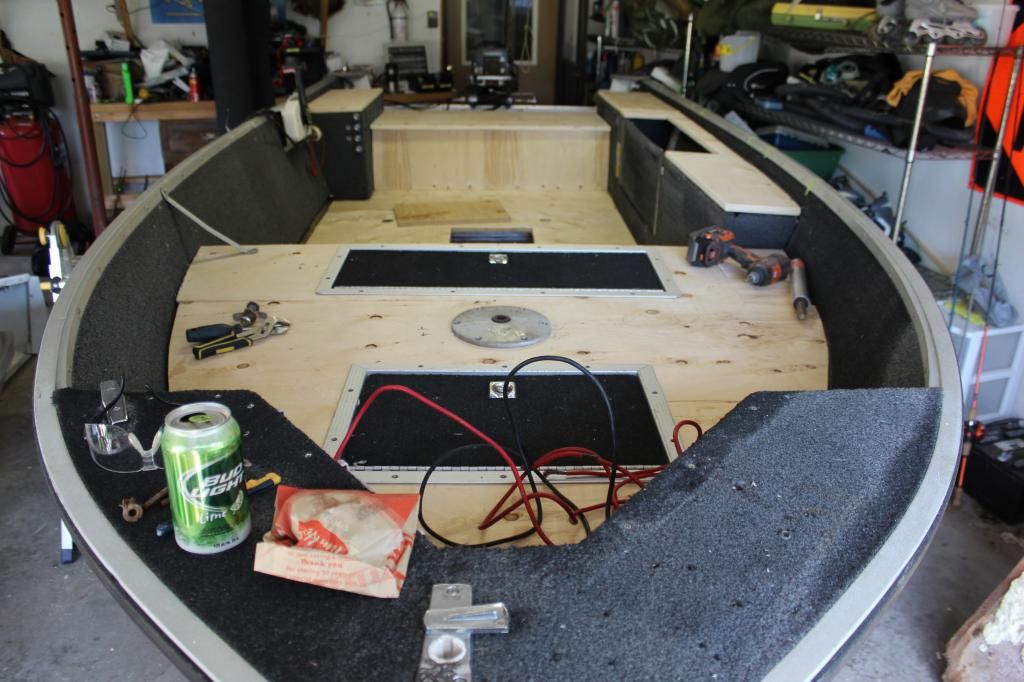
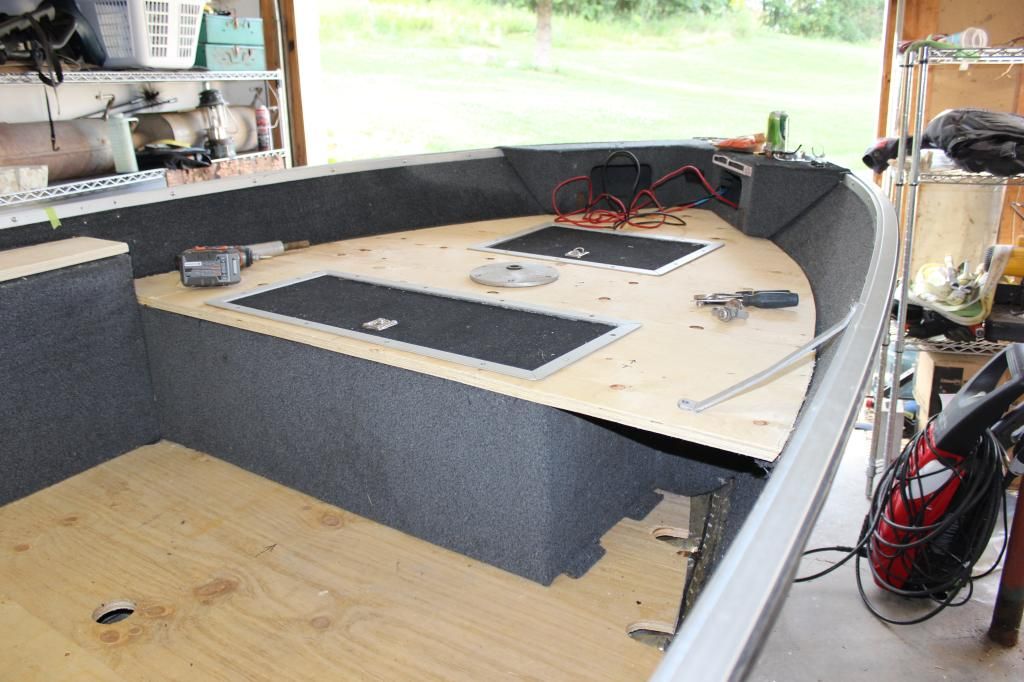
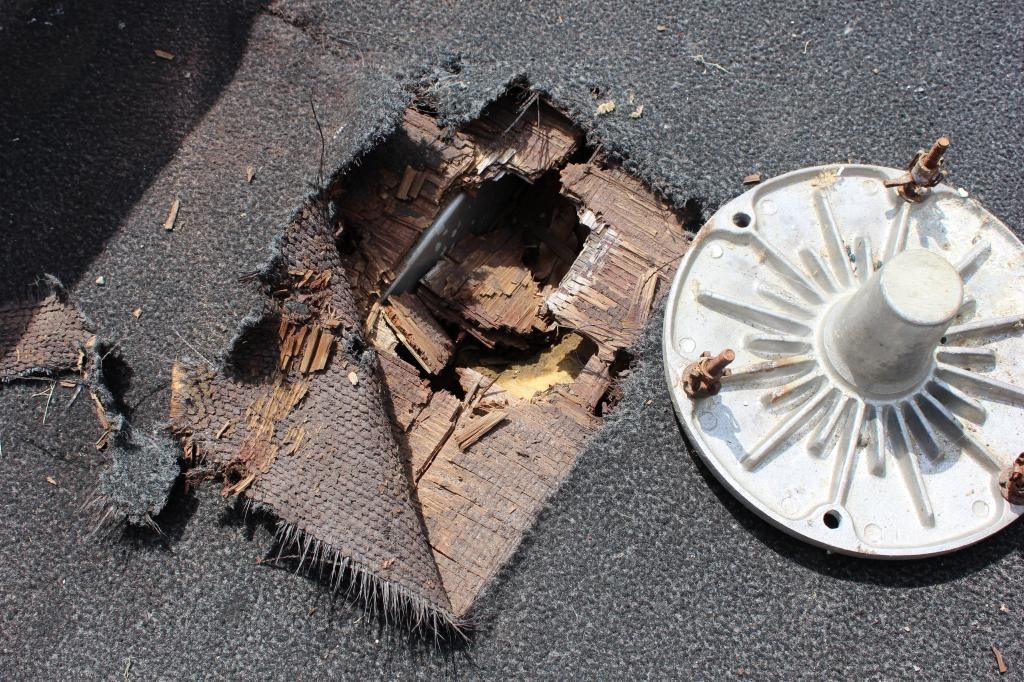
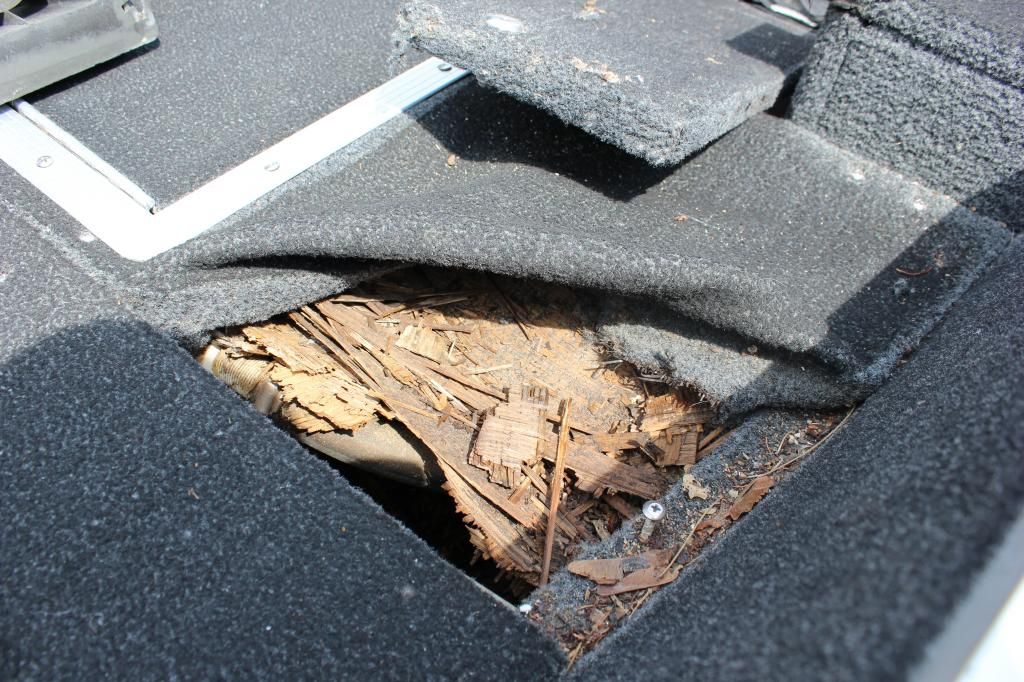
Although it doesn't look all that bad in the pics, there is not a solid piece of wood in this boat. I purchased the boat for what I believe to be a good price and am on a budget for the restore. Here are a few close ups of the particularly bad spots. On the plus side, the transom appears to be rock solid with the wood in great shape so I will not be replacing it.


IMG_0850_zps1056f11a.jpg

IMG_0833_zps78076c3a.jpg
 

jigngrub

Fleet Admiral
Joined
Mar 19, 2011
Messages
8,155
Looks like someone re-carpeted over bad wood.

Should be a real nice boat when you're done
 

jondevos

Cadet
Joined
Apr 2, 2011
Messages
22
Over the last 2 days I have stripped out the boat as far as I need to.

Front casting deck and rod storage are out.

20140719_161948_zps2b61a75a.jpg


Look at how wet the wood is.

20140719_172106_zps5ae666f0.jpg


Foam is partially water logged and every single rivet has been popped on the floor supports.

IMG_0852_zps4a8ee89f.jpg

IMG_0854_zps2e9cce65.jpg


Transom looks solid

IMG_0863_zps5880317a.jpg


All cleaned out

IMG_0859_zps89ff4952.jpg
 

jondevos

Cadet
Joined
Apr 2, 2011
Messages
22
Ok so this is what I completed tonight.

I started off by doing a test for any water leaks.

IMG_0874_zps5df4693d.jpg


Found one spot that leaks. The aluminum has corroded a small hole completely through.

IMG_0868_zpsd43b6696.jpg

IMG_0869_zps925f4403.jpg


I repaired it using a freshly chewed piece of Dentyne Ice gum. Intense flavour in the black package.

IMG_0873_zpsc93a06ce.jpg


Just kidding, to fix this I will be doing a patch using 0.050" 6061 T6 aluminum faying surface sealed with a special sealant designed for aircraft fuel tanks. That should sufficiently take care of that. I also weighed down the live well pipes to ensure they do not leak at all.

Here is the factory setup for supports under the floor. The cross members seamed extremely week being that they are nothing more than a piece of 0.063" flat aluminum stock.

IMG_0876_zpsb8b0bc46.jpg


I added 3 extra supports. You can't see it in the picture, but the 3 supports I added are bent to 45 degrees on both sides lengthwise providing both lateral support for the main stringers and because of the 45 degree edges, vertical support for the floor itself. All factory holes have been drilled to 3/16th size and all members will be were installed with closed end blind rivets.

IMG_0879_zps13f4f120.jpg


Next step will be to install blue foam board and then start making the floors.
 

REdington

Seaman
Joined
Apr 22, 2014
Messages
69
Jon,
You have a great start on your rebuild. If it were me, I would use 3M 5200 on your patch. It is designed for under water and you'll never have to mess with it again.

I hope you drilled test holes in your transom, just to make sure that it is good to go. Looks can be deceiving with wood rot.

Rodney
 

jondevos

Cadet
Joined
Apr 2, 2011
Messages
22
I did not drill test holes. That may be a good idea though. Lifting on the engine I can not get any movement in the transom so either way it is going to wait until later.
 

Watermann

Starmada Splash of the Year 2014
Joined
Jan 12, 2013
Messages
13,753
Yeah man your tearing into it alright. Looking good so far :thumb:

The thin 060 AL aren't cross members rather they're floor joint backers. As far as using other sealants below the water line, 3M 5200 is the only thing we all have used and it is time tested to work. Please post up some pics of the transom, the lower area is very dark colored, SC always used some thin white coating on them which I think I see on top.
 

Tnstratofam

Commander
Joined
Aug 18, 2013
Messages
2,679
That looks like a good set up for fishing. Should be real nice when you're finished. I'm with Waterman on that transom. The bottom looks way to dark not to have gotten wet. While you have the deck out now would be the time to replace it. Much easier repair with everything else out of the way, and it shouldn't add more than a handful of days to the repair at the most. Running an aluminum boat with a weak transom can lead to structural damage you don't see. Trust me when I replaced mine I found lots of hidden problems that were caused solely on our boat being used with a weak transom. Good luck, and I'll be tagging along if that's okay.
 
Last edited:

jondevos

Cadet
Joined
Apr 2, 2011
Messages
22
The reason the transom is so dark is that I took this picture right after filling the boat with water to check for leaks. It was still wet. I will drill some holes into the wood in the inside to spot check for any rot. Looking over the wood I didn't find any signs of rot. I did not tear anything out along the transom as it is all aluminum and I was able to remove the deck out from underneath it. So to replace now or later will be the same amount of work. I'm hoping to make that a winter project in the garage.
 

jondevos

Cadet
Joined
Apr 2, 2011
Messages
22
Also, does anyone have any specific recommendations for what to coat the wood in? I'm thinking epoxy resin but have seen that others have used different types of wood treatments.
 

Watermann

Starmada Splash of the Year 2014
Joined
Jan 12, 2013
Messages
13,753
Not sure about doing a transom coating with the wood still in the boat. Also you won't believe what you'll see behind that transom between the wood and the skin if you were to pull it. Remove one of the motor bolts that way you don't have to go drilling. use an awl or pick to probe at the wood to see if it's soft. If it were me I would pull all of the bolts and reseal them anyway for good measure if I was keeping the wood. I've not seen any restorations where the the deck was rotten but the transom was good if from the same era but there's always a first! Another way is to pull the motor off and then transom cap to check out the plys of the wood and see if they are separating any.

When you do the leak test you don't want to put much water in the boat, at least not like a kiddie pool, the weight can be damaging to the unsupported hull that has nothing to tie it together. What I do is run the trailer jack all the way up, fill the back half, check for leaks and then run the jack down and check the front half. that way you don't need near as much water inside and it should cover all the below the water line seams/rivets.
 

jondevos

Cadet
Joined
Apr 2, 2011
Messages
22
Not sure about doing a transom coating with the wood still in the boat. Also you won't believe what you'll see behind that transom between the wood and the skin if you were to pull it. Remove one of the motor bolts that way you don't have to go drilling. use an awl or pick to probe at the wood to see if it's soft. If it were me I would pull all of the bolts and reseal them anyway for good measure if I was keeping the wood. I've not seen any restorations where the the deck was rotten but the transom was good if from the same era but there's always a first! Another way is to pull the motor off and then transom cap to check out the plys of the wood and see if they are separating any.

When you do the leak test you don't want to put much water in the boat, at least not like a kiddie pool, the weight can be damaging to the unsupported hull that has nothing to tie it together. What I do is run the trailer jack all the way up, fill the back half, check for leaks and then run the jack down and check the front half. that way you don't need near as much water inside and it should cover all the below the water line seams/rivets.


I was referring to coating the floors in. I understand I need to remove the transom and do a complete replacement versus trying to recoat or salvage the old one. That will likely be a winter project. I see some people coat the wood in just paint, others epoxy resins, and I have seen even deck stains. Are there any specific ones people prefer that will last the longest at a reasonable price?

Hopefully I didn't do any damage to the boat doing the leak test. I fill it almost to the bottom of the carpet on the sides (6-8inches) and then moved the boat around on the hill to cover all areas. Pretty sure the boat is just fine.
 

jondevos

Cadet
Joined
Apr 2, 2011
Messages
22
Anyone know where I may be able to find a hatch cover from an old star craft? Im adding in floor storage to mine and would love to find a hatch cover that matches the front factory ones. I looked online and have found some that do not match and they are all close to $150 by the time I ship it to Ontario. Anyone have an old one kicking around they'd like to sell or know of a good source for hatch covers at reasonable prices?
 

REdington

Seaman
Joined
Apr 22, 2014
Messages
69
I was referring to coating the floors in. I understand I need to remove the transom and do a complete replacement versus trying to recoat or salvage the old one. That will likely be a winter project. I see some people coat the wood in just paint, others epoxy resins, and I have seen even deck stains. Are there any specific ones people prefer that will last the longest at a reasonable price?

Hi Jon
This is what I used on all the wood in my boat. I got it from WOG (woodonglass on the forum) and he said "old timers have used it for years"

1 part boiled Linseed Oil
1 part varnish
2 parts mineral sprites

I poured it on and spread it around with a cheap brush, making sure I did the edges real good, and keep brushing till the wood wouldn't take anymore.

Let it dry for 3 days and then put 3 more coats of varnish on it.
 

jondevos

Cadet
Joined
Apr 2, 2011
Messages
22
Finally got a chance to start cutting out the floor. Factory was 1/2 but I decided to go with 3/4. Here is the basic deck. Notice I added in floor storage access.
20140725_140423_zpshwxjxx1a.jpg
Coming along nicely.
IMG_0890_zps7sowuqls.jpg
IMG_0892_zpskchjpepf.jpg
 

jondevos

Cadet
Joined
Apr 2, 2011
Messages
22
Made some more progress on the boat today.

Rear casting deck area

IMG_0931_zpsidmmxvb3.jpg

IMG_0934_zpss3ofqwa0.jpg


Notice that I have drilled a hole in the right side gunnel to allow all the cables and wires to run inside of it instead of on top. Tidies things up a bit.

IMG_0948_zpstjsepnu9.jpg


IMG_0946_zps99yz7ony.jpg

IMG_0947_zpsvmk6axgm.jpg


Tomorrow I will finish the rod storage followed by sanding all the wood and then pull it all back out to seal it. I purchased marine carpet today too which matches the previous carpet. Lots of things left to do but I'm getting there.
 

MassillonBuckeye

Chief Petty Officer
Joined
Jul 26, 2010
Messages
400
Looks good! I have a couple threads regarding my 1984 PM160 on here. I'll try to link them later. The layout is always different on these.. Did you finish her?
 

jondevos

Cadet
Joined
Apr 2, 2011
Messages
22
Hey everyone. I didn't quite get to finish it this year, life got in the way. It has been put away for the winter now but first thing in spring I'll finish it. Here is a picture of where I left off.
 

jondevos

Cadet
Joined
Apr 2, 2011
Messages
22
Hey everyone.i didn't quite get to finish the boat this year as life got in the way. It has been put away for the winter but this is where I left off.

20140821_155606_zpstbjqw41d.jpg
 
Top