72 Thunderbird Formula w/twin 165hp Mercs

kramerpage

Chief Petty Officer
Joined
Jul 26, 2010
Messages
447
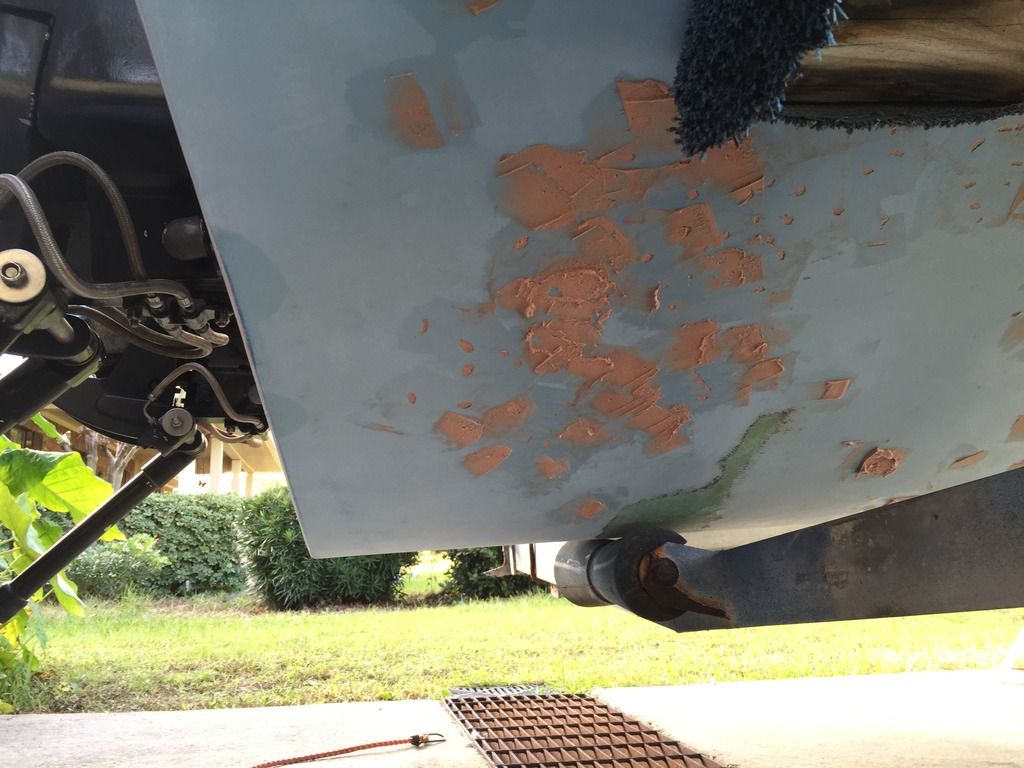
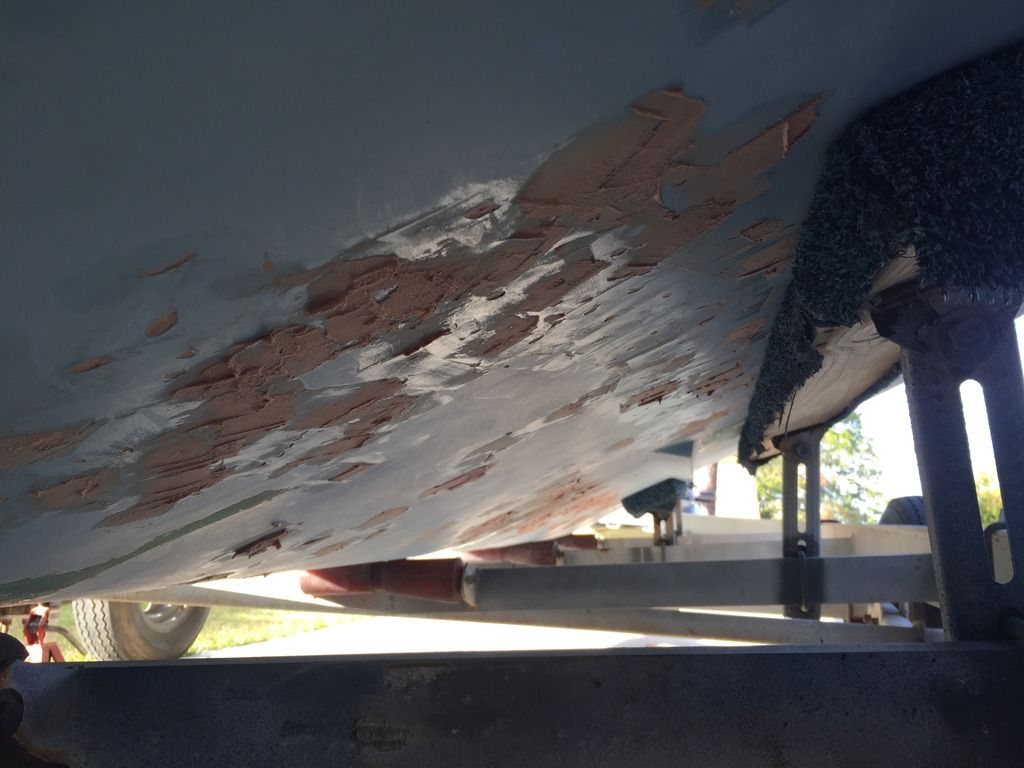
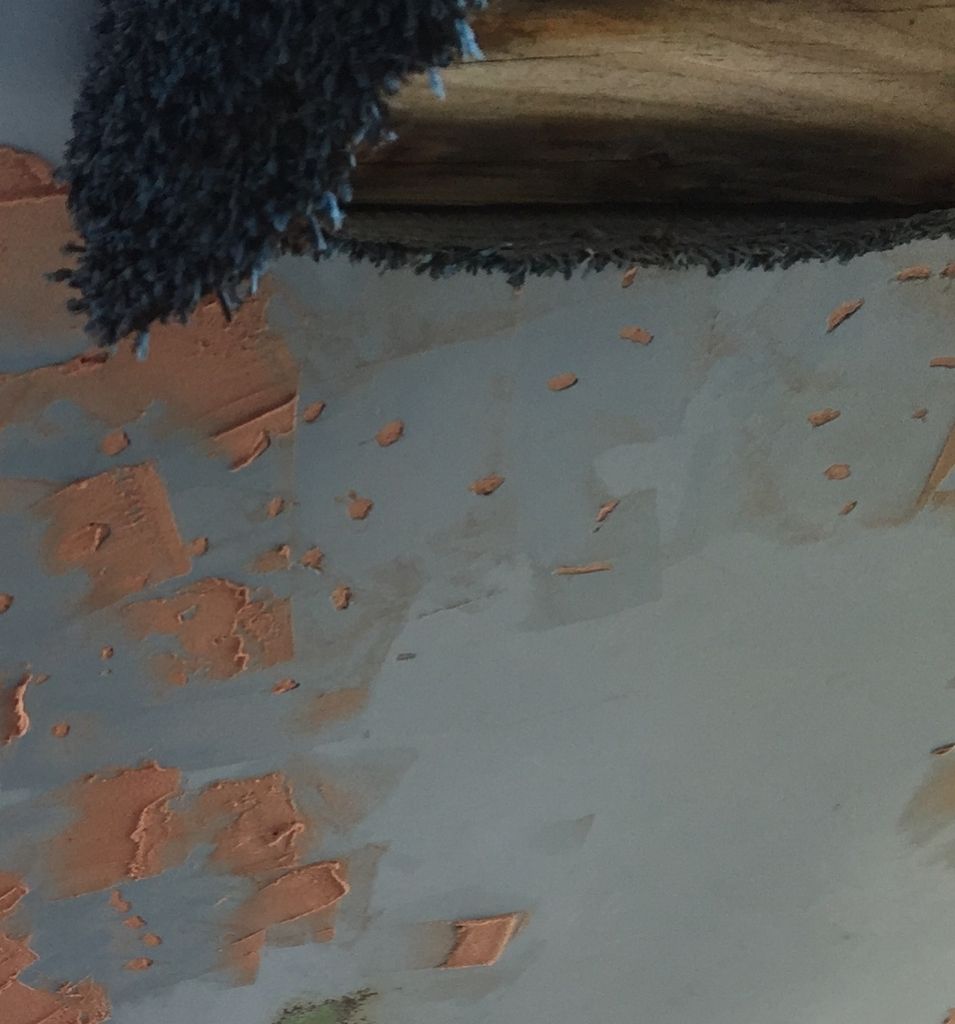
Well its been a few weeks and still plugging away at this boat. I gave up on the Hydraulic rams for now, I still cant figure why the port side has blown up 2 rams and on the starboard side the rams went up and down but very slow. I found 2 rams on ebay for a good price and they look like they were from a fresh water boat as advertised. They move very easily in and out by hand. I decided to put them on the starboard side since those rams look very salt water worn and were moving so slow. Now the starboard side doesn't work right. The rams travel all the way out, very slowly boat only retract a couple of inches and than stop so I gave up on messing with them for now. So back to the other stuff. I have mainly been trying to prep the hull and cap for painting. Its amazing how many holes, chips, nicks, dings, dents, cracks and blisters are in a 43 year old boats gel coat. The holes, chips, nicks, dings, dents, and cracks have been tedious to fix but doable the blisters as I have called them now that sucks. They are mostly on the bottom of the hull but there are a few on the sides as well. They are small cracks in the Gel coat most no longer than 1/2 or so with many having a slight half moon shape. If I take an awl/ice pick and lightly poke the Gel coat anywhere on the boat the gel coat is not damaged but if I poke these around these cracks the gel coat chips away and I find that the gel coat has separated from the fiberglass beneath it. So if I paint these areas the crack is only going to reappear and get worse so I have taken a Dremel and dug into the gel coat and the fiberglass just enough to clean away any loose gel coat. Some areas it is just the width of the Dremel bit and the visible length of the crack but other areas it ends up being anywhere from dime size up to half dollar size. Thankfully most of the spots are smaller then a dime but if I were to count them there are 100's of them. After cleaning away the loose Gel I blow them out with compressed air and wipe them down with Acetone. I then fill them in with resin thickened with glass bubbles and fairing compound. After it hardens then I get to sand them all back flush, oh the joys. Its really been fun working under the boat trying to squeeze under the trailer frame and axles. I don't have any good pictures of these cracks or blisters prior to removing the loose gel but here are a few with the fairing compound filling the holes.


Hi Mark. I have some of the same issue with my boat. Could you tell me what fairing compound you use and the recipe for the mix? I just bought a dremel 3000 to get these areas coerced. Thanks
 

Mark72233

Ensign
Joined
Jul 11, 2014
Messages
926
Kramer, I used 3m Glassbubbles or the Fairing compound mixed with resin to the consistency of peanut butter. I like the mix with the 3M Glass Bubbles better because it seemed to harden better and was easier to sand. I used the attachment pictured with the Dremel to chip away or grind out the loose bubbled gel coat and I would grind out past the loose gel coat just far enough to know I got into solid gel coat and I would go about halfway into the fiberglass so I wouldn't pierce the fiberglass but gave the mix something to grab and hold onto.


I think WOG may have suggested using Epoxy for a resin with a little more strength if you have it. I just used the poly resin I had. Again I have nothing to suggest these repairs will last because the boat hasn't been in the water yet but I did hundreds of these little spot repairs and none of them are loose and the bottom looks pretty good after the coat of primer. I plan on painting the bottom this Saturday with the gloss white paint and I think it will come out pretty clean looking.

I finally got the last coat of Royal Blue on the sides unfortunately the paint gun completely went to crap and the paint flow wouldn't adjust at all it was only putting out about 50% of the paint so I couldn't adjust the fan worth a dang so the paint has a lot of orange peel look but the coverage is good and once I get a chance to polish it down I think it will be pretty smooth. I hope.


nurseman

Lieutenant Junior Grade
Joined
Jun 2, 2013
Messages
1,045
Mark, the blue and white contrast really shows off the lines of that boat. I like what you are doing there. Sorry to hear about your gun going to pot in the middle of your shoot. The OP doesn't look too bad from here...
 

Mark72233

Ensign
Joined
Jul 11, 2014
Messages
926
Thanks Nurse, I think the gun issue are going to be on me for not taking it apart and cleaning it better. When I finally got done by using another gun I had and had time to look at the other gun I found the main needle that runs through the trigger was gunked up and had dried paint on it from previous times I painted and had not cleaned it well and than not testing the gun and equipment prior to ever mixing up any paint. Lesson learnt. 😢😡😳😜😝
 

ahmincha

Lieutenant Commander
Joined
Jul 21, 2012
Messages
1,512
I am with nm that boat looks great . And i like the outline of the boat in the last pic on the concrete
 

Mark72233

Ensign
Joined
Jul 11, 2014
Messages
926
Thanks ahmincha, I finally got the bottom painted white today that was way harder than I thought it was going to be. It took 2 quarts and about 3 hours. Working around all the chines and trying to make sure I got everything covered in a good solid coat sucks. The gloss white really makes all the spots where the gel coat is cracked stand out. Makes me wish I would have spent another week or so working on them but after fixing a few hundred of them already I was so done. The gun started messing up again so I switched the tips with the other gun I had and pressed on. I also got the console painted as well. I will take pics Monday and post them. Ahmincha nice little outboard you bought that big thing should push your boat pretty well. Can't wait to see it bolted onto the transom.
 

kcassells

Fleet Admiral
Joined
Oct 16, 2012
Messages
8,596
marc,
keep on trucking! Looking great and a super thread! :rockon::rockon:
 

archbuilder

Vice Admiral
Joined
Sep 12, 2009
Messages
5,697
Mark, are you pouring your paint through a funnel with a strainer in it? If not you might want to pick some up, they are cheap and sometimes can prevent headaches!
 

nurseman

Lieutenant Junior Grade
Joined
Jun 2, 2013
Messages
1,045
Looking very nice! +1 on the paint strainers. If the gun has a little filter in the bottom of the cup, throw that out as well and just strain the paint really good. I had clogging issues at first as well, but when I did that, I haven't had a clog since. Just a thought...
 

Mark72233

Ensign
Joined
Jul 11, 2014
Messages
926
Thanks nurse. Yes I have always used the paper funnel strainers I got them cheap at Harbor Frieght. That's the weird part I haven't changed method, mix or equipment this gun just doesn't want to flow. It was a cheap gun I bought in a set of three. I think Cordel has the same guns. Anyway I took it completely apart, cleaned it and put it back together and same issues.
 

Mark72233

Ensign
Joined
Jul 11, 2014
Messages
926
I did manage to get this pig (I have other names for her but they are not suited for this forum) back on the trailer. I mucked up the paint just a little in a couple of spots but I expected that it was a little to soon. I put her back down on the 4 keel rollers so those spots will be a little mucked up as well. I will touch up the bottom later when I paint the cap. I propped it up on 2 spots on the transom so it's not sitting on the bunks and not rocking side to side. Once the paint hardens I will raise the bunks up and bolt them down. Putting the trailer under her by myself was really fun and it's blowing about 20 mph today with some gusts higher and of course the wind was hitting her squarely on her port side so it kept wanting to rock sideways and fall over. Fun fun NOT.


Mark72233

Ensign
Joined
Jul 11, 2014
Messages
926
Question or opinions on how much weight should be on the rollers and bunks. Should I try to set it up to where most of the weight is on the bunks or rollers or 50/50, 60/40 60 being the bunks. I am thinking about trying to set it up where once the boat is completely up on the trailer the last keel roller is not touching the bottom of the boat and moving towards the front more and more weight being put on the other 3 keel rollers but keeping let's say 60% of the weight on the bunks. Thoughts
 

alldodge

Moderator
Staff member
Joined
Mar 8, 2009
Messages
40,718
Don't have a firm opinion only comments:

Have never seen a bunk trailer having any of the boat sitting on the keel rollers. The rollers are used to keep the bows keel area from being damaged when going on or off the trailer. Once the boat is sitting on the trailer there is normally an inch or so air gap.

That said, the bunk trailers I am referring to are ones which have bunks near the keel rollers and the outside where your current bunks are. Other trailers are made today which are only supported by outer boards, but those boards are in most cases 3x10 mounted on their edge (example FL Loadmaster, Mayko, and others)

I would suggest no more then 20 percent on the rollers, unless your pins are hardened, but may just use the rollers to protect keel.
 

goin70

Cadet
Joined
Oct 6, 2007
Messages
19
The color combination is perfect. You have done a fantastic job keeping the project moving and soon you will be completed. Getting the boat moved to the trailer, without any help, is a major accomplishment. That would have been a video worth seeing. Thanks for keeping the audience involved and entertained. It is nearing time for me to start having some fun. I will post the adventure. Good luck!
 

Mark72233

Ensign
Joined
Jul 11, 2014
Messages
926
AllDodge that makes sense letting the rollers get it rolling so to speak onto the bunks and than let the bunks hold her weight. I know when she was sitting on the trailer all those years there was weight on the rollers because it deformed the bottom. I think I will shoot for putting most of the weight on the bunks. There are 4 bunks two towards the rear about 8 feet long about halfway between the keel and the sides. 2 more bunks towards the front closer to the keel about 10 feet long.
 

alldodge

Moderator
Staff member
Joined
Mar 8, 2009
Messages
40,718
Here is a pic of my old trailer, which also resembles my new and also my Rinker trailer
Photo924.jpg
 

Woodonglass

Supreme Mariner
Joined
Dec 29, 2009
Messages
25,924
Rollers are guildes and carry minimum weight. Bunks are the Weight Carriers. Once the boat is Centered the Bow roller should be raised and touching the keel as should all the others. Then loosen all the carriers for the bunks and use jacks to jack them up equally to lift the boat about 1/2". Tighten the carriers. Now adjust all the rollers except the foreward most bow roller so that they just touch the keel. DONE!!!!
 

archbuilder

Vice Admiral
Joined
Sep 12, 2009
Messages
5,697
Nice work Mark, I bet getting that back on the trailer by yourself was a chore. That is a lot of boat, glad you did it safely. I agree with wood and Alldodge about the rollers. The paint colors are excellent! What is next on your agenda? I have been pondering that tonight for project fuggly. You are at a nice milestone, all that work is starting to pay off!
 
Top