72 Thunderbird Formula w/twin 165hp Mercs

Mark72233

Ensign
Joined
Jul 11, 2014
Messages
926
Looked at the old pics taken prior to and during tear down stages. All the components are the same and all the lines are hooked up in the same order or fashion. The only changes are the trim pump motors have 2 solenoids instead of just one. I pulled the down line off of the blown ram and it flows air just fine and no obvious kinks. I will have to dive into this issue on Wednesday since I am off of work that day.
 

alldodge

Moderator
Staff member
Joined
Mar 8, 2009
Messages
40,539
The only changes are the trim pump motors have 2 solenoids instead of just one

I think this is a clue to your answer. The old pump did not drive the pump in one direction (probably down). Did the first system have two lines on each cylinder or just one?
 

Mark72233

Ensign
Joined
Jul 11, 2014
Messages
926
2 lines. All the parts are identical to what was there before except the old pumps had a solenoid on the pump and a second one attached to the block near the pump so I don't think that is it after thinking about it. The newer style pumps just have both solenoid attached to a bracket attached to the pumps.
 

wahlejim

Master Chief Petty Officer
Joined
Jul 23, 2015
Messages
884
Hello Mark, I have a very similar system in my boat as I mentioned before. With the hoses disconnected, can you pull the rams in and out manually with ease? If so, then you have a valve problem. My first instinct is the reverse lock valve not being adjusted properly. The valve is activated by the shifter cable so when you are in reverse, the drive does not rise. If the reverse lock valve is closed, then pressure will build up from the pump with nowhere to go. Check the reverse lock valve and make sure it is open.

The dual solenoid system is not the issue. The placement of the solenoids do not affect the pressure of the pump.

One other thing to check would be the style of pump. Some of the pumps have the reverse lock valve in the pump itself. If this is the case with your pump, you can run the return line right to the pump and bypass the external reverse lock valve. You will still need to hook the shifter cable to the old reverse lock valve, but you can eliminate the hydraulic lines IF the reverse lock valve is internal on your pump.
 

Mark72233

Ensign
Joined
Jul 11, 2014
Messages
926
wahlejim, thanks for the info. As far as the rams go they were both sticking and tight. They were from the donor boat and donor engine I bought from 2 different places so who knows if they were working properly or not. I ran them up and down several times prior to one of the hoses blowing out and then the first time the ram blew on the starboard side of the port stern drive. I then ordered rebuild kits and rebuilt both rams. After the rebuild they both pulled in and out smoothly and easily. I put the one that blew the first time on the port side of that drive and a different one on the starboard side. Last night is the first time I tried running them again and that's when the starboard side of the port outdrive blew again. I was thinking possibly the reverse lock or the valve body since these parts where from donor boats and untested and unknown if they were even working before I got them. I think I am going to fire up the starboard stern drive pump for just a few seconds at a time and if it functions smoothly in and out and it is hooked up the same way as the port side stern drive then its not how its hooked up its in the components. I was than thinking about pulling the pump from the port side and moving it to the starboard side and carefully running it in and out a few seconds at a time and see if it runs smoothly or not. If it runs smoothly in and out than I can narrow it down to the reverse lock, lines or even a slime chance of one of the rams. It gives me a starting point and narrows down my issues.
 

wahlejim

Master Chief Petty Officer
Joined
Jul 23, 2015
Messages
884
just out of curiosity, does the outdrive move up and down freely without the rams attached?
 

Mark72233

Ensign
Joined
Jul 11, 2014
Messages
926
No out drives on the boat yet. They will go on after I finish prepping the entire boat for paint, install 2 engines and then rebuild 2 out drives than I will have the out drives installed so about 10 years from now😜. The Rams are supported horizontally without a load of any kind.
 

Mark72233

Ensign
Joined
Jul 11, 2014
Messages
926
I just got done running the starboard side trim Rams up and down at least 20 times. This side is hooked up the same as the port side and no real issues running up and down. There is no stern drive attached to the boat so no load or weight on the Rams they are supported horizontally on a bucket. They are not running in and out very fast or evenly either which without a load or attached to the stern drive I don't think it is unusual for the Rams to not be going in and out at the same rate. Going out or up they run pretty close together and it takes about 10 seconds. Coming in or down it pulls the port side in most of the way before the starboard side starts and it takes more then 20 seconds. Also the part at the very top of the transom plate that has 2 plastic hoses running to it, the trim indicator? That does not move in or out. I took it apart and it is clean and I forced air through everything and put it back together. As it fill with fluid it pushed out but now it doesn't move in or out like before. Everything else seems to be functioning ok. So next step I will pull the trim pumps and exchange them.
 

wahlejim

Master Chief Petty Officer
Joined
Jul 23, 2015
Messages
884
Those old trim pumps are known for that. I ran into the same issue. Do you have a hydraulic shop in your area? They may be able to rebuild it. The issue I ran into was gunk was stuck inside the pump itself (it is from 1980). I took it apart and cleaned it out, and put it back together, only to find out that the pump area has very specific torque requirements in order to let the balls and springs inside move as they are supposed to. I have a hydraulic guy that I do work for that tore it apart, re-assembled, and re-torqued everything and it is smooth as butter right now. He charged me $50. Compared to a couple hundred for a new one, it was a bargain.
 

Mark72233

Ensign
Joined
Jul 11, 2014
Messages
926
Yeah I don't have any hydraulic places I have worked with before but I am sure we have them. There is that company that made the high pressure power steering line maybe they could do it. I never did mess with the pumps again. I opted instead to continue sanding down the bottom of the boat that way I feel like I am making progress. It's nasty work though. It's the anti fouling bottom paint we put on her about 20 years ago. That is so tough and nasty paint and all the chines, rollers and bunkers are getting in the way and of course wearing the full face mask and hazmat suit while I sand this toxic waste off the boat. Almost done. Maybe an hour or 2 on Saturday morning and that will be done than onto dremeling all this cracks, nicks and gouges and start repairing them.
 

Corjen1

Lieutenant Junior Grade
Joined
Aug 24, 2013
Messages
1,237
Mark, glad to see you are still hammering away at the old gal!!
 

Mark72233

Ensign
Joined
Jul 11, 2014
Messages
926
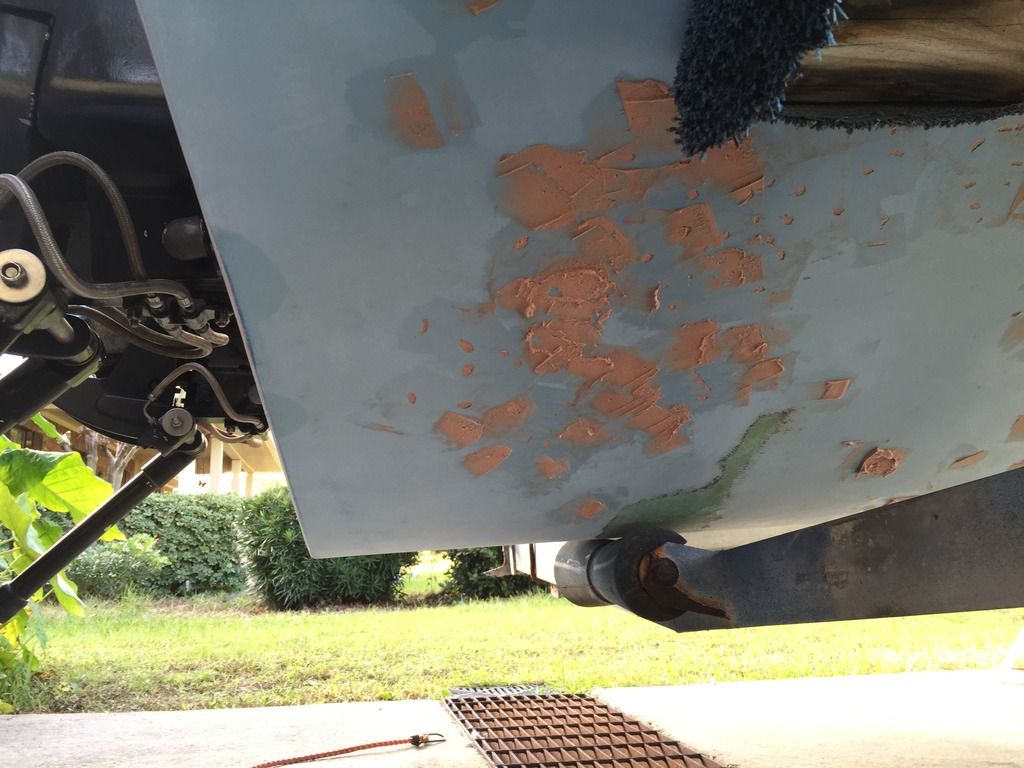
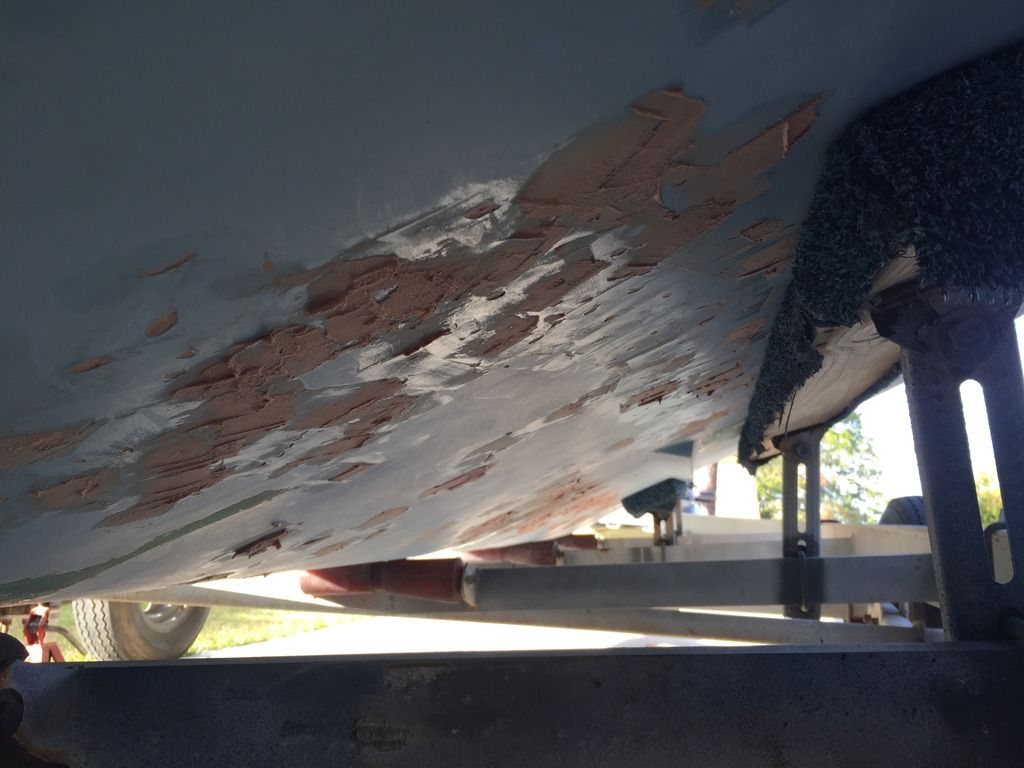
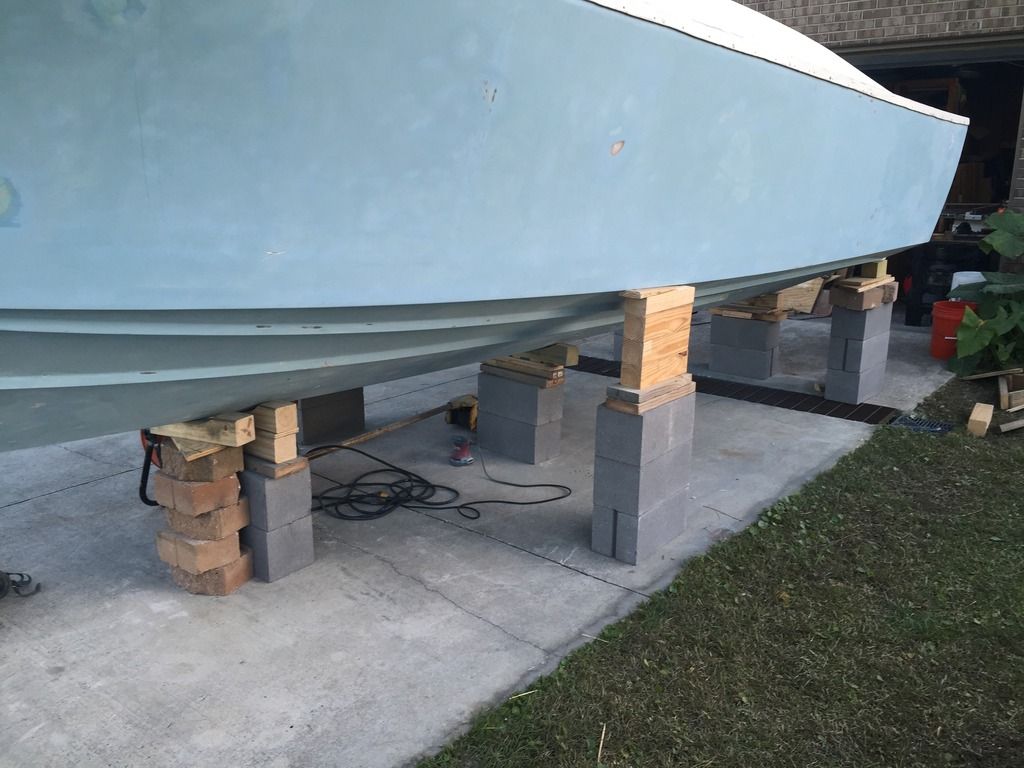
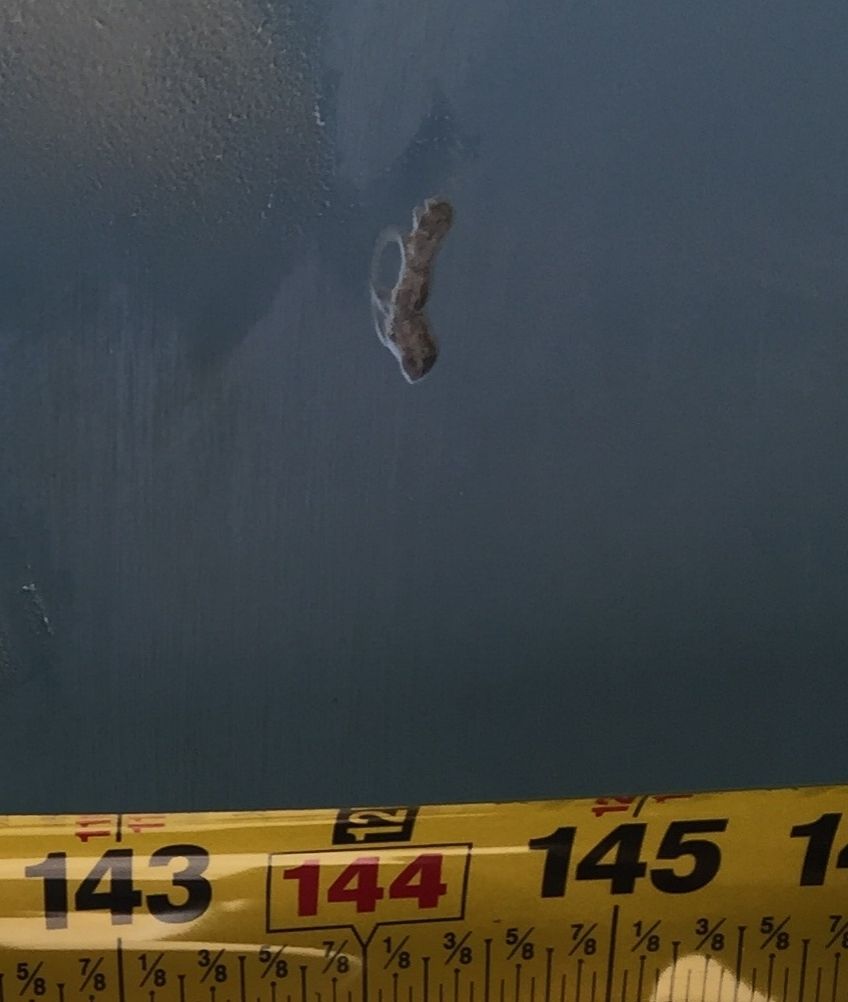
Well its been a few weeks and still plugging away at this boat. I gave up on the Hydraulic rams for now, I still cant figure why the port side has blown up 2 rams and on the starboard side the rams went up and down but very slow. I found 2 rams on ebay for a good price and they look like they were from a fresh water boat as advertised. They move very easily in and out by hand. I decided to put them on the starboard side since those rams look very salt water worn and were moving so slow. Now the starboard side doesn't work right. The rams travel all the way out, very slowly boat only retract a couple of inches and than stop so I gave up on messing with them for now. So back to the other stuff. I have mainly been trying to prep the hull and cap for painting. Its amazing how many holes, chips, nicks, dings, dents, cracks and blisters are in a 43 year old boats gel coat. The holes, chips, nicks, dings, dents, and cracks have been tedious to fix but doable the blisters as I have called them now that sucks. They are mostly on the bottom of the hull but there are a few on the sides as well. They are small cracks in the Gel coat most no longer than 1/2 or so with many having a slight half moon shape. If I take an awl/ice pick and lightly poke the Gel coat anywhere on the boat the gel coat is not damaged but if I poke these around these cracks the gel coat chips away and I find that the gel coat has separated from the fiberglass beneath it. So if I paint these areas the crack is only going to reappear and get worse so I have taken a Dremel and dug into the gel coat and the fiberglass just enough to clean away any loose gel coat. Some areas it is just the width of the Dremel bit and the visible length of the crack but other areas it ends up being anywhere from dime size up to half dollar size. Thankfully most of the spots are smaller then a dime but if I were to count them there are 100's of them. After cleaning away the loose Gel I blow them out with compressed air and wipe them down with Acetone. I then fill them in with resin thickened with glass bubbles and fairing compound. After it hardens then I get to sand them all back flush, oh the joys. Its really been fun working under the boat trying to squeeze under the trailer frame and axles. I don't have any good pictures of these cracks or blisters prior to removing the loose gel but here are a few with the fairing compound filling the holes.


Mark72233

Ensign
Joined
Jul 11, 2014
Messages
926
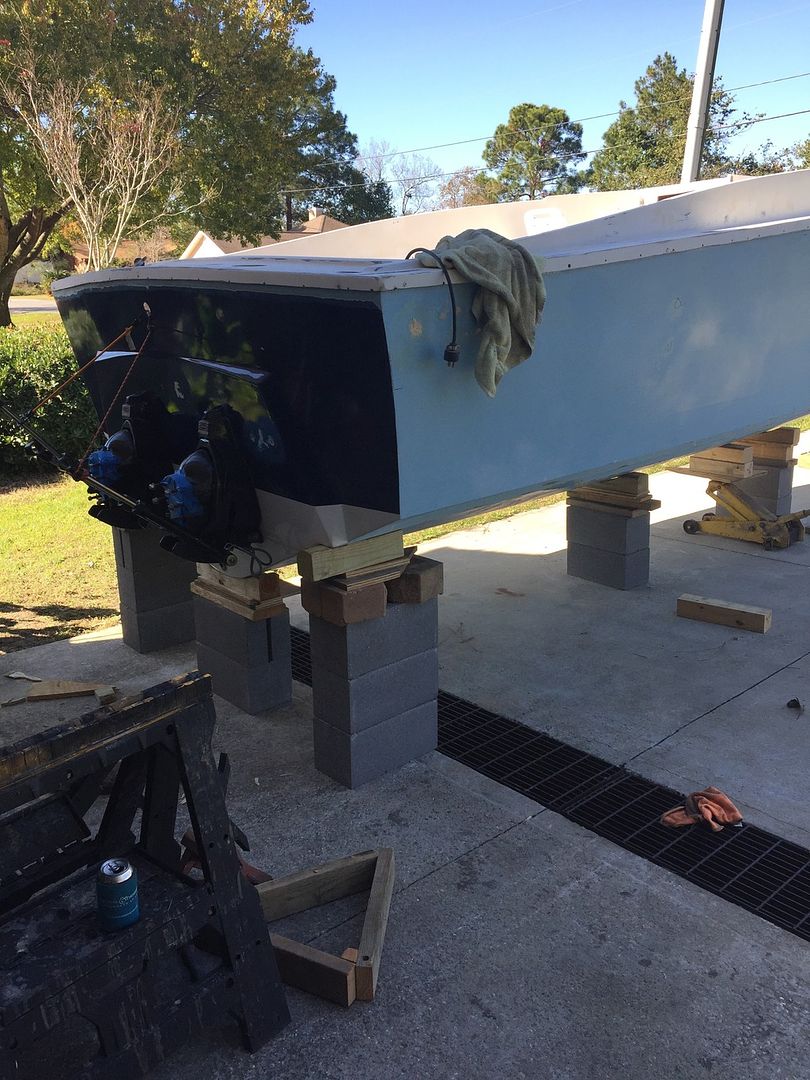
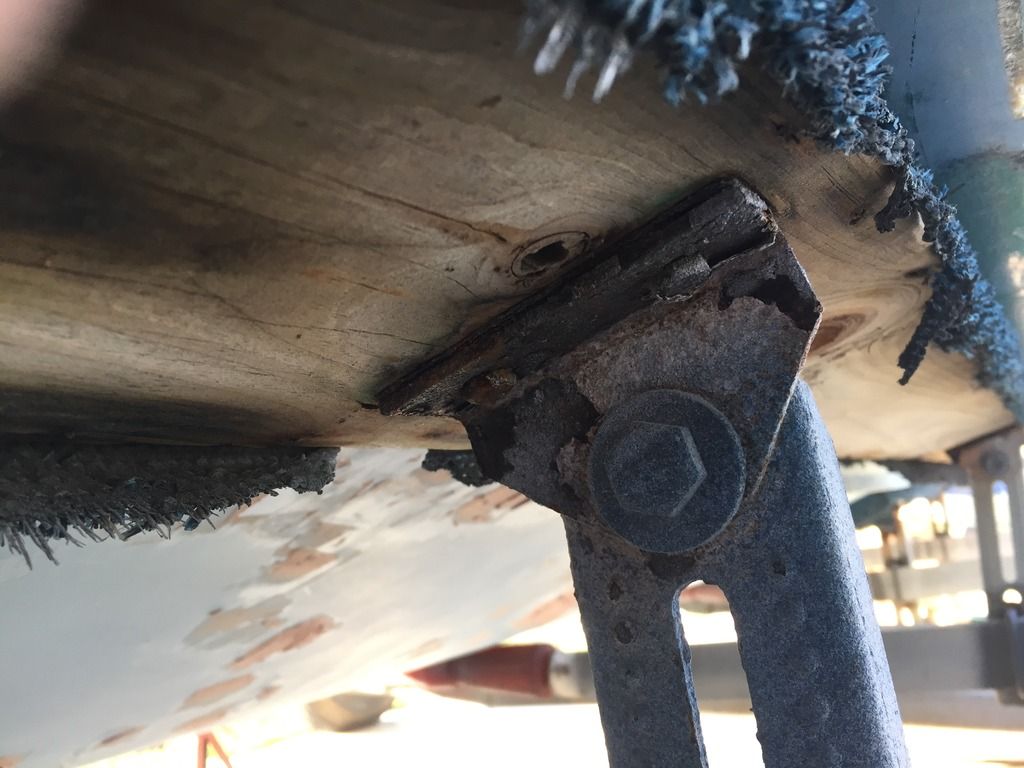
Over the weekend I also managed to get the trailer out from under the boat, that was fun because I have only done it once before about 25 years ago when we bought this trailer new. I decided not to install the engines until I get the trailer fixed because the brackets that are holding up the bunks are rusted and falling apart and dropping twin engines that weigh around 700lbs each onto them just didn't seem like a good idea. I needed to get the trailer out to fix the rollers, bunk brackets and springs anyway and having it out of the way is making it easier to get the hull prepped for painting.


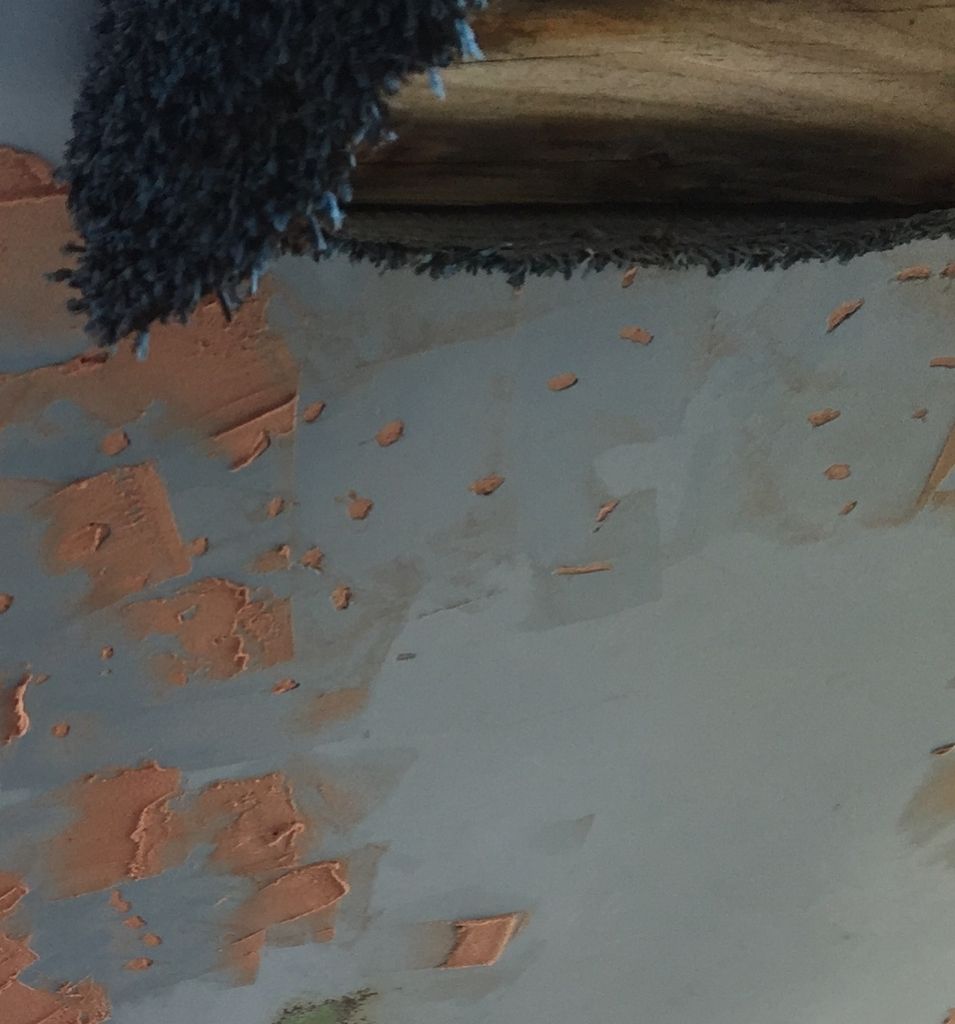
I did manage to find one picture I could crop and show the end result after I Dremeled out the cracked loose gel.


Mark72233

Ensign
Joined
Jul 11, 2014
Messages
926
I also found a picture of one of the brackets that are holding the bunks this is not the worst one but shows you where the rust and corrosion is happening at.
 

archbuilder

Vice Admiral
Joined
Sep 12, 2009
Messages
5,697
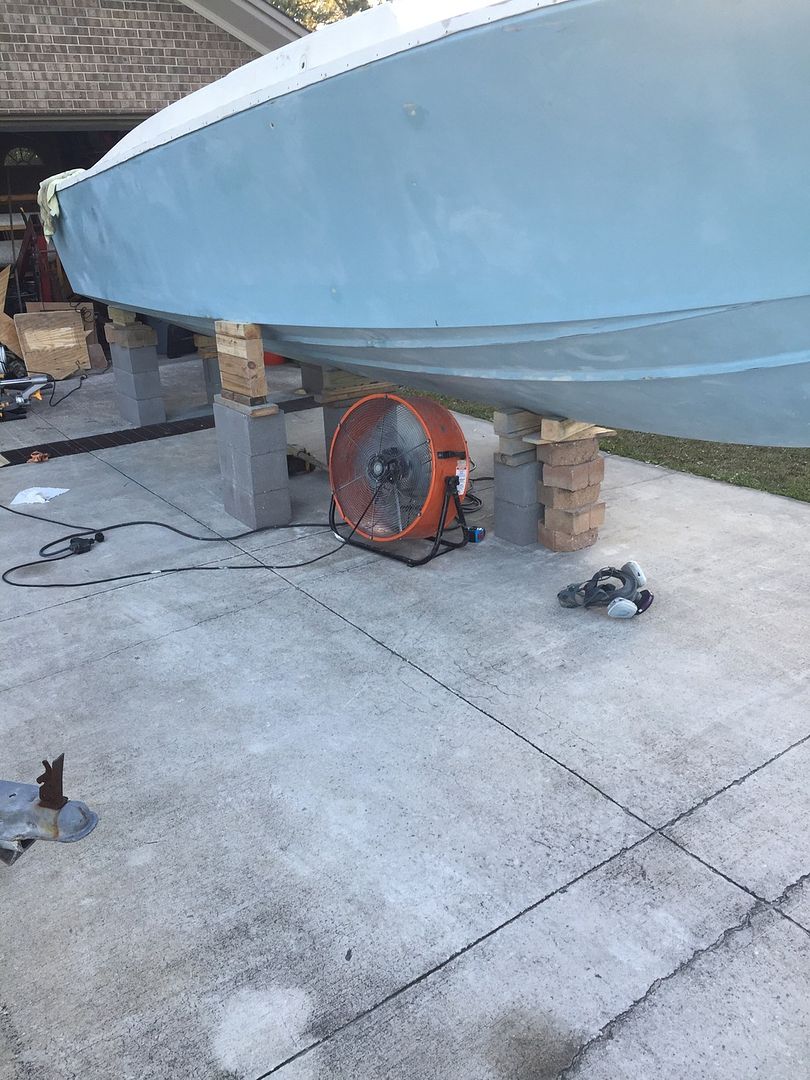
Hey Mark, looks like you continue to move a long. All of that fairing looks like a lot of work! I laughed when I saw the fan in one of your pics, everything here was covered in ice this weekend and you have a fan out, lol.
 

Mark72233

Ensign
Joined
Jul 11, 2014
Messages
926
Thanks Arch the fan actually served 2 purposes. It is hot here still, 75+ during the day with high humidity the main reason was I was laying on my back under the boat Dremeling the fiberglass which kept falling down into my face, the fan would blow the fiberglass dust away from me.
 

sphelps

Supreme Mariner
Joined
Nov 16, 2011
Messages
11,429
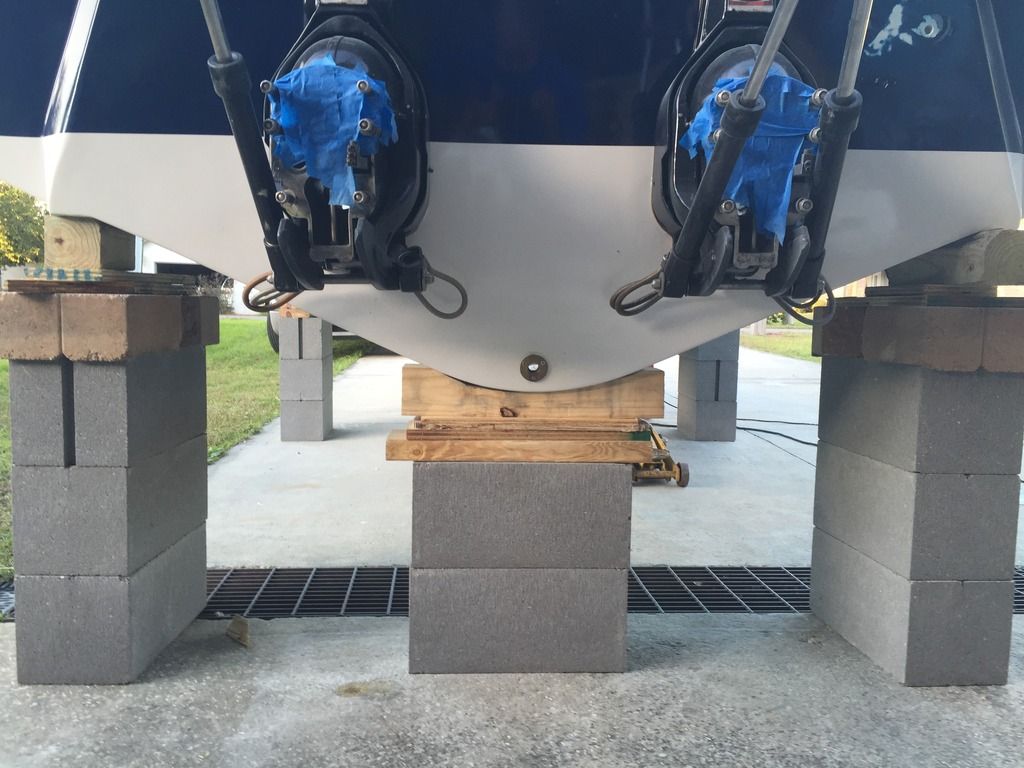
Much better crawling around without the trailer in the way huh ... I would imagine it takes a bit of getting used to it though ... She looks shored up pretty well but being under it would not be the most comforting feeling I would suppose ... I know the feeling of a boat with chicken pox ... Bunch of drimeling filling and sanding for sure .. Keep up the good work !
 

Mark72233

Ensign
Joined
Jul 11, 2014
Messages
926
Sphelps, my better half is not real happy with me getting under it but with the engines out it should weigh around 2500 to 3000lbs spread out over 7 points all holding weight. I wouldn't get near it let alone under it without being as sure as I can be but I have also told my kids to stay away from it just in case.
 

goin70

Cadet
Joined
Oct 6, 2007
Messages
19
Mark, Great to hear you are making progress. I can sympathize with you on the gelcoat blister repairs. I was faced with the same situation because my boat sat in fresh water for an extended period before I purchased. It had the same case of Gelcoat Blistering and I used the Interlux process to repair. I used interlux Water-title Epoxy Filler followed up with Interlux Interprotect 2000 then top coated with the Interlux High Performance Epoxy Paint that had Teflon. It has been about 7 years since tackling the job and I only have a couple of spots that need to be repaired. I also load my boat on a trailer and the paint has been rock solid. You might want to check it out. I will try to send the link in another post to make it easier. Best of luck and I know your fans are looking forward to completion.
 
Top