'83 Lund "Sirius" total gut and rebuild

nurseman

Lieutenant Junior Grade
Joined
Jun 2, 2013
Messages
1,045
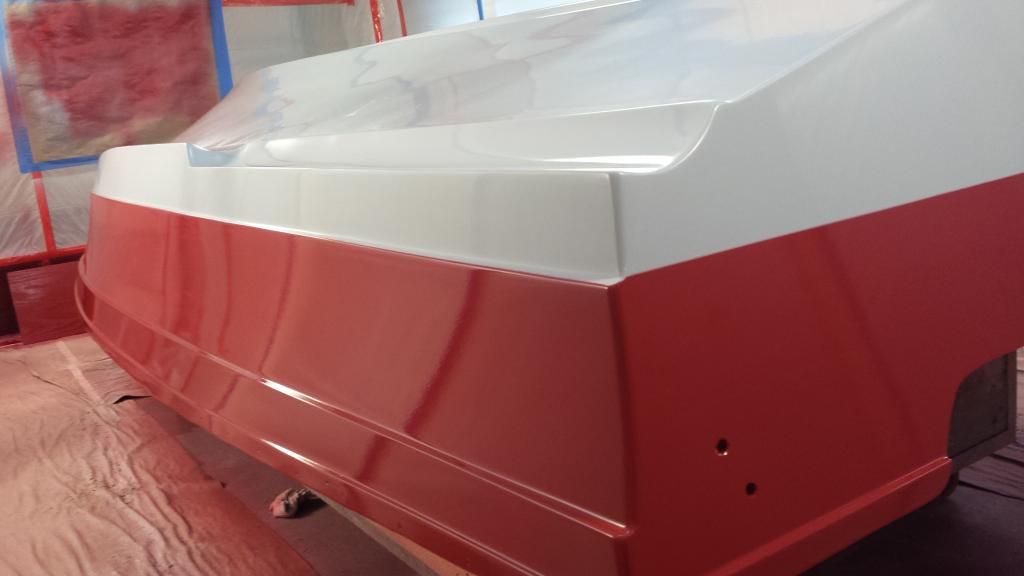
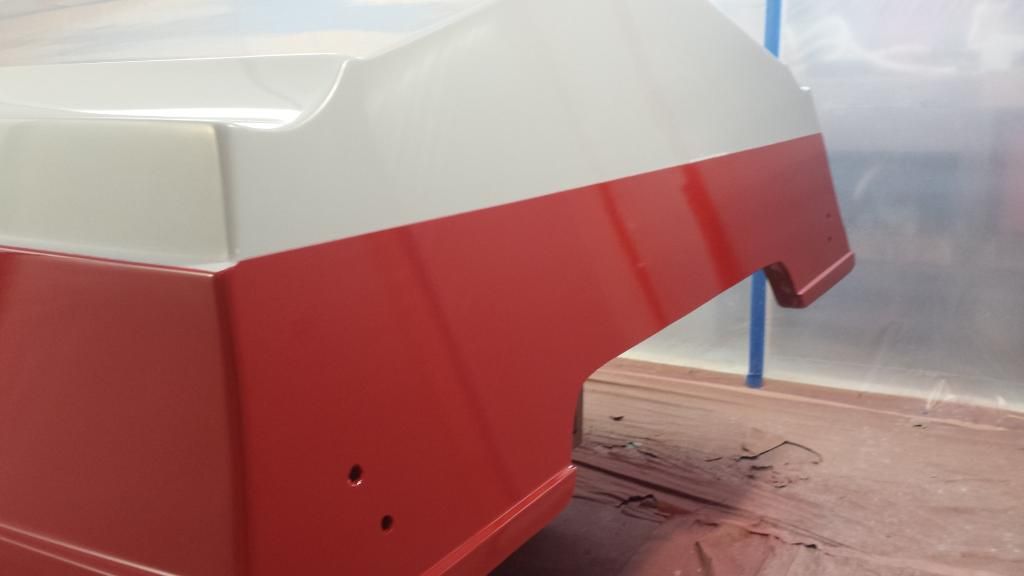
Well, I finally have some progress worth posting about. I have been super busy with work, and not much time or energy left over for boat work. Plus its been super freaking cold, but hopefully that is on the way out...
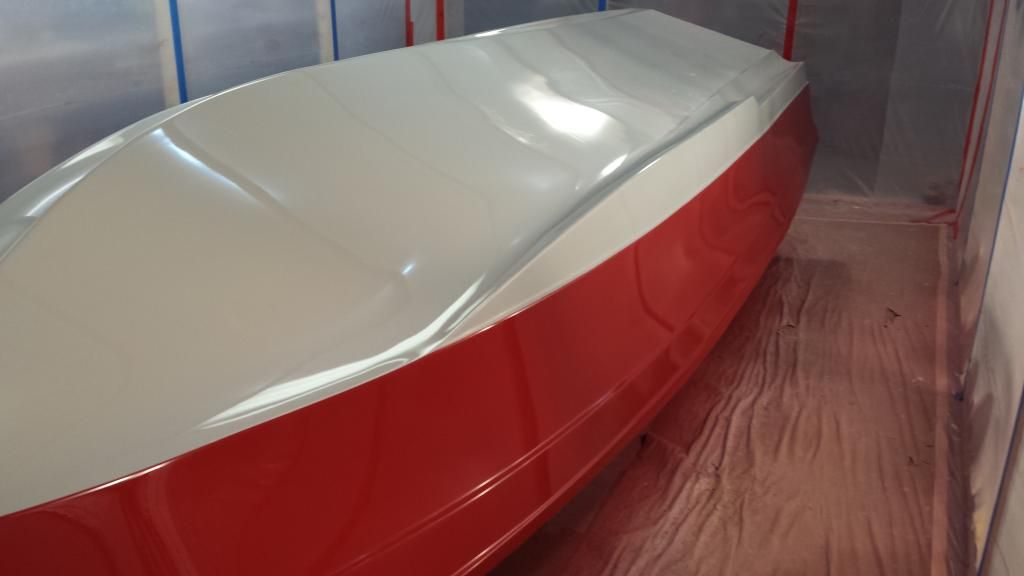
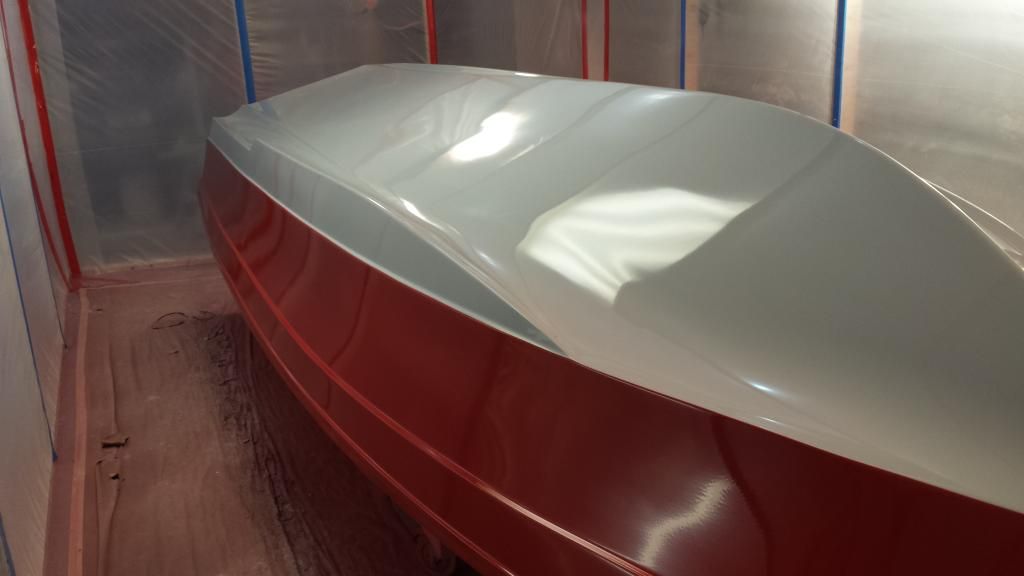
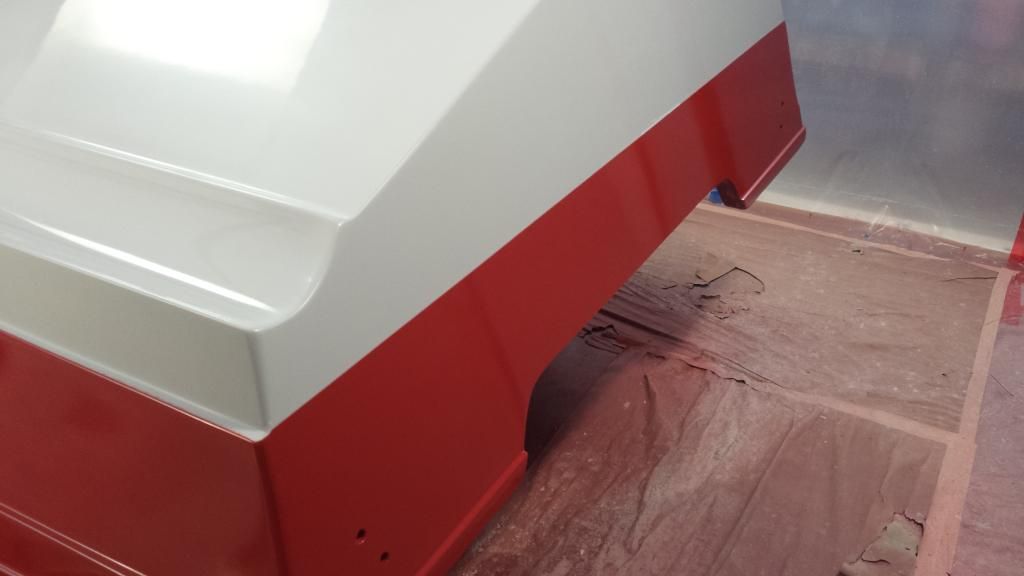
I finally got the second color on the hull, and I think I need to just stop trying to be a painter. I like the color combo, but believe me, it looks better in the pictures.:facepalm:


nurseman

Lieutenant Junior Grade
Joined
Jun 2, 2013
Messages
1,045
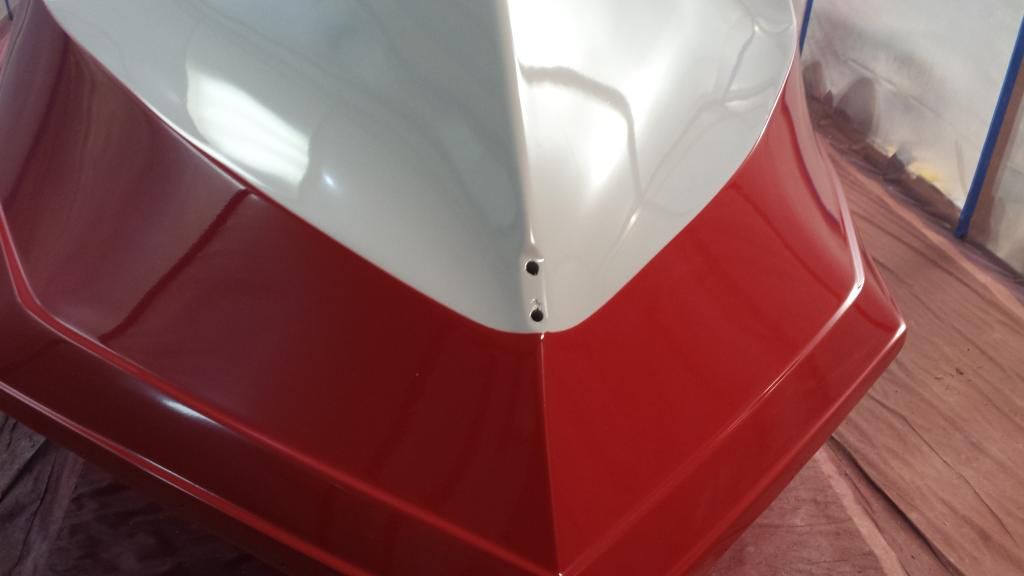
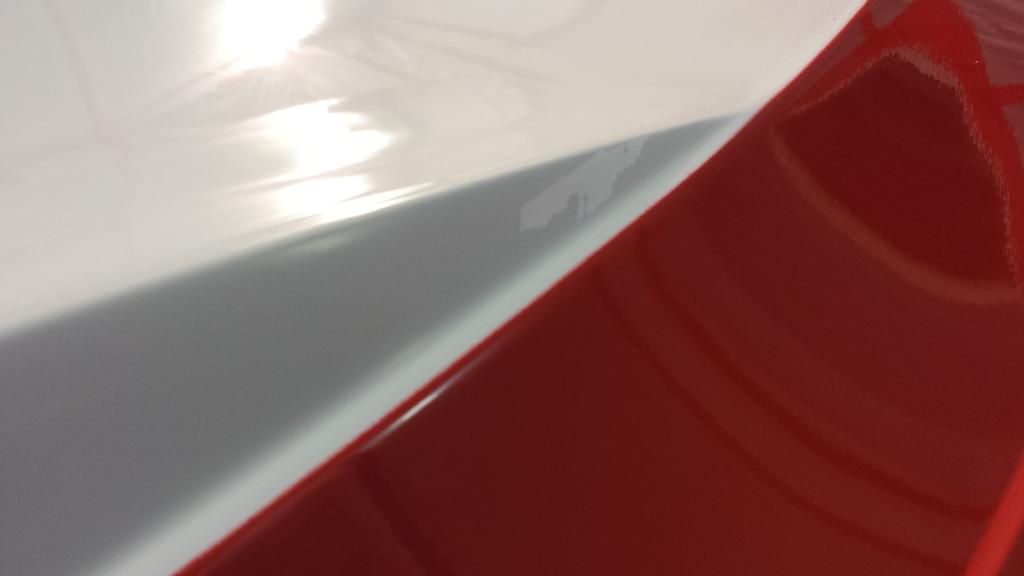
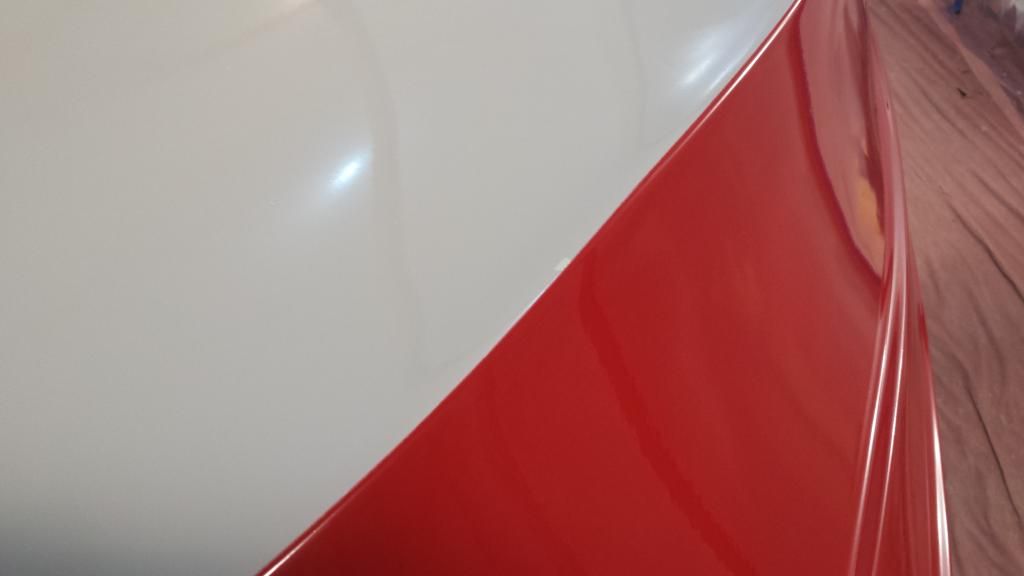
Also am having some adhesion issues with the grey paint:mad:. I was using the "delicate surface" tape, and still had the tape pull off paint. The only thing I can figure is that I used too fine a grit between coats. Any thoughts on that? You can see the strip on the grey just above the red.


This is on the port side towards the front.


This is on the starboard side in the bow area.


I was using 600 between coats. Just not sure why this is happening in just a few random spots. Am I going to be better off stripping it back down? or is there a way to salvage it?
 

Woodonglass

Supreme Mariner
Joined
Dec 29, 2009
Messages
25,924
Uhmm yah That has to be VERY FRUSTRATING!!!!! I never go above 320 between coats. I also use a very thin tape line when taping off. No more than 1/2" usually 1/4". How long was the tape on? I Try to tape and shoot just as soon as possible and then remove the tape immediately. What brand of tape did you use? You MIGHT be able to wetsand and blend but not sure.
 

Tnstratofam

Commander
Joined
Aug 18, 2013
Messages
2,679
It took me a bit to see in the pictures what you were talking about. The red looks really good with the gray. Sucks about the tape lifting the paint in spots. I'm not a painter so I can't say what the best thing to fix the paint is. Since it's fresh could you spot paint those places? Maybe it would blend okay. As far as what to do about the tape perhaps the paint wasn't cured enough?
 

jigngrub

Fleet Admiral
Joined
Mar 19, 2011
Messages
8,155
Your workmanship looks great!

I think your problems would be lesser with a better grade of paint.
 

kcassells

Fleet Admiral
Joined
Oct 16, 2012
Messages
8,596
Uhmm yah That has to be VERY FRUSTRATING!!!!! I never go above 320 between coats. I also use a very thin tape line when taping off. No more than 1/2" usually 1/4". How long was the tape on? I Try to tape and shoot just as soon as possible and then remove the tape immediately. What brand of tape did you use? You MIGHT be able to wetsand and blend but not sure.


NM,
I had to clean off my computer screen to see what you were talking about. Finally saw it what you were talking about. All in all looks Great. Just another hurdle.
When I get to painting my boat you will see you are a Rembrandt!
images
:pride:
 

zool

Captain
Joined
Aug 19, 2012
Messages
3,432
600 is too fine for a good mechanical bond...400 is about tops...also, when you pull the tape, pull it at an angle (30 to 45 deg), down upon itself...that would help eliminate some chipping. The bleed thru on the color separation line can happen if u don't press the tape down firmly enough...a fingernail ran along the edge a few times can help that..

all in all, it looks good, a little buffing will cut the peel down...

unless you plan to run it thru barrett Jackson, with a little touch up, you should be just fine

Maybe a black boot stripe along the color line will hide any prior sins...;)...or just re-tape the red line a fraction above the old line, and another red coat.
 

sphelps

Supreme Mariner
Joined
Nov 16, 2011
Messages
11,432
Love the red /grey combo ! I,m thinking with the cold temps it may be taking just a bit longer to fully cure .. It would have been nice to take it out and let it bake in the sun for a day or two .. I used basically the same paint on the mfg and did not have any issue's when I taped it off for the stripes .. But it was in the 80's and 90's .. We used 2 part epoxy paint on the girls boat which I guess would be a little step up from the enamel and did have a little adhesion problems in a couple spots . It did exactly what yours just did .. Sanded and touched up with little artist brush .. I think it's more about learning about the paints and application methods over time that will make things go more smoothly .
I'm sure even the pro's out there have problems from time to time . Just the nature of the beast ! ;)
It looks fantastic nm !! :clap2:
 

ahmincha

Lieutenant Commander
Joined
Jul 21, 2012
Messages
1,512
All in all looks good but I agree with your thoughts. What if it starts peeling off. I think I would sand it back down. I know that stinks but all the hard work you have done this is just a hiccup in comparison
 

Mikeopsycho

Senior Chief Petty Officer
Joined
Feb 6, 2014
Messages
738
I don't know anything about painting but I feel your pain! You're doing awesome work on your boat and to have problems with your paint job just seems so darn unfair! I know whatever you decide to do to fix it, it will end up looking great. I really like the colour choice.
 

Patfromny

Lieutenant Junior Grade
Joined
Dec 2, 2012
Messages
1,197
Been following your thread for awhile now. Great work, love the effort thus far. You must have been a great contractor with your attention to detail. A thought on the paint. It has been several weeks since the gray went on right? Curing should have happened by now. I think it might be either too fine a grit or something as simple as dust contamination. I would definitely sand the area to make sure the peeling ends there. I am speaking from a house painting prespective but paint prep is paint prep. If it was dust, your feather sanding should keep the area relatively the same size. If it is not scuffed enough you will probably make the problem larger but better now then the first time u load it on the bunks after a day on the lake. Do it now while it is turtled and have piece of mind down the road. It could also be that u missed scuffing those little spots. I agree that you must pull the tape while the paint is still wet and put it on just before painting. Another trick to get the tape edge crisp is to hit the edge with a plastic spoon (lightly) but firm.Hopefully it works out for u Nurseman
 

Patfromny

Lieutenant Junior Grade
Joined
Dec 2, 2012
Messages
1,197
P.s. That paint job looks killer. U are looking at it under fluorescent lights which will show EVERY imperfection. You'll be pleasantly surprised at how much better it looks once u can get it out in the sun (sometime in August if the weather keeps up like this).
 

nurseman

Lieutenant Junior Grade
Joined
Jun 2, 2013
Messages
1,045
Thanks for the comments guys! Still super busy at work. I decided that I just didn't want to trust the rest of the hull to not start letting go in the future, so I'm gonna do it again. :grumpy: I have started some sanding, but don't have much to show for it yet.
On another note, I was messing with my motor to try and take my mind off of my carp paint job, and found that it has really poor compression: 80, 90, 85, and 85. So I may be looking for another motor as well. :mad: The only saving thing is that I didn't have any money in the boat to start, so at least I didn't pay for a non-runner.
 

sphelps

Supreme Mariner
Joined
Nov 16, 2011
Messages
11,432
Sorry about the paint and the motor Nm ... That's a bummer ! Those are pretty even numbers .. Seems strange that they are all that low . Might want to recheck with a different tester ...
 

ahmincha

Lieutenant Commander
Joined
Jul 21, 2012
Messages
1,512
With those numbers being so close it may just need to be run a little and the numbers may come up. Has it sat for some time.
 

nurseman

Lieutenant Junior Grade
Joined
Jun 2, 2013
Messages
1,045
The motor has sat for 4+ years... and the tester is my father in laws, and he has had it for longer than I have been alive I think. Might not hurt to get a new tester and try it again?
 

zool

Captain
Joined
Aug 19, 2012
Messages
3,432
youre within 10%, just a bit low?....maybe give her a shot 1st, you don't have a bad cylinder, just a worn motor...

Maybe try a wet test, see if the numbers improve....just fog the cylinders to wet the rings. Im not a mechanic, so don't listen to me ;)
 

jigngrub

Fleet Admiral
Joined
Mar 19, 2011
Messages
8,155
I decided that I just didn't want to trust the rest of the hull to not start letting go in the future, so I'm gonna do it again. :grumpy: I have started some sanding, but don't have much to show for it yet.

"It's just me and my OCD!"... I don't suffer from OCD, I actually enjoy it.
 

jigngrub

Fleet Admiral
Joined
Mar 19, 2011
Messages
8,155
With those numbers being so close it may just need to be run a little and the numbers may come up. Has it sat for some time.

I agree, a warm compression check is the best and the numbers will usually be higher and better.
 
Top