1988 Imperial V220 low budget

Bt Doctur

Supreme Mariner
Joined
Aug 29, 2004
Messages
19,111
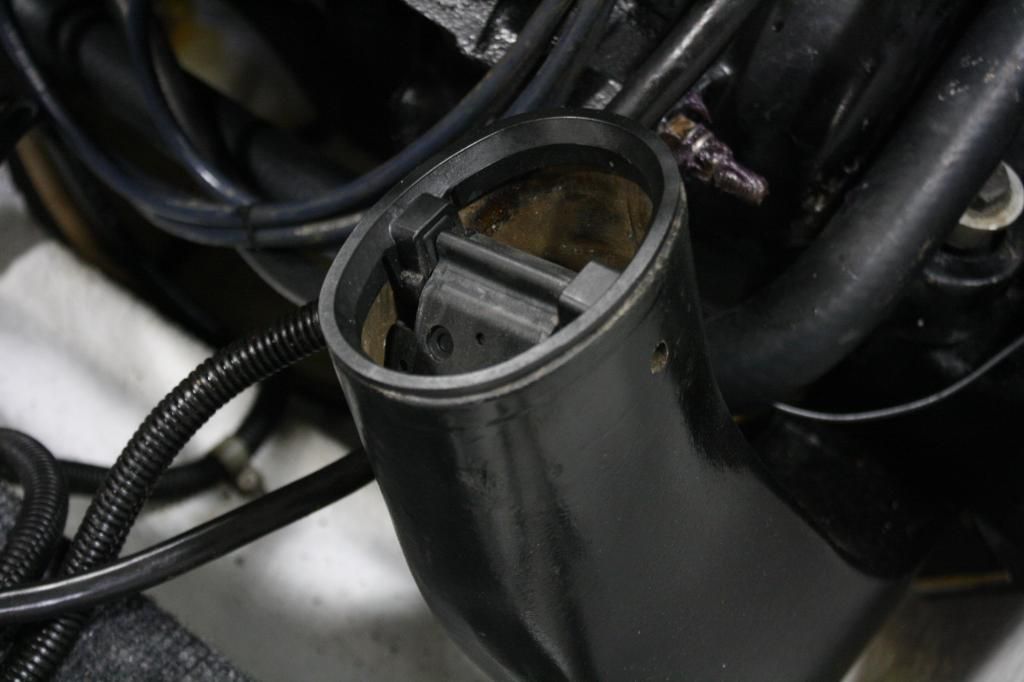
More of a protective guide for the cable . dosent seal anything. goes into the rear of the housing. The piece of wire is the safety wire to hold the allen screw in the shift slide
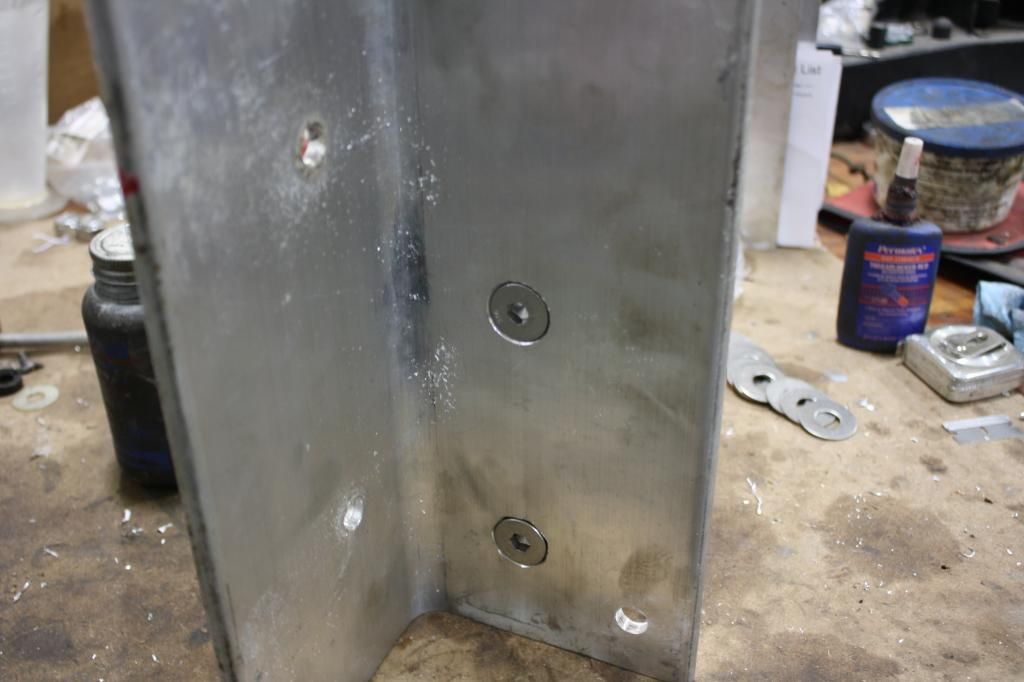
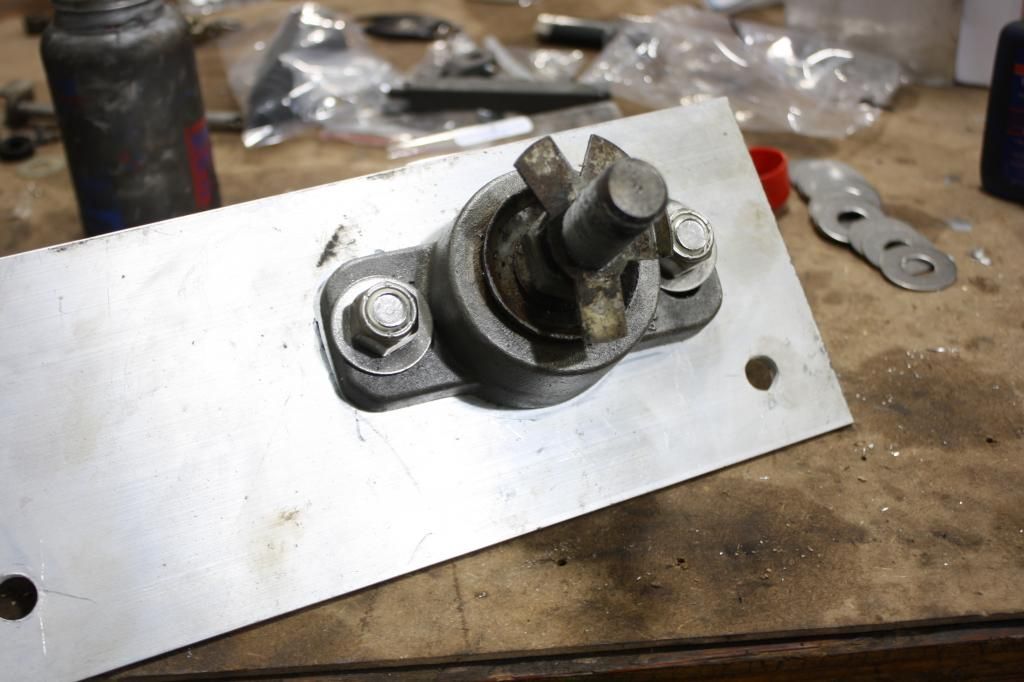
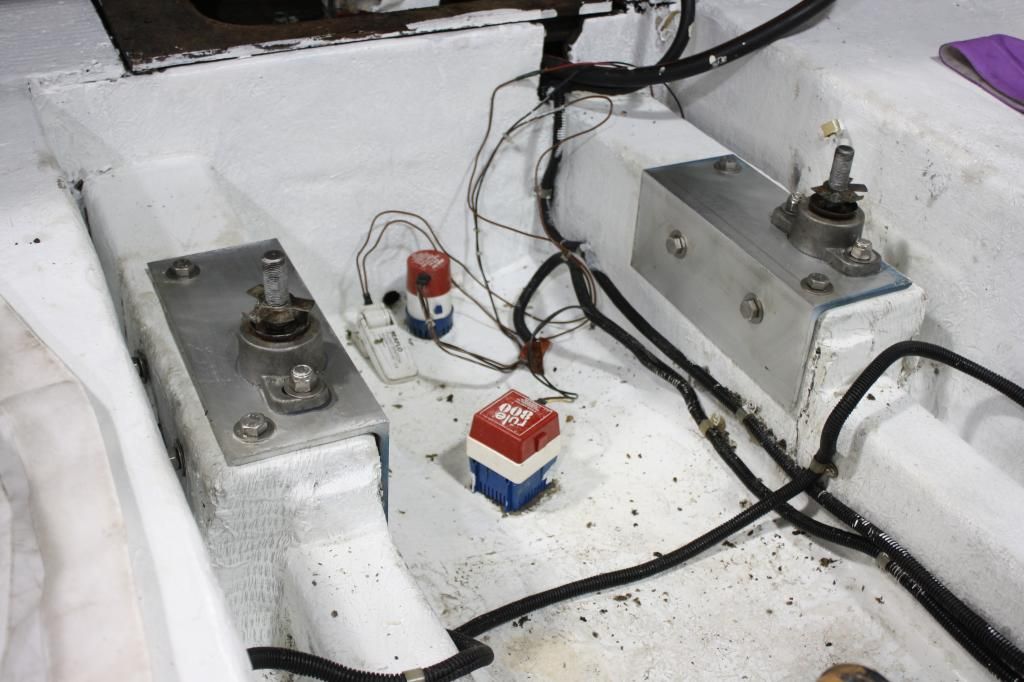
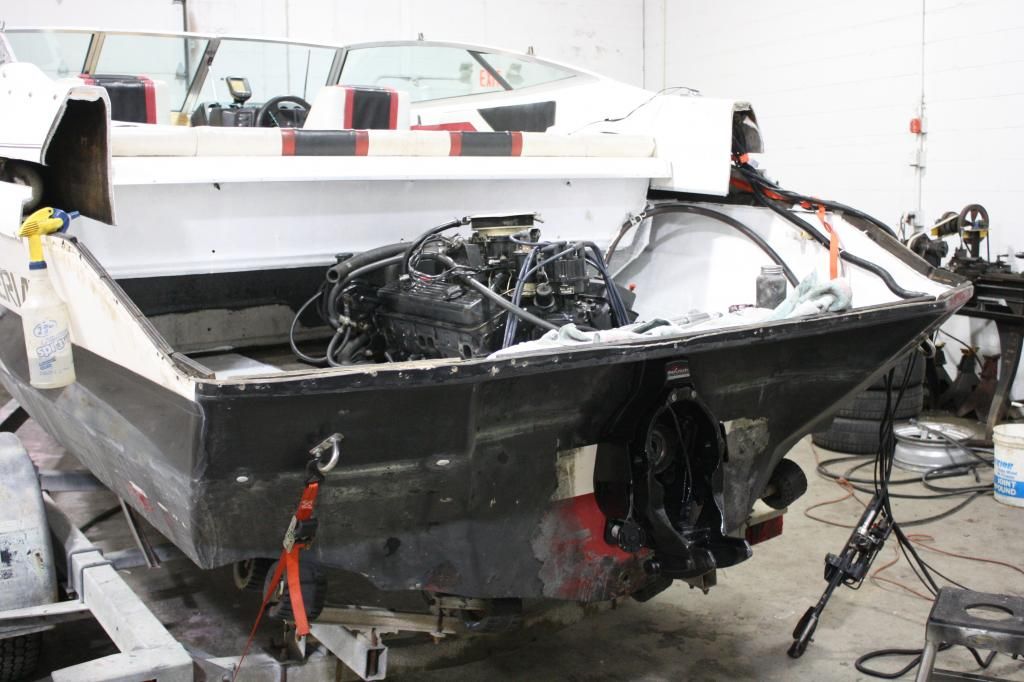
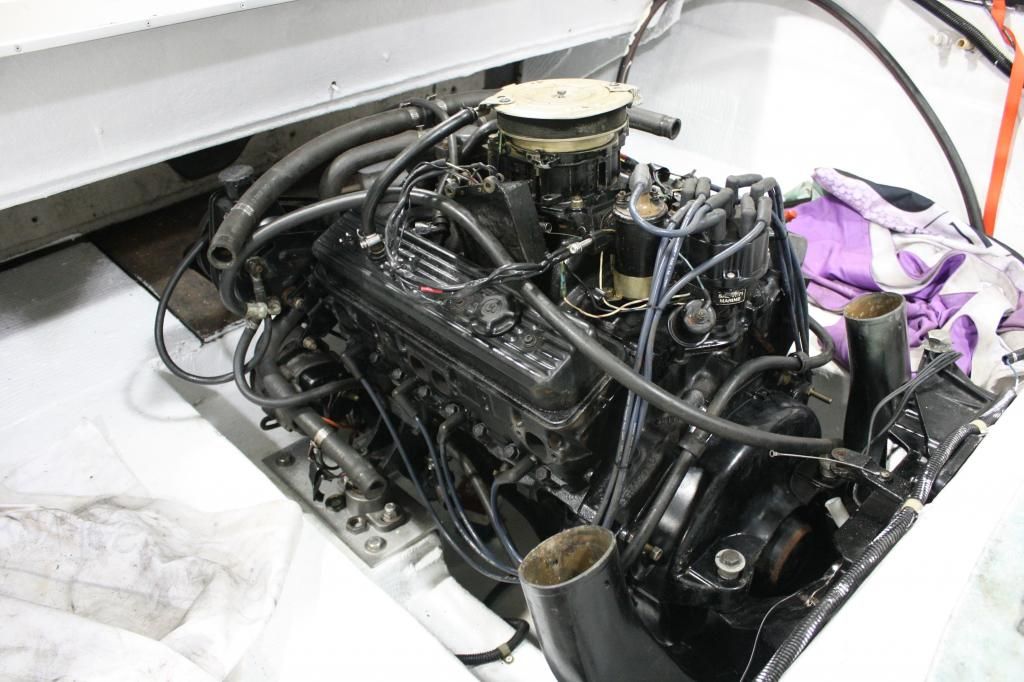
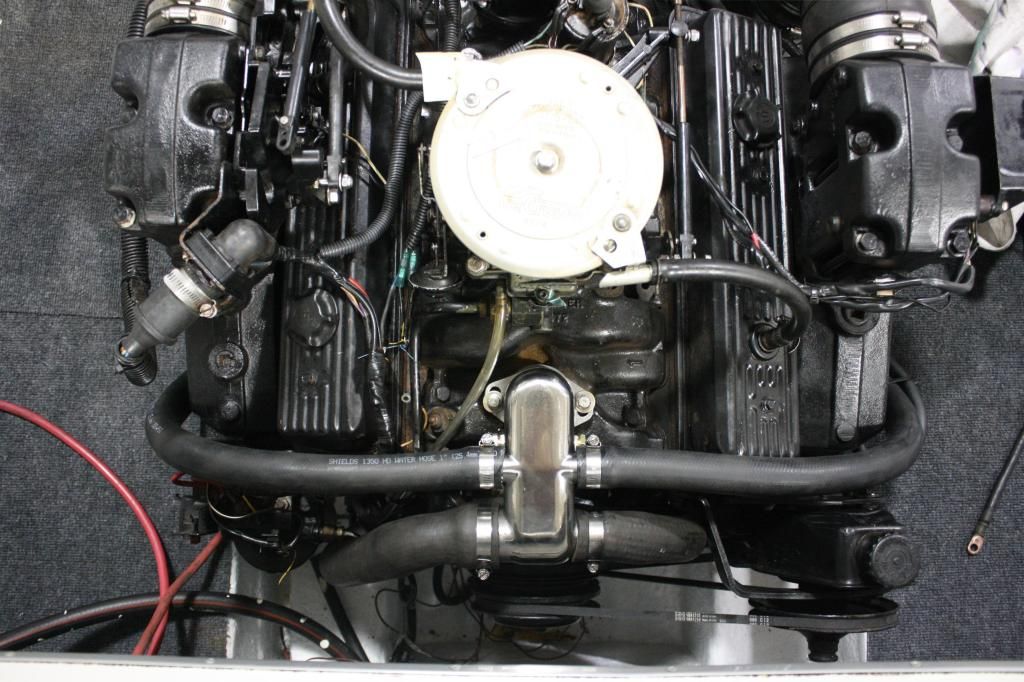
Review post #91. the Aluminum bracket looks nice but can raise the engine up. You may have to remove the front mounts completely and lower the engine to test fit the alignment.
 
Last edited:

JaCrispy

Petty Officer 1st Class
Joined
Jul 8, 2014
Messages
391
Thanks! Yeah, I was trying with and without the aluminum test fitting, etc. It seems to be the gimbal bearing itself. I gave it a few good whacks and the tool went in, not real smooth but alot better.

Well I had to reorder some 5x5" angle as the stbd mount was not in the same location as the port side, (doh!).
 

tpenfield

Moderator
Staff member
Joined
Jul 18, 2011
Messages
17,705
Just to be clear . . . the 'gimbal' of a new gimbal bearing is rarely lined up with the coupler on the engine. That is where the alignment tool comes in handy . . . by inserting it into the bearing as far as you can, then move the other end of the alignment tool up or down so that the business end of the tool mates with the coupler.

From there it is a matter of adjusting the front engine mounts so that the alignment tool sides in effortlessly and evenly.

If in no way, shape, or form you can get the gimbal pivoted so that the alignment tool meets the coupler, then there are probably issues with the transom assembly mounts.
 
Last edited:

JaCrispy

Petty Officer 1st Class
Joined
Jul 8, 2014
Messages
391
Thanks, seems to be going easier since I moved it a bit.

finally got the engine mounts in. I think I had the engine in & out 15 times lol.

IMG_6854.jpg


IMG_6856.jpg


IMG_6857.jpg
 

alldodge

Moderator
Staff member
Joined
Mar 8, 2009
Messages
40,746
Looks real good, since you had the engine out so many times wonder if there could be a pit crew job in your future :D
 

JaCrispy

Petty Officer 1st Class
Joined
Jul 8, 2014
Messages
391
Thanks, pit crew sounds good as long as I can take my sweet time getting up. My back doesn't straighten out too quick anymore. lol

Waiting on parts so I started buffing the gelcoat. When I first got the boat the oxidation was so bad the red was bubblegum pink. I did a quick clean up just to make it a 20'er with the plan of getting the right equipment over the winter. I think I started using 220 grit just to get down to the gelcoat. Glad I did it, alot easier this time around.

Here's what it looked like when I bought it.

2-1.jpg


New oxidation

IMG_6858.jpg


I wetsand with 600 then wipe it down with a wet sponge. When it's wet you can see places you missed, so I go back and spot sand those areas

IMG_6860.jpg


Then wetsand with 1000. I might go to 1500 (if I had some) but I think 1000 is good enough for this ol hag.

IMG_6861.jpg


Sponge down and let dry,

IMG_6862.jpg


then wipe off the dust with a clean towel.

IMG_6863.jpg


I picked up a nice set of buffer pads off Ebay and some 3M Finesse. I heard good things about Finesse so I figured I'd give it a shot.

IMG_6864.jpg


After one application I look over it again for areas I missed and spot sand if needed. This looks good so I'll do another round of compound (along with the rest of the boat) then wax after it's all back together.

IMG_6865.jpg


Starboard side

IMG_6859.jpg
 

Woodonglass

Supreme Mariner
Joined
Dec 29, 2009
Messages
25,924
Uhmm ya shoulda used VASELINE!!!!:facepalm::sleeping: Ok, Ok I'll go sit in the corner now!!!!:D
 

Tnstratofam

Commander
Joined
Aug 18, 2013
Messages
2,679
Looking good on the redo of the hull. Lots of hard work, but the results are worth it.:thumb:
 

JaCrispy

Petty Officer 1st Class
Joined
Jul 8, 2014
Messages
391
Thanks alot!

got some more parts in today and started reassembling things. Got the gimbal ring and steering arm installed (PITA, had to make a wrench for the swivel pin nut) went to clean up the Y pipe and found this:

IMG_6867.jpg


Corroded completely through. Doh! It's been a while since I welded aluminum, just ground all the corrosion out with a carbide deburr bit, cleaned up with acetone and slopped some aluminum back in there.

IMG_6869.jpg


IMG_6871.jpg


IMG_6872.jpg
 

alldodge

Moderator
Staff member
Joined
Mar 8, 2009
Messages
40,746
Ugly but should hold. Next, going to check flatness right, maybe a large flat file?
 

JaCrispy

Petty Officer 1st Class
Joined
Jul 8, 2014
Messages
391
I wasn't trying to be pretty with something down in the deepest depths of the bilge, lol. I did have to grind a little though, didn't realize how tight it was down there.

Reached my goal for the day and got the engine in and aligned. Ordered up some exhaust gaskets, the manifolds look good but the risers have some scaling inside. I found a guy locally selling stainless risers for $70ea. Good deal?

IMG_6873.jpg


IMG_6874.jpg
 

JaCrispy

Petty Officer 1st Class
Joined
Jul 8, 2014
Messages
391
Manifolds and risers turned out to be in real good condition after thorough inspection. Been methodically assembling everything, cleaning, greasing, replacing/shrink tubing wire terminals, cleaning up the wire harness, etc. Got a new stainless steel trim pump mount and new exhaust flappers. Had to file some of the flapper bracket so they moved freely.

IMG_6877.jpg


IMG_6876.jpg
 

jc55

Senior Chief Petty Officer
Joined
Nov 3, 2006
Messages
665
I'm interested in your aluminum repair. Did you use spool gun on a mig, or a tig? What kind of rod or aluminum did you use?
 

JaCrispy

Petty Officer 1st Class
Joined
Jul 8, 2014
Messages
391
I use a Lincoln SP175 mig with the aluminum kit. It only gets me by in a pinch. If I did alot of aluminum I would buy a tig or spool gun capable welder. Running the aluminum wire through the lead is like trying to push a chain from the last link. I have to keep the lead as straight as possible coming out of the machine and just enough pressure on the feed wheels so it doesn't bunch up. For gas I just run straight argon for everything instead of having 2 tanks. Also for aluminum I run a slightly larger tip than the wire.

t's just for light repairs really. I didn't want a little 110 Home Depot buzz box and didn't have the funds for a big machine.
 

jc55

Senior Chief Petty Officer
Joined
Nov 3, 2006
Messages
665
Interesting, Ja. I have a Lincoln 215 MIG...I've never thought about going straight wire without the spool gun, although I am quite familiar with the 'bird caging' (pushing a chain using the last link):) lol. I have a Miller Synchrowave200 Tig also, but haven't learned how it use it sufficiently. Seeing that makes me think that I can save my old jack plate.

Nice work on saving that piece. :thumb:
 

JaCrispy

Petty Officer 1st Class
Joined
Jul 8, 2014
Messages
391
Thanks! You're lucky to have a TIG, you can do so much with it. I was real good at brazing years ago so tig should just come natural but I never got a chance to use one. The aluminum kit from Lincoln would work alot better if you could have a dedicated 3-4' lead. The long travel is really what can create problems. I even put the curved end of the lead in a vice to straighten it a little bit.

Finished my thermostat housing conversion and laid down the rest of the carpet. Cleans up the engine compartment a little.

IMG_6879.jpg


IMG_6880.jpg
 

JaCrispy

Petty Officer 1st Class
Joined
Jul 8, 2014
Messages
391
Buttoned up the last bit of engine wiring and fired her up! No issues off the bat but it's like 5 degrees here so I didn't let it run too long. Don't seem to have any leaks but I managed to dirty up my clean bilge with silt draining the block again, lol.

One thing I'm having trouble figuring out is the trim limit. Everything seems to be hooked up properly. It seems like the limit is bypassed somehow. I can raise it all the way with the trim switch. The trailer switch itself doesn't work but is connected and I can raise the drive crossing the red and purple wires at the switch. Going by the diagram in the link, shouldn't the up/blue wire run through the switch? The 2 blue wires are joined together so I can't figure out how it cuts power to the up/blue wire.

Diagram: http://ww2.justanswer.com/uploads/ja...u_t-n-t_86.jpg
 
Last edited:

alldodge

Moderator
Staff member
Joined
Mar 8, 2009
Messages
40,746
Buttoned up the last bit of engine wiring and fired her up! No issues off the bat but it's like 5 degrees here so I didn't let it run too long. Don't seem to have any leaks but I managed to dirty up my clean bilge with silt draining the block again, lol.

One thing I'm having trouble figuring out is the trim limit. Everything seems to be hooked up properly. It seems like the limit is bypassed somehow. I can raise it all the way with the trim switch. The trailer switch itself doesn't work but is connected and I can raise the drive crossing the red and purple wires at the switch. Going by the diagram in the link, shouldn't the up/blue wire run through the switch? The 2 blue wires are joined together so I can't figure out how it cuts power to the up/blue wire.

Diagram: http://ww2.justanswer.com/uploads/jacksparrow1956/2012-04-26_163829_mercru_t-n-t_86.jpg


Sound like you have some wires crossed up. The Red/Pur should go to one side of the trailer switch, to the UP and Down limit switches.
The DOWN switch should have the Grn/Wht wire on the other side
The UP switch should have the Pur/Wht wire on the other side
The TRAILER switch should have the Blu/Wht wire on the other side


2012-04-26_163829_mercru_t-n-t_86.jpg
 

Attachments

  • Trim Limit switch wiring.png
    Trim Limit switch wiring.png
    145.4 KB · Views: 0

JaCrispy

Petty Officer 1st Class
Joined
Jul 8, 2014
Messages
391
on my 35 min drive home I thought about the blue and purple wires crossed, makes sense. Also, is there a replacement harness for the trim pump? The 3 wire plug and fuse holder are shot.
 
Top