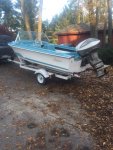
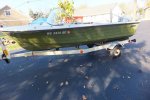
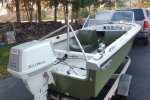
1972 Steury Runabout project

Drb007

Petty Officer 1st Class
Joined
Jun 17, 2012
Messages
240
Exciting day! Recently my brother has been working on a classic Glastron (my old one actually!) and it got me re-interested in the thought of an old boat. During the process of looking around, I got to thinking that a boat project might be a blast for my 14yo daughter, Alaina. Alaina has been involved in other projects of mine, including a 1973 VW Westfalia that we started when she was 6. She is a hard worker and seems to enjoy her time with me in the shop. As my oldest daughter just graduated high school and is off to college in a couple of months, I realize that time with either of them is slipping by faster and faster. My wife is an incredible lady, and though I know she wasn't too excited about me bringing home more "junk" to someday fix up, she was gracious enough to see the true value in a project with my daughter, time spent together during some very important years. Plus, she will have something that would be hers when it was done.
So, after searching for some time, I found a 1972 Steury 15ft runabout with a 60hp Evinrude about 1 hour from home. The seller was the grand daughter of the original owner, and it had always been in the family. Unfortunately it sat outside uncovered for the last three years. In fact, the seller had just moved it to "empty it out" of about 6 inches of rain water. The seats are shot. But, surprisingly, there is much good on this boat. The gauges are all there, speedo, tach, fuel...and not clouded over. This is the standard model, so no carpet, side pockets, arm rests, glove box, etc, but we will likely add those things. All of the trim is there, minus the right rear. I'll take a picture, but the grandfather had made his own trim piece and engraved his name on it. The motor spins, but was full of mice nests and bees. The transom has a crack on the top edge, so we are figuring on a transom repair and new floor and stringers. The Tee-Nee trailer is in decent shape, and it has brand new tires.
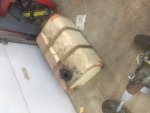
It has a big gas tank up front with a filler on top of the boat. I have to wonder if this was added, as I have the original Steury brochure that came with the boat and the tank is in the rear. Is there a preference on where the tank should be?
I am finishing up a project in my shop right now, and hope to have it done in a few months. Once it's out of the way, in comes Alaina's boat. We will post lots of pictures as we go, and Alaina will check in from time to time as well. Here are the pictures to start us off. Please take a look, as boats are new to me and I am grateful for your educated guidance!
Oh, and Alaina bought this boat with her own money she makes selling pens and other items she turns on my 90 year old Oliver lathe in the shop!
They were asking $250, she got it for $200.
 
Last edited:

Drb007

Petty Officer 1st Class
Joined
Jun 17, 2012
Messages
240
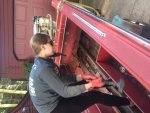
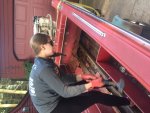
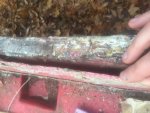
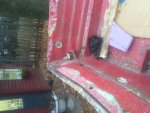
We finally got started on the work for this boat. Last night we ripped out part of the floor (need to clean up the edges) and started stripping accessories. Got the motor off and onto its stand and tucked away until winter time.
I do have a lot of questions I am hoping you all can help us with.
We went and talked to a local restoration guy for advice and that helped, but he did have some opinions I was surprised and an unsure of.
I had planned on using Seacast, and he jumped up and down and insisted that we not. He hates the stuff. Now, we only have one stringer to replace (it only has one). But I thought it would be nice to have something for the transom and stringer that we would never have to redo again. I am fine using wood, but wanted your opinions.
We planned to finish the interior surfaces and floor with the top deck body color, and then have Sea Grass custom fit for the floor to attach with snaps. He feels there is no way we can finish the floor nicely enough to do that. He also feels we have to gel coat the floor to seal it and that paint will fail.

The biggest thing I need right now is guidance on the order of work. I have read that you do the floor, get that glassed in, and then take the deck off the boat to do the transom. The guy we talked to yesterday said to just pop the top off now and we don't need to worry about the hull bowing with the floor work since the boat is small. That would sure make it easier.
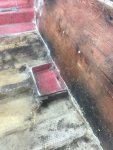
We opened up the floor so we could see what we were dealing with. With only one stringer, this should be pretty straight forward. The floor is less than 4 feet wide, but is over 9 feet long. If I need a seam, where is the best place to put it?
Up in the bow the floor is raised up about 8 inches. I have to see how far the stringer goes, but if it stops short of there should I leave that area alone?
Any advice based on the pictures would be great.
Thank you all.
Dave image1-2.jpeg image1-1.jpeg image2-2.jpeg image4-2.jpeg image4-2.jpeg image4-1.jpeg
 

Woodonglass

Supreme Mariner
Joined
Dec 29, 2009
Messages
25,924
Welcome to iBoats!!! I love the old runabout boats!! You've got a GREAT 1st Mate!!!

Do you have the windshield for her? I agree with the "Restoration Guy", if you do the wood transom and stringers correctly, and then maintain the boat properly, your daughters kids will be able to enjoy the boat with no issues. I would "De-Capitate" the boat first thing. Remove the rubber insert and drill out the rivets and get the cap off. Take plenty of beam measurements first so you'll know what they are for the go-back. she shouldn't move much being a 14 ft'r. Then get everything cut out, deck stringers, transom and get it ground down to a bare hull, Then you'll have a blank slate which makes it easy to start back with a new build. Keep posting pics and ?? and we'll be here to help!!!


Drb007

Petty Officer 1st Class
Joined
Jun 17, 2012
Messages
240
Yes, we have the windshield. It is acrylic, so she will have to do some work polishing it. I will research more what products are best for that.
Actually the boat is only missing one piece of trim, at the right rear. I am fine using the wood. The stringer is in good shape so it will make a good template. The transom is actually pretty solid too, so I should have something to work from there.

Should I do the floor and transom while it's on the trailer or get it down onto a cradle?
 

Woodonglass

Supreme Mariner
Joined
Dec 29, 2009
Messages
25,924
If the trailer is a Bunk Style trailer and the bunks extend forward quite a bit you could prolly do it on the trailer and just add a bit more support where needed. If the stringer and transom are NOT showing any rot then there's no need to replace them You may be able to re-coat with resin and glass and move forward. Post up some close up pics and we can post some opinions. Was this a "Barn Find"?? My boat was, and shes 60 years old with the original transom and still going strong.;) I posted this article on how to re-furbish an acrylic windshield here on the forum a few years back, it might be of interest...http://forums.iboats.com/forum/boat...repair/516095-windshield-polishing-re-visited
 
Last edited:

Drb007

Petty Officer 1st Class
Joined
Jun 17, 2012
Messages
240
It wasn't a barn find, but it was on a farm. Original family different generations of ownership. It had a couple of feet of rainwater in it before we bought it. The way it keeps draining water I would have thought it was full of foam, but none found so far!
While the transom seems "solid", I see cracks that I shouldn't. We are doing this project so it is done right, so it is all getting fresh material.
Thanks for the link for polishing the windshield. That will keep her busy!
 

sphelps

Supreme Mariner
Joined
Nov 16, 2011
Messages
11,432
Love the old runabouts also ! I wish my daughter was interested in stuff like this .. Very cool :cool:
Don't forget your PPE ! A respirator is a must once the grinding starts ! :painkiller:
Re-welcome aboard !
 

Drb007

Petty Officer 1st Class
Joined
Jun 17, 2012
Messages
240
Yes, we both have respirators for the grinding work. Itchy work this is...
 

Drb007

Petty Officer 1st Class
Joined
Jun 17, 2012
Messages
240
While never getting as much done as quickly as we hope, we are making progress. We have the top off of the hull, and it went pretty well. We will work on getting the rest of the floor our and the grinding done on the floor, stringer and transom, then start the rebuild. If anything catches your wise eyes, please shout at us before we do something wrong...
 

Drb007

Petty Officer 1st Class
Joined
Jun 17, 2012
Messages
240
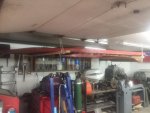
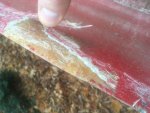
Finally got back to actually working on the boat. The deck is now hung from the ceiling out of the way until the hull is completed. Got the old gas tank out, and some of the fiberglass used to join the deck and hull. We plan to do some more cutting and grinding tomorrow. How far down to we have to grind? When I was using the scraper to remove the fiberglass on the edge of the hull I got a little deep a couple of times. I don't have to take all of that (red) off do I?

I plan to cut the fiberglass away from the inside of the transom and expose the entire wood transom, and try to remove it as one piece to use a template, right? image1-10.jpeg image6-10.jpeg image9-5.jpeg image10-2.jpeg image13.jpeg image14.jpeg image15.jpeg
 

Drb007

Petty Officer 1st Class
Joined
Jun 17, 2012
Messages
240
More progress today as we got the rest of the floor cut out.
Questions based on today's work:

The plywood floor appears to extend to the very tip of the bow. It goes under the small raised area up front. I cut it off even with that transition for now. The stringer is VERY solid, and I tapped a sharp point in numerous places to find solid wood. I cross drilled three areas and found dry solid wood.
I am tempted to leave the stringer in place and reglass over it, replace the floor up to the bow raised area, and not open up the raised area up front. The floor is only 4 ft wide at its widest, and it sits on the stringer and then the raised areas on the hull just lateral to the stringer. I can't see how that wouldn't be strong enough.

Does that sound like an ok plan?

I took out the "thing" in the bottom of the hull (depth gauge or fish finder?) and now need to know how to repair that hole. I will read about that.

I took the inner glass off of the transom. What is the best way to get the transom out without destroying anything so I can use it as a template?

As I prepare to start grinding, how much do I need to take off inside of the hull? Is all of the red layer gelcoat? Do I grind ALL of that off?

Thanks for the help guys!


sphelps

Supreme Mariner
Joined
Nov 16, 2011
Messages
11,432
You need to grind the red gell off everywhere that you will be glassing ... Just take it down to fresh clean glass and stop ..If the wood deck and stringers are not rotten up front you can sister in the stringers if you want too .. The transom may or may not come out in one piece .. I wouldn't worry too much about saving it for a template .... You can make a template very easily with some cardboard ....
 

Drb007

Petty Officer 1st Class
Joined
Jun 17, 2012
Messages
240
Question about the bilge:
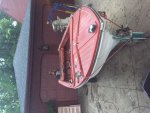
The boat did not have a bilge pump, and I'd like to add one. The bilge itself is tiny...9 inches wide, 6 inches bow to stern, and just 4 inches deep. The 6 inches goes from the end of the single stringer to the transom. Can I take some liberty during the rebuild to expand the bilge without huge structural concern? The way the bilge was built is pretty suspect...the heavy woven glass that tied the transom to the bottom of the hull was left sticking up, certainly trapping water, keeping it from ever reaching the bilge. This boat did not have ANY foam, and it is pretty shallow from the floor to the hull. I think I'd like the bilge to extend at LEAST 6 inches more to the left AND to the right to catch water coming from the two centermost hull channels. My concern is, will I have enough depth at only 4 inches to get a pump in there and really have it work?
 

TruckDrivingFool

Lieutenant Commander
Joined
Jul 30, 2007
Messages
1,818
No expert but right off I would say don't move a stringers location, add limber holes if you need to to aid draining water to the rear.

Got any pics to well, paint a better picture of what you're working with?
 

kcassells

Fleet Admiral
Joined
Oct 16, 2012
Messages
8,596
Nice work! Looking forward to following the adventure! Boats never seem to get done fast enough.;)
 

TruckDrivingFool

Lieutenant Commander
Joined
Jul 30, 2007
Messages
1,818
OK still no expert so anyone feel free to straighten out my knitpicking of terminology

Bilge - noun 1. the area on the outer surface of a ship's hull where the bottom curves to meet the vertical sides.

For all practical purposes on most of our boats anything under the deck is bilge, and what you have there is a bilge well.

Also what you have there is a keel board though functioning somewhat like a stringer but not really.

My non-expert ?2 - Yes you could lengthen your bilge well as long you tie it to the transom with a glassed cross tie and runners like they have done. You could go wider too but I don't know as I would go much wider.

That said IMHO if it's large enough to mount a bilge pump (I think it is) it is adequate to serve the purpose of giving a low spot for water taken to the deck to collect and get pumped out or flowed out an open bilge plug. I think your efforts would pay bigger dividends to put effort into limber holes and/or glassing in channeling from the sides of the keel board to the edges of the well to allow a better flow of any water in the bilge to the well. They did do a carp job of that from the factory on that boat.
 
Last edited:
jbcurt00

Moderator
Staff member
Joined
Oct 25, 2011
Messages
24,863
Yes TDF has it pretty well covered.

The well by Stuery is really to collect any water that gets onto the deck (floor) from skiers, swimmers or rain, so that collects in the well to be drained oit when you pull the plug. Not really a bilge, which is typically below the deck, and IMO not sized to need a bilge pump, but if it gives you more confidence to add a pump, add a pump.

Make it bigger if you wish, but much wider and you wont be able to put the battery setup on 1 side under the splashwell and the portable gas tank under the other side.

Extend it any further forward and it may stick out past the front edge of the splashwell.

Add a limber hole on either side of the front edge of the bilge well into the compartments on either side if the keel stringer. Size them to fit a livewell or typical drain plug.

Put the transom drain and the bilge well plugs in before you launch every time and pull all 3 after every outing, no matter if you add a pump or not.
 

Drb007

Petty Officer 1st Class
Joined
Jun 17, 2012
Messages
240
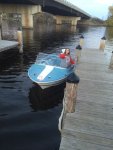
So we may have hit a bit of a hitch in the progress on the Steury. I have posted in other threads on this site about two more boats I just bought. First, I got a 1966 Larson All American. Originally I got it for the motor, a 75 hp Evinrude Starflite. However, it is in such good original condition, and we got it in the water and it goes just fine. It runs like a new boat! We got it to use as a practice boat for Alaina to learn on. Just this week I got a 1970 Sea King in extremely good all original condition. I paid $300 for the Larson and $400 for the Sea King.


With the Sea King sitting in the shop, it is REALLY hard to look at the Steury as a good project. It just doesn't have the style and class that the Sea King does. Even the Larson has some vintage character that the Steury doesn't. Past the styling, from just an economical standpoint, I think it may make more sense to have Alaina keep the Larson as her boat. It has a soft spot in the floor, so we can replace that as our project. We already know it runs and floats and goes great, so we are way ahead. It has fiberglass stringers, so no worries there. The transom is rock solid.

I planned to offer the Sea King as an option for her too, but the more I look at it, I think I am keeping it. I really love the look of it and it is soooo clean. I will likely keep it long term.

So, long story short, I think the Steury may not make it. I asked Alaina which boat she wanted to do, and she couldn't decide. She really really likes the Larson, but said she feels connected to the Steury as it was her first boat. My dad helped...he asked if her second boyfriend (super nice kid) was better than her first boyfriend. She liked the analogy:)

We can do the floor in Larson over the winter and be ready for summer boating.
Mod EDIT
Larson.jpg
Larsonfloats3.jpg
image13-3.jpeg
image11-4.jpeg
seaking2.jpg
 
Last edited by a moderator:
Top