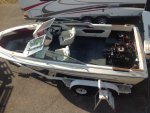
1985 Searay 197 Monaco Complete Restoration

kshallen

Seaman Apprentice
Joined
Jun 19, 2013
Messages
37
I think I'm going to use peanut butter to stick the stringers in place. Raised a bit off the hull of course. But my logic is that if I adhere the stringers with PB, the PB fillets that will have to follow might bond better than to PL or anything else. Just a theory anyway. Hence seeking the expert's advice. Thanks.
 

Rickmerrill

Senior Chief Petty Officer
Joined
Mar 13, 2014
Messages
686
Surprised you didn't get more activity on the question, hopefully you will soon. That "useless" board in the ski locker just provides a raised shelf and keeps stuff put in there from blocking water drainage, a "false floor". As for leaving the bedding compound my opinion is if it is adhered well and PB adheres to it you'll be fine. My guess is it's similar to PL Premium, polyurethane based and polyester should adhere to it if prepped. Like sasakura said it would be a good idea to do a test. For a time PL was all the rage on the forum but because of the long dry times and the problems of trying to make fillets with it (it often forms bubbles when off-gassing) it seems less popular lately. I think the majority now are going with PB for bedding and fillets. The sooner you do the fillets the better chance of getting a chemical bond with the bedding PB. Enjoying your resto, good work and I'd like to follow along.
 

kshallen

Seaman Apprentice
Joined
Jun 19, 2013
Messages
37
Thanks Rick. You have answered the question about the "useless" raised section in the ski locker. I left out the fact that this Sea Ray also came with a removable grid rack make from teak also in the ski locker. I fits forward and not on top of the "useless" floor. Based on your answer, both are history! I have ideas as to how to use that space for my fishing gear and for keeping it dry.

And yep, I agree that the trend is to adhere the stringers with PB - which I also intend to do mainly because of the PL bubbles as it cures and I'll be soooo tired of sanding by then! So, since nobody else chimed in on the "remove all previous PL or not" question, I gonna plow forward with leaving it in place after I do a test. That will save me a couple of days of sanding, which I realize I still have a fair amount to do anyway.

I'll post more pictures later this week as the rear section is now void of all foam and most of the glass "boxes". I have to clean up some fiberglass edges - this week I'm hoping.

Next up? Transome removal. I have developed an approach for re-drilling the gimble mounting bracket holes. That and figuring what to do with the swim platform. I may leave it mounted oat the top, build a brace for underneath it, remove the lower bracket (because they are drilled into the lower transome area that is going to be removed soon), and be able to continue to use it to for climbing in and out of the boat.

That's all I have for now.
Thanks again.
 

Woodonglass

Supreme Mariner
Joined
Dec 29, 2009
Messages
25,924
kshallen, from what I can see in your pics I don't think your strakes are filled with PL. Not quite sure what it is though. When you grind it does it grind off powdery or gummy. PL would be gummy. It appears to be Hard. PL stays rubbery and Pliable for YEARS!!!!. You should grind what ever that stuff is level with the hull and leave it. It's great filler for the Strakes. I guess I'm Old and Dumb cuz I'm not understanding what you're asking about leaving and reusing. Is it where the deck attaches to the sides of the hull??
 

kshallen

Seaman Apprentice
Joined
Jun 19, 2013
Messages
37
Hi WOG. That white stuff is hard. And it is stuck solidly to the hull. When I grind it, the white dust tremendous. Hence, my comment about mny neighbor closing his garage door. That same day, my wife thought the house next door was on fire as she was driving/approaching home. Then as she arrived at our house, she knew I was the culprit!
 

kshallen

Seaman Apprentice
Joined
Jun 19, 2013
Messages
37
WOG. (I hit enter too soon)

And yes, the same white in the strakes is also where the deck once attached to the hull next to the sides of the boat. if you follow it towards the sides of the hull (width size), the fiberglass is uber thick and ends at the white stuff. Is that clear? Should I shoot and post a narrated video?
 

Woodonglass

Supreme Mariner
Joined
Dec 29, 2009
Messages
25,924
Since it grinds off powdery then it's some sort of resin filler, and NOT PL!! It just needs to be some what flush with the sides of the hull and you're good to go. When the deck goes back in you'll have a 1/4" to 1/2" gap that you'll use PB to fill back in and then tab the deck to the sides again so no worries there..
 

kshallen

Seaman Apprentice
Joined
Jun 19, 2013
Messages
37
That advice is what I was hoping for. Will save me a ton of grinding time.
 

Sasakura

Recruit
Joined
Jul 12, 2014
Messages
2
This might look somewhat familiar.

photo 1.jpg
Do you know what the grey coating is SeaRay used on the inside of the hull? What do you plan on using as a replacement? If you had only needed to replace the decking could it have been done without destroying the stringers and other attaching members?
 
Last edited:

Goldie627

Lieutenant Junior Grade
Joined
Oct 28, 2013
Messages
1,010
Big K, anything below the floor level i would replicate as closely as possible. Im not an engineer or a professional boat builder but i do know that many times things are built in a certain way for a reason, meaning, for impact resistance or strength to a certain area or provides some type of function. I will be changing the floor plan / layout of my boat but will keep anything that looks like it might in the slightest way be structural (everything at floor level and below plus the bow boxes seem to be fabricated in such a way to add strength and integrity to the boat). More specifically, the piece your thinking about leaving out, the drainage cover, i would suggest putting it back how you found it or get an opinion(s) from a real boat builder(s).

If i understand you correctly, your intention is to leave some of that old sea ray resin filler, on the sides no problem, it just has to be sanded to where its not in the way of new construction. i dont think you can leave any on the bottom unless you use the exact same size stringer thickness you removed. If you go anything bigger the stringer will not physically fit, this was another reason i grinded mine out all the way.

I'll bet you a Double Hefty Burger, a large bag of greazy fries and a small diet sprite that that white stuff is cabosil! or a 40 year old derivative there of. Its more than likely their version of PB less the chopped strand fibers.

I grinded my entire hull, but then im funny that way... please let me explain... watch the video below :)

Usually folks around these parts only use PL when they cant work faster than PB can dry in one layup. Another consideration is PL is wayyyyy less expensive than PB. To circumvent this problem i built my stringers and bulk heads into a frame. The frame sits off the hull and can be removed then put back exactly in the same spot until i was ready to PB it to the hull a quart at a time. I dropped the PB in on one side of the stringer, pushed it through making sure i had complete fillage and coverage of every millimeter under the stringer, then once i was sure it was packed i made the fillet on the far side (the side where most of the PB was pushed to), then later came back for the opposite side fillet. Sometimes you can do the fillets on both sides of the stringer simultaneously but you want to be very cautious not to disturb the filling already under the stringer by moving the PB while forming the fillets.

Theres nothing to figure out when drilling transom plate / gymbal housing holes, the template is already there for you on the outside, you just drill from the outside in. However, it may be a good idea to put a piece of wax paper up against your keyhole from the inside so that you can get a tracing of where you have to drill at a slant in for your steering. (There will be a certain degree of slant for your boat). Some of the drill holders that u you use to make the perpendicular holes also adjust for slants.

When your sanding please wear protection and get a fan blowing if possible, then sand with your back to the fan or from the side. If you think that the neighbors are planning to put a hit out on you for causing dust storms, have somebody hold a shop vac where you're sanding or tarp off the area. HF has really nice pop up canopies for 69 bucks, they are well made and you cant beat the price. I have two. Its a pain in the but cheeks to keep taking your cover on and off, also, once you finish your deconstruction its not a good idea to let the sun hit your hull continuously, plus if you had the canopy your top would be covered then you'd just have to drape a tarp around the sides for sanding sessions, this would keep the dust down and make your neighbors love you again!!! HA HA

If theres anything i can do to help please let me know, and if you need to, PM me and we can exchange numbers and emails, i may be able to stop you from making some of the mistakes that i made and learned from the hard way. ;)

 
Last edited:

kshallen

Seaman Apprentice
Joined
Jun 19, 2013
Messages
37
This might look somewhat familiar.


Do you know what the grey coating is SeaRay used on the inside of the hull? What do you plan on using as a replacement? If you had only needed to replace the decking could it have been done without destroying the stringers and other attaching members?

Sasa. Yes, that boat does look a bit familiar. And, to answer the question about the floor (decking), I'll bet the stringers will look familiar too. If your floor is bad, the stringers are too. It's a 29 year old boat. And as the experienced members in this forum will tell you, water damage easily spreads to adjacent unprotected wood surfaces and structures. Here's how you can tell. Grab a flashlight and stick your head into the ski locker and look towards the side so that you can see and touch the stingers. You'll either see/touch solid wood or you'll see decay. My boat has essentially not a piece of wool I had to cut with a saw from floor level down. All that wood crumbled in my hand. The floor seemed solid, but it was the foam. Boy that stuff is tough! Frankly, the crumbly wood made my demo easier. Maybe I can help you with some advice or at least lessons I learned if you embark on a rebuild project. I don't have a ton of experience, but once you experience doing demo, you sure learn plenty and take lots of showers! Good luck.
 

kshallen

Seaman Apprentice
Joined
Jun 19, 2013
Messages
37
Big K, anything below the floor level i would replicate as closely as possible. Im not an engineer or a professional boat builder but i do know that many times things are built in a certain way for a reason, meaning, for impact resistance or strength to a certain area or provides some type of function. I will be changing the floor plan / layout of my boat but will keep anything that looks like it might in the slightest way be structural (everything at floor level and below plus the bow boxes seem to be fabricated in such a way to add strength and integrity to the boat). More specifically, the piece your thinking about leaving out, the drainage cover, i would suggest putting it back how you found it or get an opinion(s) from a real boat builder(s).

If i understand you correctly, your intention is to leave some of that old sea ray resin filler, on the sides no problem, it just has to be sanded to where its not in the way of new construction. i dont think you can leave any on the bottom unless you use the exact same size stringer thickness you removed. If you go anything bigger the stringer will not physically fit, this was another reason i grinded mine out all the way.

I'll bet you a Double Hefty Burger, a large bag of greazy fries and a small diet sprite that that white stuff is cabosil! or a 40 year old derivative there of. Its more than likely their version of PB less the chopped strand fibers.

I grinded my entire hull, but then im funny that way... please let me explain... watch the video below :)

Usually folks around these parts only use PL when they cant work faster than PB can dry in one layup. Another consideration is PL is wayyyyy less expensive than PB. To circumvent this problem i built my stringers and bulk heads into a frame. The frame sits off the hull and can be removed then put back exactly in the same spot until i was ready to PB it to the hull a quart at a time. I dropped the PB in on one side of the stringer, pushed it through making sure i had complete fillage and coverage of every millimeter under the stringer, then once i was sure it was packed i made the fillet on the far side (the side where most of the PB was pushed to), then later came back for the opposite side fillet. Sometimes you can do the fillets on both sides of the stringer simultaneously but you want to be very cautious not to disturb the filling already under the stringer by moving the PB while forming the fillets.

Theres nothing to figure out when drilling transom plate / gymbal housing holes, the template is already there for you on the outside, you just drill from the outside in. However, it may be a good idea to put a piece of wax paper up against your keyhole from the inside so that you can get a tracing of where you have to drill at a slant in for your steering. (There will be a certain degree of slant for your boat). Some of the drill holders that u you use to make the perpendicular holes also adjust for slants.

When your sanding please wear protection and get a fan blowing if possible, then sand with your back to the fan or from the side. If you think that the neighbors are planning to put a hit out on you for causing dust storms, have somebody hold a shop vac where you're sanding or tarp off the area. HF has really nice pop up canopies for 69 bucks, they are well made and you cant beat the price. I have two. Its a pain in the but cheeks to keep taking your cover on and off, also, once you finish your deconstruction its not a good idea to let the sun hit your hull continuously, plus if you had the canopy your top would be covered then you'd just have to drape a tarp around the sides for sanding sessions, this would keep the dust down and make your neighbors love you again!!! HA HA

If theres anything i can do to help please let me know, and if you need to, PM me and we can exchange numbers and emails, i may be able to stop you from making some of the mistakes that i made and learned from the hard way. ;)


Hi Goldie. Thanks for the video and the detailed reply. I'll try to shot a narrated video and include a longer response tomorrow eve - just to confirm a few things. Thanks again. Love watching your progress. And of course your vids.
 

kshallen

Seaman Apprentice
Joined
Jun 19, 2013
Messages
37
This might look somewhat familiar.


Do you know what the grey coating is SeaRay used on the inside of the hull? What do you plan on using as a replacement? If you had only needed to replace the decking could it have been done without destroying the stringers and other attaching members?

Forgot to reply to the "grey coating" question. As far as I can tell, it's just paint. It's in my bilge and in the ski locker area.
 

Goldie627

Lieutenant Junior Grade
Joined
Oct 28, 2013
Messages
1,010
On my 86 Sea Ray, im not sure what the interior coating was, but if i had to guess, id say it was gelcoat. When the time comes i plan to use pure white gelcoat for the ski locker and gastank area, everywhere else will be pure white gelcoat with grey pigment mixed in.
 

kshallen

Seaman Apprentice
Joined
Jun 19, 2013
Messages
37
To everyone who had been following my progress. I have all the demo completed except maybe just a little sanding left in prep for reconstruction. In any case, in August my project got put onto the back burner due to other priorities. Now I'm scr^#@ed because winter is knocking on the door. And, I only have torpedo heaters for my insulated garage - so doing fiberglass work might be a slow process. I'm going to try anyway. As soon as I get the boat into my messy garage.

Just wanted to give you all an update since I went dark for a while. Thanks again for all the advice and assistance so far. This project has become a passion.
 

Woodonglass

Supreme Mariner
Joined
Dec 29, 2009
Messages
25,924
You can glass in the winter if you use the torpedo's and to get the heat up over 60 then shut em down and tent the area and use heat lamps or halogens to keep it @ temp while the resin cures for a couple of hours. The key is the resin AND the substrate BOTH have to be @ 60 degrees during the application and curing process. Then all that's required is to ensure it doesn't Hard Freeze for 48 hrs.
 

DKMI

Cadet
Joined
Sep 12, 2013
Messages
16
To everyone who had been following my progress. I have all the demo completed except maybe just a little sanding left in prep for reconstruction. In any case, in August my project got put onto the back burner due to other priorities. Now I'm scr^#@ed because winter is knocking on the door. And, I only have torpedo heaters for my insulated garage - so doing fiberglass work might be a slow process. I'm going to try anyway. As soon as I get the boat into my messy garage.

Just wanted to give you all an update since I went dark for a while. Thanks again for all the advice and assistance so far. This project has become a passion.
Any updates???
 

jbcurt00

Moderator
Staff member
Joined
Oct 25, 2011
Messages
24,863
Any updates???

The original starter of this topic hasnt been on iboats since May, and hasnt posted in this topic in 9months

Please check the Forum Rules link in my signature and follow the no posts in topics after 90days of inactivity unless you started the topic

You might PM anyone to ask about uodates if they havent posted in a while. Other wise, please refrain


Thank you
 
Top