Carolina Skiff J16 Project

Joined
Jan 29, 2014
Messages
15
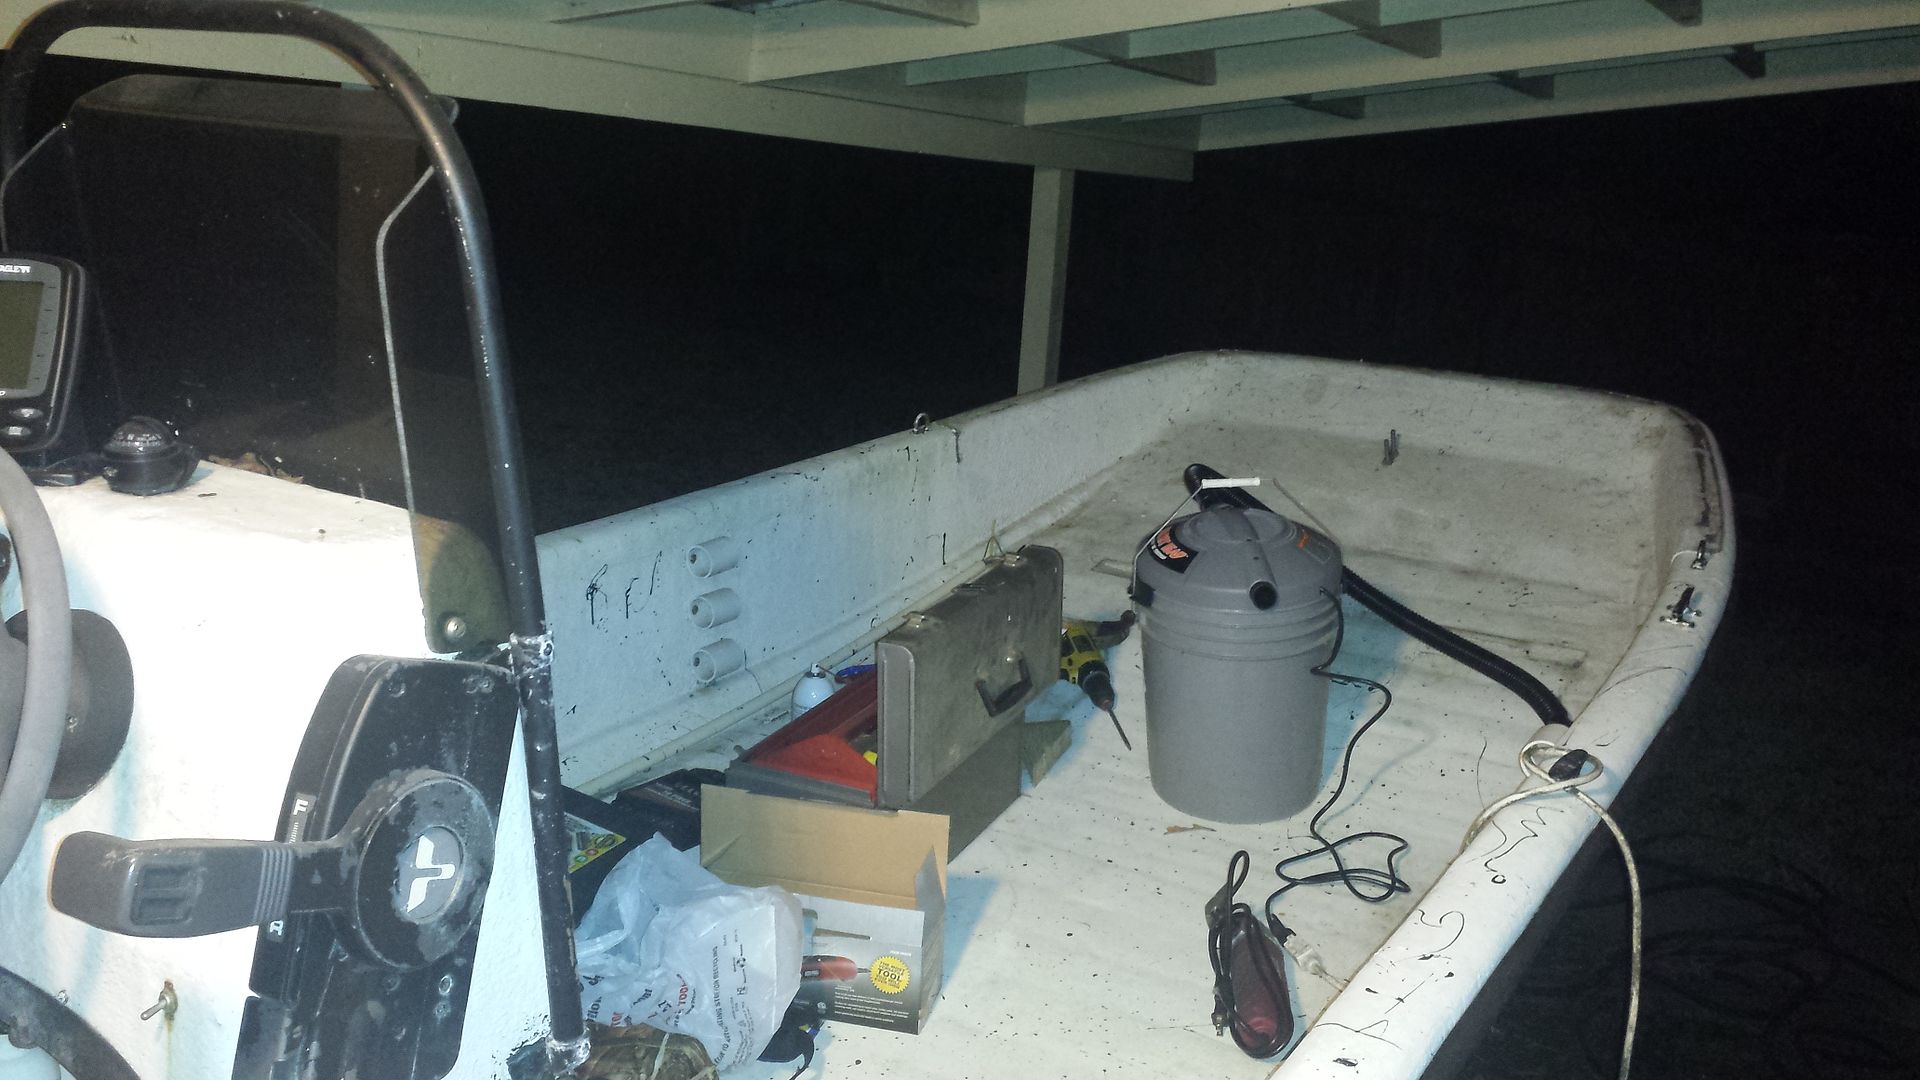
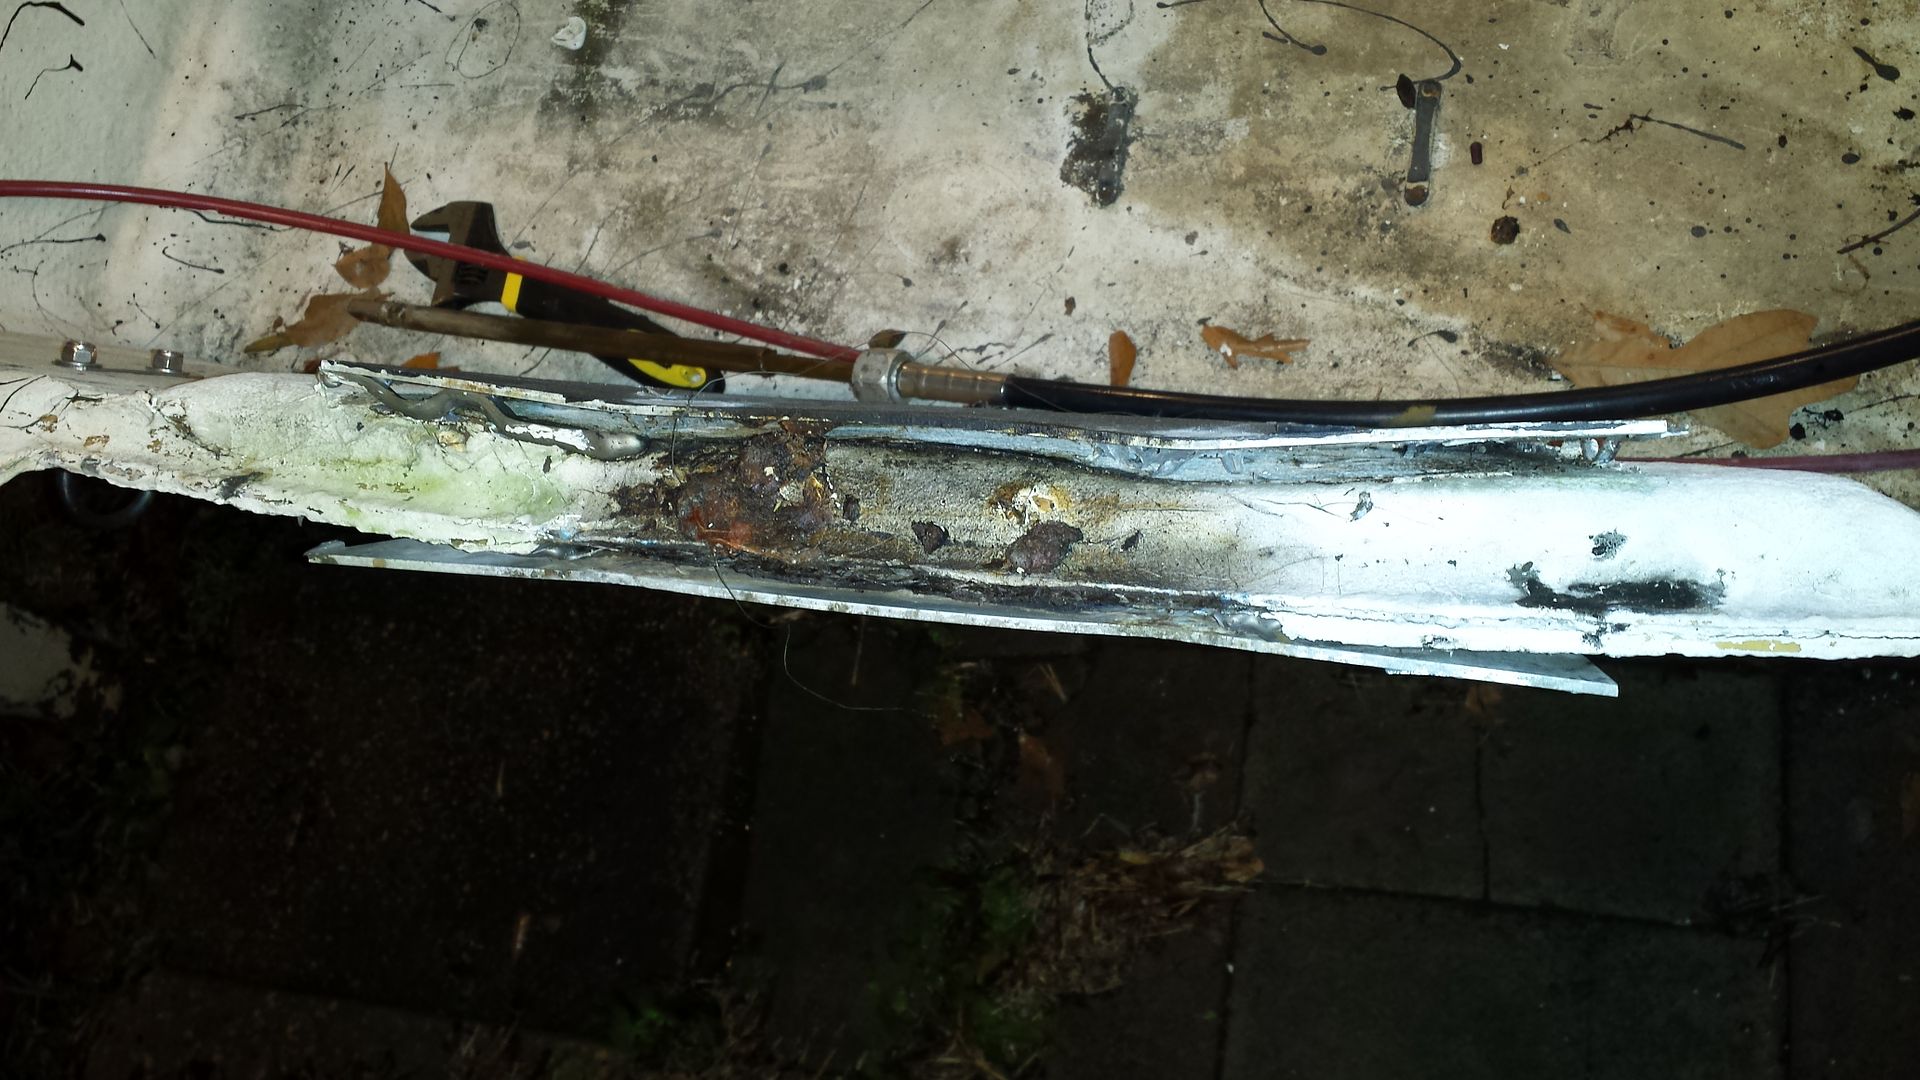
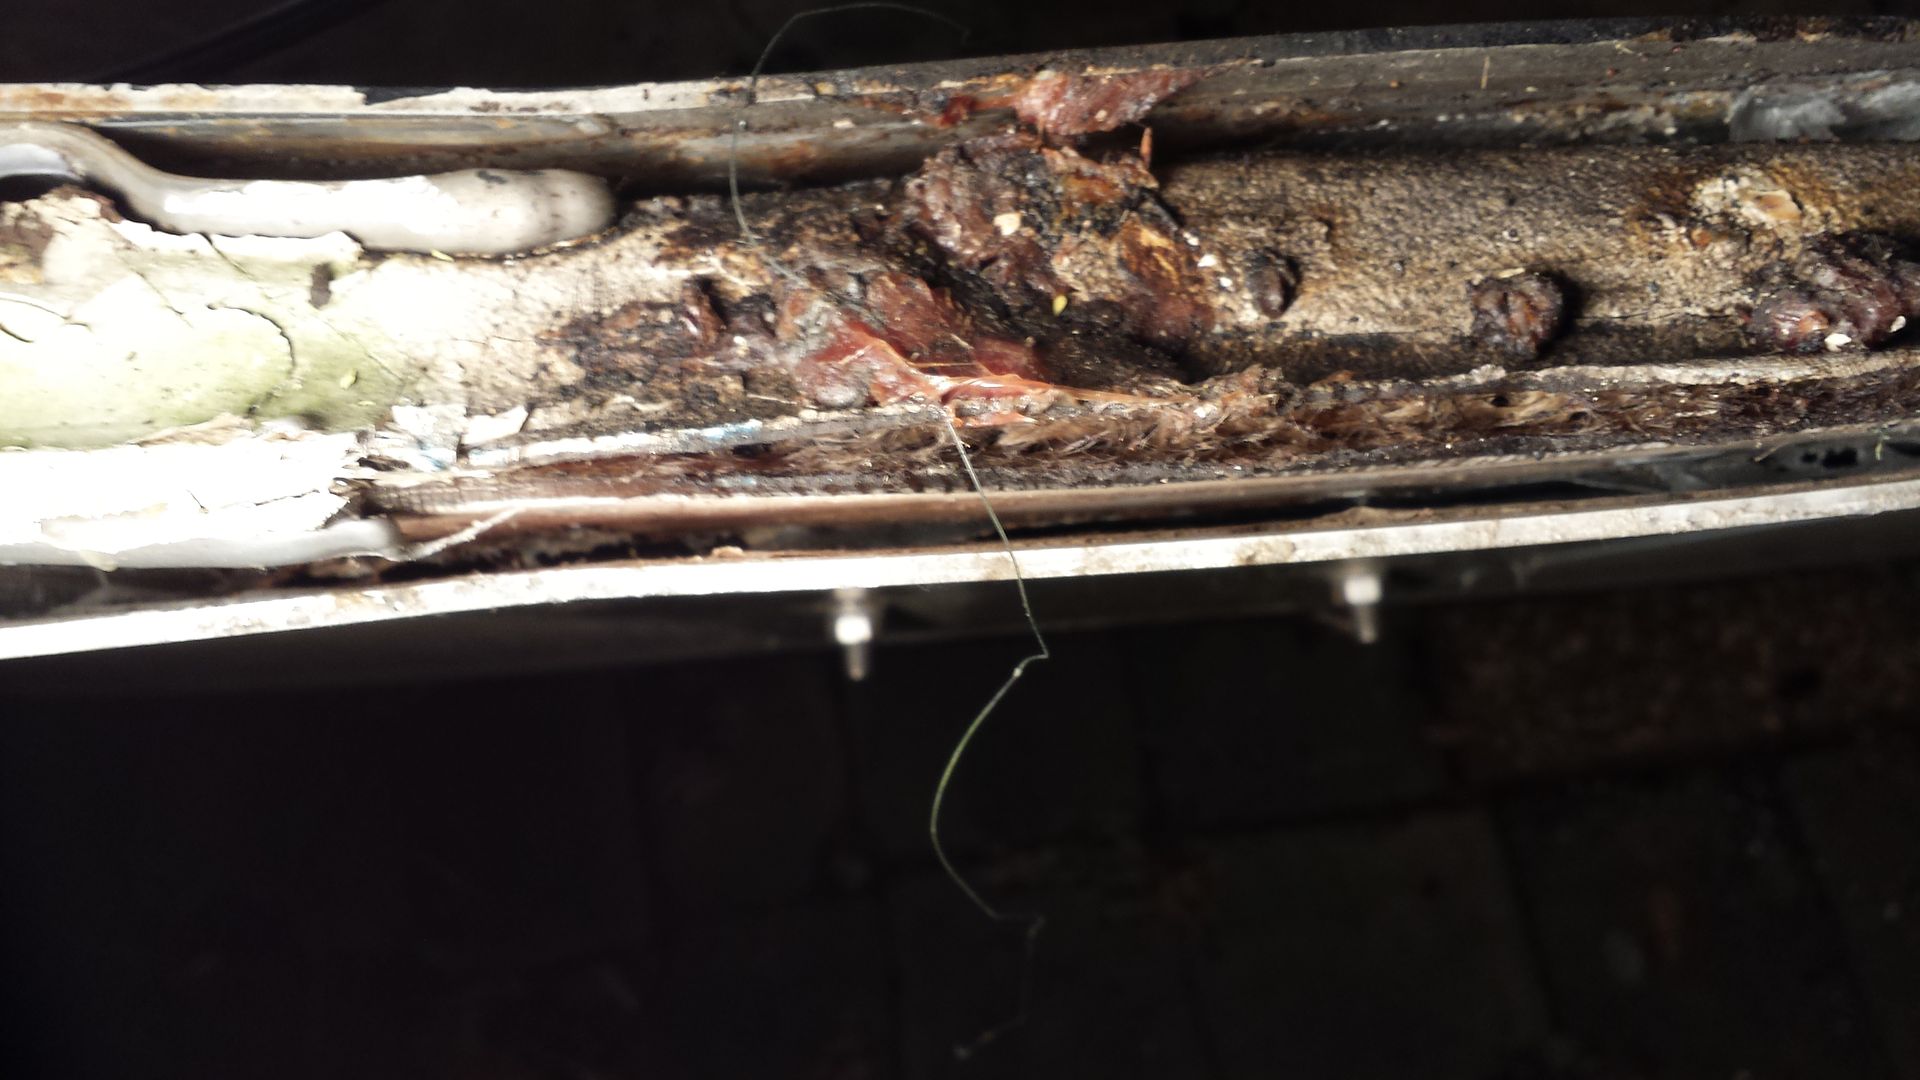
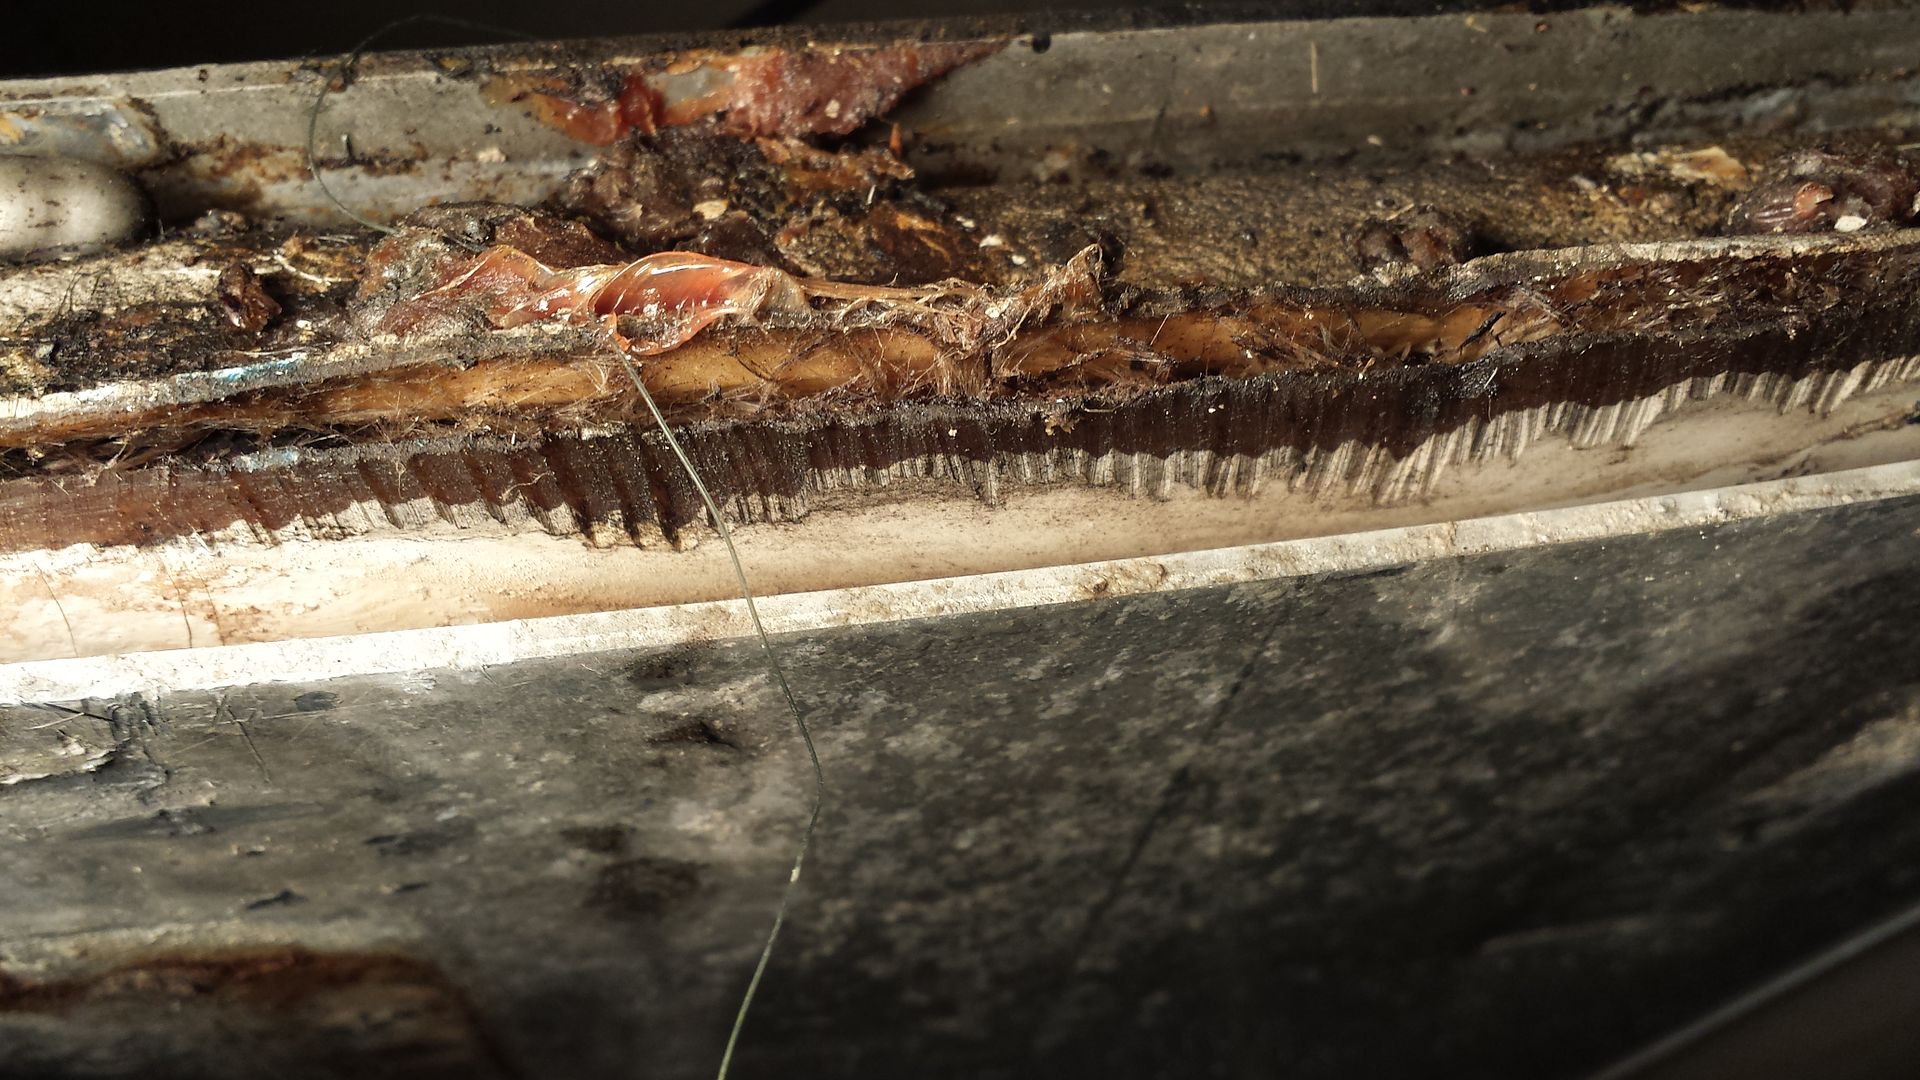
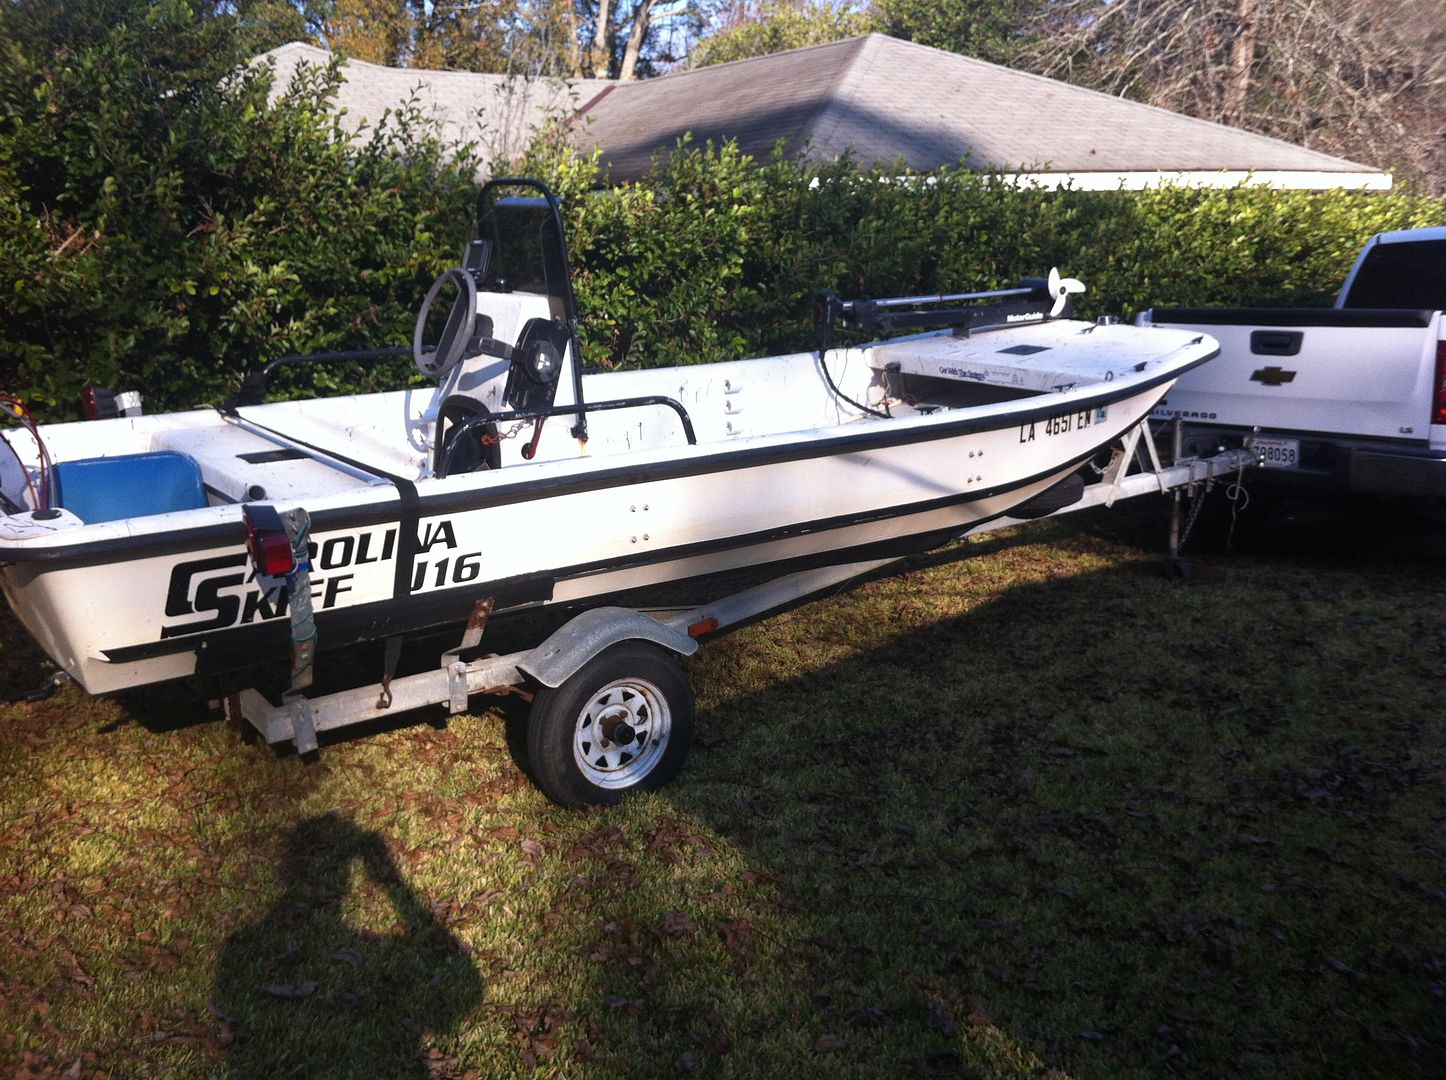
I purchased my Carolina Skiff J16 a little over a year ago. I'm in it for around $600 after selling the 25hp motor it came with and using a 30hp I got for next to nothing. After using it for a year I am ready to make some changes to the layout. This is my first go at 'boat crafting/modificating' :confused:, but considering what I have in it I'm comfortable climbing to learning curve with it. Here are some before pictures:
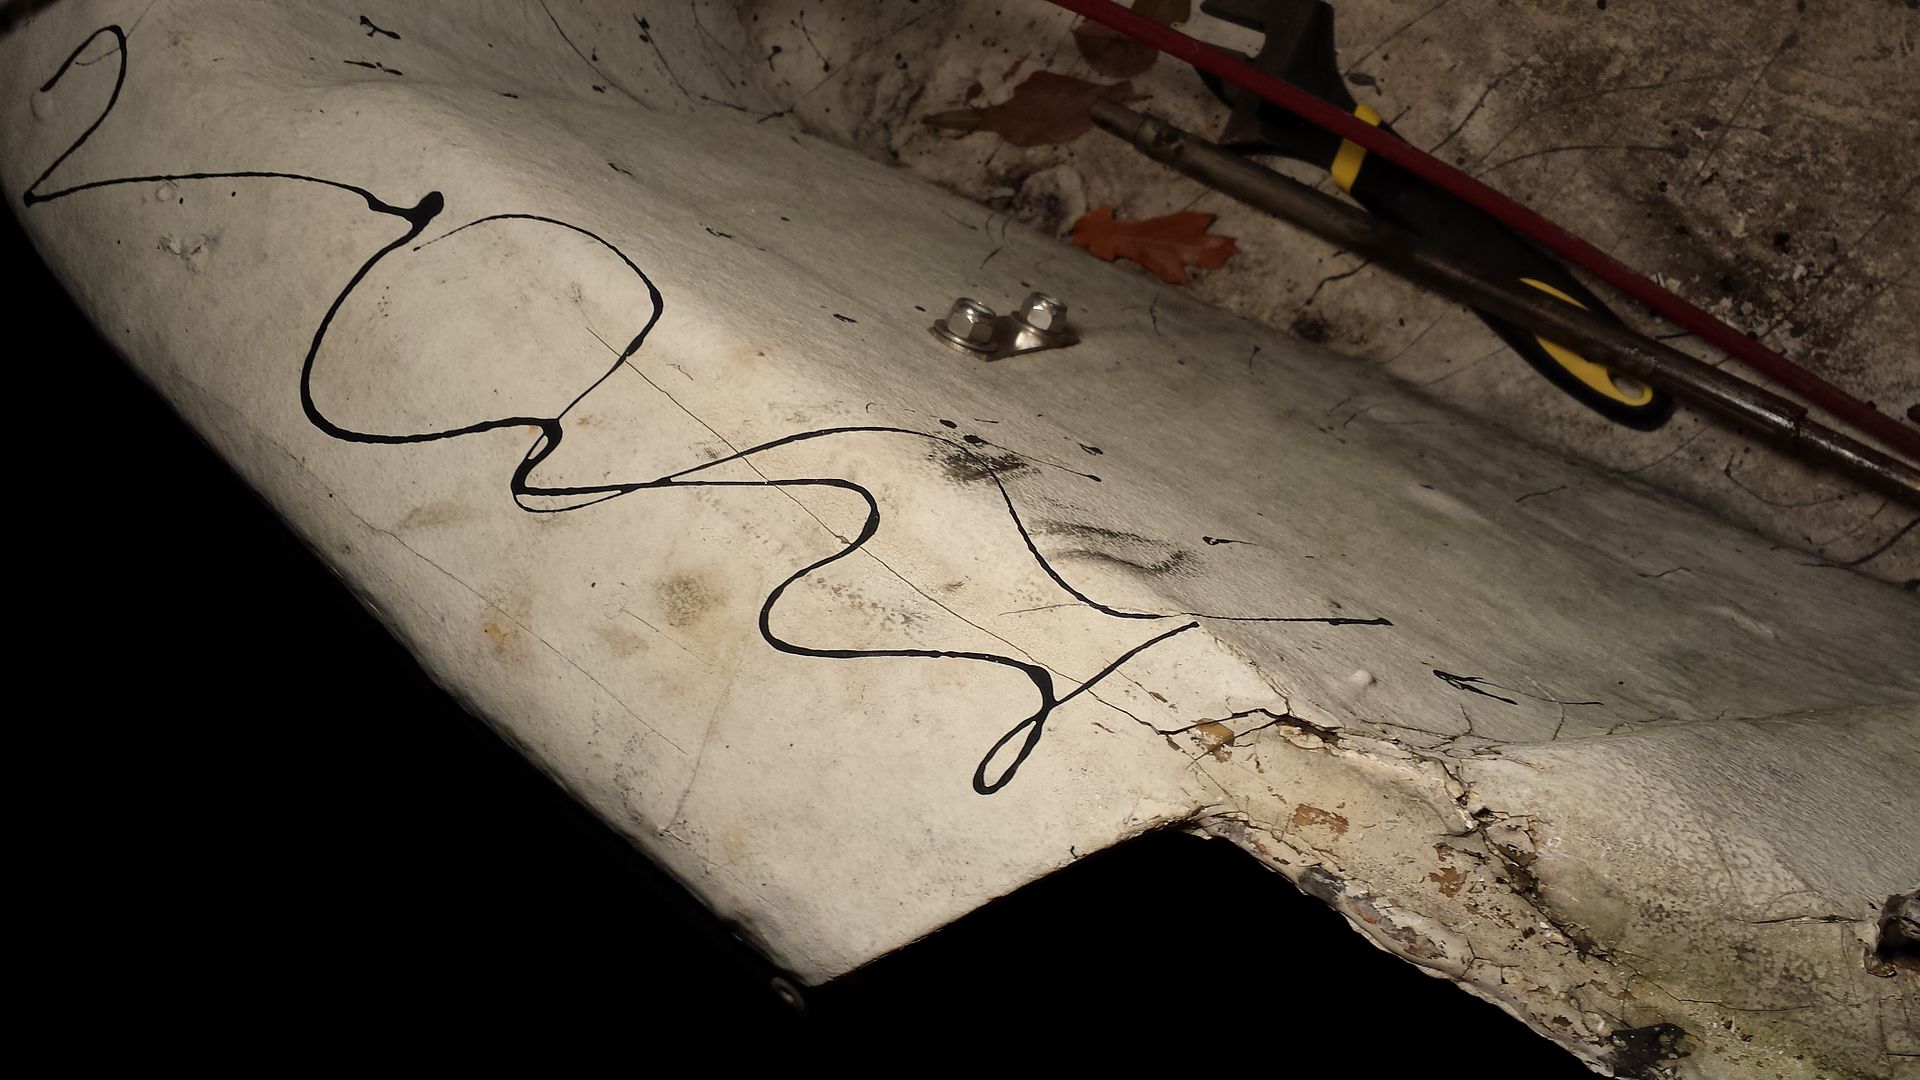
The day I got it
IMG_0217_zps4eff147c.jpg


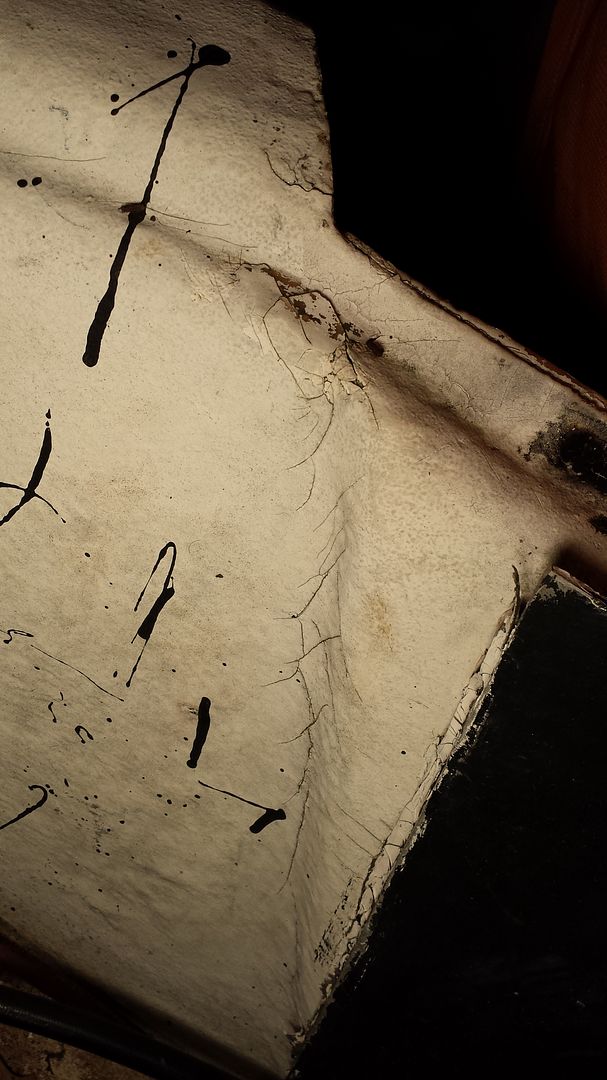
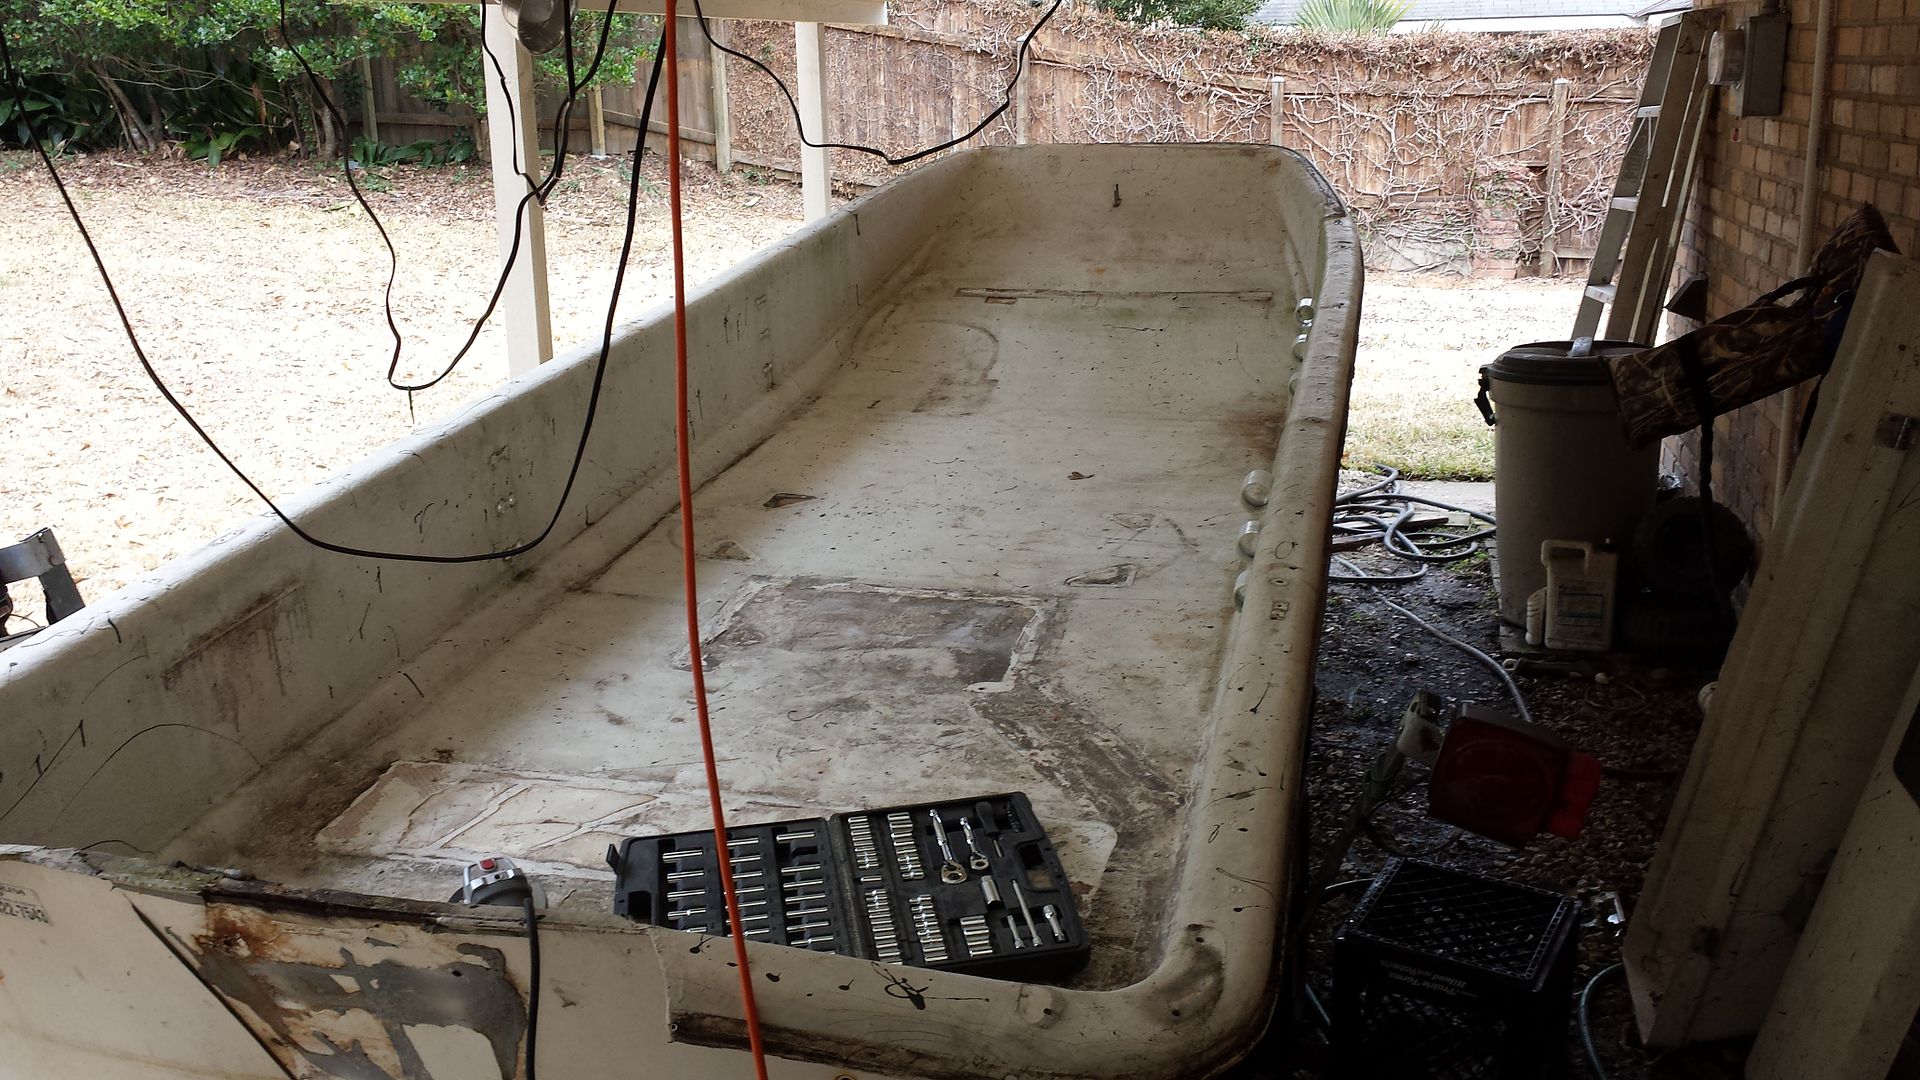
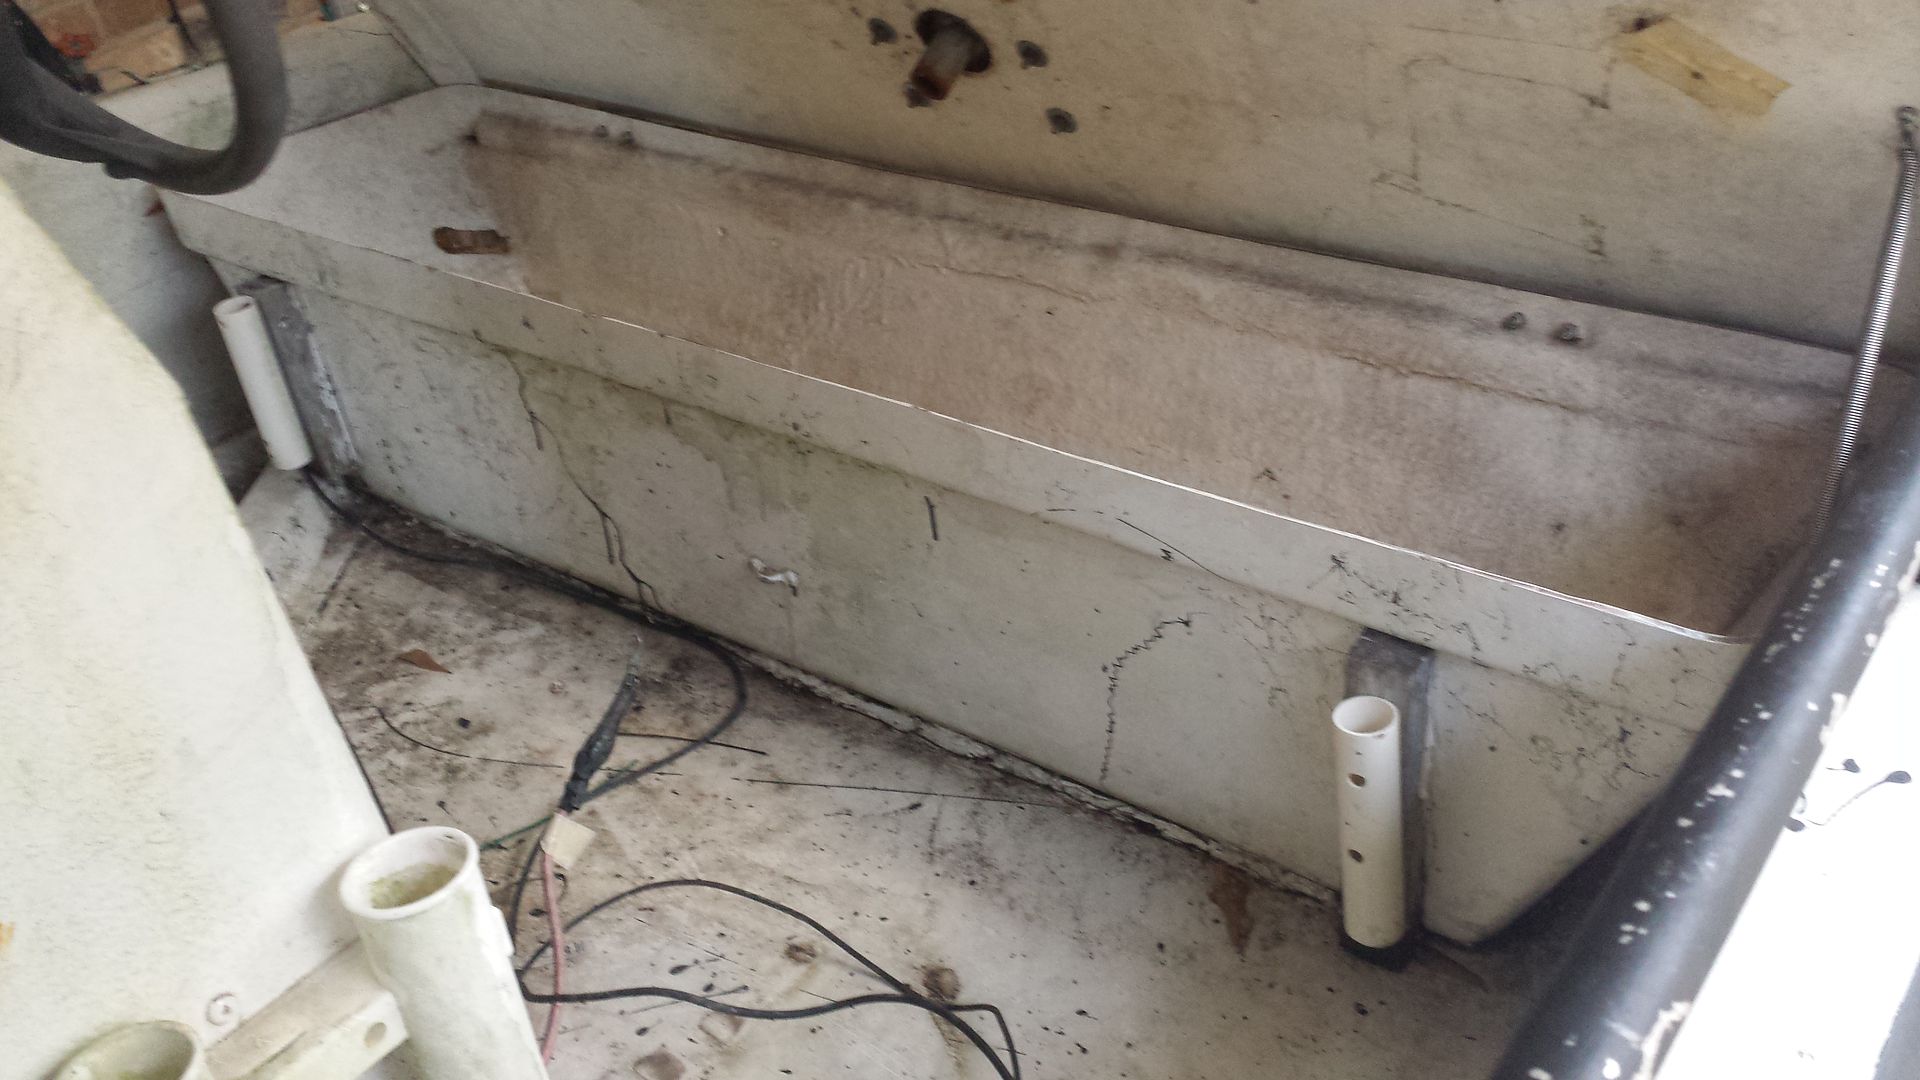
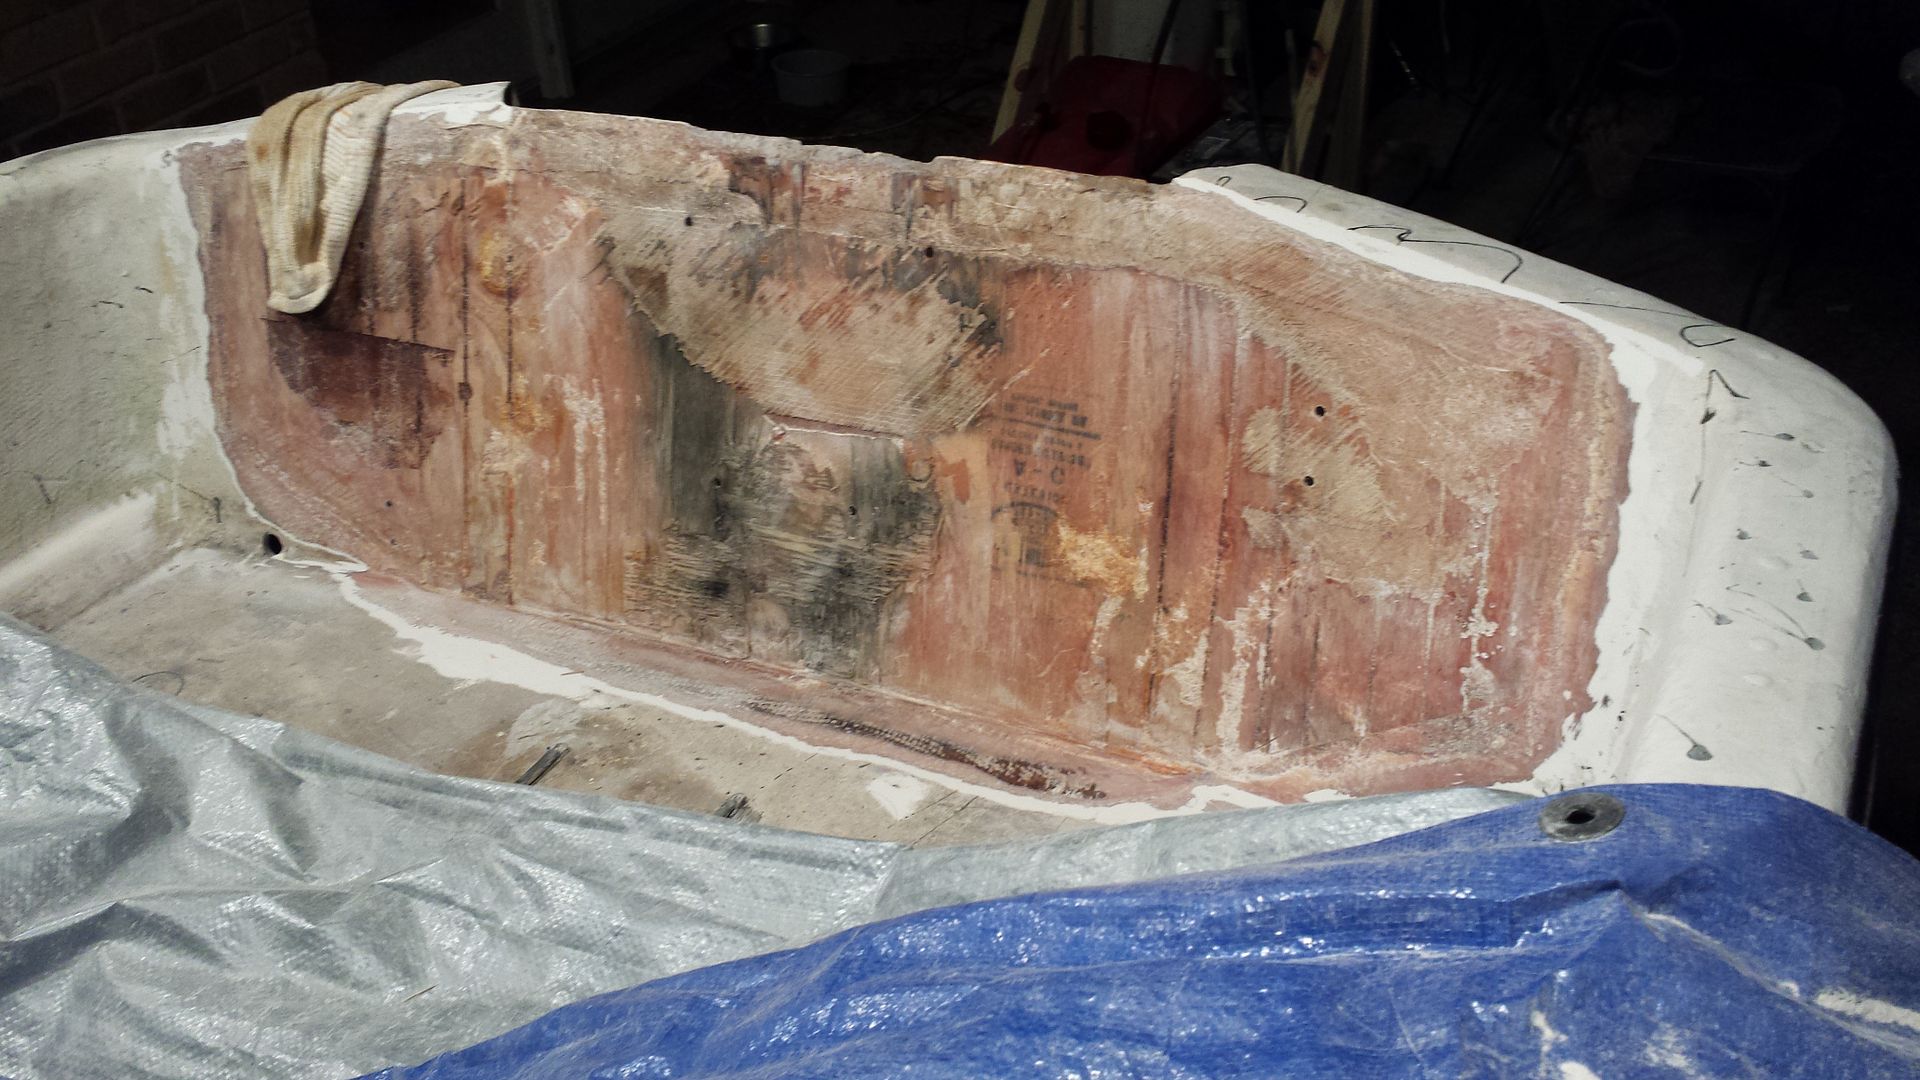
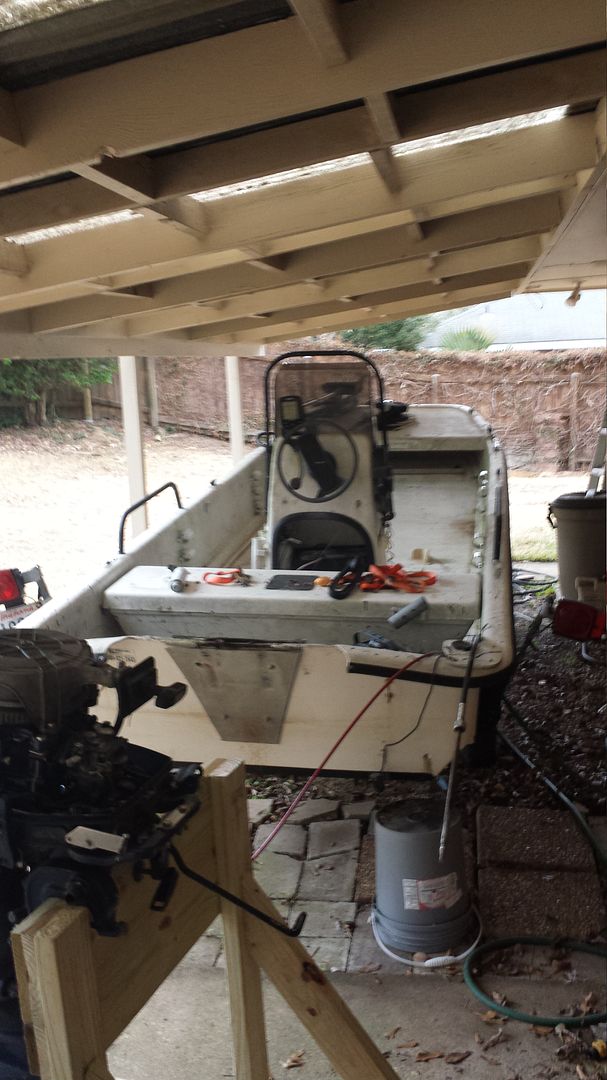
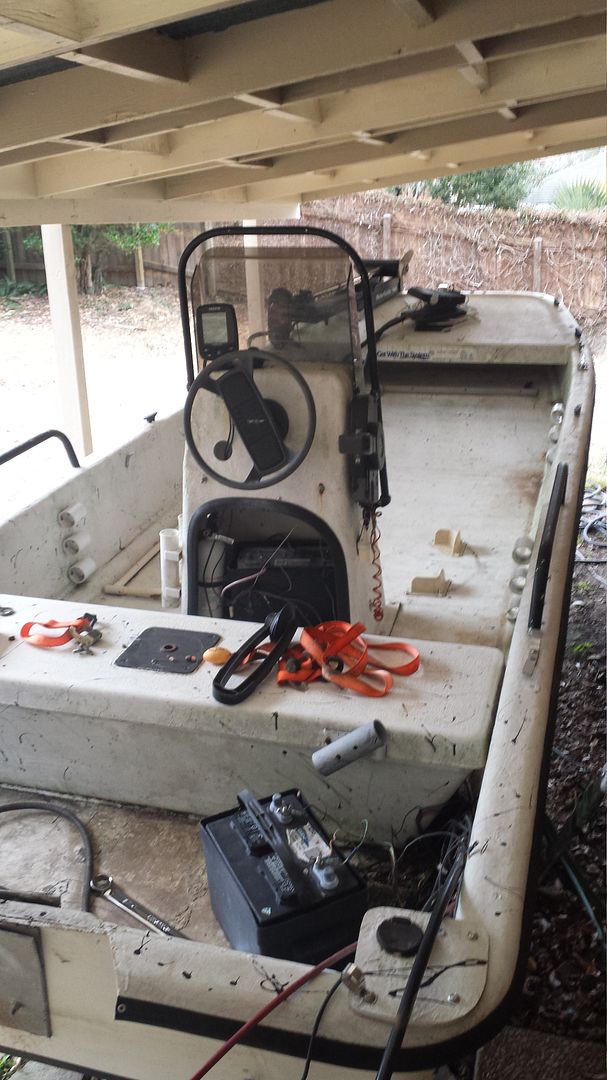
Before I started tearing into her
20140201_162142_zpsoskbg9wq.jpg


20140201_162151_zpsrpnpywxx.jpg


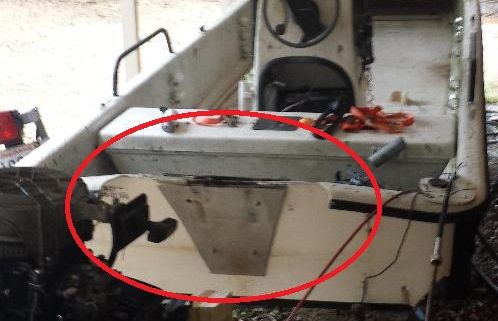
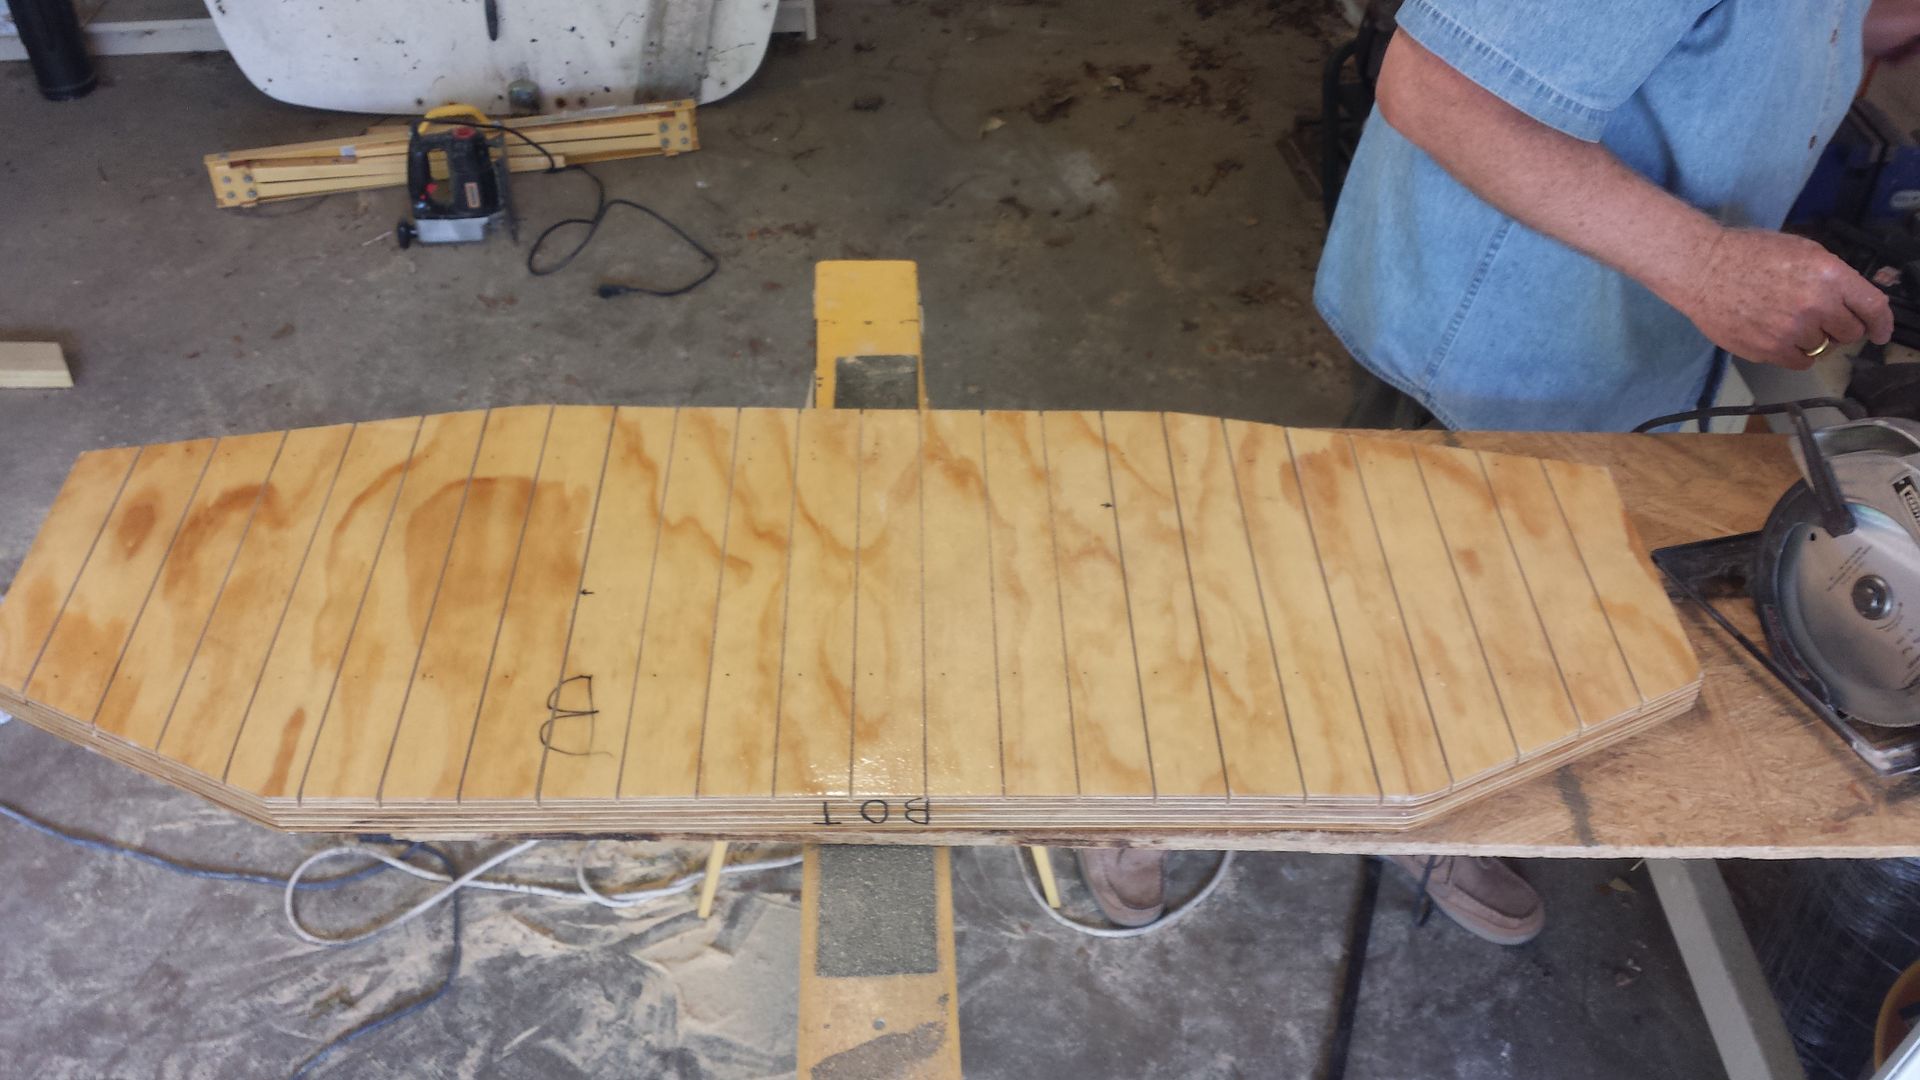
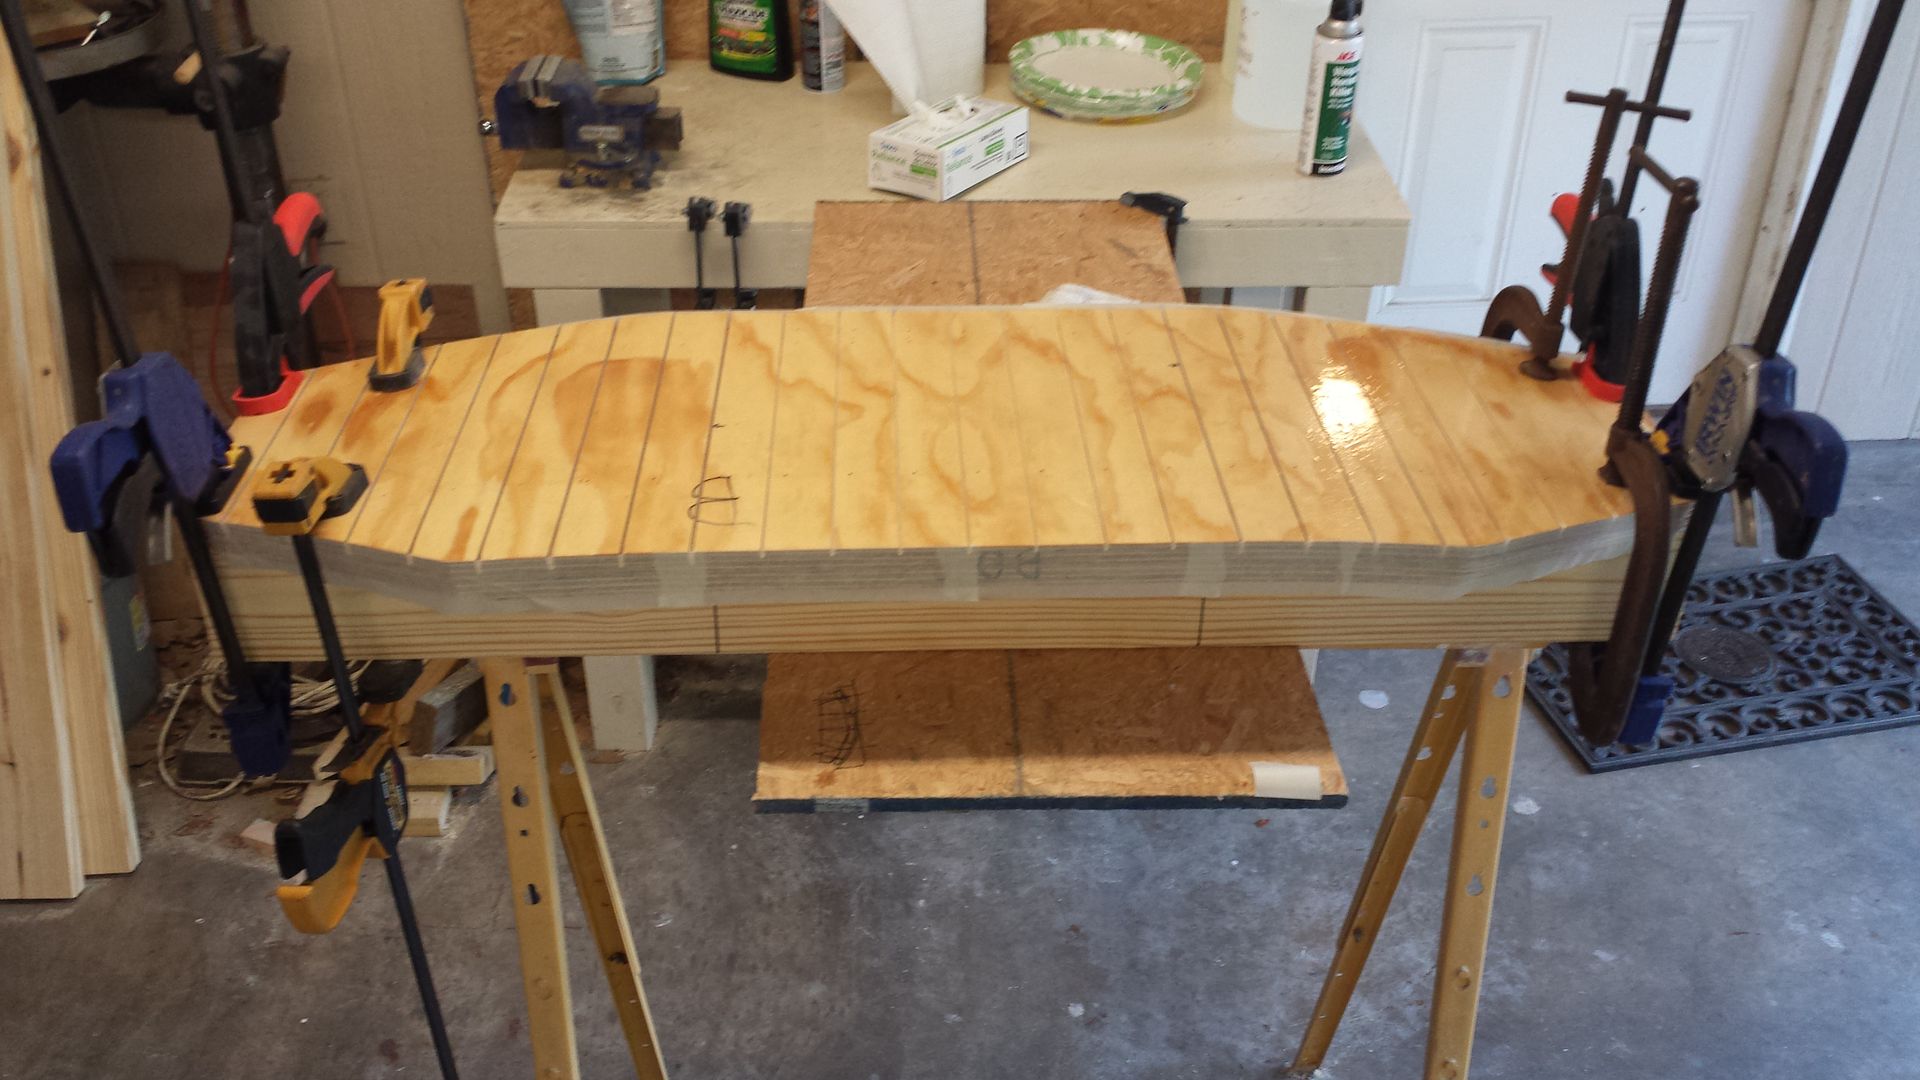
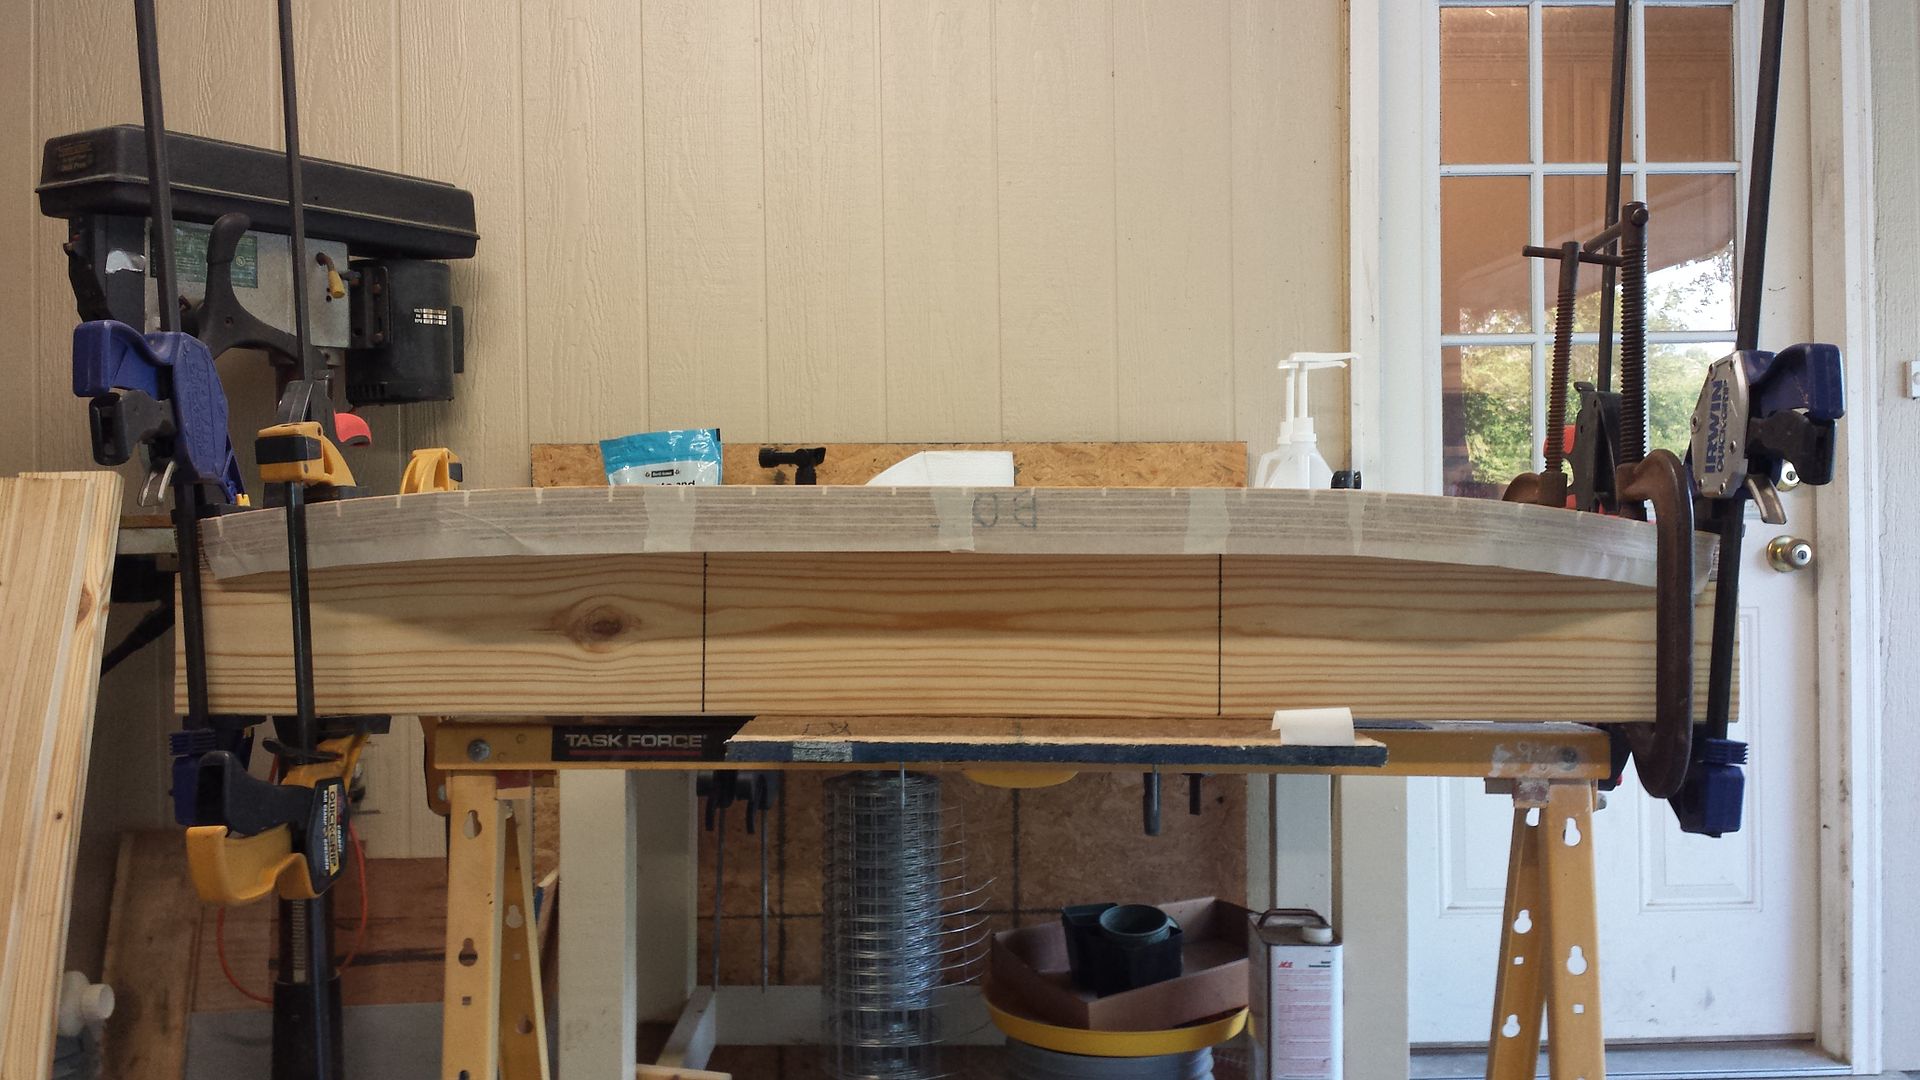
So, here is what I would like to do. I am going to take off the front deck and rear bench seat. I want put a larger deck up front, as well as deck the back to make it easier to fish from. I am also going to add some hatches to both for storage, and this will allow me to move both my batteries to the front to help shift some of the weight from the rear. Then lay down a nice new all white paint job on the inside (the previous owner tried their hand at a webbing job and failed miserably). Lastly, run all new wiring.

I am going to try to chronicle the project here, and hopefully you guys can provide advice when needed (probably going to be often). Here goes nothing.
 
Joined
Jan 29, 2014
Messages
15
Re: Carolina Skiff J16 Project

The front deck came off easy enough. I think they just used 4200 and some bolts. The angle grinder made quick work of a few stubborn bolts.
20140203_181633_zpsgieiokwo.jpg


I also pulled the motor off. I am planning on adding electric start to it from the original 25hp motor it came with. After removing the motor I notice some not so good action going on at the top of the transom. This is a 1995 hull, so it's almost 20 years old.

20140204_202248_zpsavtqk69y.jpg


It may be hard to tell if you don't know what you are looking at, but the transom is sandwiched between two aluminum sheet metal plates. It looks like they were attached with through bolts and 4200 (gray). You can see that these plates are almost completely separated from the transom and will need to be replaced?? I'm not sure if this was the factory setup, or something done later to stiffen the transom. Upon closer inspection you can see that the inside shell has begun to delaminate from the outer shell.

20140204_202349_zpsurqcughm.jpg


20140204_202356_zpswqtyw8ws.jpg


You can see some cracking here on the inside shell. There's big crack at the corner near the cutout (bottom right of picture) and it extends to the left.
20140204_202427_zpsscpspf6t.jpg


Here is a picture of the other side of the inside of the transom. You can see in the middle of the picture a series of cracks.
20140204_202445_zpshp5w6ekn.jpg


I'm not quite sure if I need to replace the transom or not. When rapping on it with the opposite end of a screw driver I don't get any 'hollow thuds' until I'm near the cracks. The rest seems to still be pretty solid. Having said that I know that the boat sat out in the weather for an extended period of time with the previous owner. So, if those cracks go to the wood; it got wet at some point.

Main question for this post: Do I need to replace the transom?
 

Bob_VT

Moderator & Unofficial iBoats Historian
Staff member
Joined
May 19, 2001
Messages
26,022
Re: Carolina Skiff J16 Project

Welcome to iboats.

Yes I would say that transom could stand a solid replacement.

I would contact Carolina Skiff and ask them what was used for the initial construction and ask for suggestions Carolina Skiff Boat Showroom: J Series

It looks as if that may be an excellent candidate for a seacast or nida-bond transom replacement
 
Joined
Jan 29, 2014
Messages
15
Re: Carolina Skiff J16 Project

I did some drilling into the transom, not surprisingly, found wet dark wood. It seemed to be worse at the top near the middle; not bad on the sides. This means that water was definitely entering from the top where it delaminated.

I've been researching poly/vinyl/epoxy resin vs. pourable compound. I priced out materials to do the job with poly resin to get a cost basis for the least expensive option:

3 gal Polyester Resin $101.22
6yd of 50" 1708 $37.68
6yd of 50 1.5mat $22.98
Plus tax $9.71
Plus shipping $49.64
Total Price: 221.23

That isn't including the cost of the core material. So, surprisingly, Seacast and NidaBond become very attractive for this job. I have a couple concerns going this route though. First and foremost, I lack confidence in my precision chain saw skills. Are there any less aggressive ways to clear away the old transom? Secondly, will I need to patch/fill/etc the existing cracks in the inner skin of the transom? Will running a layer of 1708 over them be sufficient?

I did a rough calculation for the volume of my transom and it comes out to 652 cubic inches or 2.83 gallons. Seacast's pricing seems very inconsistent, and inconvenient for my needs.

1 gallon by itself $87.00
2 gallons $133.00 ($66.50/gal)
5 gallons $222.00 ($44.40/gal)

At the 5 gallon pricing I could get the 3 gallons I need for what they are asking for 2 gallons. Does anyone know where I can get it closer to the 44.40/gal price range; or does anyone in Louisiana need 2 gallons and want to share the cost of the 5 gallon deal? I hate to pay so much more for something when I know a company routinely sells it for way less.
 

Bob_VT

Moderator & Unofficial iBoats Historian
Staff member
Joined
May 19, 2001
Messages
26,022
Re: Carolina Skiff J16 Project

You should check 3M Nidabond too it is basically the same stuff but cheaper (5 gallons for about $180).

I bet if you ask around where you live that you will find someone who has and can handle a chain saw. Yes you can use fiberglass on the cracks on the inside and outside. That will be mostly cosmetic but effective.
 

kfa4303

Banned
Joined
Sep 17, 2010
Messages
6,094
Re: Carolina Skiff J16 Project

Cool project. These old Carolina Skiffs are a great and I love the center console set up. Looks like you definitely need to replace the transom. Using a non-rotting composite material would be nice, if you have the money, but you can also use wood, if need be. In addition to looking here in the forums, check out the forums on microskiff.com for lots of other Carolina Skiff mods. Good luck. Keep us posted.
 

Woodonglass

Supreme Mariner
Joined
Dec 29, 2009
Messages
25,924
Re: Carolina Skiff J16 Project

I'm Not 100% sure about your Carolina Skiffs substructure but...the new ones are really nice...
constructionhull.jpg
If yours has wood Stringers you might consider doing some investigation as to their condition. If the transom is in that poor of condition, there's a High probability that the stringers, if any, could be compromised as well. Those aluminum plates are 100% for sure NOT factory. It's obvious in this pic, that the PO has cut away the outer lip of the original boat and installed the plates in attempt to beef up the wet and rotting transom.

YourBoatTransom.jpg


As you can see, it failed. If your boat does not have stringers and is full of foam below deck then for sure you need to ensure that the foam is dry and not saturated with water. If it is saturated then you will need to removed the deck and get all the wet foam out. There's no way to dry it out and it can add several hundred pounds of weight to the boat. If you have to remove the deck then a standard transom installation could be utilized. If no deck removal is required then a nidacore pour in transom could be done but they are about double the cost of a wood transom. Your boat your choice.
 

Cadwelder

Lieutenant Commander
Joined
Aug 30, 2010
Messages
1,780
Re: Carolina Skiff J16 Project

Not bad advice there Woody......how have you been?

CW
 
Joined
Jan 29, 2014
Messages
15
Re: Carolina Skiff J16 Project

Work has been busier than usual so free time has been limited. I have managed to strip the boat down completely to just the hull.

449_zps2b308077.jpg


Removing the bench seat was a real chore. It was held down with a healthy amount of 5200. I made some long thin wedges out of 2x4s to drive underneath and wedge it away from the hull. I also used a good amount of 5200 remover.

407_zpsa05a0e88.jpg


wedges in action
423_zpsf91212c7.jpg


428_zpsfe96648f.jpg
 
Joined
Jan 29, 2014
Messages
15
Re: Carolina Skiff J16 Project

I worked on removing the transom today. The whole deal took me about 6 hours. However, taking everything I learned and did wrong the first time, if I had to do it again I could get it out in 30 minutes or less.

For anyone thinking about doing this here it how you do it. Get a 4 ?" angle grinder, cutting disc, 36 grit flap disc, ?" and 1" wood chisel, hammer and pry bar. You'll want a long sleeve shirt/pants, a respirator and some safety glasses (goggles would be better the cloud gets pretty thick). You will also need to make some long thin wedges like the ones pictured in my seat removal post.

Waiting for the temps around here to settle down so I can get started glassing in the new wood.

Start by taking the angle grinder with the cutting disc and cutting around the edges of the transom. Use the pry bar to pop the fiberglass away from the wood. Next, take the grinder and switch to the 36 grit flap disc and start grinding about a 3" strip between the two points where the transom meets the floor. This area should be raised compared to the rest of the floor. You'll know you've gone far enough when you hit a wood strip. There is a ?" strip of resin between the wood strip and the transom wood. Use the ?" chisel to remove the resin about ?" deep. Now, you should be able to pop the wood off the outer skin using the wedges fairly easily. Use the 1" chisel to remove any wood left on the outer skin.

TRANSOMDIAG_zpsaaf0e585.png


486_zps603bbe9c.jpg
 

Woodonglass

Supreme Mariner
Joined
Dec 29, 2009
Messages
25,924
Re: Carolina Skiff J16 Project

I just realized that your thread about epoxy is referencing this transom install. Rule # 11 in the Forum rules http://forums.iboats.com/forum-rules-guidelines/forum-rules-397820.html addresses this issue. It makes it difficult for the members to understand the issue when you post questions about your project in multiple threads. It's best to keep em all in your project thread so everyone can reference your pics and previous posts. Based on what I'm seeing I'm not certain this is all of your transom. You are only at the top of the deck. there's more below the deck and as previously discussed, stringers too!!!
 
Joined
Jan 29, 2014
Messages
15
Re: Carolina Skiff J16 Project

I started a new topic because the question I was asking only loosely related to my project. I didn't want multiple post about epoxy cluttering my project thread. I felt like it was a pertinent topic warranting its own thread since there is so much contradicting info out there.
 
Joined
Jan 29, 2014
Messages
15
Re: Carolina Skiff J16 Project

After a little hiatus I am back to working on the boat. I started working on finishing the transom yesterday and intend to finish in the next week.

I decided to go with epoxy resin for this project; mostly due to peer pressure and also because it was only about $50 more than using polyester. I'm using the Raka brand and find it easy to mix correctly with the pumps for the bottles.

I went to my local lumber yard looking for some ACX or BCX plywood for the transom core. They had BCX for $35 and ACX, which was Arauco, for $50 for a 4x8 sheet. Based on the pricing I was leaning towards the BCX. A week or so later I was at Home Depot and saw they had the same ACX Arauco for $35. Thinking it was a deal I picked up a sheet. I have cut a lot of kerfs into this plywood and have yet to see a void.

Now that I had all my supplies and a day off of work it was time to start working. I took some measurements the best I could before demo'd the old transom. I used those to cut two pieces out of the 23/32 plywood. The original transom was 0.5" and doubled up to 1.0" where the motor mount would go. I wanted to go with 1.5" for added strength and to potentially support a poling tower in the future.


I then mixed up a batch of peanut butter using the epoxy resin and a healthy amount of fumed silica. I used this to glue the two sides together. After 12 hours I had a nice stiff 1.5" piece of plywood. So, I took my newly created masterpeice to the boat to check fit for the first time. Boy was I upset when I realized the outer skin of the transom had a curve to it and my new core was stiffer than a viagra ****.

here's the old man getting some reps in on the circular saw
20140423_164010_zps7a73c02a.jpg


Now I know this will probably appear as if in hindsight I should have checked fit with the outer skin before gluing the two pieces together. Then I would have noticed that the transom has a bend to it and it would be easier to put it in as layers; bending one piece at a time. While this is very true, I should have checked, I don't think it would have save me much work. I still needed to build the mold I built to hold the curve while setting the transom.

I toyed with the idea of just making the new transom straight, but ultimately decided not to mess with the original design. I went to my local Carolina Skiff dealer to look at the transom of one of the J16s they had on the lot. I wanted to make sure the transom was supposed to have the curve. First thing I noticed was that they changed a lot since my 1995 hull, but the transom was indeed curved.

I stopped by Home Depot on my way home and picked up a couple 2x6x8s and some 24" pieces of all thread. I measured the curve by setting a straight 48" piece of wood inside the boat about midway up the outer skin. I then measured the distance from the wood to the fiberglass. It had a slight curve going from 0-1 3/8" and was flat 16" across the middle. I cut the 2x6s in half and sketched the curve on them to create 2 positive and 2 negative sides for a mold.

I had already cut 1/4" kerfs 2" apart in the backside of the core for resin to get into when I attached it to the outer skin. In order to get the core to bend I increased the depth of these kerfs to 1/2" for the first 16", left them 1/4" for the middle 16" (this parts of the transom is supposed to be flat) and then increased depth again to 1/2" for the last 16". I then flipped the core over and on the front side of the core I cut 1/2" kerfs for the first 16" of both sides and offset them with the ones on the back side.

Next I took both positive sides of the mold and centered them on my core. Using clamps I bend the core over the mold. I did this to make sure that it would bend and so that I could put resin in the kerfs; hoping this would make it hold it's shape. So this is where I am now:

20140423_183535_zpsd4672602.jpg


You can't see where the core meets the mold here because I have masking tape on the edge of the core to hold the resin in.
20140423_183523_zpse292c0b8.jpg
 

Willyclay

Captain
Joined
Sep 8, 2006
Messages
3,240
Re: Carolina Skiff J16 Project

Attaboy on the Aruaco, good stuff! Great looking fab work. Thanks for all the pix. Good luck with the rest!
 
Joined
Jan 29, 2014
Messages
15
Wow, I can't believe I started this project 6 years ago! After my last post, I finished the transom install, repaired the front lip of the hull and flipped the boat over onto a thrown together stand to prepare it for painting. And that is how it sat for 6 years. Time, money, women I'm not exactly sure what distracted me away from this project, but I am returning to it. Here are some catch-up pictures from where I left off 6 years ago:

Gluing the transom in:
20140505_165743_zpsb8f32e90.jpg

Some point during the layup process:
20140507_234316_zpsf128e071.jpg

Front lip for rub rail missing:
20140429_181936_zps311597ec.jpg

Set up a jig of sorts to build a new lip off of:
20140429_200052_zps8aa931d1.jpg

Closer look at the damage:
20140429_200103_zps63d18e88.jpg

New lip was a success:
20140505_162052_zps821cb785.jpg

Rub rail fits:
20140505_162021_zps92a7c2d9.jpg

This is how she sat for 6 years after all of that:
20140525_214628_zps36b78586.jpg
 

Baylinerchuck

Commander
Joined
Jul 29, 2016
Messages
2,726
Wow....that is a long time. Well, welcome back there Craptin. Lol, love the screen name and avatar. Great sense of humor.
 
Joined
Jan 29, 2014
Messages
15
Fast forward to the present, I got back started in earnest on the project at the beginning of October. After a whole lot of sanding and fairing some gouges, I was able to finish priming the hull with TotalBoat Total Protect last weekend. I was not overly impressed with the Total Protect, and it was likely user error, but it did not go on as smoothly as the marketing would have you believe. I thinned it 10% with their thinner, tried 1/4, 3/16 and high-density foam roller covers and could not achieve better than a typical-orange-peel-wall-texture finish. So, it was back to sanding this week to get the primer layer smooth and ready for the Interlux Brightside. I am going to try to spray the Brightside this weekend, hopefully, that goes smoothly...rimshot!

20201003_113552.jpg

20201003_113619.jpg

20201007_163702.jpg

20201013_171302.jpg

20201015_180958.jpg

Close up of the finish from the Total Protect:
20201015_181018.jpg
 
Top