89 Bayliner Trophy 21ft CC

m casey stock

Chief Petty Officer
Joined
Apr 29, 2012
Messages
514
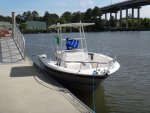
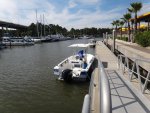
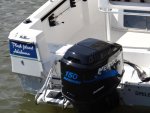
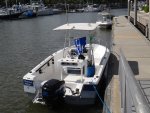
I really would not call this a restoration, it's more the normal upkeep of a part time usage boat. Mostly I just wanted to post some pictures of it, a few of when I first got it home and in my shop and others of how it looks now. Although not much was needed but a good cleaning, there are a few changes to be noted, like reconfiguring the bow rail after doing away with the long pulpit and repainting the engine cover and installing new decals after the motor was rebuilt.

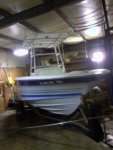
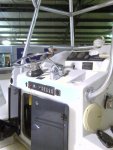
This is how she looked right after getting her home
428138_2238434858952_807080721_n.jpg 417903_2238434298938_1686381610_n.jpg 427188_2238435418966_1699869464_n.jpg
Later after I reinstalled the bow rails (the PO had taken them off, hacked them actually) and the long factory pulpit was missing.
481843_384473668237818_342441677_n.jpg 486578_384471761571342_809486610_n.jpg
 

m casey stock

Chief Petty Officer
Joined
Apr 29, 2012
Messages
514
Re: 89 Bayliner Trophy 21ft CC

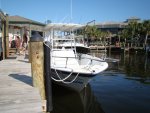
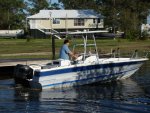
This is how things look now with the shortened bow rail, reworked pulpit area and the repainted/decal motor. I also installed bow driving lights after getting trapped the first time out after dark and having to find our way home with flashlights. I hid all the wiring in the bow rails.

469127_607828682568981_2105528132_o.jpg 469268_607838665901316_2045429556_o.jpg 736758_607830155902167_58592661_o.jpg 977147_607829525902230_494316345_o.jpg

The Wife at the helm!

963800_607819789236537_224219287_o.jpg
 

jbcurt00

Moderator
Staff member
Joined
Oct 25, 2011
Messages
24,871

m casey stock

Chief Petty Officer
Joined
Apr 29, 2012
Messages
514
Re: 89 Bayliner Trophy 21ft CC

Actually, this one came first. That is the delay with the tin. There is no rush because we can jump in this one and play when we get that urge. Although this one is for the coast and the tin is for around here. I am getting a little antsy to splash the tin. Just so busy at work these days.

I fixed the missing pictures thing, don't know why it does that sometimes.
 

m casey stock

Chief Petty Officer
Joined
Apr 29, 2012
Messages
514
Re: 89 Bayliner Trophy 21ft CC

that was my first real boat! :love_heart:
I like that!

This is my second Bayliner. I was completely happy with my first one (sold it to build a house) and am completely happy with this one. It's a great little boat.
 

m casey stock

Chief Petty Officer
Joined
Apr 29, 2012
Messages
514
Re: 89 Bayliner Trophy 21ft CC

Any of you guys ever used this product?

poly-image.jpg

The finish sealant part is what I'm interested in, the boat has already been prepped and no longer has the powder or oxidation on it, although a good wax makes it look real nice, it just doesn't stay more than a couple trips out. The boat is used mostly in salt or brackish waters so it's pretty rough on the finish. Is this good stuff or is there something better out there.
 

kjdunne

Petty Officer 1st Class
Joined
Sep 22, 2007
Messages
370
Re: 89 Bayliner Trophy 21ft CC

I've used the Poli-Glow with excellent results. As with any finish, it's all in the prep. I have a 1985 Manatee that was a dull, chalky white when I got it. The oxidation was beyond the Poli-Glow prep products' ability to remove. I wet sanded by hand with #400 paper to reveal a light grey colored gel coat.
Follow the instructions and watch the video on thier website for application. The first couple of coats really absorbed into the gel coat, almost disappearing. The next couple gave a streaky appearance. After about 6 coats, it started to smooth out and shine. I put on about 8 coats and it has a deep gloss now. The finish coats go on quickly and dry fast if it's above 70 degrees or so. I get lots of compliments on it, especially after people find out how old the boat is.
It is easy to clean, nothing sticks to it. Fresh water rinse and toweling after use is all it needs. If you are going to put vinyl graphics or registration #s etc. on the boat, do it before the Poli-Glow or they won't stay on. It is very slippery when wet, so be mindful of that for areas where you walk.
I've had the Poli-Glow on it above the rubrail for 2 seasons and on the hull sides for 1 and so far it seems to be durable. I use the boat about 20 times a season in salt water. My next step is to sand and finish the running bottom and see how it holds up there. (Thankfully it's never been bottom painted!)
I was a skeptic of the "mop & glow" type products out there but decided to give this a try after seeing a demo at a boat show. I must say I am very satisfied with it and can recommend it. Again, it's all in the prep.
Make sure you get any wax residue off before you apply so it absorbs into and bonds to the gel coat.
 
Last edited:

m casey stock

Chief Petty Officer
Joined
Apr 29, 2012
Messages
514
Re: 89 Bayliner Trophy 21ft CC

Thanks for the reply kjdunne, I appreciate the detailed information. I look forward to giving it a try this summer.
 

m casey stock

Chief Petty Officer
Joined
Apr 29, 2012
Messages
514
Re: 89 Bayliner Trophy 21ft CC

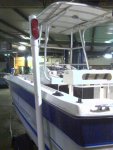
I put a steering cable on the Ol' Girl this past weekend, wasn't too bad. I'm not sure how long the cable has been in place, but I know the motor is not original to the boat because the boat is an 89 mod. and the motor is a 2001. I think the helm is original because I've seen several Bays with the same one, although I guess they could have changed out the drive. They may have gotten lucky and the cable worked from the old motor to the new, but I'm figuring not. Most likely it came with a Force as did most in that time era and it now, of course, has a Merc. hanging off the rear. Either way, It's been on there for a while. It was stiff when I bought the boat and I've just kinda nursed it for the last couple years until finally last year in a heavy chop I turned the wheel and the boat didn't! I got a pop pop pop as the gears on the helm jumped over the teeth on the cable rack. Thankfully I was able to power down and ease back to the dock. I doctored on it some to last the rest of the season, but knew that come this Spring it would have a new one. I was able to change it out without removing the motor, which was nice, but there was a trick to doing it. I was able to tapthe motor tilt/steering cable tube toward the opposite side of the cable after removing the large locking nut. This gave me the extra inch or two needed to clear the end of the steering cable end shaft. It's a little tricky getting the that tube back the other way because there is a ridge that will catch on the inside of the tilt bracket when tapping it back towards the cable. What I did was to have my wife tap on the tube with a rubber mallet while I jostled the motor up and down with the tilt/trim switches mounted to the motor. This may sound odd, but it worked. Each time I changed directions the motor would move forward or backwards causing the tube to move as well. For a brief second the tube would be centered as it wiggled back and forth. The right combination and timing (a bit of luck too) she tapped the tube just as the tube was aligned and WALLA! Once it was past the ridge, it was just a matter of continuing to tap it back into place and then putting the large lock nut back one. Just a note to remember, be sure to slide the nut onto the cable before you poke the cable back into the tube and remember to poke the cable back into the tube before tapping the tube back into place. Luckily I remember to do all this, but it sure would have added a bit of stress to the job to have done all that jostling and tapping in perfect time just to have to back it out and start over. You still need a bit of strength and determination to remove the old cable from the tube and twist and push and finagle the new cable back into the tube. I guess they drilled the hole for the cable to go through high in the splash well to help keep water from entering it during a back wash, but it sure made a bad angle for that cable. It's fine once the rigid end of the cable is in the tube, but you kind run out of flex as you work the cable out of the tube and you don't have much to begin with when you start putting the new cable back in. Anyway, like I said, easy peazy, doable as long as you have the patience. Took me about three hours start to finish and that included picking up and putting away tools, stopping to smell the roses (I was on our vacation property you know) stopping to eat the breakfast my wife brought out to me, and clean up. Okay, so not really that much actual working time. Don't know what the boat shops would have charged for the complete job, but when I called the lady said "I bet at least three hours" and around here $100.00 an hour. I got a deal on my Teleflex cable, brand new off evilBay for just under $130.00 shipping and all, saw it other places for well over $200.00. So I'm figuring unless you just got it that way, spending $550.00 or more plus tax, kinda puts a strain on the going out to eat budget. I'll just do it myself thank you very much! LOL :victorious:
 
Last edited:

Pcolafisher

Petty Officer 2nd Class
Joined
Jun 26, 2013
Messages
188
MC, can you show some close ups of the space in the front of the console to see how you avoid water running in under the cushion? My Trophy CC let's water into the console under the cushion. CC
 

Pcolafisher

Petty Officer 2nd Class
Joined
Jun 26, 2013
Messages
188
MC, can you show some close ups of the space in the front of the console to see how you avoid water running in under the cushion? My Trophy CC let's water into the console under the cushion. CC
 

m casey stock

Chief Petty Officer
Joined
Apr 29, 2012
Messages
514
MC, can you show some close ups of the space in the front of the console to see how you avoid water running in under the cushion? My Trophy CC let's water into the console under the cushion. CC
I'll do the best I can, the boat lives 4th away from me at our vacation property. I'll shoot some pics and post them next time I'm down. Best I can remember there is a strip of weather stripping that runs around the opening under the seat. Also there is a large plastic container that was installed from the under side that is larger than the opening under the seat and it is mounted in place with stainless screws and fender washers sealed with silicone. The container also has a sealed drain I'm the bottom that exits out the side of the boat so if water gets in it will drain right back out. I'm not sure what the PO used it for, but we store our off shore life vests there and they are always dry. I've never had a problem with water under the console, spiders yes, water no.
 

Pcolafisher

Petty Officer 2nd Class
Joined
Jun 26, 2013
Messages
188
Thanks a million! I have to find some way to get or keep all the water out. I'm at the point of having to replace the seat and backrest. I have the vinyl and need to buy the epoxy. CC
 

Pcolafisher

Petty Officer 2nd Class
Joined
Jun 26, 2013
Messages
188
M Casey - can't get out of Meridin to the coast? I guess it's just as well, I've been too busy working on our move south to go out in the boat or work on it. I did have a couple of good charter trips back in May to June. I hope to be retired and with the boats by year's end. Would really appreciate photos! Thanks! Craig
 

m casey stock

Chief Petty Officer
Joined
Apr 29, 2012
Messages
514
M Casey - can't get out of Meridin to the coast? I guess it's just as well, I've been too busy working on our move south to go out in the boat or work on it. I did have a couple of good charter trips back in May to June. I hope to be retired and with the boats by year's end. Would really appreciate photos! Thanks! Craig
Will be going down this weekend. I'll get some shots for you and send them you way. With the changes to this site, posting pictures without photo bucket is almost impossible and truthfully I really don't want to go to the extra trouble to post them on here (which is a shame) but I can send them to you in an email if you want to PM me that info.
 

m casey stock

Chief Petty Officer
Joined
Apr 29, 2012
Messages
514
Hey Pcolafisher,
I tried posting pictures in you personal message box, but I'm not sure they took. We'll try something different if the y didn't.
 

Pcolafisher

Petty Officer 2nd Class
Joined
Jun 26, 2013
Messages
188
Thanks! I tried the pm check but no photos. At least I finally have my retirement date at the end of February. I'll finally have the time to work on the Trophy. I may also try to weld up a T-top. Do you have photos of your anchor points? Cheers, Craig
 

m casey stock

Chief Petty Officer
Joined
Apr 29, 2012
Messages
514
No Title

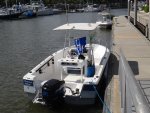
The front "T" top mounts go all the way to the floor? Not sure..I don't have a picture that shows them and its been months since I have looked in the boat, the rear ones mount to the side of the CC as seen in the picture posted here. If these pictures post without a hitch, I'll take more detailed ones this weekend (should be going down) to post for you. If you will PM me your email address I will send them to you directly along with the pictures of the front seat cushions if you still need them.
 

Attachments

  • photo213446.jpg
    photo213446.jpg
    45.2 KB · Views: 0
  • photo213447.jpg
    photo213447.jpg
    106.5 KB · Views: 0
Top