Starting new project 1973 Sea Ray 240 SRV

CrazyFinn

Petty Officer 1st Class
Joined
Dec 12, 2016
Messages
357
Still gets stuck with about 15% travel left. It seems to be getting air bound.

Maybe there is something wrong (a major gouge, scratch, crack) inside the bore at that point, or the bore is expanded somehow in one spot - something that doesn't stop you from manually pushing the ram past it, but the fluid escapes around the piston. Was there water in the ram at some point that was allowed to freeze/expand? Just a thought...
 

sheboyganjohn

Senior Chief Petty Officer
Joined
Aug 2, 2005
Messages
753
Don't know if there was ever water in it. What was odd, is when I pulled it out of the oil it would suck air into the one side if the last stroke was in the direction to draw fluid in on that side. I even tried leaving it in the oil for 30 seconds after finishing the stroke and it still sucked air. If I stroke it the other direction it is fine. Calling for rain the next few days. May just pull it off and take it in the basement and tear it down. It's just a basic hydraulic cylinder, so other then getting it to come apart, it should be easy to rebuild.
 

sheboyganjohn

Senior Chief Petty Officer
Joined
Aug 2, 2005
Messages
753
Got the throttle cable thing figured out. Previous owner had the shifter apart and put the arms on too far forward and I ran into the dash with the handle before I got it to WOT. I then finished the fuel lines on the other motor and tried to start it. Nothing turned on on the dash. I could get the engine to turn over, but no gauges. Tired the other motor, it will not turn over nor will anything on the dash come on now. There is a bit of a butcher job of wiring in the dash and I was digging around in there a bit while working on the cables so I might have knocked something loose. I think I will be doing a re-wire job on the dash next. Decided to at least get the other motor running. Kept turning over but would not kick at all. Went to check and see if the gas was getting to the carb and it was, right through and into the intake with out stopping, even with the key off. So I guess I have a stuck float.

I swear that I get one thing fixed/back together and two more things break.
 

sheboyganjohn

Senior Chief Petty Officer
Joined
Aug 2, 2005
Messages
753
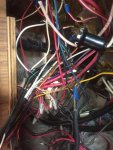
Got the majority of the wiring fixed today. Pulled everything that was not needed to run the boat out from behind the dash. Cleaned up the wiring for the port engine and found out why it would not start. There is a secondary pigtail connection at the dash. When I was working on the shift cables yesterday I must have hit the connector while putting the shifter back in the dash and unplugged it just enough to not make connection. I put it back together and used a hose clamp to hold it together. Then I went to do the starboard engine. Unplugged the connector and pulled it into the cabin so it would have more to work with. Noticed what looked like a couple of loose wire strands under the tape. I undid the tape and this is the mess I found.
IMG_1668.JPG

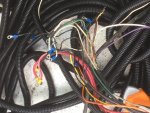
This is a close up once I unwired the entire pigtail and pulled it out so I could rewire it.
IMG_1670.JPG

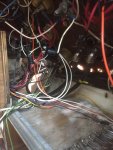
I got it all rewired and installed. Here is behind the dash after the install, and removing all the buttons and switches from the dash so I could get all the wiring cleaned up. Now just to clean up all the old fiberglass dust from in there.

IMG_1673.JPG
 

sheboyganjohn

Senior Chief Petty Officer
Joined
Aug 2, 2005
Messages
753
Decided to finish up the motor side wiring by replacing the last three connectors at the starboard motor. Got them replaced and realized I was missing a resistor wire on that motor. Undid part of the tape on the pigtail and found that resistor wire tucked up inside with a bare end. Pulled the coil and found that it was replaced with a 12V coil, no external resistor needed. So I decided I would just check to make sure I had continuity when the switch was in the run position. I would guess you would make the wiring jumper somewhere in the motor end pigtail, but I did not want to undo a mile of tape. I then spent the next hour trying to find my meter. Never found it. Had to go out and buy a new one. So, over 2.5 hrs of work with perfect weather I was able to replace three ring connectors and check continuity on one connection.

Busy tonight and looks like rain tomorrow. If the rain is not too bad I can jump in the boat and work on the switch panel under the bimini top.

Next big parts of the project will be to locate the chase in the deck for the fuel fill line and drill the opening for it and run the fuel line in and get the fuel tank installed. Will also run all the new fuel lines. I am just using standard auto fuel line for now. Once I get it all run where I want it I will order the exact amount of marine fuel line to replace it.

On a related note, has anyone run copper tubing for fuel lines? I was thinking of doing copper from the fuel filter to the bilge wall near the fuel pump on each motor. Then run hose from the bilge wall to the pump. I don't know if that would be cheaper then running marine fuel line.
 

sheboyganjohn

Senior Chief Petty Officer
Joined
Aug 2, 2005
Messages
753
Well measured and drilled the first hole for the fuel fill and was off by 4", drilled into the foam. So I glassed that plug back in and measured back over and hit the right spot. Got the fuel fill run and ended up with about 2' of extra hose. Next I glassed over the side shelves. I also cut the front bulkhead in the fuel area to the proper height so I can install the stair on it. Glassed in the supports for the fuel tank. This allows it to sit off the bottom of the boat and still allow drainage under it. Filled in the opening under the front bulkhead I had left for drainage while I was building. Now I have the sump area in front of it for the cabin. Ordered a rebuild kit for the carb so I can hopefully fix the leak past issue.

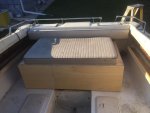
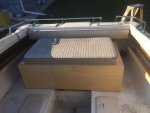
Last thing I did was build the dog house. Ended up making it a bit too big. I think I will just make a new cushion for the top of it and leave it that width. I can build in a couple of steps on the port side since the step to the swim platform is located there.
IMG_1678.JPG
 

Attachments

  • IMG_1678.JPG
    IMG_1678.JPG
    99.2 KB · Views: 1

Broaters

Petty Officer 2nd Class
Joined
Jul 31, 2017
Messages
139
just read through your post. good work on this boat. too bad that most of the pics are gone.
I'm about to start the reconstruction work on our Searay. thanks for sharing your info.
looking forward to future progress.
 

sheboyganjohn

Senior Chief Petty Officer
Joined
Aug 2, 2005
Messages
753
Welcome aboard Broaters.

I plan on getting the pic's back up eventually. I am still debating on creating my own website to host everything or find a decent hosting site that does not cost a small fortune like photobucket.
 

Scott Danforth

Grumpy Vintage Moderator still playing with boats
Staff member
Joined
Jul 23, 2011
Messages
47,543
just downsize the photos to under 400k and post them into the thread and iBoats hosts them.
 

chevymaher

Commander
Joined
Mar 29, 2017
Messages
2,915
Welcome aboard Broaters.

I plan on getting the pic's back up eventually. I am still debating on creating my own website to host everything or find a decent hosting site that does not cost a small fortune like photobucket.
Post image for the moment is free and easy to use.
 

sheboyganjohn

Senior Chief Petty Officer
Joined
Aug 2, 2005
Messages
753
just downsize the photos to under 400k and post them into the thread and iBoats hosts them.

I am just not looking forward to having to resize all my existing photos. Going forward I will E-mail the photos to myself from my phone and pick large instead of original as the size. So far those has all posted to Iboats ok.

I don't want to get into another free hosting site. If I do anything it will be something I pay for so I have some control over it.
 

CrazyFinn

Petty Officer 1st Class
Joined
Dec 12, 2016
Messages
357
I am just not looking forward to having to resize all my existing photos. Going forward I will E-mail the photos to myself from my phone and pick large instead of original as the size. So far those has all posted to Iboats ok.

I don't want to get into another free hosting site. If I do anything it will be something I pay for so I have some control over it.


I re-size all of my photos on my computer before uploading anyway. They don't need to be hi-res to show off my rotten wood and mushrooms growing in my boat... The iBoats upload has been working fine since I abandoned Photobucket (or they abandoned me).
 

kcassells

Fleet Admiral
Joined
Oct 16, 2012
Messages
8,600
Check the settings on your cell. Mine let's me lower the kb under tools/settings so I do em myself the pics and then they post.
 

Baylinerchuck

Commander
Joined
Jul 29, 2016
Messages
2,726
I use an image resizing app then transfer those from my phone to PC, then upload to iboats full size through the advanced editor. For some reason the iboats forum doesn't play well with iOS.
 

sheboyganjohn

Senior Chief Petty Officer
Joined
Aug 2, 2005
Messages
753
Well it looks like I will have a lot of time to resize photos. I herniated a disc in my back early this week. It was so bad I could not even attempt to stand, both legs would lock up in Charlie horses from my butt to my feet and would not release even if I laid back down. Worst pain I have ever felt in my life. Had to be hauled out by ambulance and spent two nights in the hospital. Now my left leg is numb from the knee down. I am using a walker to get around right now. Have an appointment with a neurosurgeon on Wednesday. Guess we will plan on splashing this project next summer.
 

kcassells

Fleet Admiral
Joined
Oct 16, 2012
Messages
8,600
Yikes!!! Back Surgery B L O W S!! Good luck. Look at alternative solutions if there are any. :blue:
 

sheboyganjohn

Senior Chief Petty Officer
Joined
Aug 2, 2005
Messages
753
Well I was able to get all 190 photos I had in photobucket downloaded to my computer, one at a time. The album download function would not work for me. I think they all came back at a lower resolution so I may not need to resize them. I will give it a try with editing. I will redo my cull lumber engine pulling thread first. It is short.
 

sheboyganjohn

Senior Chief Petty Officer
Joined
Aug 2, 2005
Messages
753
Got all the photos for this thread and the motor puller thread done. Will work on the dory thread next week.

As for me, it is surgery on Monday to remove the chunk of disc that is pushing on the nerve tail in the spine. The disk is below where the spinal cord ends, but it is pushing inwards to where the cord would be if it was longer. It is just a 'horse tail' of nerves at that point. Sounds like a simple surgery. I will be home the same day. 4 to 6 weeks recovery so I should be back to fighting form just in time to cover the boat for the winter. Oh well, there is next year, again.
 

Tnstratofam

Commander
Joined
Aug 18, 2013
Messages
2,679
Prayers for a quick recovery. Thanks for restoring the photos in your threads. It is alot of work but will help lots of people down the road who need help with their resto work.
 
Top