stringer questions

Status
Not open for further replies.

charles1961

Petty Officer 3rd Class
Joined
Dec 9, 2012
Messages
98
Re: stringer questions

i keep losing your post . i seen which pic you were talking about
 

charles1961

Petty Officer 3rd Class
Joined
Dec 9, 2012
Messages
98
Re: stringer questions

can you tell from my old pics and my new pics if things look good, or if you have a questions
 

jbcurt00

Moderator
Staff member
Joined
Oct 25, 2011
Messages
24,862
Re: stringer questions

attachment.php

The heights dont seem to all be at the same level so the decking will fit flat..

Step downs, wavy uneven cuts.

I'd fill any edge voids prior to covering the edges of the plywood.

Make sure to allow for a poly tank to expand, and be securely mounted.
 

charles1961

Petty Officer 3rd Class
Joined
Dec 9, 2012
Messages
98
Re: stringer questions

right now the stringers are only rough cut. they won't be final until another "1" and a half roughly are taken off and the other higher bulkheads will have more taken off . they will all be even when I finish trimming . yes once i trim them down i will fill the voids then . when i was trying to fill the voids before i put them in the boat some of the voids went all the way thru , so i figured i would let in run down inside the void while it was sealed on one end
 

charles1961

Petty Officer 3rd Class
Joined
Dec 9, 2012
Messages
98
Re: stringer questions

there is about a one-half to "1" gap around the gas tank on all sides. wasn't sure what to use for the tank to sit on instead of the bottem of the boat. it seems like they used a thin rubber strip on the bottem of the tank. what is a good inside the tank cleaner ?
 

charles1961

Petty Officer 3rd Class
Joined
Dec 9, 2012
Messages
98
Re: stringer questions

I also plan on wrapping the stringers and bulks after i round the edges on them
 

charles1961

Petty Officer 3rd Class
Joined
Dec 9, 2012
Messages
98
Re: stringer questions

definetly I will fill the voids after i trim everything down evenly.
 

charles1961

Petty Officer 3rd Class
Joined
Dec 9, 2012
Messages
98
No Title

I have some newer pics. getting closer
 

Attachments

  • photo206311.jpg
    photo206311.jpg
    102.2 KB · Views: 0
  • photo206312.jpg
    photo206312.jpg
    124.9 KB · Views: 0
  • photo206313.jpg
    photo206313.jpg
    113.7 KB · Views: 0
  • photo206314.jpg
    photo206314.jpg
    123.9 KB · Views: 0
  • photo206315.jpg
    photo206315.jpg
    127.9 KB · Views: 0
  • photo206316.jpg
    photo206316.jpg
    131.7 KB · Views: 0
  • photo206317.jpg
    photo206317.jpg
    104.6 KB · Views: 0
  • photo206318.jpg
    photo206318.jpg
    112.2 KB · Views: 0
  • photo206319.jpg
    photo206319.jpg
    128.9 KB · Views: 0
  • photo206320.jpg
    photo206320.jpg
    119.2 KB · Views: 0
  • photo206321.jpg
    photo206321.jpg
    139.1 KB · Views: 0
  • photo206322.jpg
    photo206322.jpg
    136.9 KB · Views: 0
  • photo206323.jpg
    photo206323.jpg
    134.5 KB · Views: 0

tpenfield

Moderator
Staff member
Joined
Jul 18, 2011
Messages
17,695
Hi Charles:

Some of the foam does not look like it was well mixed prior to expansion, based on the dark liquid looking areas in some of the foam.

I am wondering what was your process for mixing and pouring, and if the foam expanded well.
 

charles1961

Petty Officer 3rd Class
Joined
Dec 9, 2012
Messages
98
tpenfield, I am sorry I was not more descripted about my pics yesterday. I was trying to get them posted and having problems. what you are seeing there is fiberglass resin which i used to seal the foam after trimming the foam off. just sealing up the open cells.couple of people in coating places that i bought my foam mix and fiberglass resin said i could use this or couple of other things.but thats what you see , cured resin. foam did expand well, but i still have high and low areas, but pretty close. its a little tricky pouring foam over foam and getting it just right lol.
 

tpenfield

Moderator
Staff member
Joined
Jul 18, 2011
Messages
17,695
OK, thank for the explanation. The resin over foam trick would be also good for areas where the foam has to be cut and leveled off
 

charles1961

Petty Officer 3rd Class
Joined
Dec 9, 2012
Messages
98
here are some more pics.having a problem loading pics. keeps coming up a error loading pics. any solutions ?
 

Tnstratofam

Commander
Joined
Aug 18, 2013
Messages
2,679
Since the forum upgrade about the only way to load pics is using a photo bucket account and copying the url of each pic and pasting it in your post. I just read through your thread, and it looks like you've been making steady progress. I know how tedious and slow some of the work can get.
 

igy

Cadet
Joined
Jan 20, 2013
Messages
14
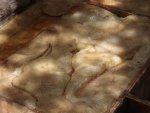
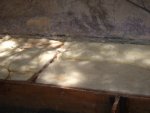
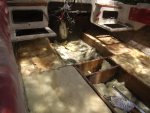
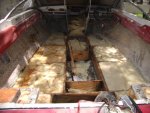
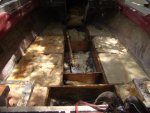
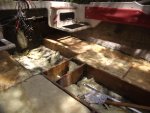
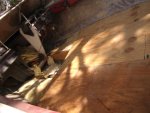
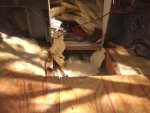
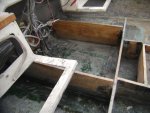
Yes Charles looks like you have made pretty good progress and a good job as well. I recently semi completed a restore of a 14ft Swiftcraft Stiletto (Australian boat). New floor, stringers and transom, had to flip boat to repair minor gelcoat damage on hull, cut out the splash well to get at the transom, etc etc. I didnt put foam under floor as wasnt there originally although slightly regret it now, as would have been much quieter.

I did have fun and learnt a lot along the way as first boat restore, and would be able to complete the job much quicker next time....But I very much doubt there will be a next time, it just is so time consuming that I feel time could be better spent.

That being said we have had the boat on the water twice (early summer here) and the kids and rest of the family absolutely love it so it has been worth it!

I can post pics if anyone is interested.

Some things I learnt:
Shop around for resin and similar products as the cost varies hugely. Often its worth paying freight when you can bundle other items you need or will need.
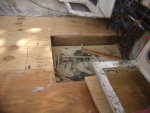
I did use PL glue to bed stringers in and didnt mind waiting the 5-7 days for full strength.
I then used peanut butter to fillet the stringers against the hull to make laying in the matt easier.
Use cheap paint brushes and cheap mixing pots, then throw them away after each use (in most cases). Its cheaper than trying to clean, as acetone is the same price as resin in Oz, so near the end of the project I finally had this figured out.
Have good breathing apparatus and replace the filters regularly.
Have a ready supply of latex gloves, they are very cheap.
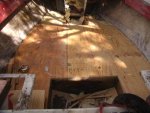
I used outdoor ply with WP glue and probably saved $300 over using marine ply, which is probably worth it.
I redesigned my floor so there are no penetrations, hopefully this will last longer. As with penetrations there is always going to be some moisture getting in.
Be prepared to find obstacles along the way, and that everyone is going to cost you more money.
Be prepared to spend a lot of time in the shed...alone.
Have old clothes to reuse and or throw out when glassing, sanding etc.
Set the trend early in the project and have your wife/partner make a coffee run to the shed every 2 hours.
Have fun!
 

charles1961

Petty Officer 3rd Class
Joined
Dec 9, 2012
Messages
98
Thanks Igy:I am not sure if the photos that I was trying to load yesterday even came up. the upload was telling me that it couldn't load the pictures. I do have to take some new ones . I d have the floor down and i am trimming the ski locker out and the engine compartment out and soon i will be starting to put the engine and hardware back in. hope to have some more pics soon .
 

charles1961

Petty Officer 3rd Class
Joined
Dec 9, 2012
Messages
98
thanks tnstratofam. yes it is time consuming. i am down to working on it to 1 day a week. i am determine to get it done though . i will have to look into the photobucket thing , thanks
 
Status
Not open for further replies.
Top