'93 Sea Ray 200br Overhaul

Sergi

Petty Officer 3rd Class
Joined
Jun 12, 2012
Messages
80
Hello folks,
My name's Sergio and I'll write you from Spain. I was wanting for years to own a boat, and marrying with my wife, almost an Atlantic siren, water sports addict didn't help either.
I must tell you that I realized that I'm some kind of masochist, the one avid for old, broken things for made them a huge projects to restore. I also like to give my personal touch on my projects, and that's the troublesome part of it all :D

So I was hunting for a good victim around while scrutinizing the forum for the viability of what I had in mind. I came across Frisco's phenomenal adventure almost at the same time that Sea Ray crossed my sight view, and I got it. Time will tell if I must thank my inspirator or hate'm :lol:
I know that most probably I would not add nothing new, but perhaps can make for some entertaining or funny reading.

Please meet the said victim of my devious plans:
iPvlwIVV5xOco.jpg

iAUOkzBMdtlmI.jpg

*No, I'm not the guy standing.

And that's one of my ideas for him:
ibpDrvLbCcz4EY.jpg


I also planned for a slight refresh on the inside, something to remove him the old look. Perhaps I'm a maniac or my first impression was so bad, but that for sure will render funny. I want to change the lateral panels to somewhat like the one's on the more modern sports, with more glass and less cushion, that will be more tough and lasting. We'll see if that glass part can be added to the cap seamlessly.
For the bow area I want to redo completely and make it curved again as the sport. One problem will be the consoles not being the same dimensions and so the insides not symmetrical.
And for the aft zone I'm decided to make it modular. The seats, panel and storage. I'll make some kind of cross bars and attach to them the firewall and cushions. For the seat base I'll make a removable storage box. If I'm able. :cold:
 
Last edited:

Sergi

Petty Officer 3rd Class
Joined
Jun 12, 2012
Messages
80
Re: '93 Sea Ray 200br Overhaul

After arriving home, I started the inspection and dismantle of all removable things, panels and that stinky carpet.
iLln55F5GY6TD.jpg

im7UZMkSOJcWc.jpg

irKvtQOT3VkIS.jpg

itN5Q9IkkwSIf.jpg


Yes, you can see some rot in the transom.
There also was a soft spot at the bow, some little hits revealed the things under.
iO36Fl2wNux7m.jpg


Rest does not seem to be better.
ib2u9s2aanKSf7.jpg


It seems to me that the PO left the boat on the outside, uncovered and instead of being tilted to the back and the plug removed, he raised him from the back. There was a lot of mud under the front of the hull. If that's correct would be that the deck damage had been made at the storage.
Well, I paid almost nothing for it so, what the heck.

So next step was removing all the fix panels and the deck.
 

Sergi

Petty Officer 3rd Class
Joined
Jun 12, 2012
Messages
80
Re: '93 Sea Ray 200br Overhaul

After I removed the inner transom skin I found it rotten. But sincerely I expected something worse, the wood was still hard and firm.
i4hhVCl8jTliM.jpg

You can see that most of the rot comes from the area surrounding the stringers. :blue:

It seems that the area under the portboard console was very damaged.
iYxFItA8o7qOw.jpg


After removing the deck, it was all destruction caused by the bad idea of running a flexible tube, the tank ventilation tube, through the stinger and the deck. I could easily take out the deck and foam surrounding the tube with my bare hands.
isB2LSJPxTlhY.jpg

inDg3EKNSZR27.jpg

Rain water had raised up here during the storage.

The starboard side was either better:
iDpltn1j3leVP.jpg


All the wood under the deck was completely rotten and I removed it with the foam.
 

Sergi

Petty Officer 3rd Class
Joined
Jun 12, 2012
Messages
80
Re: '93 Sea Ray 200br Overhaul

Here I will save you for all the nasty work and curses during two months of cutting glass and grinding to the bare hull. Even I still haven't managed to take the lid of the deck and that nasty grey thing.

I must say that Spain is not known for being a country of dedicated people, I mean, that folks there don't usually mend of repair their things themselves. And god bless us, as I've seen some really nasty repair there... from professionals. They only like using and disposing and are a good example for a consumist society, so materials, tools or know-how is not commonly available or cheap.
I an example, for my other projects, custom offroad suspension for my Jeep, I could not go to a tool shop and buy an affordable MIG machine. All decent one's started at 1000?. Most of parts for my projects I bought from the states.

What I try to say, is that no-one was capable of telling me what tools, accessories or sanding discs where better for removing the deck and stringers. I tested almost everything from manual saws, to the angle grinder. Sawzalls aren't available. A Portuguese friend of mine managed to buy one when we setup his CJ7, but I was not fair to ask him for after having it's MIG for several months.

So finally I used the angle grinder with a wood cutting disc to cut through panels, deck and the stringers. This is a fearsome metal disc with big teeth that is prone to getting you a finger or the whole hand if it locks and slips from your hands. Nothing happened thou.

I also used the angle grinder for removing the remaining lids, and I had hard times to get something that could do for a sanding disk. All I could get at the shop had nothing to do on anything more than wood. The best flap disc was useless.
So I finally found one strange grinding disk with 4 holes with a very big and hard sanding particles on resin that took the s**t out of the fiberglass. Even the shop didn't know what machine was that disc for or application, but I'm delighted.
Plastic supports would deform from the heat and didn't had the required mounting for the amazing disk so I put a metal cutting disk first on the grinder and it worked like a charm.

That alone was a big adventure. :lol:
 

Sergi

Petty Officer 3rd Class
Joined
Jun 12, 2012
Messages
80
Re: '93 Sea Ray 200br Overhaul

After some deliberation I decided for not to put wood anymore on this boat. I'll be using foam, for the stringers and the transom and honeycomb for the deck.
I tried to get some sea cast, even contacted with their sales dept. and they told me they would be willing to send me the necessary material for the transom repair. But after waiting for more than two months for a quote and trying to contact again with then with no success I decided to use high density sheets.

So last week I got one sheet of 350kg/m3 (21.85lbs/ft3) density closed cell foam for the transom and a few of 100kg/m3 (6.24lbs/ft3) for the stringers. That material is awesome. It is like wood. I'm currently using one of the sheets that made for the protective cover with two stands for a glass cutting table.

For the transom I plan making the same profile that was before on wood but logically charging more on glass. I guess two sheets of 2cms thick with a layer of biax in between gutted with a technical glue (very expensive) I could find in a shop that makes materials for high performance boats. The one's on Volvo ocean races and such.
The info on the product there It's the 90-82 PA: http://www.resinascastro.es/fotos/090118221727_G4Ne.pdf

Then after tabbing I'll be putting on top tree layers of 1708, lately found that is biax+csm backing, so I'll be buying some and letting the 17 biax I bought for tabs and the deck.

For the stringers I'll tab with 3 offset strips of csm, then laminate again with 3 layers of 1708 and then cap it with csm.

For avoiding delamination, I'll try making trough holes on the foam and then glassing through and onto the exterior lamination. Something like a glass rivet. Don't know if I'm clear enough. And the holes on the transom for the outdrive, I'll make them oversize and solid from PB and then drilled.

?Will the 3 layers be enough for the transom and the stringers? ?What are your thoughts?
That's the part where I've more doubts, so if anyone could give a hand I'll be very happy.
 
Last edited:

Sergi

Petty Officer 3rd Class
Joined
Jun 12, 2012
Messages
80
Re: '93 Sea Ray 200br Overhaul

This weekend we where preparing the inside of the hull. It had some hits and a hole that wanted a repair so we finally opened the can of resin.
ib1AgNNYbr1HjM.jpg

The white blur is a dust debris that managed to pass in front of the camera lens.

The transom outer skin had a few damaged areas that I repaired as they were common hits on the hull, and then laid a layer of biax on top.
ijKMvW8K5E1tA.jpg

ibnRKoJg2XqDnq.jpg


The finished product:
iLUm2pkZZjUEw.jpg

Again the white mark is another dust debris flying around. It does not have any tab there or air.
That camera seems to make strange things on the color of the repairs.

Here my helper cutting some biax, on the foam table. Transom template on second plane:
iBmhGbNjaRM7f.jpg


Yes, we found we love repairing boats and we dance on it
i1acHIbauvn8Z.jpg

*Dancing debris spectrum?

What I found is that the aluminium roller, the one that's used for eliminating the air on the layers, for me, it does nothing. In fact it creates more air voids while it passes through. Perhaps it's me that doesn't know how to use it. But I prefer little hits from a brush or a small pressure with him.
 

Sergi

Petty Officer 3rd Class
Joined
Jun 12, 2012
Messages
80
Re: '93 Sea Ray 200br Overhaul

Thanks FriscoBoater for the great info you shared there. Sure that will be a great help for me.

Yesterday I made the foam parts for the transom. That stuff is simply awesome. It could resist the force applied from all my weight on top while cutting without breaking or deform. Also It's a dream to work on. I could made tapers and round the corners to exactly the desired shape with the angle grinder and a wood sander.

ibkOFt1zYAqmjT.jpg


Today late I'll be gluing and laminating the two parts together.

Being a foam transom, I don't know if would better skin one or two layers before gluing to the boat or directly tab to the foam after glued and then skin like normal wood.... What do you think?
 

Sergi

Petty Officer 3rd Class
Joined
Jun 12, 2012
Messages
80
Re: '93 Sea Ray 200br Overhaul

This weekend has been so intense, for progress made as well as incidents.
The transom was assembled and glued on the aft mirror of the boat.

There's the transom almost finished. I put a layer of combi and one csm in between the two layers of foam for a thickness of around 0.12". The biax has a good weight.
i07aJofQqGouH.jpg


Notice the mounting holes, oversized and packed with peanut butter. It doesn't go through the glass but filled from each side.
iAdEN0NabQgYU.jpg


So after it cured I glued and clamped it all. I used a professional structural adhesive (quoted in above post) that happened to be blue and white after gelled. So the white ribbon at the top area it's the glue overfill used for filleting.
irNVCwT8rCs6D.jpg


That stuff is polyester based and seems like the PB but after it finally cures, it maintains a certain amount of flexibility. I like it, but if only wasn't white (and cheaper). I think that's the glue the boat originally had for stitch the stringers and ribs.

After I replaced the clamps, I tested flexibility, torsion and rigidness on the transom and it feels solid as ever. Even when still lacks two layers of 1708 over it.

And then was a surprise on sunday. We had a little flooding on the garage.
ibzRVmDVFonn09.jpg

When I stumbled on this I went so nervous and frenetically tried to get out that water as fast as I could. I was so worried about it adversely affecting the cure of the glue. But seems that hasn't any noticeable effect.
Perhaps because even when there was such amount of water, the humidity wasn't so high at all. It wasn't until monday, when I managed to get all the water out when humidity raised to the point that the glasses on all the cars tarnished. I think the concrete drying was the culprit. But at the moment all the work was cured.

Those two last weeks had been so rainy and has only worsened for the recent days. Past night I saw the worst hail (I think that's the name) of my life. The roads where covered with at least two inches of ice that still was there this morning. Lucky enough that none of the roof windows broke. It was really scary that I could not sleep.

The next steps are: doing the fillet (done), tabbing and lay the two layers of 1708. I missed the thickness on the foam for the front panel, so I will be grinding it with the wood shaving machine.

Also it seems that the boat had a good hit on the keel below the gas tank, and the glass in that area is affected that you can see the yellow shadow under. As the damage is contained on the tank area, I guess it's better to first put on the stringers for rigidness before grinding there. It's like 2'x4" and I must take out the pvc tube there.
 

Sergi

Petty Officer 3rd Class
Joined
Jun 12, 2012
Messages
80
Re: '93 Sea Ray 200br Overhaul

This past weekend we've done some more work on the boat. We finally covered the transom and started with the stringers. So there are the pics:

ibuqu6V53sdntr.jpg

This one is the transom before being laminated. If you take a more careful look at it, you can see the "laces". They run from one side to the other of the foam and on top of the first biax applied. So it is bonded to the exterior and in between of the next layers, to prevent de-lamination. If that works as I spect, would be my little contribution.

Then it all is tabbed and two more layers of 1909 and a final mat are laid. All of them wet on wet.
That's the final product:
ibqpSjAPJXVVoT.jpg


itgV3j4giLrrk.jpg


The drain hole still has to be opened. On this image you can appreciate the high weight of the biax I have to use. The grain is still visible trough the final csm layer. I can assure you that this thing eats resin as it was the world's end. IIRC we used @1 gallon only on the tabbing and final layers.
Also you can appreciate that my transom does not ends down the bilge. I don't know if that's good or preferable, but It was like this stock and I suppose that it's better for the transom not being always submerged. Even if it's for the little water there's always on the bilge.

Almost after we ended the work on the transom we started to build the wood structure to support the stringers in place and made two templates from styrene. I really hate this thing. But that was the better I could buy for 4€. Urethane isolation panels are way more expensive.
ibsa4d9rjITs6n.jpg


I used the protractor method and I'm already cutting all the foam panels and glass patches. I estimate that by the next weekend I will be ready to glue the stringers in. :joyous:
It all depends on how much profiling will be required due the hull shape. It wasn't practical to make 2,5" thick templates, and the material being foam it will be much better to sand them in-place.

I plan on make a sandwich of two foam layers of 3cms, with one layer of 19lbsft 45deg biax and two csm in between. then two 1909 on each side. Then glue and fillet, tab and then cap with two layers of csm. It's semi structural foam, not as heavy as the transom but good enough.
I also plan of making some "anti-de-lamination laces" there. I will wait for capping them until I'm really sure of the final deck thickness and that the fuel tank fits in.

Stay tuned.
 
Last edited:

Sergi

Petty Officer 3rd Class
Joined
Jun 12, 2012
Messages
80
Re: '93 Sea Ray 200br Overhaul

We have the stringers in place!
i8uncuUBxOwJt.jpg


This glue showed as a big aid during the stringer placement. that stuff is dense enough that one could put the stringer and it stood in place without any structure supporting it straight. Then I had the time enough to fine-position and "jump over it", so the excess glue came over and then I was unable to move it anymore. So sticky it is. After few minutes you could kick it with no displacement.
Yes, the stringers are totally floater over the glue by @5mm without hull contact and no, I didn't kick or jump over them. :lol:
The only drawback I find is the white mess you make all around.

A detailed pic:
iwTojU3UjRKRc.jpg


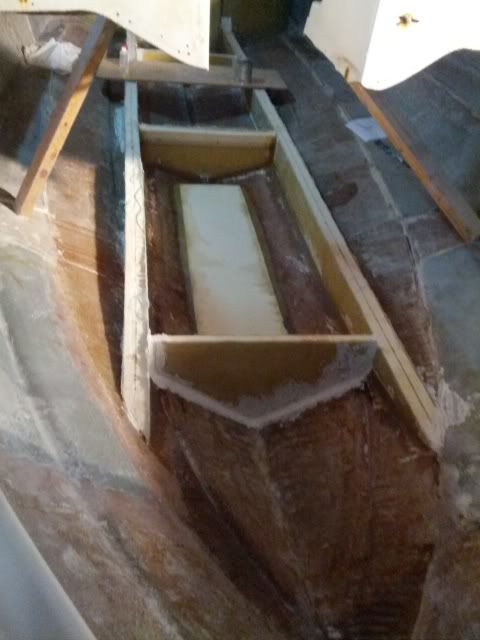
Now, I'll make the tank bulkheads and then remove the drain tube before gluing them so I can access the damaged area. And then, the chairs reinforcements will be the only thing that separates me from the deck. Perhaps I'll add some ribs to further support the deck, as I still have plenty of foam over there (they included two additional layers for free :D)

I plan to use 15mm (err... 6/10") thick honeycomb on the deck. Should be thick enough?
 

jigngrub

Fleet Admiral
Joined
Mar 19, 2011
Messages
8,155
Re: '93 Sea Ray 200br Overhaul

I plan to use 15mm (err... 6/10") thick honeycomb on the deck. Should be thick enough?

15 mm is .59" or almost 5/8" and should be fine, especially if you're going to use expanding foam under the deck.

Your work looks great!
 

Sergi

Petty Officer 3rd Class
Joined
Jun 12, 2012
Messages
80
Re: '93 Sea Ray 200br Overhaul

Thanks jigngrub for your kind words. I had a little fear because almost no-one was watching this thread. I was starting to think that I was doing a completely mess that anyone wanted to be aloof.

Uhmmm I'm getting the think about fractions of inches. Better in eights :lol: It's so difficult to teach the mind for someone that never used fractions and only decimals.

Yes, we'll be using foam under the deck. and I think that a simply layer of that big combi under the deck and another on the upper plus the csm or light woven will do. Or will be better with two combi layers on top?
 

Hoosmatroos

Petty Officer 1st Class
Joined
Jul 11, 2011
Messages
250
Re: '93 Sea Ray 200br Overhaul

Don't worry, also a watcher here ;)

How do you fit your new deck? Do you screw it to the stringers and will that hold (aka do the screws have enough bite on the foam stringers?)

Keep going because we want to see more. Perhaps some video's and more pics?
 

Sergi

Petty Officer 3rd Class
Joined
Jun 12, 2012
Messages
80
Re: '93 Sea Ray 200br Overhaul

Hello Hoosmatroos thank you for watching!

I plan only gluing it to the stringers, bulkheads and any rib i finally make. Perhaps it's not visible enough, but those stringers have something more than... 2 6/8" thickness (@7,5cms) I guess that glue surface is enough to avoid lateral displacement of the deck over the stringer when stepping on a surrounding hollow area, and even more difficult having almost all voids filled with foam.
The only other movement I can think of is the deck lifting, but I guess it's only possible If I come too close to the hull with the deck or having a good hit from below.

What I'm sure is that a bolt wouldn't be a help bolted to a foam piece and through a polypropylene honeycomb. Perhaps by using a bolt with really wide fins and over filling the hole in the foam with some chemical bond... but I guess the bolt will become more of a ripping agent (intrusive hard object surrounded by soft material)
So foam on foam, plastic on plastic. :redface:
The specifications of that glue pray that it's made to replace bolted assemblies. We'll see.

I'm so sorry, but I don't currently have any camera to make any video. It's already hard enough for the photo camera to work inside the garage that for the two last pics I had to wait until yesterday at midday (finally we could see the sun), and open all the doors and all the lights.
Here winters are similar to the one's in Ireland or so, lots of rain that never seems to end. So the days are dark, but the landscape is beautiful. I'm from a more sunny place, that would be the Florida of Spain, and all that humidity here it's killing my back and legs. But hey, we all know that women's are the ones in charge.
 

Woodonglass

Supreme Mariner
Joined
Dec 29, 2009
Messages
25,924
Re: '93 Sea Ray 200br Overhaul

Outstanding glass work!!! The transom is Picture Perfect. You will have a boat to be proud of for many years. Let us know if and when we can be of assistance.

superjob.jpg
 

Sergi

Petty Officer 3rd Class
Joined
Jun 12, 2012
Messages
80
Re: '93 Sea Ray 200br Overhaul

It has passed some time from my last updates. Those are are a mix of too much work at job and the requirement of earning some home points. You know that from time to time you must get some of these, if you don't want your others half to cut in half your fun time.
So I had to plant some new trees in the garden and mount some curtains rails. HAHA.

After that I continued the work on the boat, and now I've some delayed pics I want to share with you. I'll also write the date they where taken.
 

Sergi

Petty Officer 3rd Class
Joined
Jun 12, 2012
Messages
80
Re: '93 Sea Ray 200br Overhaul

18/02/2013 - The bulkheads where made:
IMG_20130218_143347_zps6259c41e.jpg

The where also made of PU foam, the high density one. I also made the floor of the skylocker.
Denial, the white thing is not silicone, it's the same glue I used for the transom.
 

Sergi

Petty Officer 3rd Class
Joined
Jun 12, 2012
Messages
80
Re: '93 Sea Ray 200br Overhaul

25/03/2013 - Some more sanding.
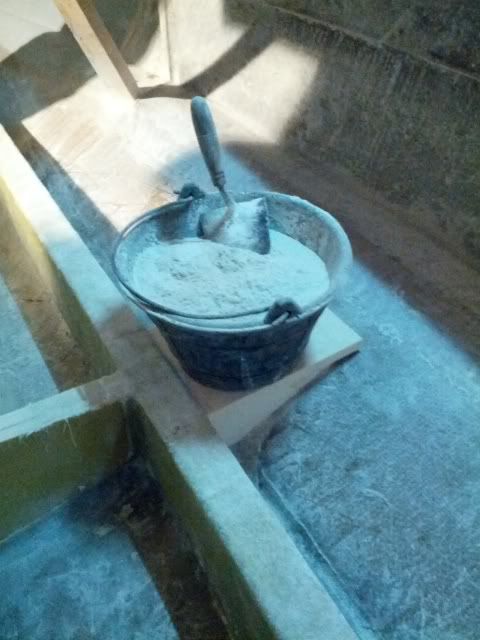
I was sanding for three days (denial, all the easter's holidays). I never thought that such amount of sanding was still left. And when I took the following pic, I thought that cup of dust was a lot of it. I took out four like this. A medium garden bag almost full. But I was finally done. I don't want to hear about FG sanding at least for a pair of years.
IMG_20130325_195128_zps523ffbf7.jpg


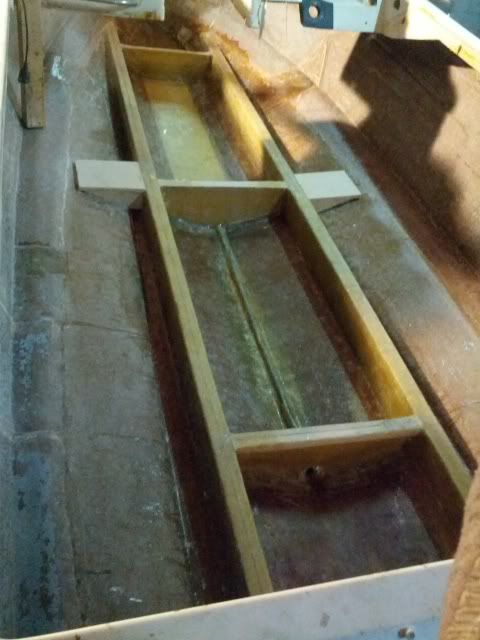
The strings where capped and several layers of combi and a final thick mat layer was applied to them. I also made two PU reinforcements for the seat buckets that you can see at each side and in detail on the above pic.
IMG_20130329_112043_zpsdf4fe42b.jpg


28/03/2013 - Keel repair
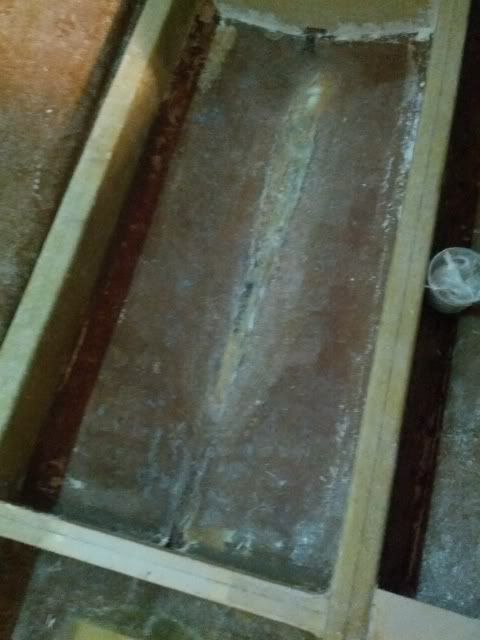
I also had made a major repair at the center section of the boat. I noticed a bright spot at one side of the drainage tube and I sanded to patch it, but as I sanded the affected area became bigger and bigger. I jumped under the hull and inspected it. I found what it seemed a big patch on the keel, 4 or 5 foot along the keel and It was clear that the boat was hit by reefs (I finally understood the name)
So I sanded it all without going through the gelcoat, so it served as a mold. Men, that was a big and scary hole.
IMG_20130328_173522_zps9478e0a6.jpg


I repaired it directly using high weight roven and mat with two final layers of combi that took all the tank compartment. I was surprised how well It got.
IMG_20130328_203920_zpsf975fc84.jpg


But I had a "little" affright there. After the hole was repaired and the resin was curing I decided not to wait and put the drain tube and finish it all. It seemed ready for it. so I placed the tube and laid the peanut butter on the sides. Allright, then I laid mat over it, but the mat started to lift from the top of the tube.
I could not get it to stick and it started to get a strange color and brightness. then I noticed the heat. OMG!
The PB reacted with the heat coming under from the patch and "boiled"?
It seemed to only mess the top layer and only on the higher of the tube, so as it was cold there, I didn't bother some more, got my car cart and got some rest under the boat, where it was hot HEHE.

Some minutes later, the mat stuck to the tube and only remained that light color you can see on the previous pic. I closely inspected the patch but was alright. So lucky that part as cured enough, I suppose.
 

Sergi

Petty Officer 3rd Class
Joined
Jun 12, 2012
Messages
80
Re: '93 Sea Ray 200br Overhaul

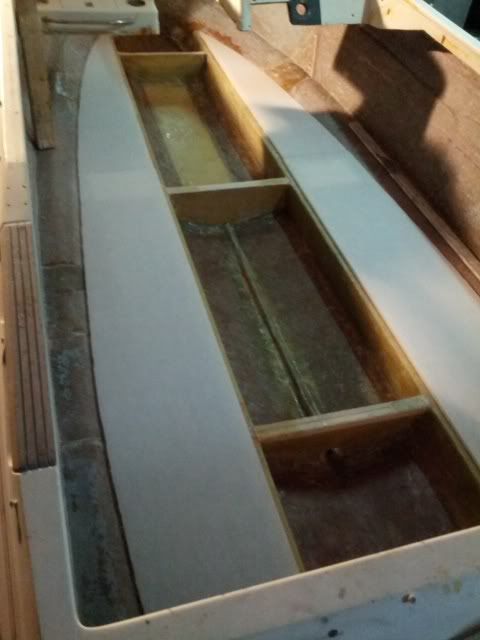
29/03/2013 - The deck sides where glued in.
As I commented, I used honeycomb, prelayered for the bottom side before where put in place.
IMG_20130329_132340_zps0eb7b284.jpg


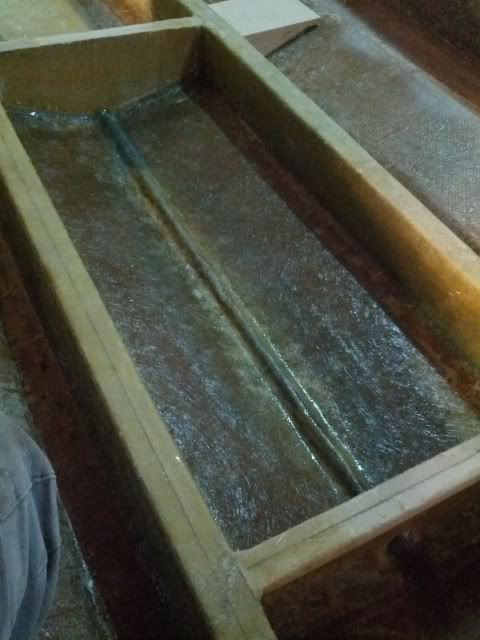
There, with all the edges filled with PB and the foam already inside.
IMG_20130409_203821_zps9b5cccdc.jpg


Sorry but I don't have any pics or videos of this phase. You may understand. Basically I was doing all the cooking and logistics and my wife, inside the boat was dumping cans inside the holes. The salesman told us that it was a slower version that the foam seen on this forum and that it would be good for 45 seconds of mix and 90 seconds total until dump, but he lied. The first batch suddenly "exploded" in our hands on the first 10-15sec before we could dump it and managed to let it in a plastic bag aside.
Seems to me that there was something wrong with one of the components, as the cream time would drastically vary as we consumed the product. As it was something only at the top of the can.

When doing the port starboard, for example, we lack of foam and had to make 3 batches, and with the same calculations and mix, we have to put a bunch of carafes full of water and other weights (including both of us), for port board not to pop up. I made additional hole for it to spill out.
Same thing on the starboard tack (you can see spill) as contrary on the port side.

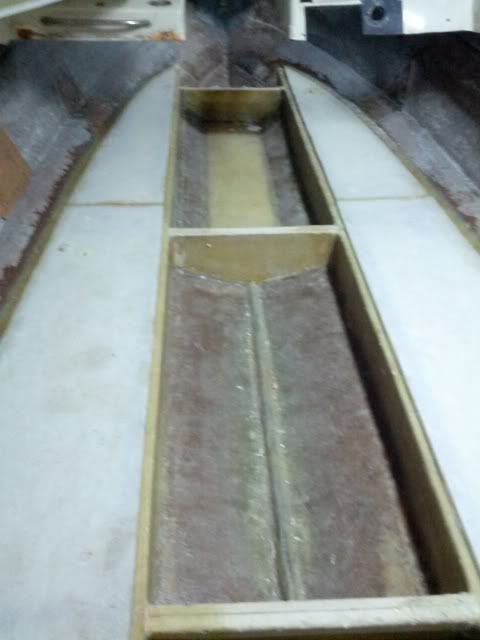
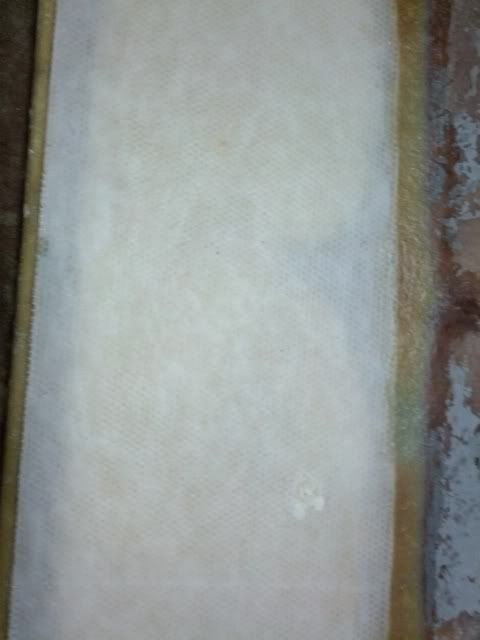
The advantage with the honeycomb it's that you actually can see the covering.
IMG_20130409_203836_zps67d5728f.jpg

The pouring holes get nicelly covered.
Can anyone tell me why this bit of PB on the right still is blue when dry unlike all other PB on the boat.
 
Top