1976 Tom Boy Boat, 1976 40 HP Johnson Outboard and who knows what Trailer

Rickmerrill

Senior Chief Petty Officer
Joined
Mar 13, 2014
Messages
686
"you'll use it faster than you think"

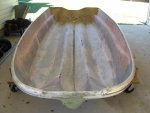
Yeah, while unloading the first 20Gal order I thought to myself how am I going to use up all this resin. While unloading the 2nd 20Gal order I thought to myself how did I use up all that resin!
 

gm280

Supreme Mariner
Joined
Jun 26, 2011
Messages
14,590
I have another question for the knowledgeable ones. Presently I have the entire inside of this tri haul grinded out. And will probably start the individual Uh Oh patches. And I am planning to cover the entire haul with poly and clothe to help with the thin and flimsy flex. However, I have not taken off the top rub railing that goes around the outside of the haul in fear of the haul warping out of original shape. But I did grind up to and around each and every rivet that holds that rail on. My ideas is to cover the haul, doing the transom, stringers and flooring and maybe even built the rod boxes before removing the rail and grinding the areas of the rivets and then making a smaller strip poly/clothe covering for the top section. And then reattaching the rail back via some large head rivets again. That way I think I can maintain the original curvature and structure without issue. Does that sound like a viable option or does anybody have a different approach? :)
 

Woodonglass

Supreme Mariner
Joined
Dec 29, 2009
Messages
25,924
The Rub Rail is not lending much structural support to your hull. It appears that a Pipe or something is clamped to the inner portion of the hull to act as a stiffener (gunwale). Is that correct. I see no need to remove the outer Rub Rail unless you just want to do it. I would suggest you use either some nylon straps or some 1x4's spanning across the beam of the hull to maintain it's shape.
 
Last edited:

gm280

Supreme Mariner
Joined
Jun 26, 2011
Messages
14,590
The Rub Rail is not lending much structural support to your hull. It appears that a Pipe or something is clamped to the inner portion of the hull to act as a stiffener (gunwale). Is that correct. I see no need to remove the outer Rub Rail unless you just want to do it. I would suggest you use either some nylon straps or some 1x4's spanning across the beam of the hull to maintain it's shape.

Actually WOG, that "tube" thing you alluded to in not in the later pictures of my grinding shots. I removed them before finishing the grinding efforts. It was actually a hollow tube that the steering and motor control cables were run through. But they won't be going back on because the new side rod boxes (with the lower sections blocked off and filled with mix-n-pour-in-foam) will replace them. So the only thing left is the rub rail sections now. And it sure seems like that is all that is holding the side shape to me. I grinded up to the rivets and on the sides of the rivets, but the rivets are still high and dry with old fiberglass underneath. So I figured once the side rod/foam boxes were installed they would hold the shape to allow me to remove the rivets and sand those areas down even with everything else. Then I can run a 6" strip of polyester and fiberglass in that area to strengthen them before reinstalling the rub rails back with new large headed rivets again. Hope that makes a little sense. But I want the rub rails to go back on after I polish them. However I am presently afraid to remove them because they seem to be holding the boat side shape on the side tops. I do like the idea of side to side arms to hold the shape and I think I can work around those wood pieces 'til I get more structural capability with the poly and glass clothe.

One more question. What are the usual kick times with the polyester? I understand that can be adjusted per MEKP percentages, but there probably is a min and max for such. I was just interested how much time I may have being how a lot of this rebuild effort I will be all by myself... Thanks in advance. I really do appreciate it! :decision:
 

Woodonglass

Supreme Mariner
Joined
Dec 29, 2009
Messages
25,924
Ok I found this old pic. Does your rub rail wrap over the top edge of the boat???:confused:
fetch
 

gm280

Supreme Mariner
Joined
Jun 26, 2011
Messages
14,590
WOG: Ok I found this old pic. Does your rub rail wrap over the top edge of the boat???:confused:

Answer; NO! that picture is kind of misleading. But the actual rub rail stops about even with the top of the actual haul. Here is a later picture and you can see the outside rub-rail might go a little higher but not wrapped over into the boat itself. You can also see the rivets along the sides that hold it on... But each rivet is now a little higher then the surrounding fiberglass. So my thoughts were to wait until the sides were shored up better, and then remove the rivets and grind the areas under the head of the rivets before applying the poly and clothe to stiffen that area up. I do like the idea to use supports out of 1 x 4's to support the sides and then remove the rivets and finish up the grinding under them. Sound like a viable option to me... What about the min and max kicking times with the MEKP percentages?

Haul-3.jpg
 

Attachments

  • Haul-3.jpg
    Haul-3.jpg
    32.5 KB · Views: 0

sphelps

Supreme Mariner
Joined
Nov 16, 2011
Messages
11,432
You will get a good idea how it kicks when you put your small patches on . Just do a few small batches to start .. The colder the temps the more you can bump up the hardener ...
 

Woodonglass

Supreme Mariner
Joined
Dec 29, 2009
Messages
25,924
Ok,NOW I see the Rub Rail configuration. It does have some structural basis to it so I agree you'd do well to brace the inside with some 1x4's You might even want to consider fabricating a gunwale from some 1x2 and glassing that in place when you're glassing the hull. Since you don't have a top cap it might not be a bad Idea and it would sure help stiffen up the sides of the hull. For your MEKP ratios, here's my rule of thump. Temps between 60-70 I like to mix 2% MEKP (I use the Metric system) Soooo 1000 cc of Resin would get 20cc of MEKP Temps @ 70 to 85 1.5% MEKP 1000 cc Resin / 15cc MEKP Temps over 85 1000cc Resin / 10cc MEKP. If you use this mix ratio you can expect to get about a 20 to 30 min working time as long as you are not working in direct sunlight and no wind and the humidity is low. All these things can have an effect on the resin. Propane heat makes High Humidity. That will slow the cure of the resin. It's always advisable to make Wet on Wet layups to get the best bond between layers.
 

gm280

Supreme Mariner
Joined
Jun 26, 2011
Messages
14,590
You will get a good idea how it kicks when you put your small patches on . Just do a few small batches to start .. The colder the temps the more you can bump up the hardener ...

Yes, I kind of thought that as well. But the polyester I'm presently using for small patches and such in not the same poly I'll be doing everything else with. It is just some I had already and need to use it up now. It still kicks because I used some a week ago and it works very good. So it will give me an idea, but the actual amounts will still need to be "learned" with the many gallons I'll purchase next. Thanks for your reply though. Keep watching for this project along the way...

WOG, I appreciate the MEKP percentages you supplied and will migrate them to my temp/humidity ranges soon...hopefully anyways. Seem every time I get (or think I am) ready to start with the final cardboard pattern layout, the weather changes again... I'm going to try and mock up the layout via some cardboard before actually cutting the plywood. Maybe that will keep the Uh Oh's at bay... How does that go, measure once cut multiple time...no, measure three times cut four time...no, Oh yea measure twice and buy new wood because you transposed those measurement wrong on the wood...YES! YES! YES! Okay, I'll calm down now. That is why I like cardboard patterns to layout first. Actually I make pretty good measurements and rarely even screw up them doing all types of woodwork and metal working through the years.. I guess cardboard is a much better material to screw up with then costly plywood. :watermelon:
 

gm280

Supreme Mariner
Joined
Jun 26, 2011
Messages
14,590
Okay now that the Holidays are over I can get back to working on the boat again and use the funds for this project again. I was thinking about using the usual 3/4" B/C exterior plywood for both the transom and the stringers and then switching to either 1/2" or even 3/8" for the flooring because I will be using mix and pour foam. And then using 3/8" or even 1/4" for the rod boxes and such . Of course everything covered and water proofed with poly and CSM, and the hull and flooring and transom covered with 1708. How does that sound to everybody?
 

gm280

Supreme Mariner
Joined
Jun 26, 2011
Messages
14,590
Sooo, what are you yammering about...Get Bizzzeeee!!!!:D:eek::lol:

I still have to drive and pick up the "stuff" to get busy...I mean Bizzzeeee!. And that "stuff" is a few hundred miles away. So it will be either this week coming up or the next. I can buy the plywood and start making the parts, but I won't be able to seriously do much until I get the poly and CMS/1708 in hand... Just passing my build ideas out there for others to concur. And I can tell you I am excited after re-watching "friscoboater's" great videos again on how he redid his 1995 Sea Ray boat from the How To's section at the top. Item number 14. That is a must watch for doing transoms and stringers in my opinion... He tackled his project with great displeasure of buy a "good" boat to only find out it actually wasn't that great of a boat deal after all... But he did it and a good job I'd say!
 

gm280

Supreme Mariner
Joined
Jun 26, 2011
Messages
14,590
I got an idea (yes another lame brain idea from this peanut gallery). :facepalm: If I rebuilt the stringers in my hull like shown in the attached picture, would it be a good idea to use mix and pour foam BEFORE applying the actual floor over top? What I mean is, if I installed the stringers and add the cross supports as shown, and then mixed up the foam and poured each box individually, then I could take a standard hand wood cutting saw lay it on its side and cut across everything that protruded above the boxed in areas before pouring the next area. Or can the mix and pour foam be cut like that and still be water proof? I honestly don't know. But if it can be cut/trimmed, then you could easily make certain that every area was properly filled and the floor would be installed without cutting holes in it afterwards for the mix and poured foam to be installed. I just don't know the foam capabilities. But the floor would also be supported because the foam would be flat on top after trimming and the stringer/cross connected supports. :decision:

Hull-1M.jpg

I have another question. I understand that you use PL glue to install the stringers to the hull because if you Peanut Buttered the stringers down, they would create a hard spot on the hull. After allowing the PL glue enough time to off gas and cure, you then use Peanut Butter and fillet the stringers on both sides, and follow that up with many pieces of 1708 and poly to fillet them down for the support. I've read that on here so many times. BUT, doesn't applying the peanut butter fillets AND the many pieces of 1708 with coats of poly actually create a hard spot as well? Seems like it does but I am not any expert... :confused:
 

jigngrub

Fleet Admiral
Joined
Mar 19, 2011
Messages
8,155
Yes, you can pour and cut the foam... but you'll need to paint over it to reseal it. Or you can use a scrap piece of plywood wrapped with plastic and screw it down over each cell and pour the foam in via a pour hole. Allow foam to set (about 15 minutes) remove plywood and repeat.

A hard spot on boat stringers doesn't mean a hard substance between the stringer and the hull, it means the stringer sitting down hard on the hull without any adhesive underneath it... the latter is what you don't want and it a "hard spot". PB is fine for bedding in stringers and you can bed a fillet at the same time without having to wait for the adhesive to off-gas.
 
Last edited:

sphelps

Supreme Mariner
Joined
Nov 16, 2011
Messages
11,432
PB would be the easiest way to go for bedding the stringers and nothing wrong with using it .. And for pouring the foam if you don.t want to cut holes in your newly laid deck than doing what jig suggested would be the way I would do it .. Temporary cover ,pour the foam ,uncover ,move on to the next ..
Btw , nice job on the grinding/clean up of the hull !! If ya get a spare minute I got a little tri-hull that could use your expertise ! :D
 

gm280

Supreme Mariner
Joined
Jun 26, 2011
Messages
14,590
PB would be the easiest way to go for bedding the stringers and nothing wrong with using it .. And for pouring the foam if you don.t want to cut holes in your newly laid deck than doing what jig suggested would be the way I would do it .. Temporary cover ,pour the foam ,uncover ,move on to the next ..
Btw , nice job on the grinding/clean up of the hull !! If ya get a spare minute I got a little tri-hull that could use your expertise ! :D

Ha thanks for the kind words, but mind you, pictures can be misleading...I hope anyways. I did make a few (okay a lot) of Uh-Oh's and grinded through. So I have to also fix those areas too... It took me about a week off and (mostly) on grinding it in prep. And the entire area was totally covered in white power. Kind of looked like snow, but it is now ready for the next stage. Hopefully that happens in the next week or so. It basically depends on the "WEATHER"!
 

Quick3201

Petty Officer 2nd Class
Joined
Jul 31, 2011
Messages
150
Boat builder in Southport NC uses a composit product to build his boats, no wood. It looks like a composite "ply" material, comes in all sizes like plywood, works and is used like plywood. All his builds are that and fiberglass. May be expensive but will not rot.
 

Mikeopsycho

Senior Chief Petty Officer
Joined
Feb 6, 2014
Messages
738
Like jig said, no prob pouring the foam before laying down the deck wood. I used the plastic wrapped plywood boards method, but I didn't screw them down, just weighed them down with batteries and let the foam ooze out the front edge, or sometimes left a 3/4" gap between the boards for the foam to expand through. After trimming where needed I coated the top with poly resin, as I had read here on iboats to seal the surface. Worked very well for me and I liked that I was able to see that the cavities were completely filled with foam.

It looks like a lot of cross pieces (bulkheads?) in your design. I'm no boat builder, but that looks like a lot of extra work that I wonder if you really need to do. It'll be bullet proof, that's for sure! :)
 

gm280

Supreme Mariner
Joined
Jun 26, 2011
Messages
14,590
Mikeopsycho. Those cross supports were only a drawing to allow others to visualize what I was going to do. Even if I were going to install cross supports, I would never put that many it. One or two and that would be enough if I install any at all. The original layout was merely two long stringers with two side wood planks to hold the floor at the sides. I will beef it up some, but not just two stringers and forget about it. This boat has to go back better then new or else... I could easily go buy a new fishing rig today if that is what I wanted to do. But I like refurbishing things back to better then original. A curse I have! But I do such things to continuously learn about different things. My project before this boat was I refurbished an old beat up Geo Metro just to see if I could do auto body work. It is shown at the beginning of this thread if you want to see how it came out. But I like working on this project boat presently. Really a great challenge and new skills learned!
 

jigngrub

Fleet Admiral
Joined
Mar 19, 2011
Messages
8,155
I'll be putting bulkhead/ribs in on 24" centers on my build so the plywood will be supported both ways and it won't matter which way I turn it.
 
Top