DIY reupholstering of boat seats/captain's chairs

natemoore

Master Chief Petty Officer
Joined
Jun 13, 2009
Messages
844
I cut out all my vinyl pieces for both sides, making them a little larger than the original. Better to have too much than not enough.

Installing the the reverse order that I took it apart, I start with the rear top panel.


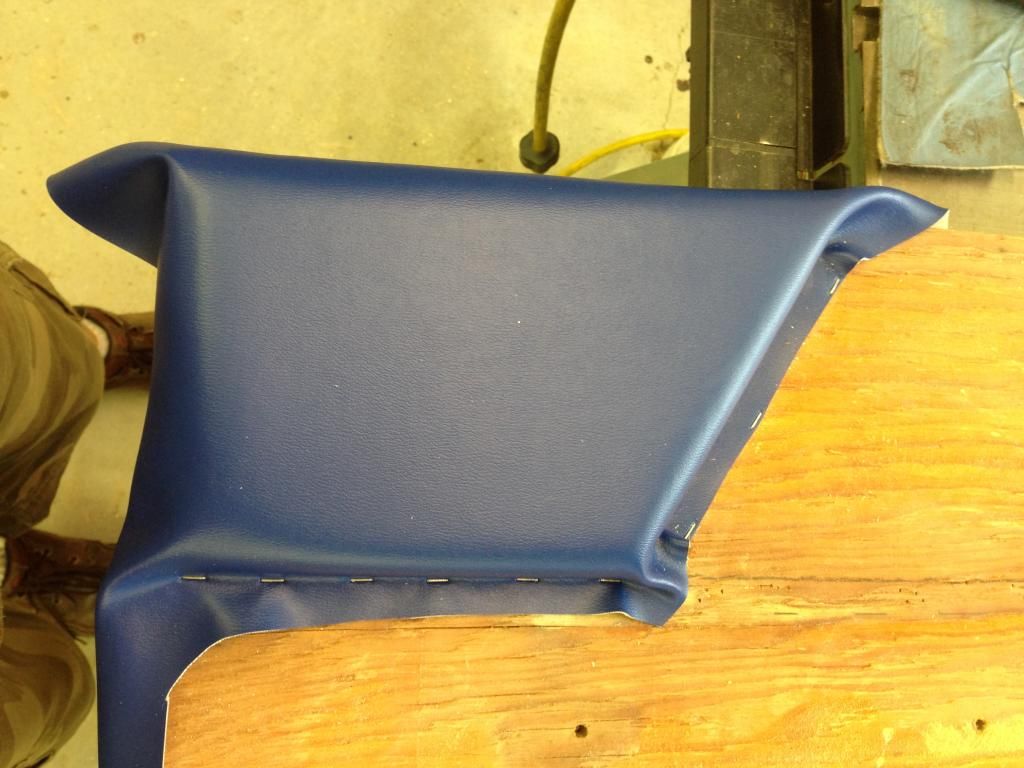
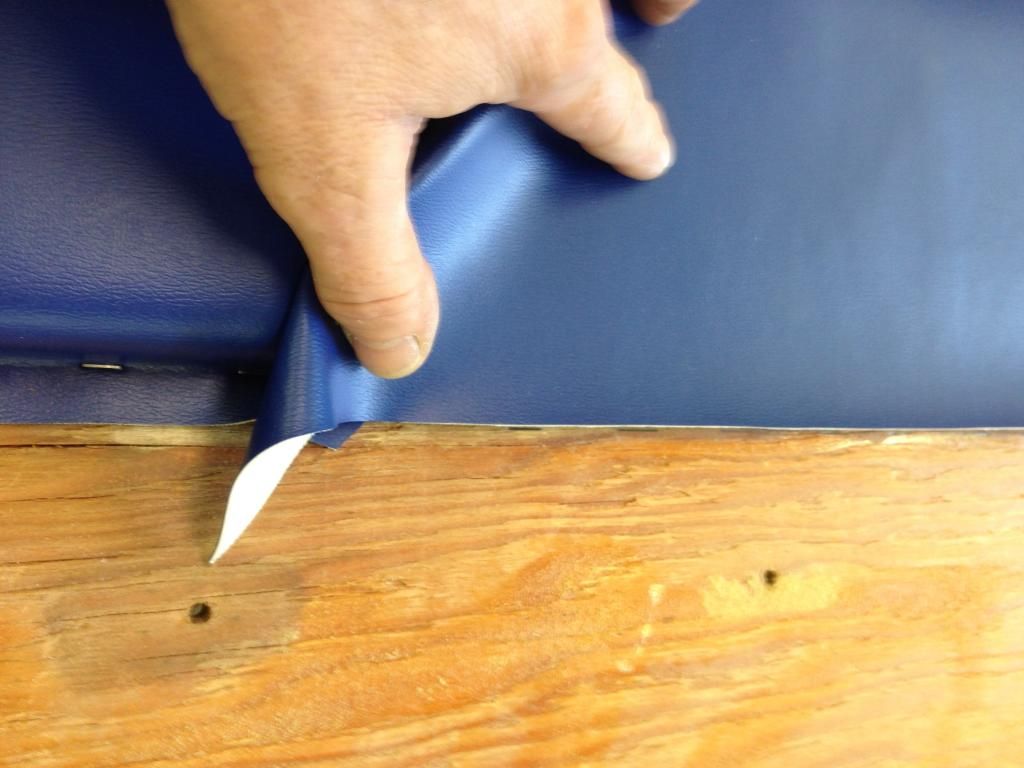
It takes some trial and error to figure out exactly where to staple the next piece. You want it tight up against the foam from the previous panel, and when you flip it over, you want it running parallel to the board with enough slack on each side to staple.


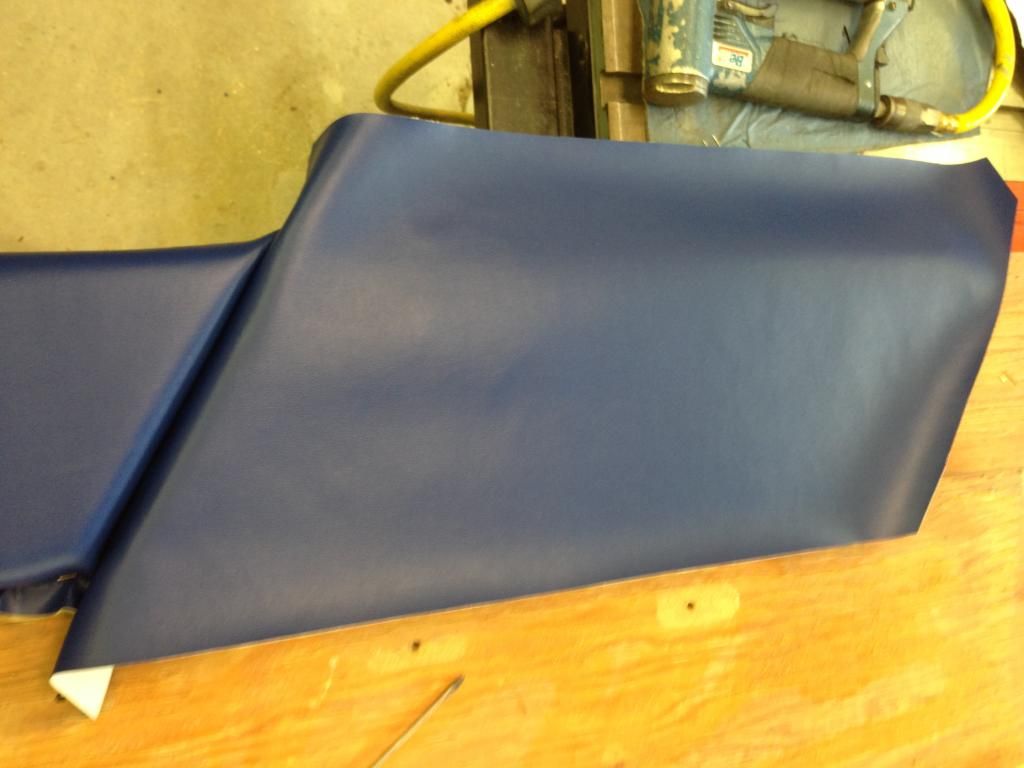
After you get the piece of vinyl stapled, but the next piece of foam up to it. I used contact adhesive to stretch the foam back to the original length and hold it in place.


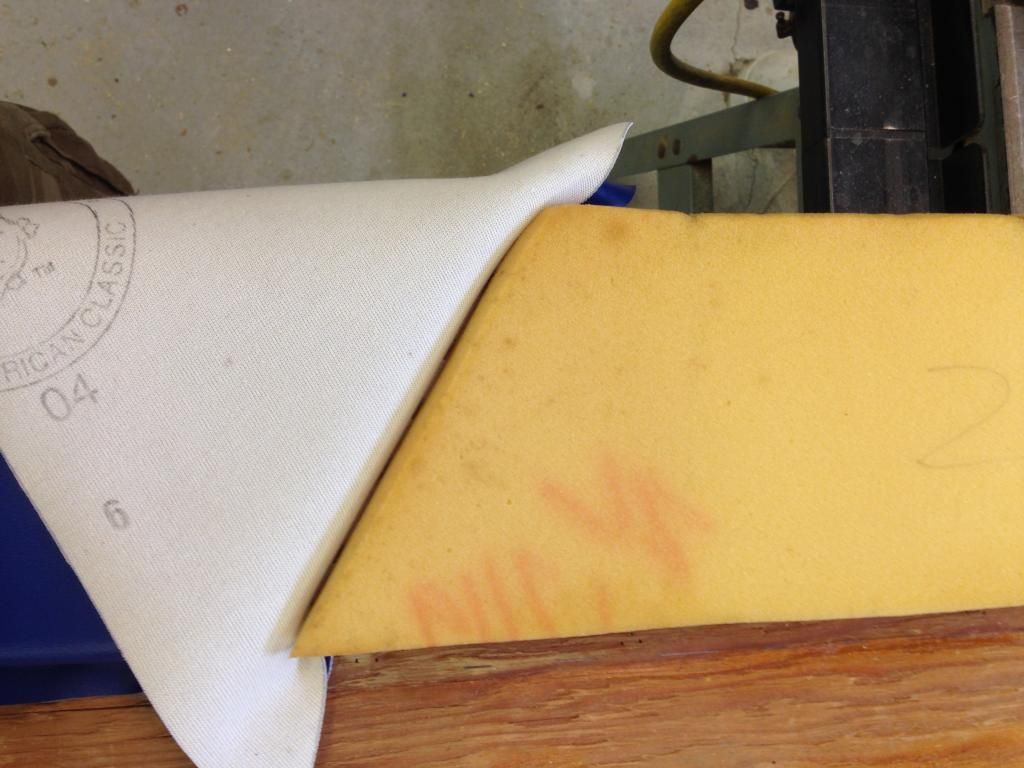
Now you're ready to stretch and staple.


natemoore

Master Chief Petty Officer
Joined
Jun 13, 2009
Messages
844
On my upholstery, the top, forward flap of each panel was stretched forward, overlapping the panel in front of it.


Forward is to the top in this picture.


The lower, aft flap of each panel was stretched rearward, overlapping the panel behind it. The overlaps for an "S" shape facing the bow of the boat.


Now proceed thusly toward the front of the panel. I don't do all the tucking, stretching, and stapling until I see how the middle white panels are going to have to be tucked, stretched, and stapled.

 
Last edited:

natemoore

Master Chief Petty Officer
Joined
Jun 13, 2009
Messages
844
This is the forward white center panel. Use the cardboard strips to butt the white vinyl tightly up against the completed blue panels above it (as it's oriented in the boat). You want a tight, straight line with no gaps that would show the staples in the blue vinyl.


Notice how I used the clamps on the sawhorses so I can stand the entire panel upright or lay it flat easily.


This is the rear white center panel. Same technique here using the cardboard strip. Pull the white vinyl tight and staple in a few places on the bottom close to the foam (under the white vinyl). I used a straight edge and pencil to mark my staple line. Again, you want a straight line here.


natemoore

Master Chief Petty Officer
Joined
Jun 13, 2009
Messages
844
Next is the lower blue strip. Tack the vinyl in place, butt the cardboard tightly against the foam above it, and staple away.


Nice straight, tight seam.


With everything basically tacked in place, now is the time to stretch everything. I had to pull out several dozen staples getting everything smoothed out and looking right.


These areas around the aluminum trim caused me the most grief, but I eventually got them looking good. I think the reason I had so much trouble getting all the sags out was because I didn't use new foam.


natemoore

Master Chief Petty Officer
Joined
Jun 13, 2009
Messages
844
This is the last piece of vinyl, the white strip along the top. Since there is a 3/4" piece of wood here, there's no need for the cardboard.


Wood strip and foam screwed in place. Notice the slits in the foam. That's where the screws go. Wrap it around, stretch and staple.


Last thing is the welting that goes around the top. I basically lined up the top edge of the welting with the top edge of the vinyl, rather than having it stand proud of the vinyl. The reason is so that it will fill any gap between the side panel and side of the boat. I used a straight edge on this too.


Now to get ready to attach it to the boat. Using the old screw holes, puncture the vinyl from the back using an awl and cut a slit in the vinyl the width of the screw head. When you screw it to the boat, pull the vinyl up around the screw head before you torque it down. The screw head will be completely hidden when you're done.


natemoore

Master Chief Petty Officer
Joined
Jun 13, 2009
Messages
844
Here it is in the boat.

CAUTION: When I did my bow section (has it really been two years???), I used a black permanent marker to label the vinyl pieces. After a year or so, the numbers bled through. Now I have backward numbers showing. Bummer! I have plenty of white vinyl left over, and I may redo it in a couple of years. USE A LEAD PENCIL TO MARK YOUR PARTS!


Gator1996

Petty Officer 1st Class
Joined
Jul 29, 2011
Messages
228
natemore.
I have to say that I am way past impressed. This is probably the best work I've seen from any non-professional on any site and better than most pros. The welting on your bow cushions was unbelievably straight. I gotta say I'm crazy jealous. Great job! You should be proud.
 

natemoore

Master Chief Petty Officer
Joined
Jun 13, 2009
Messages
844
natemore.
I have to say that I am way past impressed. This is probably the best work I've seen from any non-professional on any site and better than most pros. The welting on your bow cushions was unbelievably straight. I gotta say I'm crazy jealous. Great job! You should be proud.


Dang! That's a hell of a compliment. I appreciate it! Did I mention that I won a Home Economics sewing award when I was in the 9th grade...despite the fact that I was stoned practically every day? :lol:

I put a lot of the credit in my Sailrite LS-1 sewing machine. Gotta have the right tools to do any job correctly.

Next task is doing the starboard side panel and replace the carpet. I've got a soft spot next to the anchor storage area, and I'm hoping that the rot is limited.
 

natemoore

Master Chief Petty Officer
Joined
Jun 13, 2009
Messages
844
Climbed into the boat to install the side panel and ran into a huge wood spider. The damned thing was crawling up my chest as I was screaming like a woman! One just like this:


I think it was about 2.5" in diameter.
 
Top