1970's Aluminum Mckenzie Cherokee Runabout Rebuild

Status
Not open for further replies.

jigngrub

Fleet Admiral
Joined
Mar 19, 2011
Messages
8,155
If you're using wood sides just wrap the vinyl around the back like you did the decking. Should look real good.
 

jhendery

Petty Officer 1st Class
Joined
Jun 14, 2012
Messages
336
Yes. Thanks Jig. Going to use wood sides. They're already cut. Just need to match the vinyl and install. Oh yeah and need to pickup more nasty contact cement.

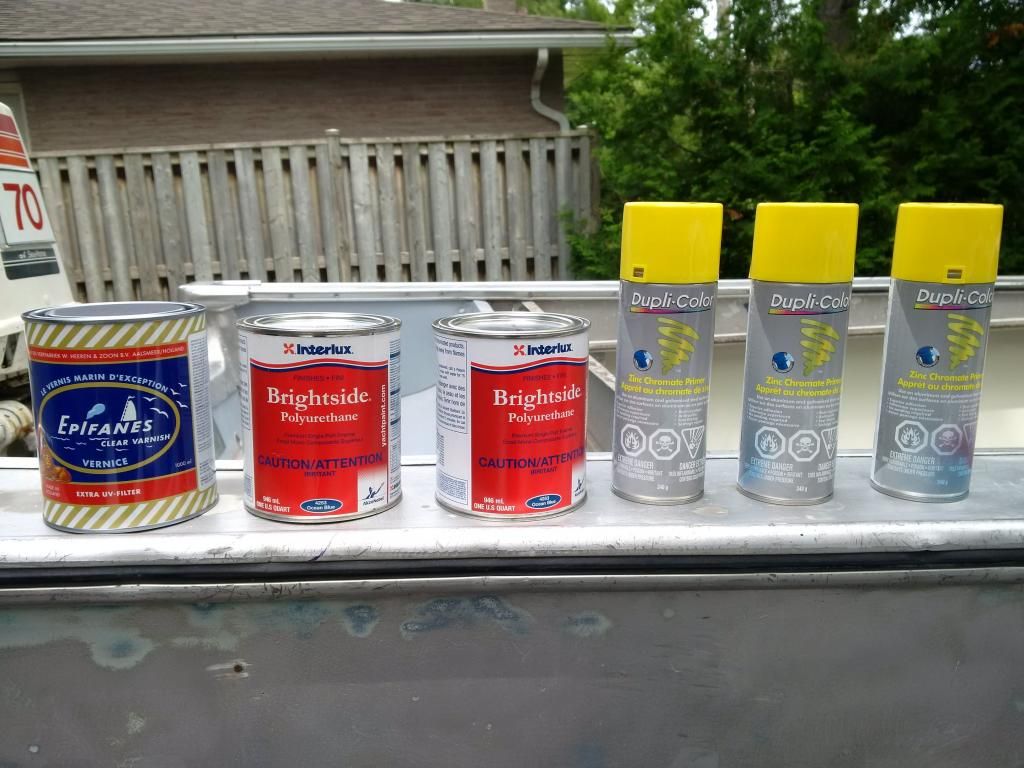
Picked up a few supplies yesterday. Got an extra can of the Epifanes marine varnish and 3 X rattle cans of the ZC primer. And got the polyurethane top coat. Going with ocean blue and Kingston grey. Have a 1/2 can on the grey left over from the splash well. Should look real good. :)


Did manage to get a couple things done yesterday. Marked the helm hole position. And got the transom cap holes drilled.

Should be able to get a few more things done this afternoon. Raining now but expect to clear this afternoon. :)

Have a good one eh!
 

jhendery

Petty Officer 1st Class
Joined
Jun 14, 2012
Messages
336
Wish List

- sand port chime
- sand port and starboard sides (again)
- tape and mask
- zinc chromate
- drill 2 1/4" helm hole and bolt holes in dash
- marine varnish dash
- drill 1/4" holes for transom caps and install SS hardware
- drill and rivet 3/16" transom with splash well
- install transom caps with 5200
- install gunwale caps with 5200
- cut vinyl for starboard and port sides
- apply vinyl to sides using contact cement


Red = completed

Also packed the starboard trailer bearing with wheel bearing grease. Now both bearings should be good to go.

Should get the hull prepped for ZC primer this week and sprayed onto the hull and topside.

Should be able to apply a coat or two of Epifranes to the dash. Just need to confirm hole size for the toggle switches.

Have another thread going for the ob. Also hope to re-assemble lower end unit with seals and new impeller.

That's it for now. Cheers and have a good one eh!

:)
 
Last edited:

jhendery

Petty Officer 1st Class
Joined
Jun 14, 2012
Messages
336
In terms of dash switches for bow light, stern light and bilge I am going with Seachoice 2- position on/off toggle switch. (page 17 12101)

http://www.gillroys.com/2pos-toggle-switch-s586242.html

Haven't picked up the switches but was curious to know how they mount. Considering the dash is 3/4" thick - is it a simple process to drill 1/2" hole through dash and install the switch?
 
Last edited:

jbcurt00

Moderator
Staff member
Joined
Oct 25, 2011
Messages
24,871
Nope, you'd have to drill a larger then 1" hole almost halfway +/- thru the dash from the back (larger enough that the switch 'body' fits in it) & then a 3/8" hole thru the center of the 1" hole.

Then wire the switch, take the hex nut off the toggle shaft, and push it thru the hole. Once the threaded shaft is sticking out of the dash, you put the hex nut back on..

You have to make an oversized diameter hole in the back of the dash because the toggle shaft isn't 3/4" long. It's only 15/32" long and you have to have enough threads showing to thread the nut on after it pushes thru.

That's why dash switch panels are so popular. Ya cut a 3" X 4" square hole (or whatever fits your plate) in the dash, mount the rocker & toggle switches in an aluminum panel & mount the whole panel to the dash.
 

jhendery

Petty Officer 1st Class
Joined
Jun 14, 2012
Messages
336
That's why dash switch panels are so popular. Ya cut a 3" X 4" square hole (or whatever fits your plate) in the dash, mount the rocker & toggle switches in an aluminum panel & mount the whole panel to the dash.

Thanks JB. I am looking for something simple and it sounds like a dash panel including toggle switches is the way to go. Can you recommend one?
 

jbcurt00

Moderator
Staff member
Joined
Oct 25, 2011
Messages
24,871
Thanks JB. I am looking for something simple and it sounds like a dash panel including toggle switches is the way to go. Can you recommend one?

Lets start at the beginning, what do you want switched? Bow light (navigation), stern light (anchoring), general 'cabin' lighting around the perimeter of the gunwale &/or up under the covered bow, bilge pump, horn & etc?

AND most importantly, do you WANT to cut a large squarish hole in the dash?

Lots of guys suspend a panel slightly back from the edge & below the dash so they aren't cutting a big hole...

Bend up a small aluminum panel, cut the correct size hole & apply foam & vinyl to the panel. Then put one of these in it & hang it below the dash in the corner near the helm's gunwale:.
28990-2-lg_1.jpg


Depending on what you want to switch on & off, and how they are switched, a horn is a momentary on push button or toggle usually, once you let go it goes off. Bow/stern are sometime 3way switches: bow on, stern on, both on.

Iboats sells a bunch

as do other retailers

Spend some time looking thru pix of them. LOTS of panel & switch styles to choose from. Find one that fits what you want to switch & fits your budget & LA boat's style. LA boat's style is why I recommended suspending them behind/below the dash.
 

jhendery

Petty Officer 1st Class
Joined
Jun 14, 2012
Messages
336
Lets start at the beginning, what do you want switched? Bow light (navigation), stern light (anchoring), general 'cabin' lighting around the perimeter of the gunwale &/or up under the covered bow, bilge pump, horn & etc?

Bow light, stern light, bilge and cmc tnt. I have the cmc toggle switch. The switches can all be 2 position on/off. Probably get the rubber boots too. :)

AND most importantly, do you WANT to cut a large squarish hole in the dash?

think a basic dash panel may be the way to go?


Spend some time looking thru pix of them. LOTS of panel & switch styles to choose from. Find one that fits what you want to switch & fits your budget & LA boat's style. LA boat's style is why I recommended suspending them behind/below the dash.

Thanks for the suggestions JB! Good suggestion. Going to do some research.

Think I will build a dash panel. Will be easy to drill holes and install switches. Then mount dash panel to dash.

Good - so now I can move ahead and apply Epifranes marine varish to the dash.

Have a good one folks! :)
 
Last edited:

jhendery

Petty Officer 1st Class
Joined
Jun 14, 2012
Messages
336
Was a busy weekend with not much time for La Boat. But did get a couple things done ...

- first coat of Epifranes marine varnish applied to dash
- port chime sanded
- vinyl cut for starboard side

Need to pickup Acetone for cleaning contact cement. Hope to have vinyl applied to both sides and marine varnish completed.

Have a good one eh!

:)
 

UConnMRB

Petty Officer 2nd Class
Joined
Jul 18, 2014
Messages
119
Just read the whole thread. I learned a lot for my restore. Your boat looks great!
 

jhendery

Petty Officer 1st Class
Joined
Jun 14, 2012
Messages
336
Just read the whole thread. I learned a lot for my restore. Your boat looks great!

Thanks for stopping by UConn.

Got a couple of things done ...

- Epifranes marine varnish applied to both sides of dash - should get the dash sanded tonight and ready for second coat
- applied vinyl to starboard side

Have a good one eh!

:)
 

jhendery

Petty Officer 1st Class
Joined
Jun 14, 2012
Messages
336
Wish List update ... Red = complete

- sand port chime
- sand port and starboard sides (again)
- tape and mask (starboard)
- zinc chromate (starboard)
- drill 2 1/4" helm hole and bolt holes in dash
- marine varnish dash (5 coats and counting ...)
- drill 1/4" holes for transom caps and install SS hardware
- drill and rivet 3/16" transom with splash well
- install transom caps with 5200
- install gunwale caps with 5200
- cut vinyl for starboard and port sides
- apply vinyl to sides using contact cement


Got a bunch more things done.

Have 5 coats applied to dash front and probably 4 on the other side. Seems to be coming along well. Finishing up with 200, 320 and 400 grit sand paper. Hope to have the marine varnish finished this week.

Then install dash and connect rack and pinion steering. :)

Sprayed ZC primer onto starboard last evening. Getting ready to mask for the topcoat. Going to go with a 2 tone finish with ocean blue and Kingston grey at the bottom.

Have a good one eh!

:)
 

jhendery

Petty Officer 1st Class
Joined
Jun 14, 2012
Messages
336
Last coat of marine varnish didn't go on too well. I used varnish that wasn't fresh and ended up with a rough finish. Anyway more sanding tonight and another coat and we'll see where things are at.

Got a second coat of ZC primer applied to starboard side. I think it's ready for Tremclad primer.

Going to roll on the TC primer and get things ready for top coat. Not sure if I will need to sand after primer? Is sanding expected?
 
Last edited:

Grandad

Lieutenant Commander
Joined
Jun 7, 2011
Messages
1,504
Hi Jeff. Just quietly lurking. You might consider switches that have a long throat/barrel that allow simple mounting through a drilled hole such as one of these.
http://www.iboats.com/Marine-Push-P...5498084--session_id.835148470--view_id.216625
That's the style originally used on my '72 Holiday. The originals have a bonus feature in that dirty contacts can be accessed and cleaned. I did this with one of mine when it stopped working. I was able to pry the little brass tabs up and open the cover to access all the parts which showed no signs of wear, just some accumulated crud that was easy to clean out. A little dielectric grease and voila, good as new. They're not aerospace stylish, but I'll take an ugly switch that works dependably over a plastic capsuled switch that doesn't any day.
One more thing. If you're limited in space for switches, sometimes you can place some of them in other locations. I think that the bilge pump switch is a good example. I removed mine from the dash and replaced it with a rubber covered toggle switch in the stern area. I see no need for a bilge pump switch at the helm.
- Grandad
 

jhendery

Petty Officer 1st Class
Joined
Jun 14, 2012
Messages
336
Hi Jeff. Just quietly lurking. You might consider switches that have a long throat/barrel that allow simple mounting through a drilled hole such as one of these.
http://www.iboats.com/Marine-Push-P...5498084--**********.835148470--view_id.216625
That's the style originally used on my '72 Holiday. The originals have a bonus feature in that dirty contacts can be accessed and cleaned. I did this with one of mine when it stopped working. I was able to pry the little brass tabs up and open the cover to access all the parts which showed no signs of wear, just some accumulated crud that was easy to clean out. A little dielectric grease and voila, good as new. They're not aerospace stylish, but I'll take an ugly switch that works dependably over a plastic capsuled switch that doesn't any day.
One more thing. If you're limited in space for switches, sometimes you can place some of them in other locations. I think that the bilge pump switch is a good example. I removed mine from the dash and replaced it with a rubber covered toggle switch in the stern area. I see no need for a bilge pump switch at the helm.
- Grandad

Thanks for stopping by and chimming in Grandad. Thinking I am going with a plate and mount the switches into the plate. Something like LL did on his StarCraft. I have the TnT switch already and the others will be similar two position switches.

BTW - hope your health is ok and you're getting out on the water!
 

jhendery

Petty Officer 1st Class
Joined
Jun 14, 2012
Messages
336
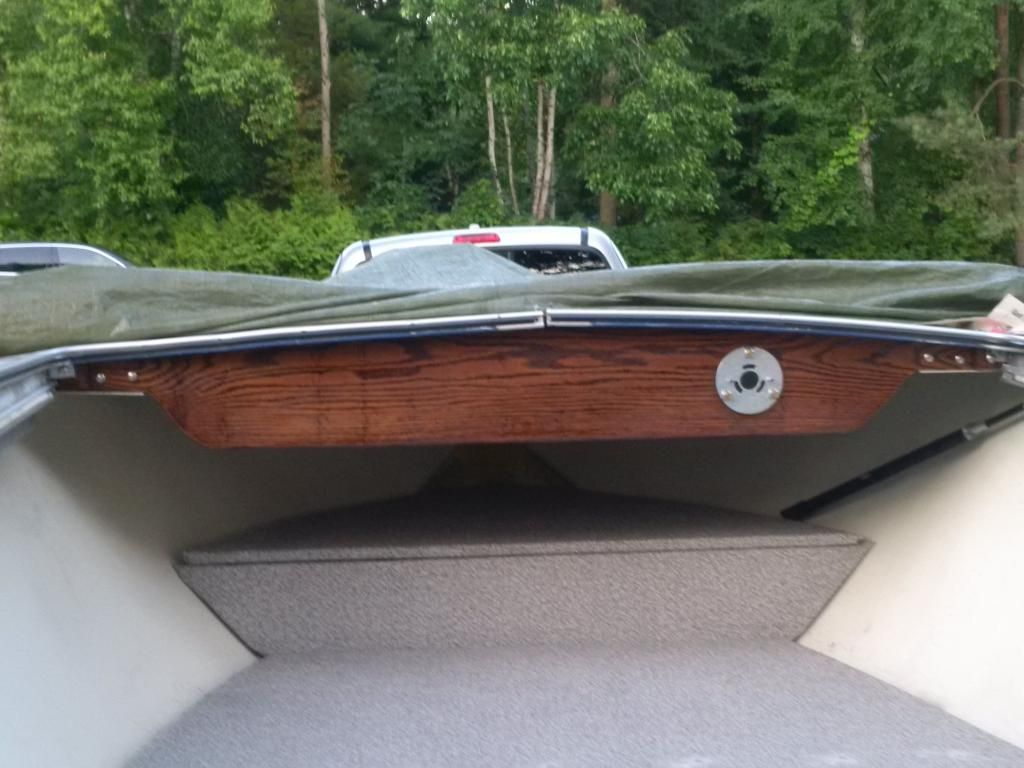
Got the dash installed. Need to pickup lock washers and install the dash using ss hardware and West Marine waterproof sealant.

Was on sale 40% off so I am going to give it a try.

Should have everything fastened down sometime this week. Feels real solid and I am pleased with the results. :)


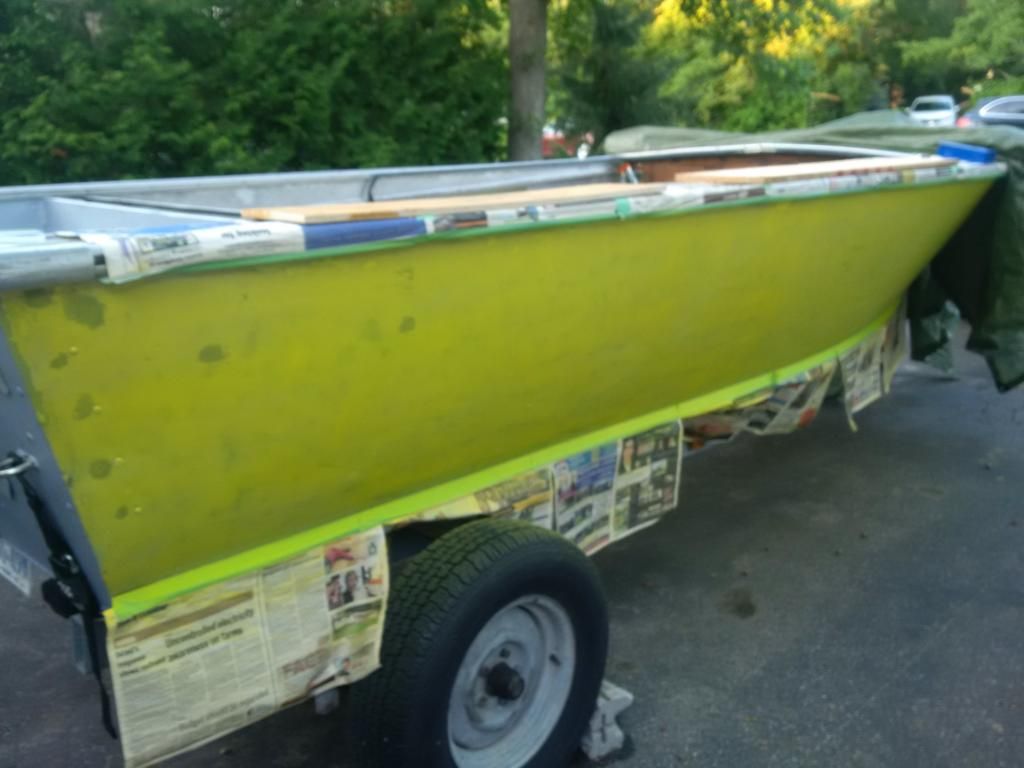
Here's a shot of La Boat with ZC primer applied to starboard side. Think I need to sand before rolling on TC primer.


Have a good one folks!

:)
 

jhendery

Petty Officer 1st Class
Joined
Jun 14, 2012
Messages
336
BTW - got the helm mounting plate positioned into place. Mounting screws are 2 1/4 inch long and dash is 3/4". There's roughly 1" of screw that protrudes through the other side. And the nylock nut will only turn so far.
 

jhendery

Petty Officer 1st Class
Joined
Jun 14, 2012
Messages
336
BTW - got the helm mounting plate positioned into place. Mounting screws are 2 1/4 inch long and dash is 3/4". There's roughly 1" of screw that protrudes through the other side. And the nylock nut will only turn so far.

update .... going to replace nylock nuts with lock washers and regular nut.

I think the reason I have so much material on the other side is because not all dashes are built 3/4" thick.
 

jhendery

Petty Officer 1st Class
Joined
Jun 14, 2012
Messages
336
Bought the necessary hardware today to fasten the dash into place.

Supposed to rain here the next few days. Hope to find time to get things done.

Starting to think about mounting board for control box. Thinking about going with 3/4" or 1/4" oak. Which thickness is better suited for control box?

Have a good one eh!

:)
 
Status
Not open for further replies.
Top