Before and after Transom repair pics....

mxcobra

Chief Petty Officer
Joined
Jun 27, 2011
Messages
526
My first boat repair undertaking
just wanted to share theese before and after transom pics...
I'm preatty sure this came out better in my back yard then from the factory...
DSCN1683.jpg

0617121350.jpg
 

BonairII

Commander
Joined
Jun 7, 2011
Messages
2,727
Re: Before and after Transom repair pics....

Looks great.

How about some detail on what you did and what you used, so this can also be an informative thread?
 

tpenfield

Moderator
Staff member
Joined
Jul 18, 2011
Messages
17,711
Re: Before and after Transom repair pics....

'After' looks much better . . . :) the 'before' image looks like there is hardly any fiberglass on the transom.

Nice work.
 

mxcobra

Chief Petty Officer
Joined
Jun 27, 2011
Messages
526
Re: Before and after Transom repair pics....

Well what I did - keep in mind I'm a first timer.

Found out my new boat has rot. befor pic lower right hand corner.
Is the first thing I did when I got home with her, Ripped a chunk of transom off with my hand.
So next It all comes apart motor out- tools come out of the tool box.
I cut, grinded, pulled, tore, beat, cursed, and grinded some more.
I then used a 1 1/4 chisal and hammer to scrape and pry the boat hull clean of the old transom wood.
As to remove every last bit of rot. A 4" grinder with 60 grit sandpaper flapps grinded out the bad glass..
(I did build a grind tent over boat during major demo, as to protect my neghbers from the toxic glass dust.
I tryed to save as mutch old stuff as I could for patterns and such.
Also took many measurements, drew up a plan of what was their and took many pics.

I need to mention- I got all the Info needed for this build from I boats

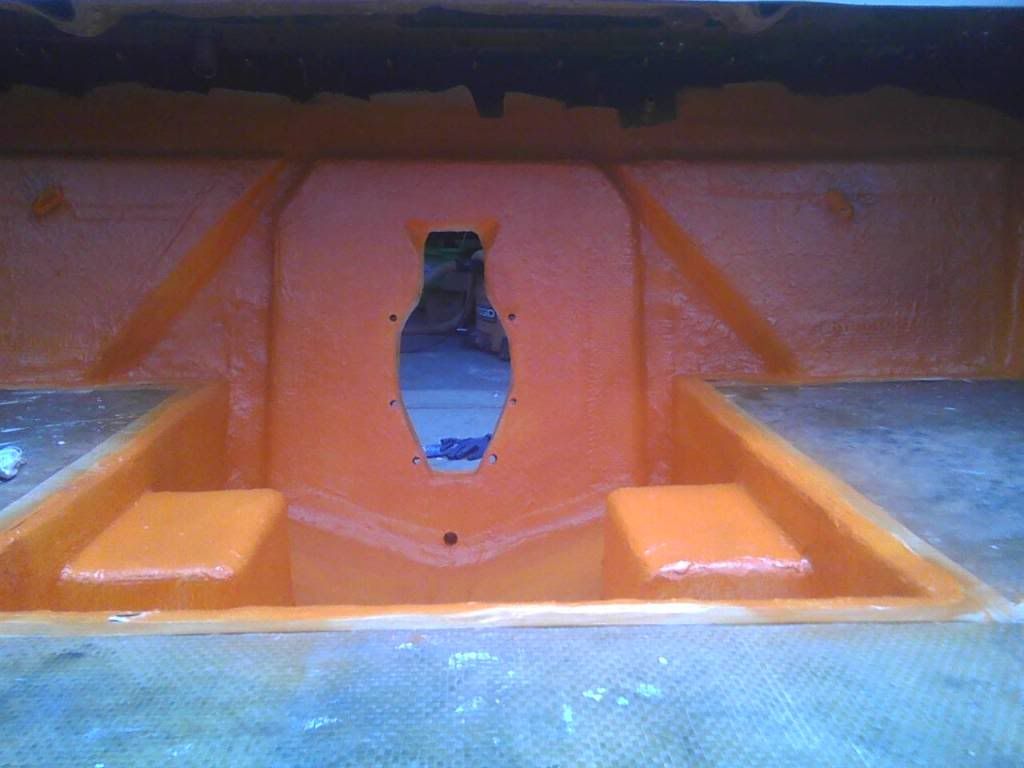
Gota go to work at my real job I will do a right up on parts and instalation in a few.....
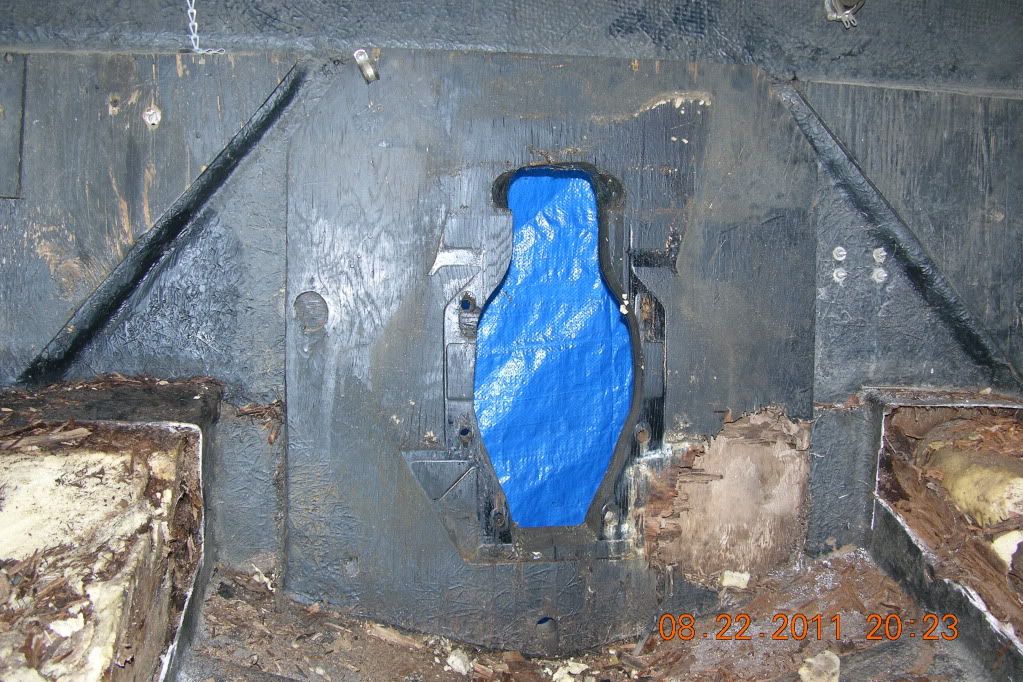
 

mxcobra

Chief Petty Officer
Joined
Jun 27, 2011
Messages
526
Re: Before and after Transom repair pics....

For installation I made Templates from cardboard.
Then used outdoor plywood and cut the transom pieces.
I was able to save a piece from boat, that I like lined up and glued back together- to use for keyhole cutout and mount holes.
Engine plate was made from 2 3/4 pieces of outdoor plywood.
The engine mouts were made with micro lamb - I got out of trash, at housing project.12" peices glued together just like transom platte.
I used a v notch trowel to spread pl premium , then clamped boards in press and let dry.
To mount in boat I also used pl to glue. - I Clamped, bolted, wedged, and braced up in boat anyway I could. Let dry You must let PL dry for up to 7 or more days, Or it causes a reaction with poly and bubbles up.
Then with trusty grinder Smothed out all the bubbles in pl. and rounded wood edges for glass to lay on.
I used 1.5 oz csm and 18 oz Woven Roven - with Poly boat resin.
Tabed all edges with 40 oz of glass -mat- woven -mat- woven -mat. some key points evan got more woven.
Coated the whole thing in white gelcoat, and a sealer type paint in orange.......
 

Woodonglass

Supreme Mariner
Joined
Dec 29, 2009
Messages
25,924
Re: Before and after Transom repair pics....

mxcobra,

It all looks great. Now for the important part. Is the inside wall of the keyhole exactly parallel with the outside walls. Is the Transom thickness within the recommended tolerances for the outdrive? This is very critical in the successful completion of an I/O transom build.
 

mxcobra

Chief Petty Officer
Joined
Jun 27, 2011
Messages
526
Re: Before and after Transom repair pics....

What a way to make my heart bounce Woodonglass! Coming from one of the teachers on iboats...
But I followed The guidelines here on page 10

http://www.boatfix.com/merc/Install/gas/86017211.pdf

I belive to be right on the money mesured with a micromater-I am right around 2 1/16 inch
Time will tell boy Im getting close....
mxcobra,

It all looks great. Now for the important part. Is the inside wall of the keyhole exactly parallel with the outside walls. Is the Transom thickness within the recommended tolerances for the outdrive? This is very critical in the successful completion of an I/O transom build.
 

Woodonglass

Supreme Mariner
Joined
Dec 29, 2009
Messages
25,924
Re: Before and after Transom repair pics....

I had to do it doncha know!!!! You were doing such a good job explaining the process I just want to make sure you didn't leave out one of the most important parts!!!!:p:eek::D Really Nice Restore!!!!
 

Yacht Dr.

Vice Admiral
Joined
Feb 26, 2005
Messages
5,581
Re: Before and after Transom repair pics....

They didnt have a lick of glass on the trans lol..

Forget about the Keyhole..is your Mounts where they should be ?

Bwahahah..coughh..cough.. sorry had to mate :) ..

Looking 300 times better then Oem thats for darn sure.

Good work.

YD.
 
Top