77 Skeeter Restoration

fishbone77

Petty Officer 1st Class
Joined
Apr 12, 2011
Messages
304
Hey All,

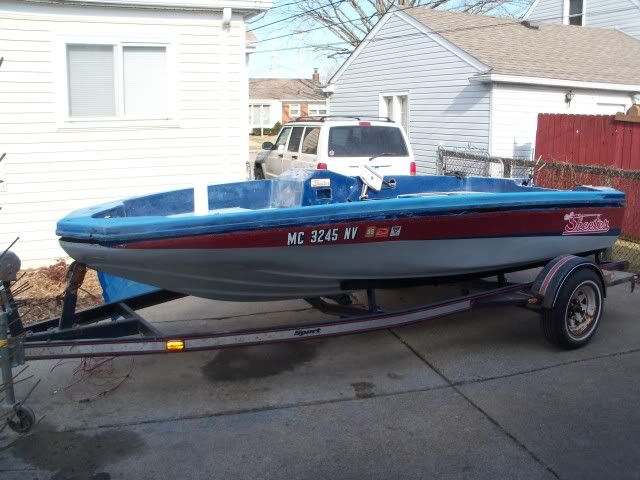
It's been a while since I've posted any updates regarding my 77 Skeeter. About a year and a half ago, I was given the boat by my Father-in-Law. He had run it for several years, started working on the electric and never finished. It was stored outdoors for 7-10, so the floor, stringers, and transom were all rotten, not to mention all the wear and tear a decade of weather has on the deck, carpet, hardware, etc. Amazingly, the '81 Johnson started on the 3rd crank when I hooked it up to the battery - these things were tanks. So here's a quick summary of what's happened since:

Motor: For me this was an important starting point - I'm in medical school, so for me to invest any significant money in restoring the boat, I needed to make sure there was a "working furnace in the house" so to speak. I was encouraged that the motor was a Johnson (you can get parts), but was still pleasantly surprised that after clearing out the mouse nest from inside the motor, it fired after only 3 cranks! After firing it, I went through the motor, replaced the lower unit oil, replaced all the fuel lines, and rebuilt the carbs as well.

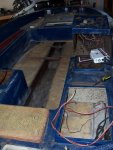
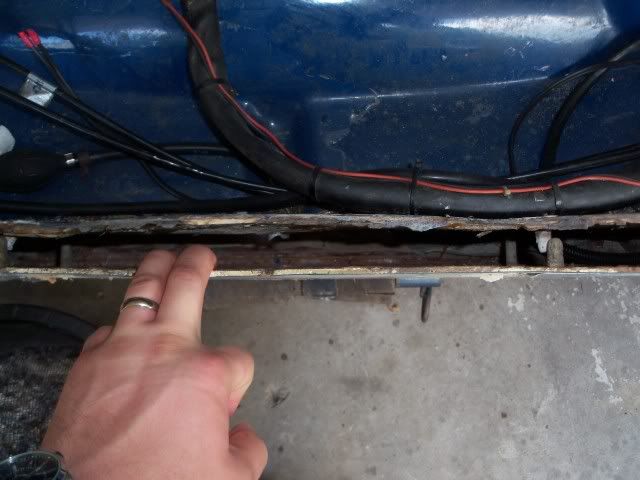
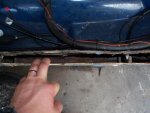
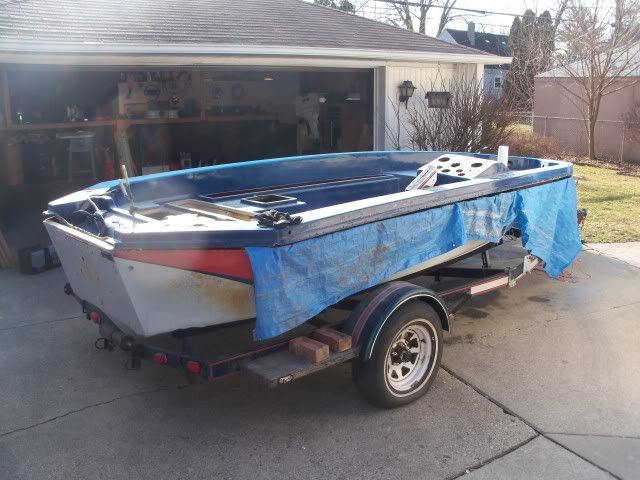
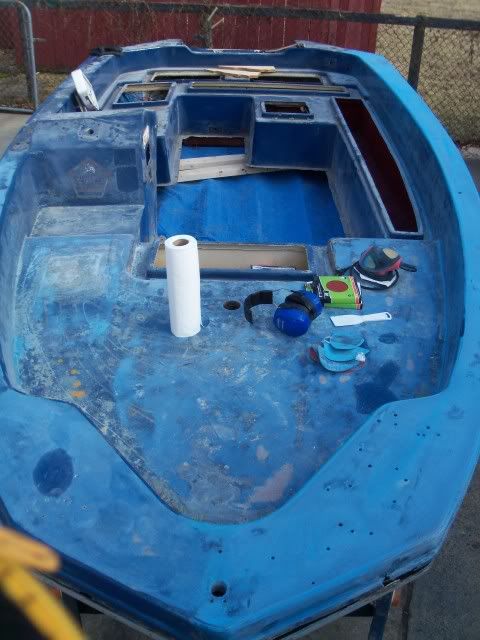
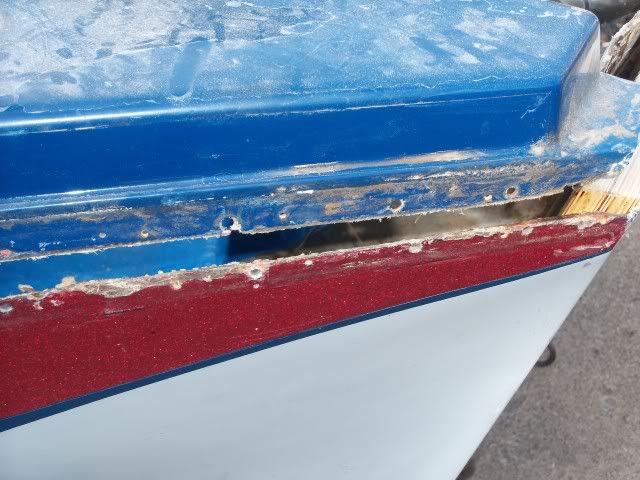
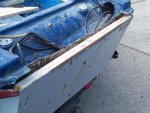
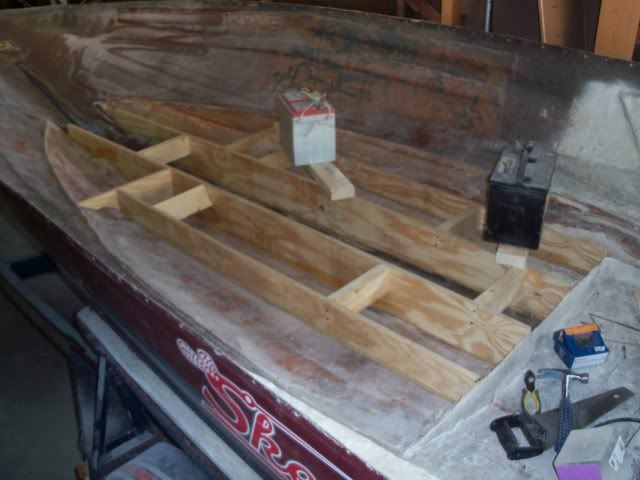
Structure: To me this was the project that just kept getting bigger. This past summer was mostly tear-down. I knew there was transom and floor rot, so I popped the cap off the boat. Originally, I thought the stringers might be ok, but after the floor came off, I realized that the stern parts of the stringers were definitely rotten. I also checked the foam that was under the floor and realized that even after sitting in my garage dry for almost a year, the bottom 2 inches of the foam was still saturated with water!

100_1516.jpg


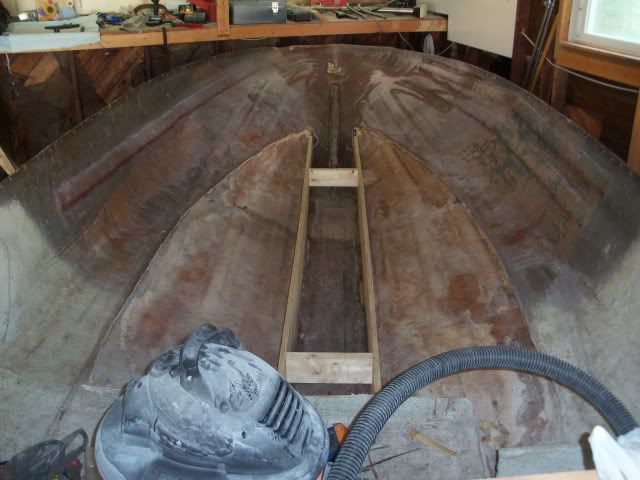
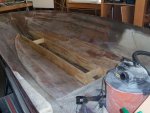
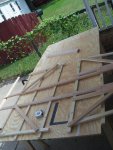
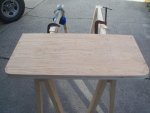
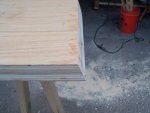
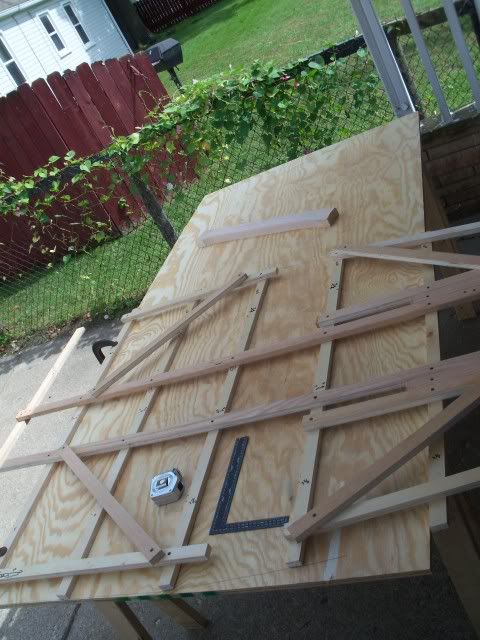
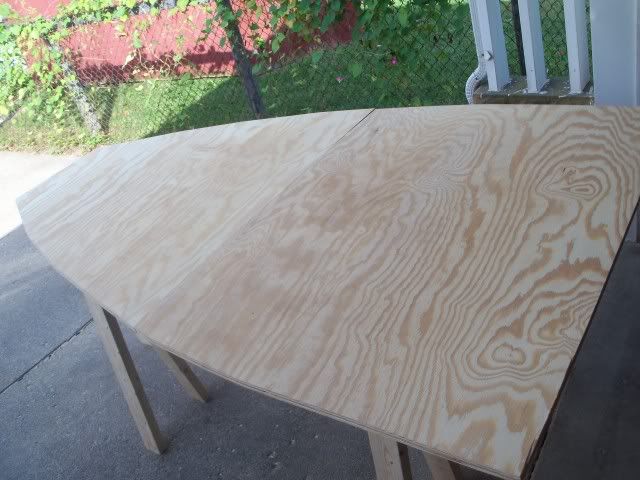
Thus started the grinding...I think by the time I was done with the grinding, my wife thought a dust bomb had gone off in the garage - everything was coated in dust. I took the boat down to the hull, but took the time to build a faux-floor that I could use when mapping out a new floor, and I also wanted to use it to measure vertically to synthesize a couple additional stringers. Later on, I also used it to plot out the profile for my new floor.

100_1509.jpg


100_1515.jpg


100_1526.jpg


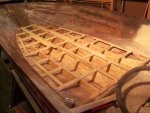
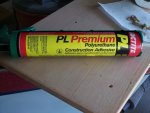
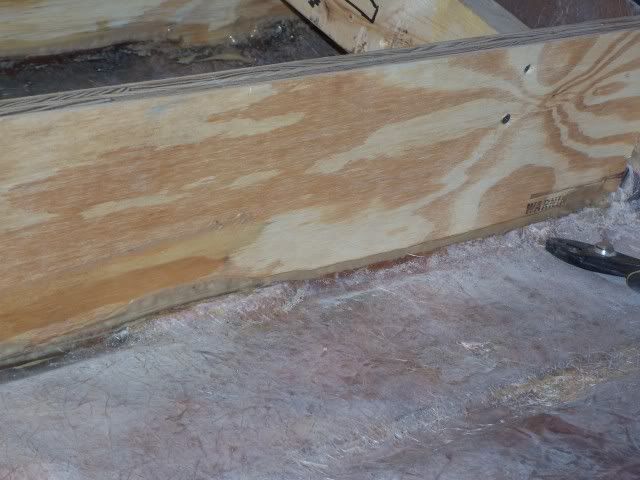
For the stringers, I used exterior grade plywood with epoxy sealed edge-grain. I glued them in with Lok-Tite Construction Adhesive and then fiberglassed them in with epoxy after some great input from fellow Iboaters regarding the pros and cons of polyester resin and epoxy. Being a newB to this, I elected to go with epoxy - didn't have to worry about wax, could use less cloth, but the downside was cost - I went with MaxBond epoxy sold out of Ontario, California. I was a bit unsure about whether to use this or a more well-known brand, but after input from Iboaters who have used it with good success, and a few calls to talk with their chemical engineers, I was ready to try it. I agree with others who have commented that it is relatively thick when mixed, even using their low-viscosity formulation - it translated into not getting as good of a wet-out, and then having to use more epoxy to make up for it - so overall poor epoxy-economy. So net message: I think Maxbond is a good product, however after paying shipping and a lower efficiency of use, you still end up spending close to what it would cost to use a more traditional brand like US composites or Adtech. Still costs less than WestSystem.

100_1520.jpg


100_1527.jpg


After fiberglassing in the stringers, I laminated two sheets of 3/4" ply together with the same MaxBond epoxy to form the transom, and then put a layer of 17oz glass on one side. I purchased my fiberglass from a local shop - Michigan Fiberglass located here in Detroit - the guys there were very helpful - he recommended using a fiberglass that incorporated both a layer of woven and a layer of chopped strand mat for strength - basically 2 layers in one. This would have been excellent, if the Maxbond had performed better on wet-out. Both good products, just not necessarily the best with each other. I still have to tab in the transom this spring, and will probably use just use 17oz woven, even if I end up using 2 layers. I'll stick with the Maxbond low-visc since I started with it - and I think it will wet-out the woven better than the combo I was using.
 

Attachments

  • 100_1508.jpg
    100_1508.jpg
    139.4 KB · Views: 0
  • 100_1517.jpg
    100_1517.jpg
    139.6 KB · Views: 0
  • 100_1518.jpg
    100_1518.jpg
    143 KB · Views: 0
  • 100_1440.jpg
    100_1440.jpg
    146 KB · Views: 0
  • 100_1515.jpg
    100_1515.jpg
    147.4 KB · Views: 0

fishbone77

Petty Officer 1st Class
Joined
Apr 12, 2011
Messages
304
Re: 77 Skeeter Restoration

A few more pics of the transom while I was shaping it...

100_1441.jpg


100_1530.jpg


100_1531.jpg


100_1611.jpg
 

Attachments

  • 100_1530.jpg
    100_1530.jpg
    146.6 KB · Views: 0
  • 100_1531.jpg
    100_1531.jpg
    128.1 KB · Views: 0
  • 100_1441.jpg
    100_1441.jpg
    136.1 KB · Views: 0

Rockmere1

Seaman
Joined
Feb 27, 2011
Messages
68
Re: 77 Skeeter Restoration

Nice work, and looks great! Good to hear your working on it again!:D
 

fishbone77

Petty Officer 1st Class
Joined
Apr 12, 2011
Messages
304
Re: 77 Skeeter Restoration

Thanks Rockmere1, Yeah, I had some pretty big certification tests this past summer, but I made a big push during September/October before I had to shut down for the winter - but it's nice to be planning and prepping again! Plus, I can sand the deck at any time of year...

So anyways, looking ahead for next steps this summer, this is what I'm looking at - any input welcome!

Fiberglassing: As mentioned above, I have some fiberglassing that I couldn't finish before it got too cold last fall - I need to fill and tab in the transom (it is already epoxied to the hull). I'm planning on continuing with the Maxbond epoxy - I've been happy with it, but will probably just use a couple layers of 17oz woven without the chopped glass - hopefully I'll get better wet-out - I don't think I want to thin it too much because I've been reading in the forums that if you thin it too much, it will reduce the strength of the epoxy. I'll also have to do some fiberglass repair in a couple of places on the deck where I notice it has been cracked (edges of the hatch openings, etc. - nothing really structural).

I also need to glass in the floor. I'm again using exterior grade ply (100% waterproof glue between laminates) - and will epoxy the edges to waterproof them. For the underside, I am wondering what people recommend - do I need to put fiberglass cloth on the underside - I'm worried that it will crack against the stringers and so was planning on no cloth, but painting with Interlux bilge-coat - will this be ok? I am planning on using fiberglass cloth on the topside of the floor, and then tab it in to the hull.

Painting: I do want to paint both the cap and the hull. Here's my current dilemma - I've debated most of the winter about whether to do a gel-coat or to paint, however I think that my budget is going to decide for me. So in the realm of paint, I've been scanning the forums - I've read about a lot of people that have had good results with Rustoleum Topside paint, and that you can use it for the hull as well as long as you're not keeping your boat in the water too long. Some people I've read combine it with an Acrylic Enamel Hardener. However, I've also read that Rustoleum is a softer paint, and given that there would be a lot of walking, I worry about chipping, and general wear n' tear...

I got some valuable input from Woodonglass regarding his recipe for Valspar Tractor and Implement paint that he combines with Acrylic Enamel Hardener and a little Acetone if you want to spray. It sounds like he's had really good success with this and that it may result in a more durable finish. I will be covering the floor with either carpet or with a product like Kiwigrip, however the designs of these old skeeter wranglers leaves some paint exposed between the hatches, etc. This is the way I'm currently leaning. From what WOG and others have said, it does sound like good prep is the key to painting.

Floor covering: Another debate: carpet vs. an anti-slip surface. I know that carpet is more traditional for my type of boat, but lately I've been really tempted to go with a Kiwigrip surface coat, just for the sake of ease of cleaning, and keeping the boat drier. A little worried about noise, even though Kiwigrip is advertised as "sound-deadening". Any input?
 

Texasmark

Supreme Mariner
Joined
Dec 20, 2005
Messages
14,558
Re: 77 Skeeter Restoration

Give you an attaboy for your stamina. Looks like you are doing it right. I restored once but it was alum and had none of the headaches you are going through.......buttttt when you are done, it's YOUR boat; you earned it.

Mark
 

fishbone77

Petty Officer 1st Class
Joined
Apr 12, 2011
Messages
304
Re: 77 Skeeter Restoration

Thanks Mark,

Appreciate the compliment - it has definitely turned into a big project - but having a blast doing it!

Heading out today to work on sanding the cap - supposed to get up to 42degs up here in Michigan - I don't know what happened to our winter, but I'm not complaining this time!

Will post pics later -

Fishbone77
 

fishbone77

Petty Officer 1st Class
Joined
Apr 12, 2011
Messages
304
Re: 77 Skeeter Restoration

Spent some time outside with the boat today - Last summer I had the cap off and on sawhorses in one side of the garage with the hull in the 2nd stall - my wife "asked" me when she was going to be able to park her car in the garage again...and it was decided that I had until snow flew to get the cap put back on for the winter. Of course with this weather...

Anyhow, I got a pic of the entire boat -

100_1609.jpg


When I set the cap back on, I did 2 things - In anticipation of any sanding I could get done over the winter, I draped a tarp under the cap so that clean-up would be easier in the spring when I take it off - trying to keep as much dust out of the hull as possible since I still have some fiberglassing, etc. to do - I'll still blow it out and wipe it down, but I think it'll make my life easier. The 2nd thing I did was I placed some 2x4s cross-wise on the stringers between them and the cap, keeping the cap raised about 3 inches from where it would normally sit flush when finished. I just did this to try and preserve the fiberglass edges of the hull and the cap.

100_1608.jpg


Today I managed to remove a sticker-border that wrapped all the way around the edge of the cap - old stickers baked in the sun for many moons, so it took a while - some of it I was able to shave off with a razor-blade, other parts I softened with GooGone and then sanded away with 60grit. I also got started on sanding the cap a little, but still a long ways to go!

100_1616.jpg


100_1612.jpg


One quick question - I am planning on using Interlux Watertite Epoxy Filler to fill any holes, gaps, etc. in the hull and the deck, but noticed that I have a ton of old rivet holes along the seam that I need to repair - what's the best way to do this? Here's a pic:

100_1610.jpg


Let me know what you think!
 

Attachments

  • 100_1609.jpg
    100_1609.jpg
    144.6 KB · Views: 0
  • 100_1611.jpg
    100_1611.jpg
    147.6 KB · Views: 0
  • 100_1612.jpg
    100_1612.jpg
    142.6 KB · Views: 0
  • 100_1616.jpg
    100_1616.jpg
    146.5 KB · Views: 0
  • 100_1610.jpg
    100_1610.jpg
    146.5 KB · Views: 0

fishbone77

Petty Officer 1st Class
Joined
Apr 12, 2011
Messages
304
Re: 77 Skeeter Restoration

Hey All,

Random question, but I've read somewhere in the forums that most guys are using Photobucket to post pics with better success than just the iboats attachments - does anybody know how to do this?

Thanks,
 

Woodonglass

Supreme Mariner
Joined
Dec 29, 2009
Messages
25,924
Re: 77 Skeeter Restoration

Posting Pics on the forum is All messed up at the moment. Open up a Photobucket account. It's free @ www.Photobucket.com Once you have and account click the upload green button. On the upload screen at the bottom of the screen is a Customize your uploads link.
Click it and set you pic default size to 640x480. Close out and then upload your pics. Once they are uploaded hover over the pic and you will see four link tags. Use the IMG tag. Click on it and it will say copied. You can now go to iBoats and copy this tag into your iBoats post and the picture will be there. PM me if you need help.

One other thing, YOu DON'T use mat with epoxy. You only use cloth. The guys at the shop steered you wrong. The mat will double up the amount of epoxy you use and can actually weaken the bond. You only need to coat the bottom of the deck with two coats of epoxy not cloth required. On the deck, I'd use a coat of epoxy, a layer of 7.5 oz biaxial cloth and then two coats of epoxy. Run the cloth up the sides of the hull about 6" to tie everything together.
 

fishbone77

Petty Officer 1st Class
Joined
Apr 12, 2011
Messages
304
Re: 77 Skeeter Restoration

Thanks WOG - that really helps - That's what I'll plan on doing - The more I think about it, the more it seems like this guy was totally hosing me - I had already purchased my epoxy from another supplier and I think he may have been trying to make it so I had to buy more from him.

I'll definitely ditch the mat and go with just the biax cloth from here on out -

Thanks also for the tips on the Photobucket - I'll be starting up an account tonight!

Fishbone77
 

fishbone77

Petty Officer 1st Class
Joined
Apr 12, 2011
Messages
304
Re: 77 Skeeter Restoration

Got the photobucket thing figured out - not too bad! Thanks again!
 

fishbone77

Petty Officer 1st Class
Joined
Apr 12, 2011
Messages
304
Re: 77 Skeeter Restoration

Well I went ahead and opened my mouth and bragged about the mild winter we've been having - the very next day we got a nice, wet snow all over detroit - haha... More time to plan and keep my mind on work I guess!

I've been thinking about fiberglass repairs to the cap - I'm wondering what people have been doing along the seam where the cap joins the hull for old rivet holes, etc.? Is it best to try and fill with a thickened epoxy, or is it better to actually lay cloth over it? I'm just worried about interfering with the seam and how the cap fits onto the hull...

100_1610.jpg


Thanks for all input!
 

Woodonglass

Supreme Mariner
Joined
Dec 29, 2009
Messages
25,924
Re: 77 Skeeter Restoration

In the picture, I'm not seeing anything to worry about
 

fishbone77

Petty Officer 1st Class
Joined
Apr 12, 2011
Messages
304
Re: 77 Skeeter Restoration

Do you think I can just sand, refinish and put in new rivet holes then? I don't need to fill the old ones or anything?
 

JDA1975

Lieutenant
Joined
Aug 27, 2011
Messages
1,385
Re: 77 Skeeter Restoration

the edges will be covered by the rub rail, for added strength of joint I am going to run a piece of aluminum along the inside of hull lip for the rivets to bite to since the glass is weakened by the old holes
 

fishbone77

Petty Officer 1st Class
Joined
Apr 12, 2011
Messages
304
Re: 77 Skeeter Restoration

Thanks Judge,

I've been reading your thread for a while - got a ways to go, but I hope my boat turns out as nice as yours! That piece of aluminum sounds like a good idea - When I first took the cap off the boat, it looked like somebody had done so before me - and with all the extra rivet holes, i was worried - Thanks for the idea!
 

Woodonglass

Supreme Mariner
Joined
Dec 29, 2009
Messages
25,924
Re: 77 Skeeter Restoration

So what is your overall plan for the boat? Deck, Stringers and Transom???
 

fishbone77

Petty Officer 1st Class
Joined
Apr 12, 2011
Messages
304
Re: 77 Skeeter Restoration

Yep - Deck, stringers, transom...I put new stringers in last summer, and need to finish tabbing in the transom and then put in the deck - I'm ready to do that as soon as the weather warms up. After that, I figured I would flip the hull to fair, prep, and paint the bottom... Ideally, I'd love to have the thing painted by the end of this summer and next winter I can finish up with hardware, wiring, etc.

Realistically, I'll have some significant time in March and April to work on it (we'll have to see how warm it is), some time in May, and then again during the summer after July.

I guess at this point, in my spare time, I'm trying to do things that I can do in the cold (garage isn't heated) like sanding the cap, re-carpeting the trailer bunks, possibly some initial wiring - we'll see...
 

fishbone77

Petty Officer 1st Class
Joined
Apr 12, 2011
Messages
304
Re: 77 Skeeter Restoration

Pulled the boat out of the garage yesterday -

I did a thorough job of finished pulling all hardware from the cap (gas caps, remaining rivets, screws, etc.) and just when I thought I had gotten them all and had started sanding...I found the ones I had missed! Haha - anyhow, I got some more sanding on the cap done. I'm using 60-grit to do much of the initial work, and will definitely have to go over it again with something finer (150?) before priming - Any suggestions as to how fine I should go before applying the primer coat? I was planning on following WOG's advice after the primer coat and wet-sanding with 320 after priming/using scotch-brite pad. Will be using his Valspar Tractor-paint method.

It's getting warmer up here in Michigan, so pretty soon I think the cap will come back off the boat so I can finish up the transom and floor and this project can have a more logical flow to it - I've been stuck doing odds n' end jobs during the winter (anything that can be done in the cold).
 

fishbone77

Petty Officer 1st Class
Joined
Apr 12, 2011
Messages
304
Re: 77 Skeeter Restoration

Started building a frame to set the cap on today - should have it pulled back off the boat by this weekend! Pics to come...
 
Top