My Glasply Project Boat

bharness

Cadet
Joined
Oct 28, 2011
Messages
22
Well, here goes:

First of all, I think I will need to eventually post my thread in 3 different categories: Engine, Outdrive and restoration. But for starters, I am going to start in the restoration category since that will be my primary focus for the foreseeable future.

Moderators: Please jump in and correct me at any time. I am definitely a newbie.

I live in Gods Country: Kennewick, Washington. We are located in SE Washington. We average around 7 inches of rainfall per year. Yeah, it is dry and dusty.

I have been cruising iboats.com since early spring. Finally became a member in October 2011

I have to give credit to Trooper82 for getting me off the dime and starting my own thread. I have been following his restoration project with great interest.

I have spent the past 9 months looking for a boat to buy. I am retired, so I wanted a “project”. Not like I don’t have enough to do as it is.

Anyway, I bought 1973 Glaspy 21 foot boat with a cuddy.. It has the 250 Mercruiser inline 6 cylinders. I bought the boat and tandem axel trailer for $700.00 from a private party in Spokane, Washington.

The PO did not have a lot of information about the boat. They bought it and were going to fix it up but did not have the time or the money. I can relate to the money issue LOL.

Overall, for its age, the boat is in good condition. .It does not appear to have been abused, just neglected. Is there a difference?

The engine turns over. The compression is about 130 (give or take 2 to 4) on all 6 cylinders. If the hour meter is correct (?) the engine has approximately 2800 hours on it.

The stern drive is a MC-1 (At least that is what my research indicates. The numbers on the stern drive are 55894. The serial number on the stern drive is 3604980.

She comes with a 47 gallon fuel tank located under the deck. There is a 15 gallon fuel tank located on the left and right sides. OOPS, I mean port and starboard.

The interior of the cuddy is in good condition. All of the upholstery is in better than average condition. But OMG, I can’t stand that 1970’s green vinyl upholstery. That is definitely on its way out.

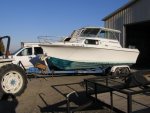
This picture was taken when my wife (Grandma) and I drove to Spokane to pick up the boat.

In the future all references to my wife will be Grandma and all references to the boat will simply be her.

[GLASPLY 1.jpg
.

As you can see from the picture, looks like someone tried to do a paint job on the bottom of the hull. Not sure what that is all about but I am certain I will find out. ..,

Overall, for its age, the boat is in good condition. .The trailer is in good condition. It does need a couple of tires replaced. But they would good enough to get me the 140 miles back home from Spokane. Down the road I plan on sanding, painting, rewiring the trailer.

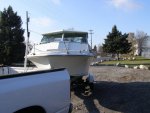
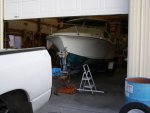
This picture shows her at new her home and finally under cover. She had been sitting outside for a long time. In spite of sitting outside for I am guessing several years, the paint is in surprisingly good condition.
GLASPLY 8.jpg


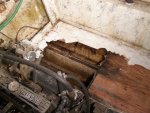
This next picture will probably come as a shock to most of you.

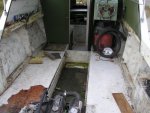
I started doing some “poking” around and guess what I found.

GLASPLY 8.jpg

Can you believe that? The old girl is 39 years old and already needs a facelift. Did I say I wanted a project?

Thanks to this forum, I have a general idea of what I am facing as far as repairs are concerned. I am not the first newbie boat owner to discover this problem.

Again, thanks to this forum, I pretty much expected to find this kind of damage so therefore I was not/am not surprised.

I discovered this damage about the same time Trooper82 started his thread. That is why I have been so interested in what he is doing.

I had a boss who believed: “The devil is in the details”. He also taught me that everything has a “key”. This means things have to be done in sequence.

That is where I am now. What is the correct sequence?

I am thinking I should do the following:
Remove the seats
Remove the fuel tank.
Remove the engine
Remove the stern drive
Remove as much stuff as possible so I have a nice clean/clear work area.

This is where I will stop for today. I just need some confirmation that I am on the right track.
 
Last edited:

bharness

Cadet
Joined
Oct 28, 2011
Messages
22
Re: My Glasply Project Boat

Oops. Posted the wrong picture. I have some boning up to do on this thread posting stuff.
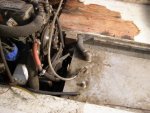
Anyway, here is the picture of the damage I discovered

GLASPLY BOAT 008.jpg
 

jbcurt00

Moderator
Staff member
Joined
Oct 25, 2011
Messages
24,871
Re: My Glasply Project Boat

bh,
Welcome aboard, nice to have you with us & good luck!

I have also taken a jump into the deep end of the pool for my 1st project. Total gut & redo is probably not a great 1st choice. But I guess we'll know our boats & how to repair/replace everything when we're done, so that education is certainly of great value.

When you go back to & read your own thread or any of your posts in the forums, at the bottom w/ the Reply, Reply with Quote tabs, there should be an Edit or Edit Post tab. You can use that to edit any of your posts on your own thread or someone else's thread. As long as you are logged into your iBoats forum user id/name, you can edit your stuff to correct errors (photos, spelling etc.... I will be doing that to my Mercury 650 thread I posted earlier this week, I had my details backwards in my posting, & want to correct them). If you catch any errors in your posts, it may be prudent to correct them as you catch them. That way advice can be focused on your actual problems/questions & not the grammar or accuracy of the details. It will also help get quicker answers to your questions etc.

The I-Boat groups will be definitely be helpful, will ask plenty of questions, and ask for plenty of photos. Once again: Welcome, & good luck with restoring 'her'.....:cool:

PS: By the way we are also often a daft, drool, goofy, snide, but ultimately fun, info rich & infinitely helpful bunch......


EDIT: ( at the bottom of my post window there should now be an Edit note & my optionally included reason)
There are many experts in all aspects of a total overhaul, I will let them comment on your itemized list & order of rehab. Look for Archbuilder (Miss Morgan build), OOPS (Hull extension fame), WOODONGLASS (currently adding an upholstery thread to his rebuild thread) and MANY MANY MORE. They will probably swing through & may comment, but just reading their threads is exceptionally informative​
 
Last edited:
r.j.dawg

Ensign
Joined
May 30, 2011
Messages
993
Re: My Glasply Project Boat

That's a great looking boat you have there. I'm going to be watching this resto for sure. As for the paint job on the hull, you are probably looking at anti fouling paint. Quite common on boats that are wet slipped in your region.
Good luck and keep the pics coming.
 

Trooper82

Commander
Joined
Nov 21, 2011
Messages
2,648
Re: My Glasply Project Boat

bh- nice looking boat, I like it. I can tell you it will be alot of fun tearing into her. Like I said in my thread, not a pro, but I started with gutting mine. Figured it had to come out sooner or later anyway, so why wait.

You sound like you got on here bout the same way I did. I cruised in and out for awhile before creating my account. Glad I did though. Most informative group of folks in here.

Looking forward to following your resto-repairs.

Have Fun!!
 

86 century

Ensign
Joined
Sep 8, 2009
Messages
986
Re: My Glasply Project Boat

Atleast you where looking for a project my first was a total suprise.
The best advice I can give is take lots of pictures and measure everything atleast two times before you tear her apart.
She has a good look lots of freeboard.
What kind of water(ocean,inland lake)
The folks here are great.

Good luck
 

bharness

Cadet
Joined
Oct 28, 2011
Messages
22
Re: My Glasply Project Boat

86 century
Thanks. My digital camera and tape measure are becoming real good buddies.

We have the Pacific ocean about 4 hours from where we live. In the Seattle area, there is the Puget Sound, Ocean and the Straits of Juan De Fuca. That area is deep water and can get real rough.

The Columbia, Snake, and Yakima rivers are about 3 miles from my house. These rivers have lots of dams on them, so there are miles and miles of good water AND deep.

The Columbia River starts up in Canada and goes all the way to the Pacific Ocean. The Columbia gets real rough.

OK, end of the geography lesson.

Thanks to all for your comments. I really like this site. Seems to me we are all in the same boat to a certain extent.

I know, bad humor

Thanks again.

bh
 

bharness

Cadet
Joined
Oct 28, 2011
Messages
22
Re: My Glasply Project Boat

OK, She has a belly tank. According to the manufactures label on the tank, the capacity is 47 gallons.

I removed the tank sending unit and cover and put a small dowel rod into the tank to measure how much fuel was in the tank.

Looks like there is about 25-30 gallons of nasty smelling, bad looking gas.

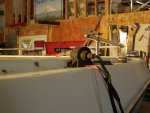
So now, I have to drain the tank. I look around my shop and I find an electric fuel pump. I also find about 40 feet of rubber fuel line.

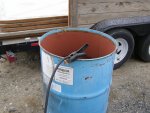
I hook up the fuel line to the tank. I ran the hose up and out of the boat and installed the electric fuel pump. I then run the hose outside of my shop and clamp it to a 55 gallon drum.

I hooked up electric lines to the fuel pump and ran them to a deep cycle battery. I placed the battery about 8 feet from the fuel pump. I get paranoid with sparks around fuel.

It took about 4 hours to completely drain the tank into the 55 gallon drum.

FUEL TANK.jpg

ELECTRIC FUEL PUMP.jpg

55 GALL DRUM.jpg

My next step is to remove the belly tank and the two side tanks.

QUESTION: Do I really need 3 fuel tanks in this boat? Would you guys reinstall all 3 tanks or just go with the 47 gallon belly tank?
 

coFLounder

Cadet
Joined
Nov 28, 2011
Messages
23
Re: My Glasply Project Boat

I hooked up electric lines to the fuel pump and ran them to a deep cycle battery. I placed the battery about 8 feet from the fuel pump. I get paranoid with sparks around fuel.

It is not the fuel you need to worry about it is the vapor from the fuel. Make sure if you do this sort of work again keep the spark sources as high as possible. The vapor (fumes) are heavier than air so they will sink. Long hose down the hill and a siphon would work as well.

Nice looking project should be fun to watch.
 

GT1000000

Rear Admiral
Joined
Jul 13, 2011
Messages
4,916
Re: My Glasply Project Boat

Welcome bharness,

As has been mentioned, you are in the best place to get all of the best info, cheering on, snide remarks, good and not so good ideas, and a ton of fun to restore your nice looking aquisition.

My first question is, if the engine turns over and the compression is that good, why not try and fire it up to make a quick check of all of the mechanical systems, like A- does it actually run, B- Shift, C- Steer, D- Tilt/Trim, E- Water Pump flowing properly, F- Oil levels and quality?[ is there any water in the oil, including the engine and leg...
I only mention this because one of the hugest expenses in a boat is the drive, Hulls and Trailers are relatively inexpensive to refresh, recondition, restore, compared to the drive...
I would suggest you read the thread relating to waking up the engine/drive after a long nap, and make sure that at least this part of the boat is usable... here is a link... http://forums.iboats.com/showthread.php?t=158086

That being said, the rest of your tear down plan sounds right on track, basically, if you are going for the full restoration, you need to gut the boat as much as possible, take lots and lots of measurements, notes and pictures, add the proper support for the hull before any major stringer/deck transom removal, and as has been mentioned, ask as many questions as necessary to make things easier on you.

From reading through your first post, you mentioned it has a Total of 77 Gallons of Fuel capacity...Well depending on several factors, it may be a good idea to keep it that way as opposed to not having enough capacity... from my limited knowledge, I don't think it is necessary to have the tanks always full, but if it happens to be a thirsty engine/heavily loaded boat and you happen to go for a long cruise [overnighter], the extra capacity could come in quite handy. Then again, if you are sure you won't ever need that much capacity, you have a couple of options...sell the extra tanks, or convert them to raw/sewer water storage, and/or replace one of them for a potable water container and keep the other for raw water, convert the space to storage, or a live well, ski locker, cooler, etc., etc.

Just thinking out loud...:redface: yea, it gets me in trouble every now and then...

The pros will be along shortly to chime in and help.

Also, PLEASE, make sure you wear all of the proper personal safety items when working with fiberglass. It is a very bad thing for your lungs, skin, and eyeballs.

At the top of the forum is a great primer to read through... here is a link... http://forums.iboats.com/showthread.php?t=288451

I'll be tagging along to help if I can, learn and cheer you on, have fun!

Best regards,
GT1M
 

bharness

Cadet
Joined
Oct 28, 2011
Messages
22
Re: My Glasply Project Boat

[I have been pretty busy the past week but I finally got a chance to get back to the boat. I think she felt ignored.

Anyway, as I mentioned in an earlier post, I am going to pull the engine and finish gutting the deck and stringers.

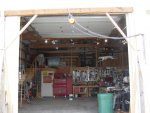
I have to build a framework that allows me to remove the engine. I don't have access to a hoist tall enough to do the job.

It is 5'4" from the floor of my shop to the top rail on the gunwales. That is almost as tall as I am.

I did some measuring, drew out a sketch, checked on what kind of material I had stashed and started building it yesterday

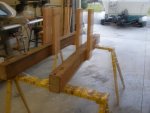
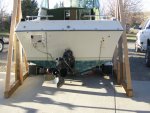
I took a 4x6 and cut it to 6 feet long. This will serve as the base for my frame. GLASPLY BOAT 013.jpg

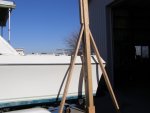
Then I took a 10' 4x4 and attached it to the 4x6. Because of the heighth, I needed it at least 10' tall.

I then took some 2x4's and cut them at angles to brace the 4x4 to the 4x6.

GLASPLY BOAT 019.jpg

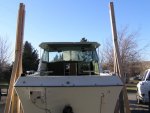
I made a pair of these. I plan on putting a 4x6 across the top of the 4x4 upright. The 4x6 will be braced to the 4x4 uprights.

I built the thing so I can disassemble it and store it. I am sure I will find other uses for it.

Anyway, it did not turn out to bad. I get accused of "overbuilding".

GLASPLY BOAT 022.jpg

GLASPLY BOAT 023.jpg

QUESTION:
There is 3/8" copper tubing that runs in a U shape from the interior of the cuddy, down the port side, back across the transom and up the starboard side and terminates in the cuddy.

There is nothing hooked, connected or attached to this copper tubing.GLASPLY BOAT 017.jpg

DOES ANYONE HAVE AN IDEA AS TO WHAT PURPOSE THE COPPER TUBING SERVES?

ANY REASON I CAN'T TAKE IT OUT?

SOME SORT OF GROUND?

Thanks
bh
 

logan944t

Petty Officer 2nd Class
Joined
Jun 26, 2010
Messages
155
Re: My Glasply Project Boat

Was this boat ever used as a mine sweeper? :)
 

GT1000000

Rear Admiral
Joined
Jul 13, 2011
Messages
4,916
Re: My Glasply Project Boat

Hi BH,
That gantry frame looks plenty stout to pull the engine with out any problem...if you have any doubt, just try and lift the front of your truck with it...LOL:p:D

As far as the copper tubing...Duh??? I'm stumped...:confused:

Have a very Merry Christmas,
GT1M
 

bharness

Cadet
Joined
Oct 28, 2011
Messages
22
Re: My Glasply Project Boat

--------------------------------------------------------------------------------
Was this boat ever used as a mine sweeper?


Mine sweeper? I don't think so"

I am finding out that this copper tubing has something to do with being a ground for the old school electronics that was on the boat.

Anyway, it is coming out.
 

Trooper82

Commander
Joined
Nov 21, 2011
Messages
2,648
Re: My Glasply Project Boat

BH,

Let me know how your gantry works out will ya. I am planning on making similar and would like to know how it performs for you. I will be getting the materials next weekend. I had planned on using 2x6's for everything, doubled everywhere but the base. Then putting in an angle brace from the uprights to the top and on the uprights to the base as you have done. I get accused of over doing it too, but I always say better safe than sorry.

You and your family enjoy the holidays.
Trooper
 

bharness

Cadet
Joined
Oct 28, 2011
Messages
22
Re: My Glasply Project Boat

Well we had family up for Christmas. My son in law and I finished building the gantry so I can remove the engine from the boat.ENGINE REMOVAL2.jpg

Then my grandson and I removed the 3 fuel tanks. He jumped right in and did a good job. I think Grandma bribed him with a bunch of Christmas cookies.

This is what she looks like now.
INTERIOR 1.jpg

I decided to let her sit outside in the sun for most of the day. I think she was glad to get out of the shop for a while.
ENJOYING THE SUN.jpg

Next step is to start cutting out the floor.
 

Trooper82

Commander
Joined
Nov 21, 2011
Messages
2,648
Re: My Glasply Project Boat

Looking good bh! You will be caught up with me in no time. 3 tanks? I was considering a second tank for mine, if i decide to got out in the Gulf. I have heard the good fishing is like 50 miles out. Not sure i would be comfortable going out that far in a 20'er. Glad you got to spend time with family. That is what the holidays should be for. I will let you know this weekend how my gantry turns out. You made an I beam from 3 2x4s? And that is a 4x4 across the top right?
 

nphilbro

Petty Officer 1st Class
Joined
Dec 19, 2011
Messages
304
Re: My Glasply Project Boat

That gantry is a great idea! I've been turning in my head trying to figure out how I'm going manage my own Glasply since I need to not only have access to the outside of the hull for some repair work, but access to my trailer as I add rollers and paint.

Mine is only a 19 1/2 ftr so this is a very feasible way to support a sling for short term access to areas I couldn't otherwise access. I'd modify the design for my needs, but that solves a lot of problems I was facing.

Good luck with your project! Maybe I'll see you up at the Potholes some day or when you head over to the real God's country on this side of the Cascade curtain ;).
 

bharness

Cadet
Joined
Oct 28, 2011
Messages
22
Re: My Glasply Project Boat

You made an I beam from 3 2x4s? And that is a 4x4 across the top right?

I used a 4x6 for the base, 4x4 for the uprights, with 2x4s screwed to the 4x4. The top beam is a 4x6
 

bharness

Cadet
Joined
Oct 28, 2011
Messages
22
Re: My Glasply Project Boat

We have had company all week, so I have not been able to get a lot done. My grandson and I have managed to spend a few hours working on the boat.

He pulled up some of the fiberglass on the deck. While he was doing that, I removed the bilge pump, blower, fuel lines, fuel seperator and other misc parts. I also manged to get the outdrive removed.

That service manual is a life saver. Excellent step by step instructions.

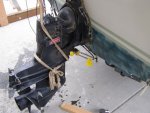
The gantry I built, worked out very well for removing the sterndrive. I was able to take some of the pressure off so it did not get in a bind. Got the outdrive all leveled off and she slid out just fine. I have been taking lots of pictures as I progress so I can refer to them when I start reinstalling the parts.REMOVING THE STERN DRIVE 044.jpg

My next step is to get the engine removed. But, I am going to build a "roller bench" and mount the engine to the bench. That way, I can easily access it. I will design/build the bench so the contour of the engine will fit right on it.
 
Top