I got a (new)question for you Starcraft guys, Officially a Project

Watermann

Starmada Splash of the Year 2014
Joined
Jan 12, 2013
Messages
13,753
No way I would temp fate using a torch, that thin AL would warp and be a mess. Then if it even worked and the wad of stuff stuck it would be a huge pain to sand down nicely.

I suggest my favorite hole plugging method using JB Water Weld 2 part epoxy stick. Clean out the hole, sand/scuff up the underside, wipe clean with a solvent and then make a wad of JBWW about the size of a nickel. The reason for the size of the JB wad is so that it doesn't start to kick before you get it in place. Pinch off a piece of JB from the wad and push it in the hole from the underside making a mushroom and with the other hand press down on the JB leaving a bit of a bulge in the hole to sand down flush. This has proven to me to be a very tough and permanent hole repair.
 

TruckDrivingFool

Lieutenant Commander
Joined
Jul 30, 2007
Messages
1,818
Ya know that doesn't make me want to try it any less right?

Seriously though the sanding/shaping doesn't worry me but the warping does and is why I want to do some tests. Not discounting your method as seen many here use some variation of it with mostly good results but the low temp brazing really does strike me as a much better repair.
 

jbcurt00

Moderator
Staff member
Joined
Oct 25, 2011
Messages
24,863
Those rods run about 50/50 on reviews posted here
...

Love em or hate em

Cant recall a single
wish I hadnt filled w JB or MarineTex

post in over 5yrs
 

TruckDrivingFool

Lieutenant Commander
Joined
Jul 30, 2007
Messages
1,818
Since I found JBWW more readily than the rods I was looking for, you guys beat me into it. Filling the holes that way.

Does it matter which color of ZC primer I use?
 

Watermann

Starmada Splash of the Year 2014
Joined
Jan 12, 2013
Messages
13,753
Never have used ZC primer, only SE. What colors does it come in besides gray?
 

TruckDrivingFool

Lieutenant Commander
Joined
Jul 30, 2007
Messages
1,818
The ZC seems to come in green and tan/yellow dunno if there is a difference. Maybe I'll just use the SE as I know I can get it locally. With that do I want a full coat or just a dusting like ZC?

I gotta say the JBWW method works quite nicely. I only sanded one down because I had to see a finished one, but I knocked out the dozen or so holes that needed filled in about an hour. Sand them tomorrow and be on to cleaning up the outside of the seams and recaulking them with 5200 to ensure they're are sealed for good.

An thoughts on using the nylon brush wheels on AL? All I can find locally is steel.

Notice my astonished face at the start, Thanks guys!


Last edited:

Watermann

Starmada Splash of the Year 2014
Joined
Jan 12, 2013
Messages
13,753
Yeah the JBWW hole repair is the way to go for the ease of repair and strength.

On the SE, I shot a full coverage coat of it on the bare AL with my HVLP and then a full coat of regular primer before the paint coats and it seem to be very durable so far.

On the seams and especially the keel area, gluvit or coat it is a much better option for sealing than 5200 as it's thin epoxy viscosity gets down in better than the thicker 5200.
 

TruckDrivingFool

Lieutenant Commander
Joined
Jul 30, 2007
Messages
1,818
I've already Gluvited the insides and ended the leaks on the seams I'm looking at

1. Double my leak protection by avoiding the chance of water being able to work it's way in under the Gluvit possibly causing a problem.
2. Giving me a sure surface for paint to stick to. This has been a concern since I started stripping the paint.
 

Watermann

Starmada Splash of the Year 2014
Joined
Jan 12, 2013
Messages
13,753
Too much of a good thing isn't a good thing, 5200 is an adhesive sealant designed to be sandwiched between 2 objects.
 

TruckDrivingFool

Lieutenant Commander
Joined
Jul 30, 2007
Messages
1,818
What would be a good product to run a small "caulking" fillet along the seams then? Like I said sort of double insurance to not let water into the seems to cause problems down the road.

Trying yo upload a pic of an example of what worries me but failing so far.
 

TruckDrivingFool

Lieutenant Commander
Joined
Jul 30, 2007
Messages
1,818
Ok back onto topic - all these little holes are what I want to seal to avoid any possibility of outside water pressure being able to work its way in under the Gluvit possibly causing an issue down the road. I'd leave it up to paint alone but some seams won't be painted.
Seams resized.jpg
 
Last edited:

Watermann

Starmada Splash of the Year 2014
Joined
Jan 12, 2013
Messages
13,753
My SS has those small pits and fissures in the sealer on the keel strip. You have to remember there's a couple inches of overlap AL hammered tight with solids with sealer in there and that's just the outer edge you can see. It's just the excess squeeze out sealer edge that's showing those pits they don't go through to the inside. The problem is the below the waterline keel area that's been hammered on beaches and rocks that could leak. In that case if there's some gaps between the keel plate and the hull you could work some 5200 between the 2 to seal it.
 
Last edited:

TruckDrivingFool

Lieutenant Commander
Joined
Jul 30, 2007
Messages
1,818
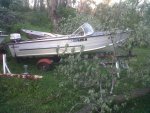
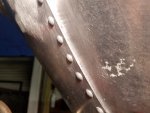
Got her flipped back over, the seams on one side all cleaned up, and started to try to find a polishing method that works for me.

Tried a cheap buffing set for a drill with minimally acceptable results on flat areas and poor results around rivets. Resorted to hand polishing with micro mesh to 6000 grit followed by metal polish with better results but still can't obtain the holy grail of a chrome finish.

Was too dark by the time I finished for pics so I'll have to get some tomorrow but I did set the camera up trying to get a fail video out of the boat flip but was unsuccessful in that even.


Watermann

Starmada Splash of the Year 2014
Joined
Jan 12, 2013
Messages
13,753
That's a bunch of work polishing, no way I would even think of it, too much like sanding and I hate sanding. Then the fight to keep the AL from going back to it's beautiful natural gray color.

Nice work on the flip. :encouragement:
 
Top