1990 Chris Craft 254 Seahawk ( Refurb and upgrades)

Status
Not open for further replies.

chriscraft254

Commander
Joined
Jun 4, 2011
Messages
2,445
I purchased this boat about two years ago. Just thought I would share what I have done, for those that consider buying an older Chris Craft Seahawk. The boat was solid but had some mechanical issues. We are still working on getting the mechanicals straightened out. But in the mean time, I have been very busy upgrading different things and making the boat better in general.

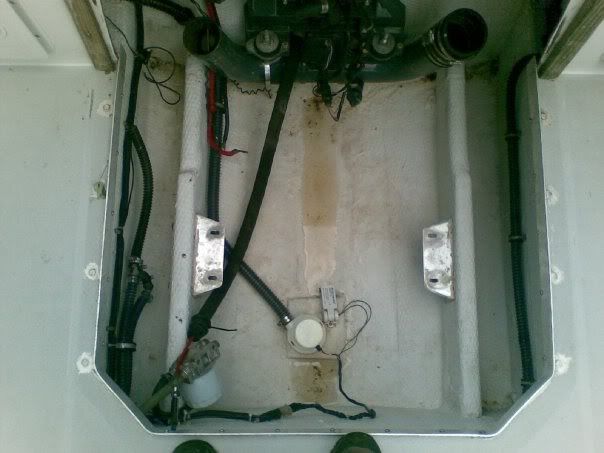
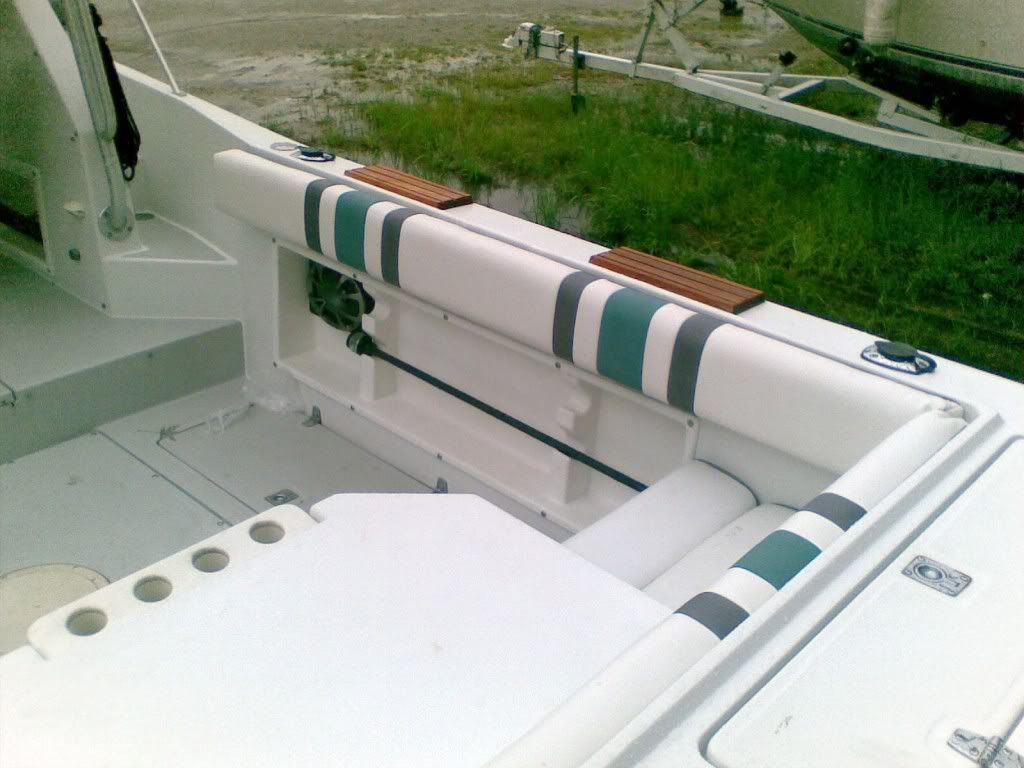
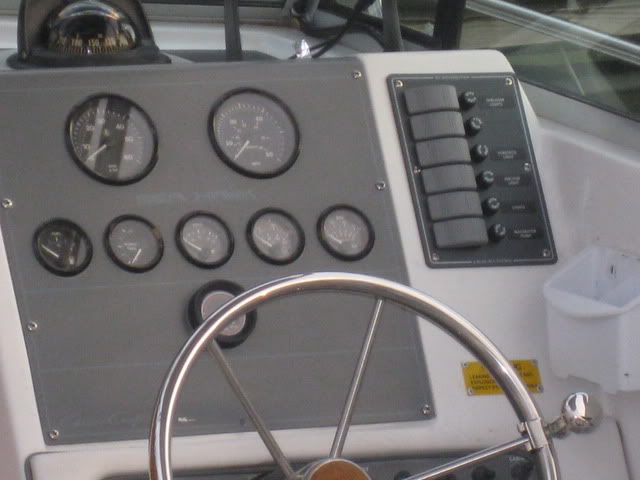
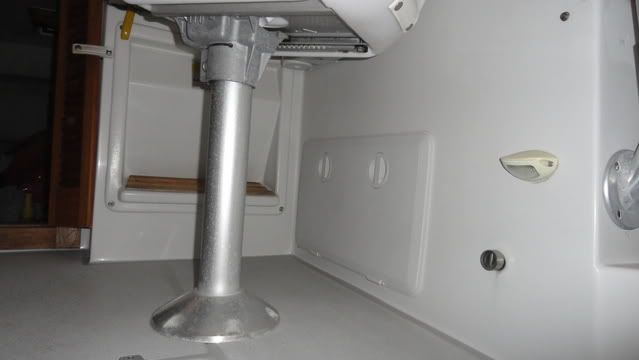
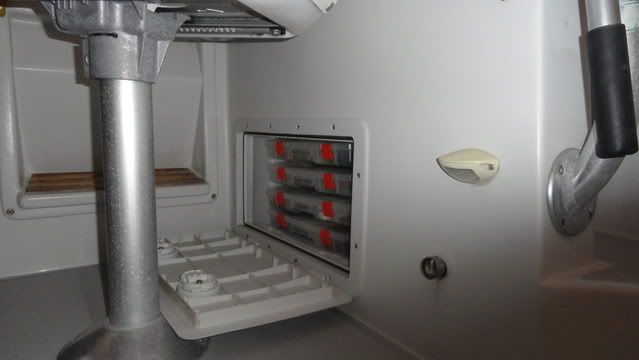
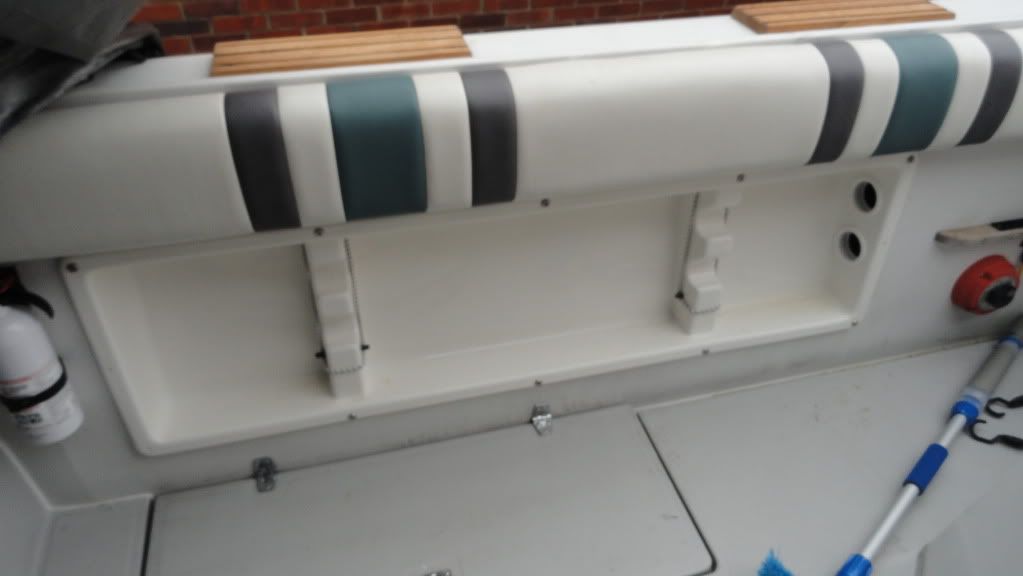
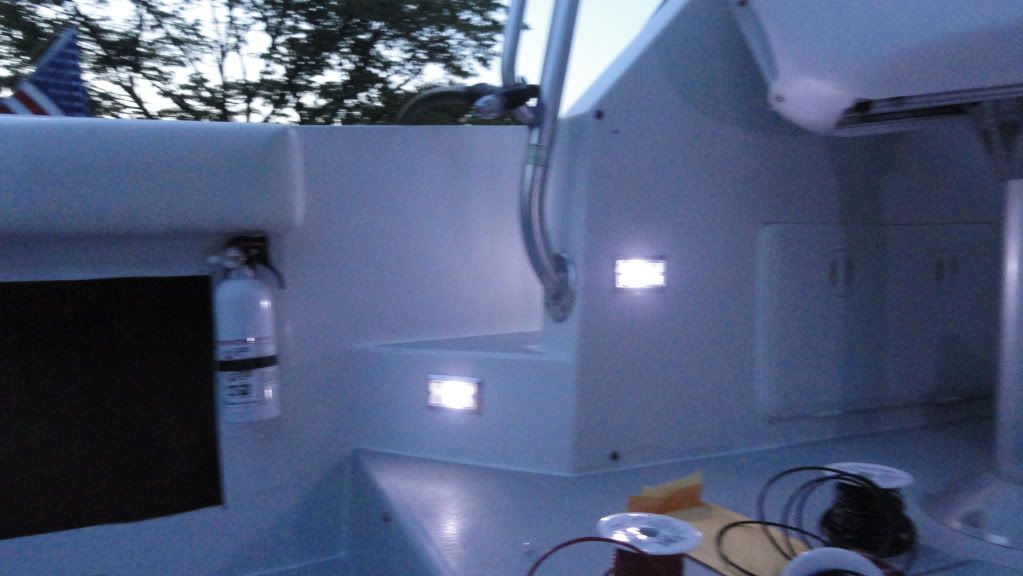
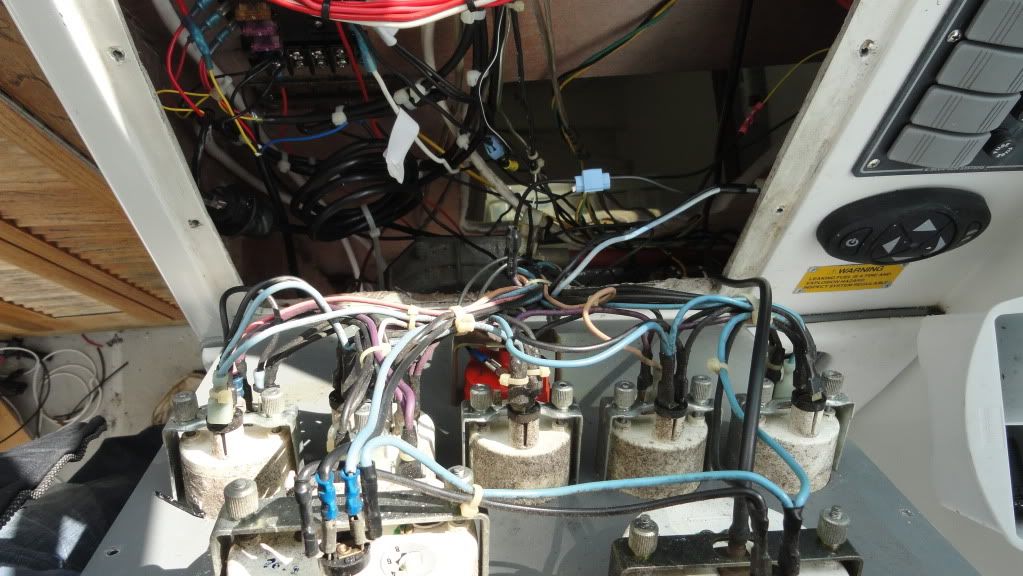
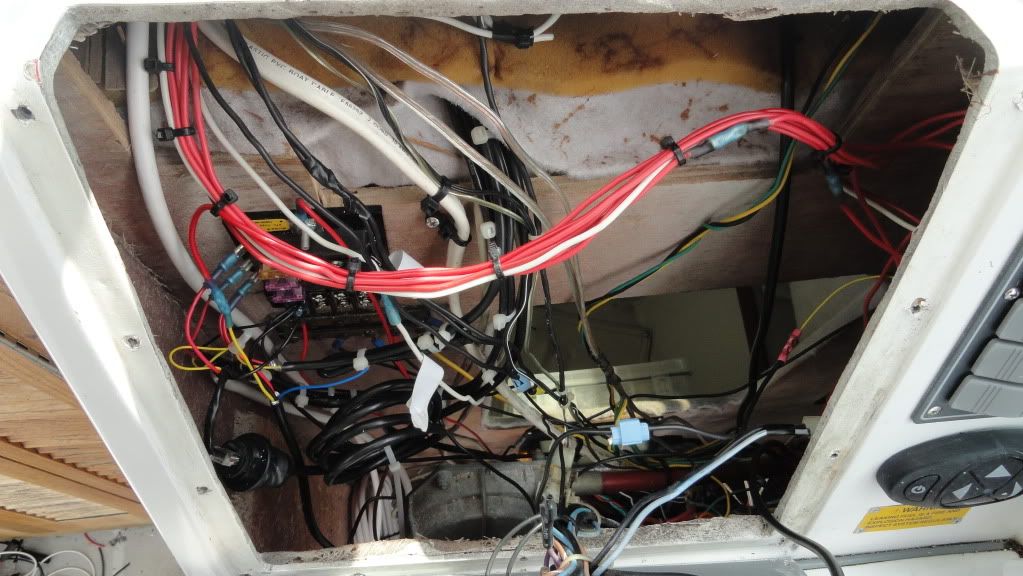
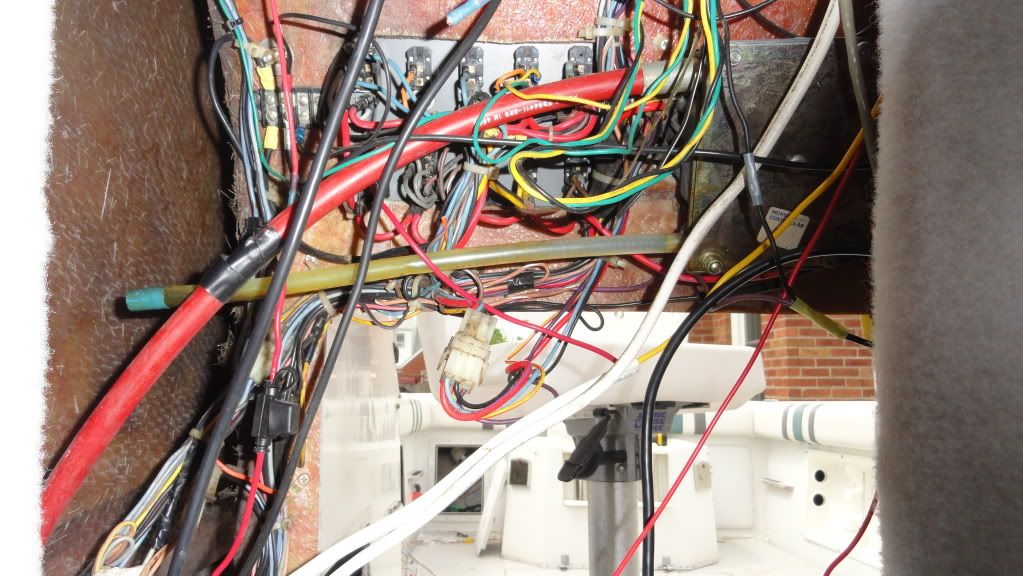
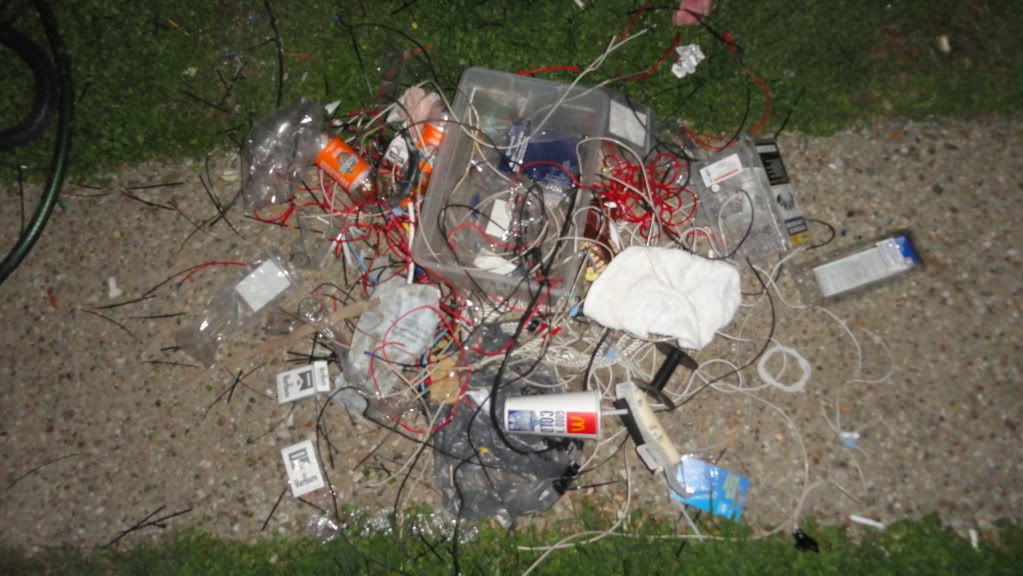
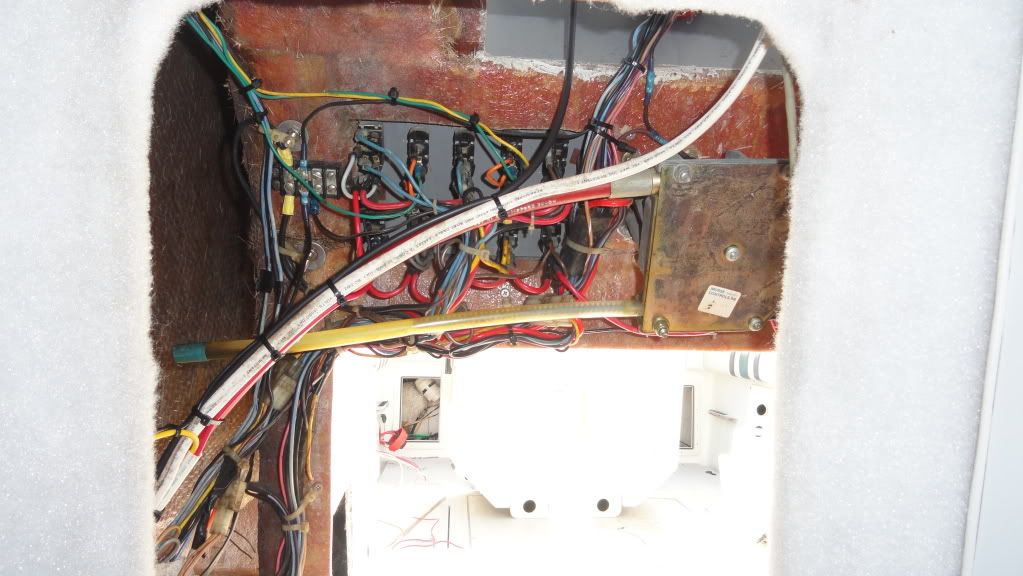
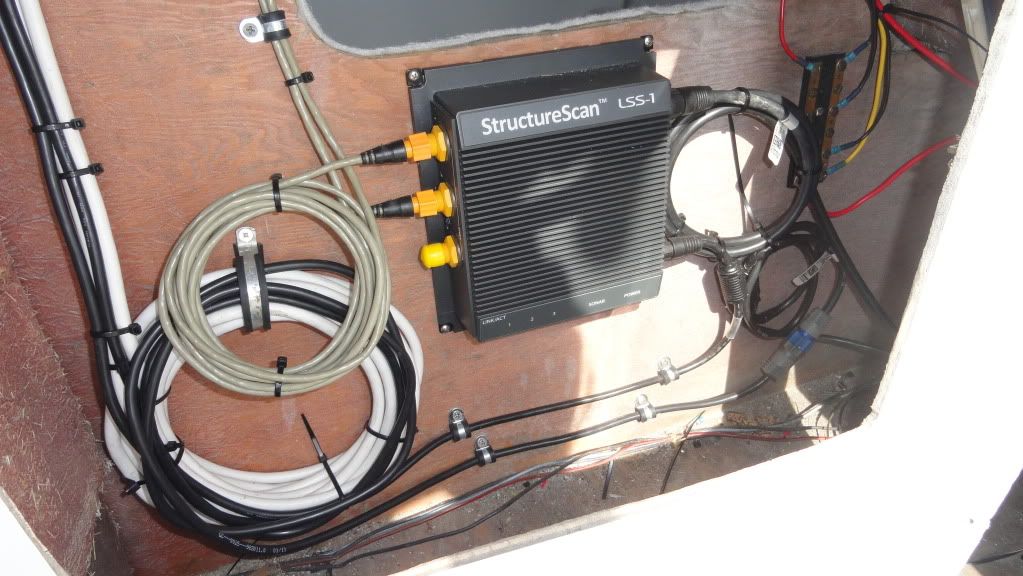
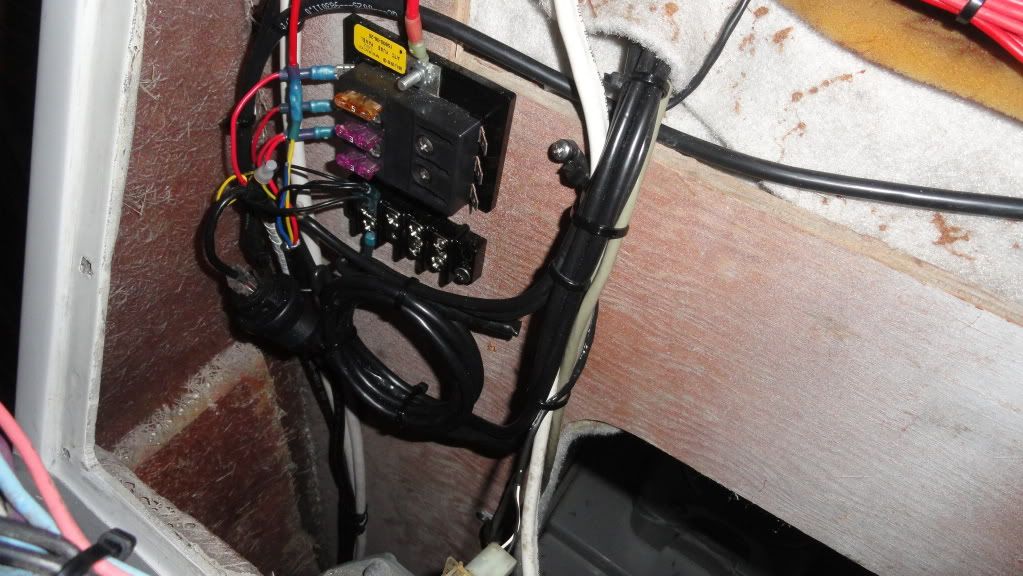
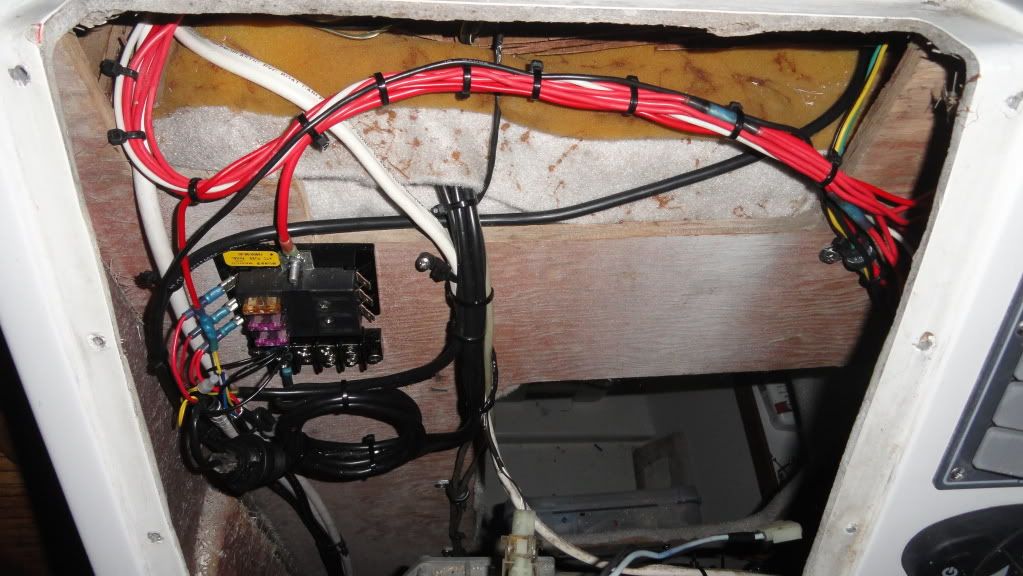
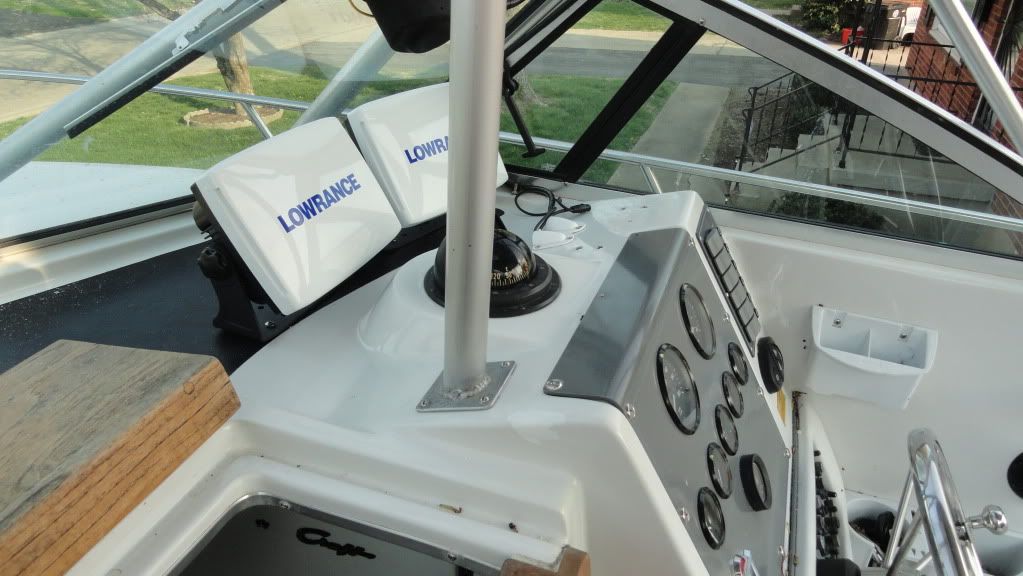
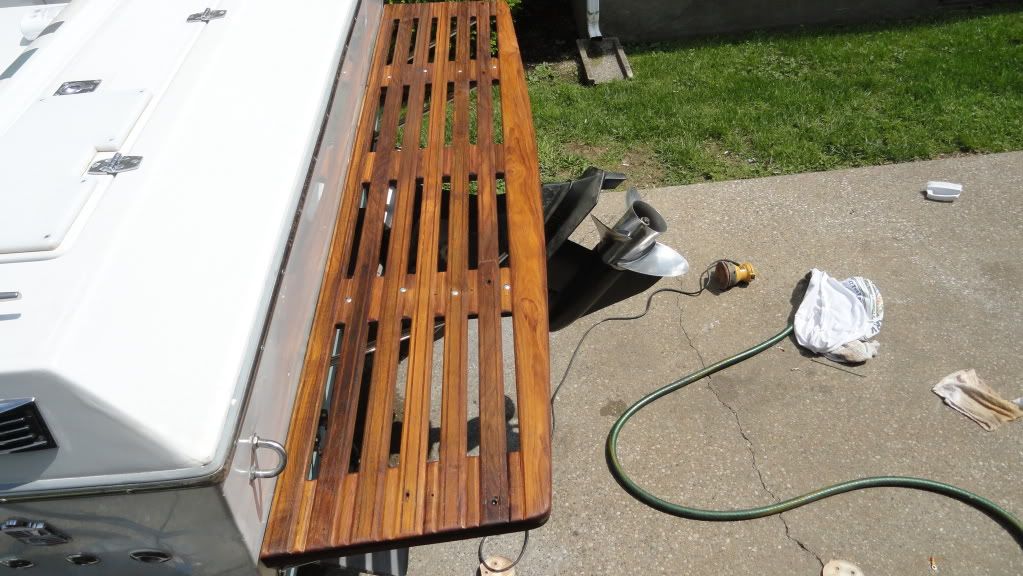
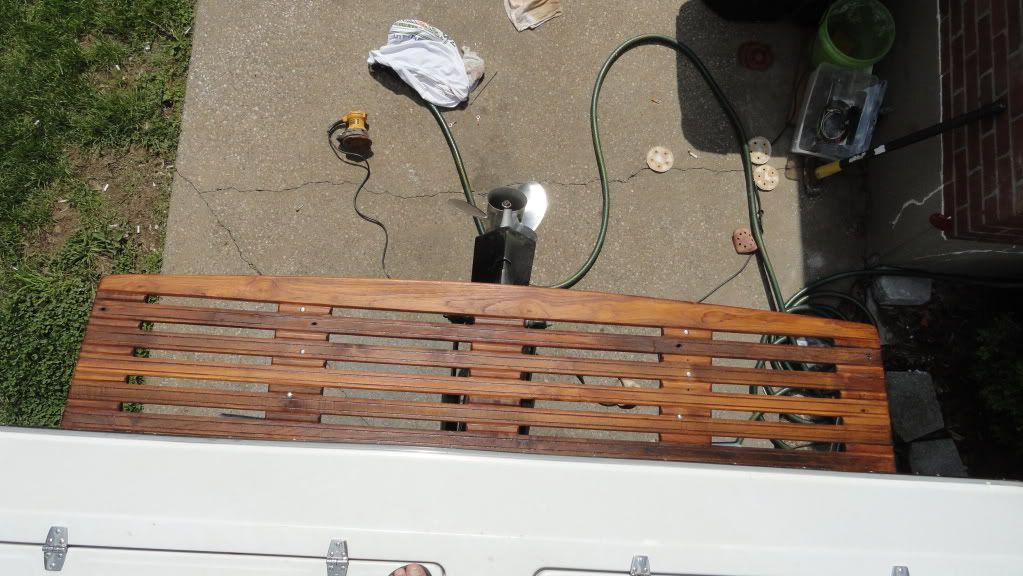
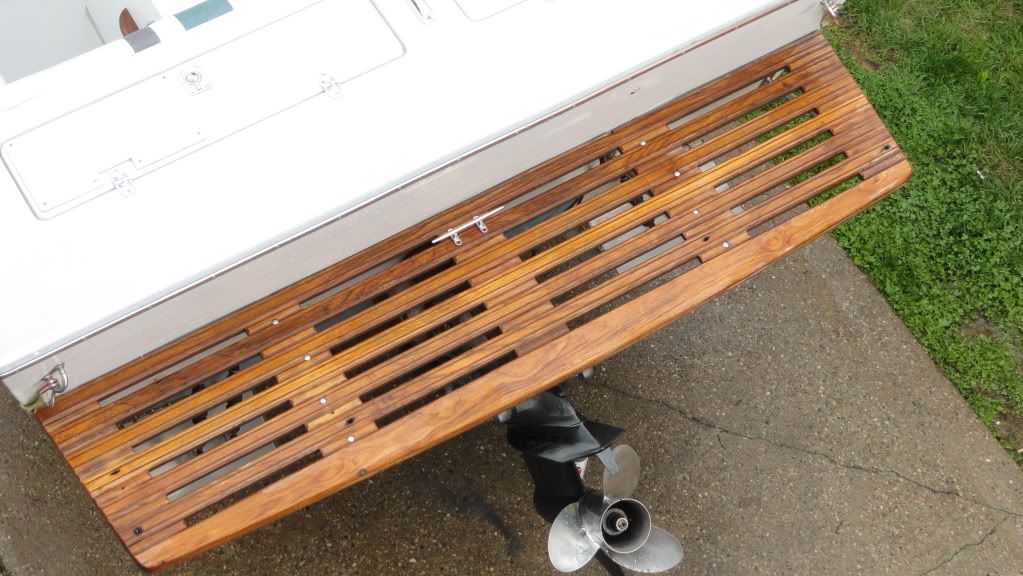
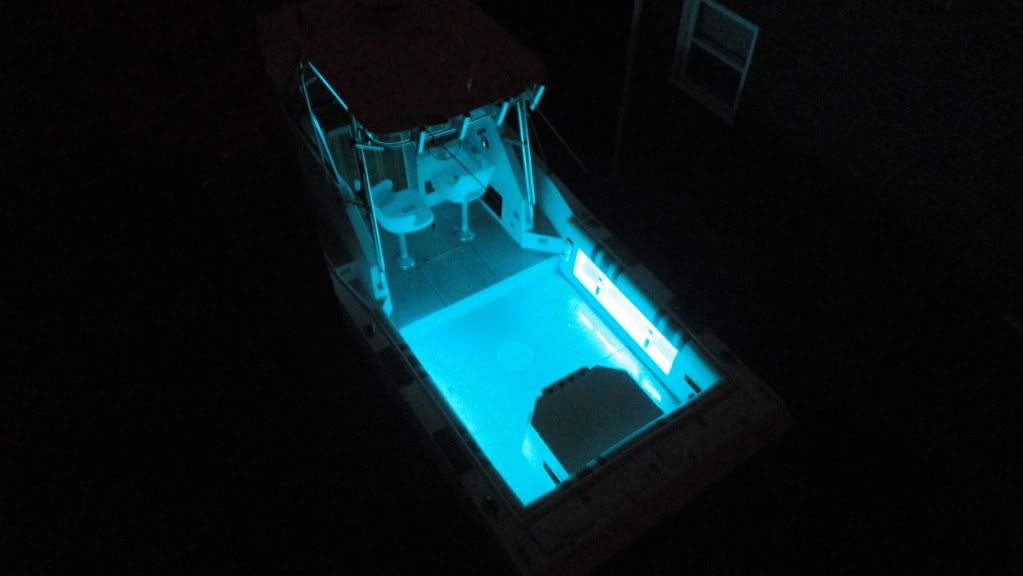
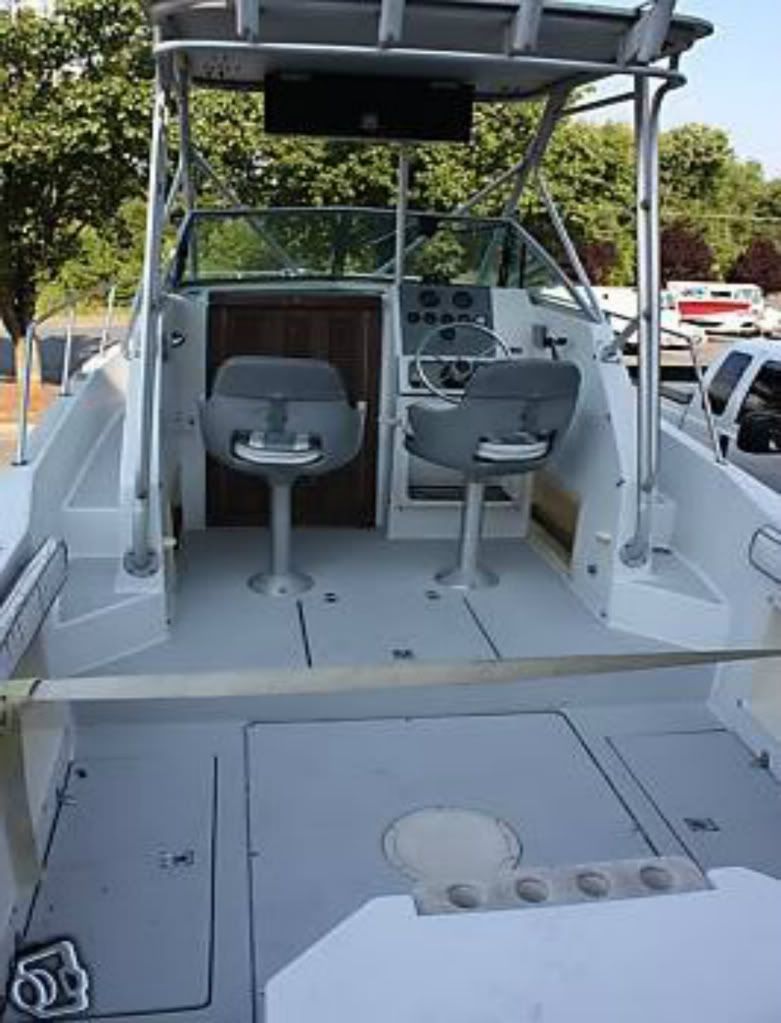
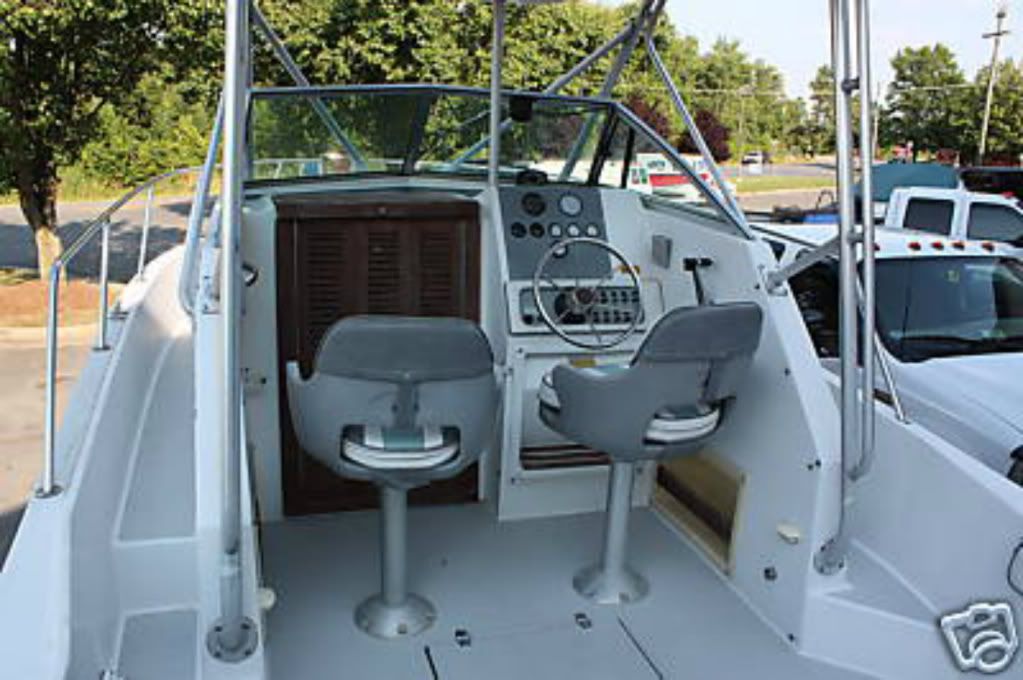
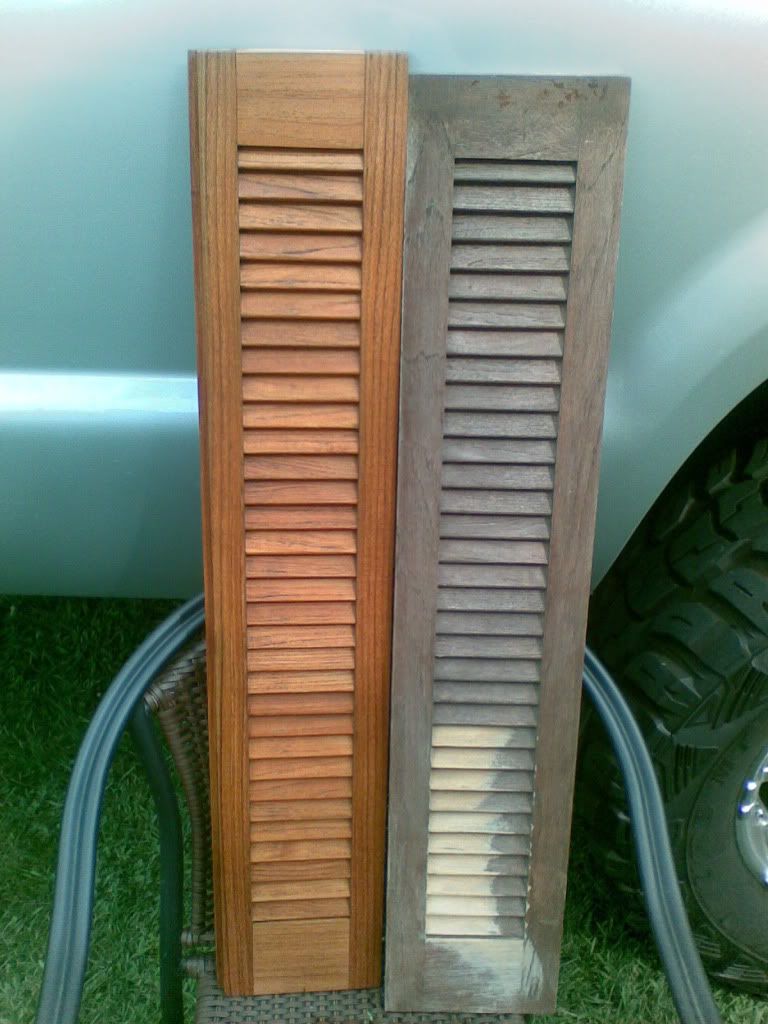
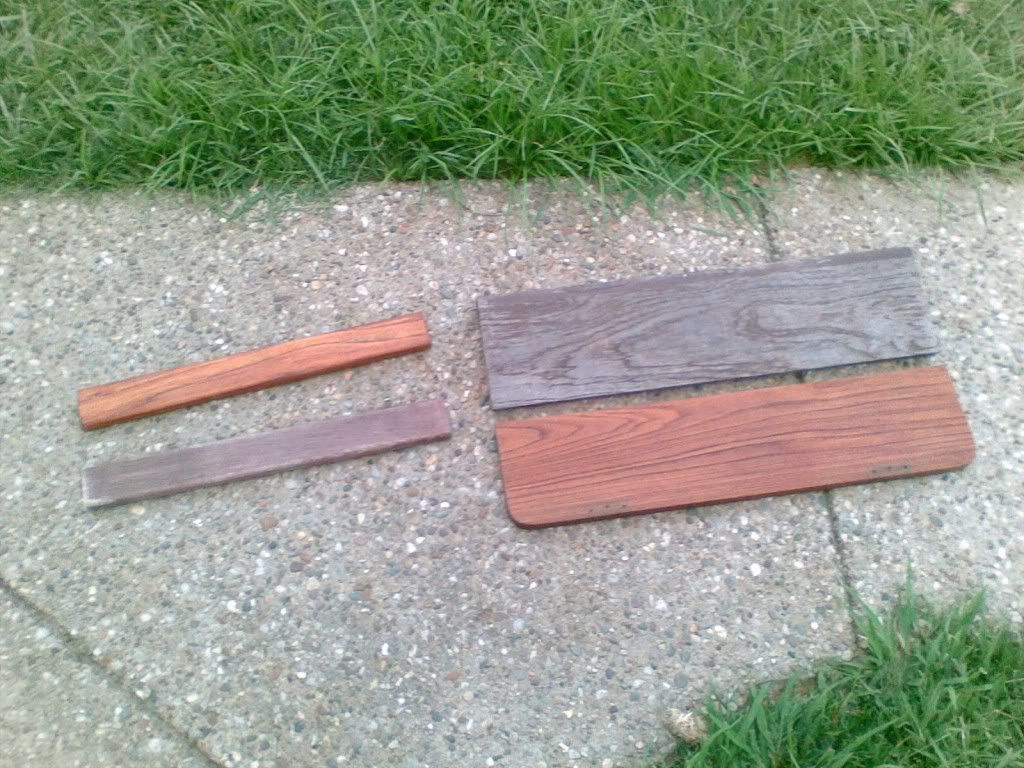
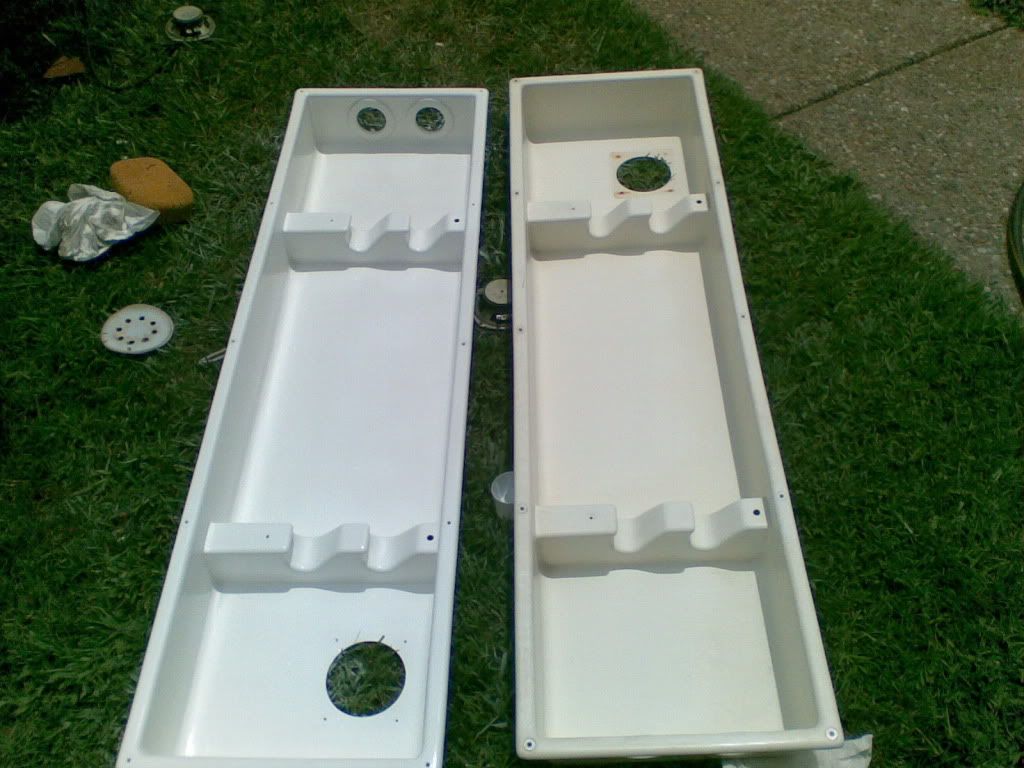
I am very pleased with the way this boat is set up for access to everything especially wiring. I do not have all before pics but most. I wanted to share because I think everyone thinks buying an old boat means you are going to be rebuilding everything from the stringers up. If the boat is well taken care of, it can last forever imo. Hope everyone enjoys the pics and the thread. I will be posting alot of pics of before and after as I went through this boat. Most things are cosmetic, but I do get into adding new things, cleaning up wiring, refurbing teak, etc,etc,etc

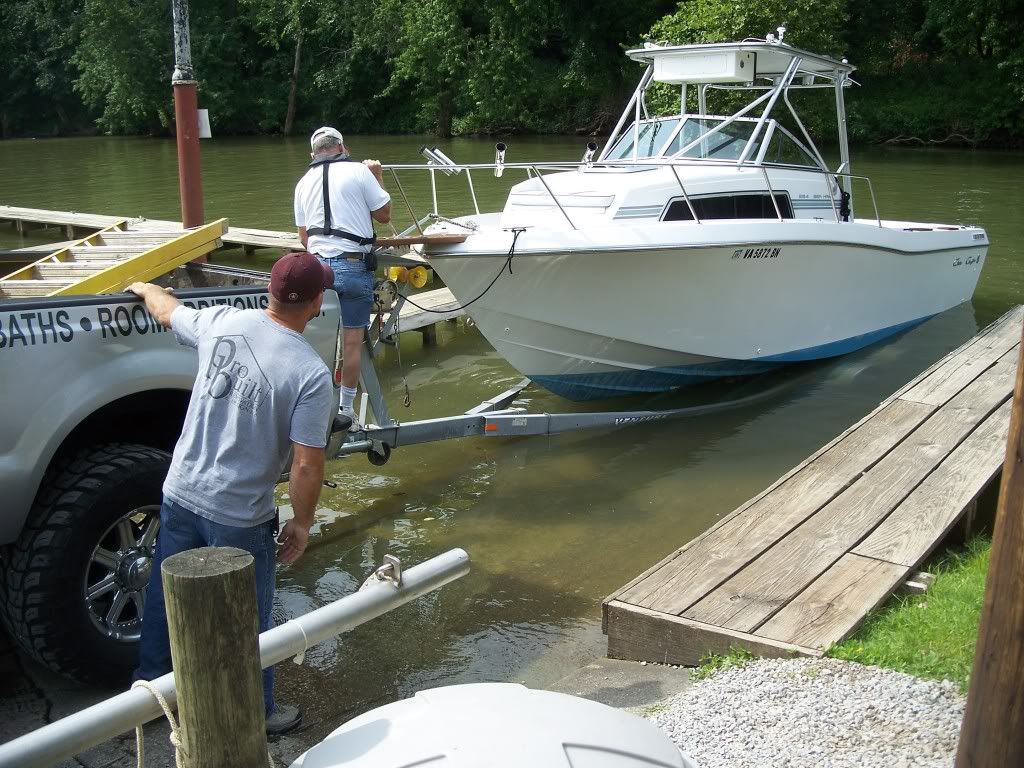
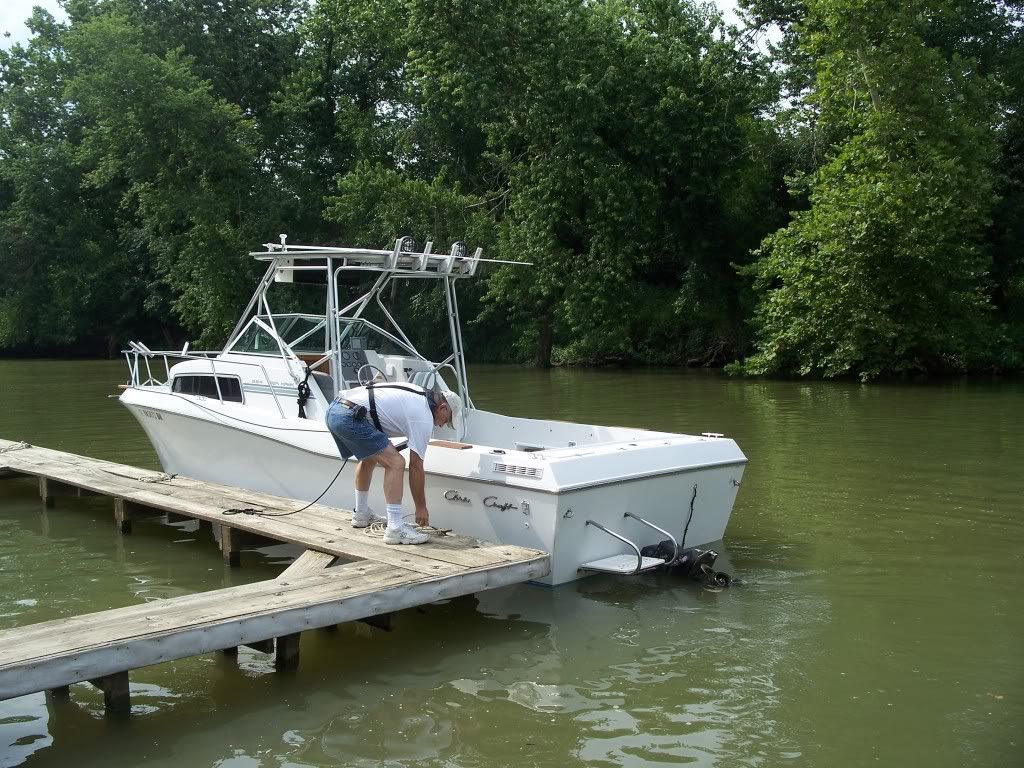
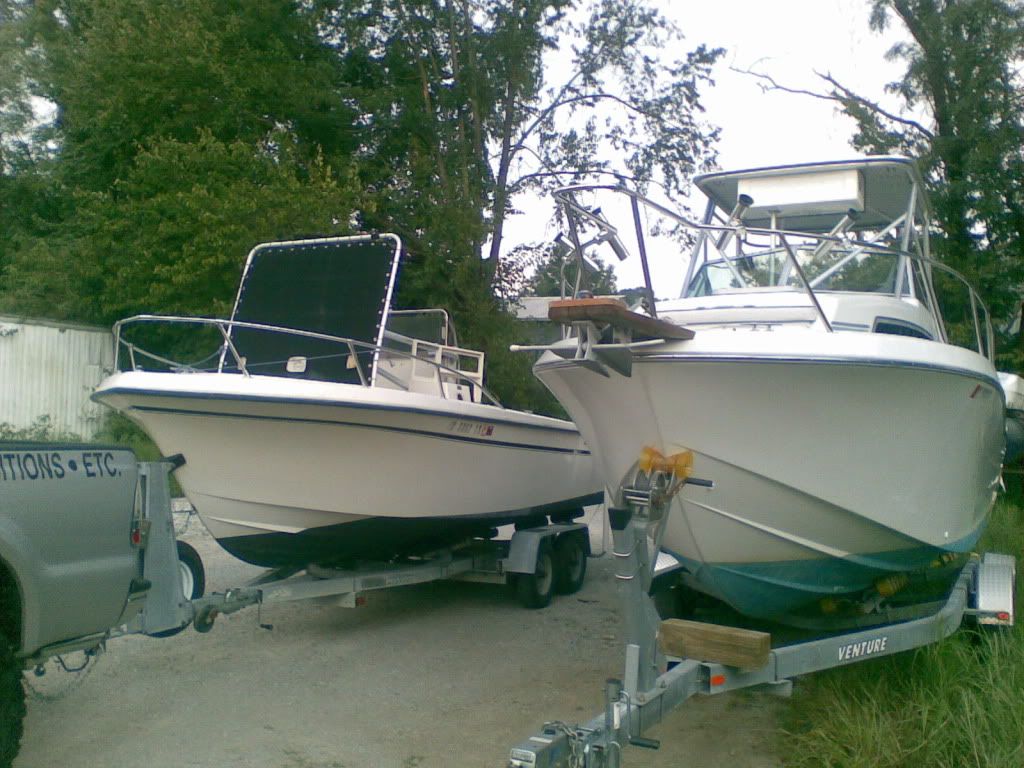
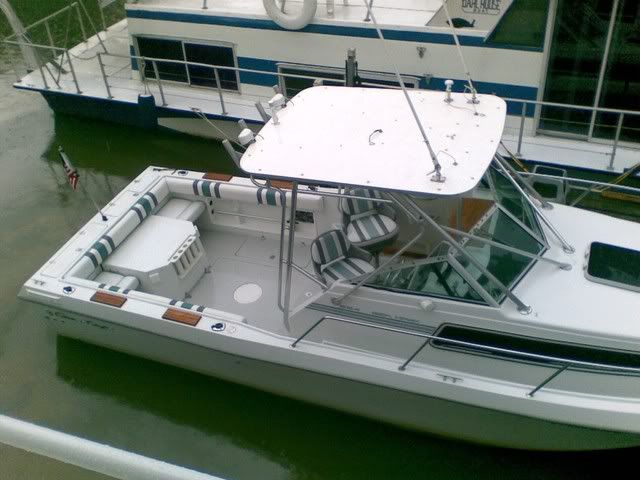
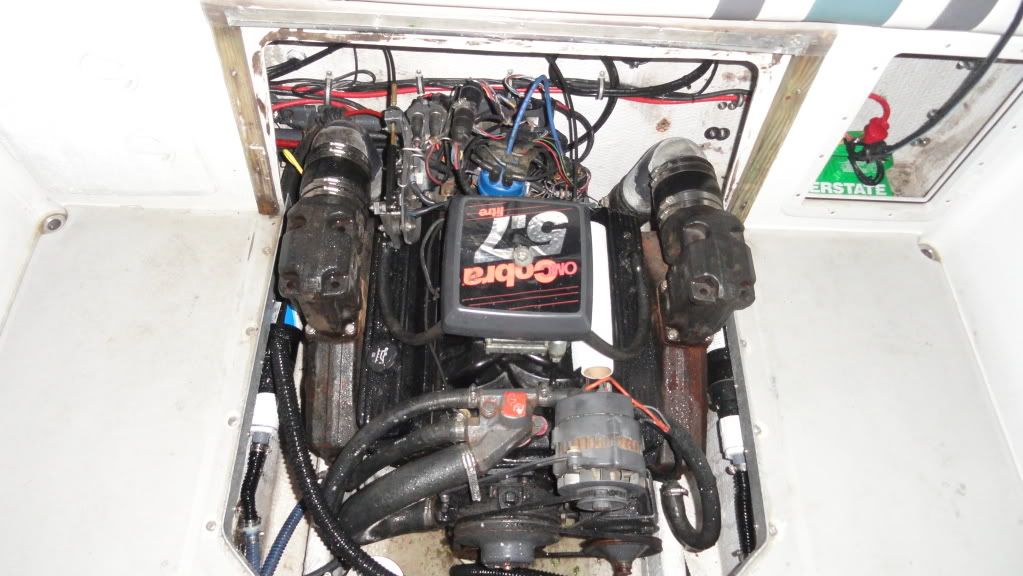
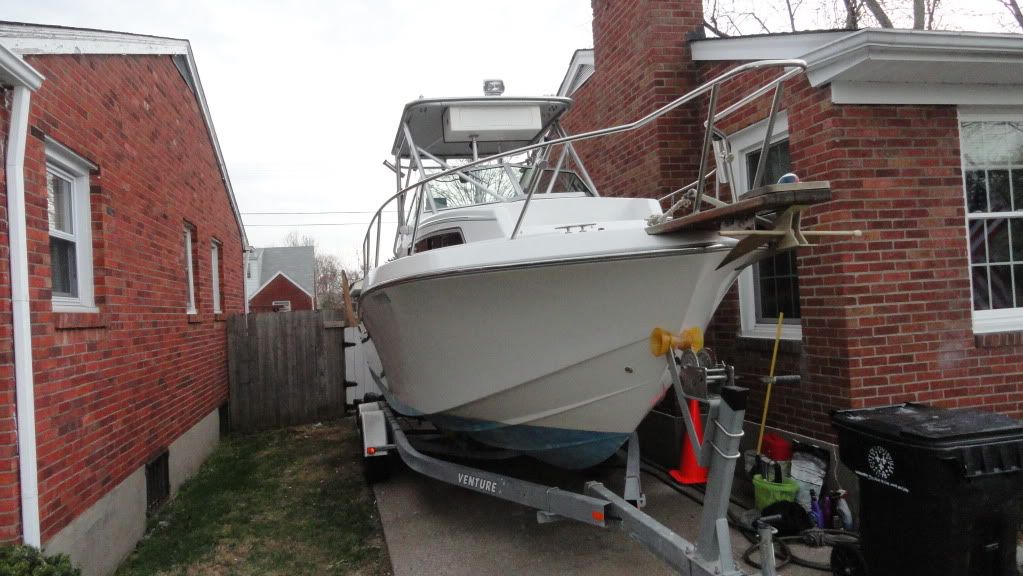
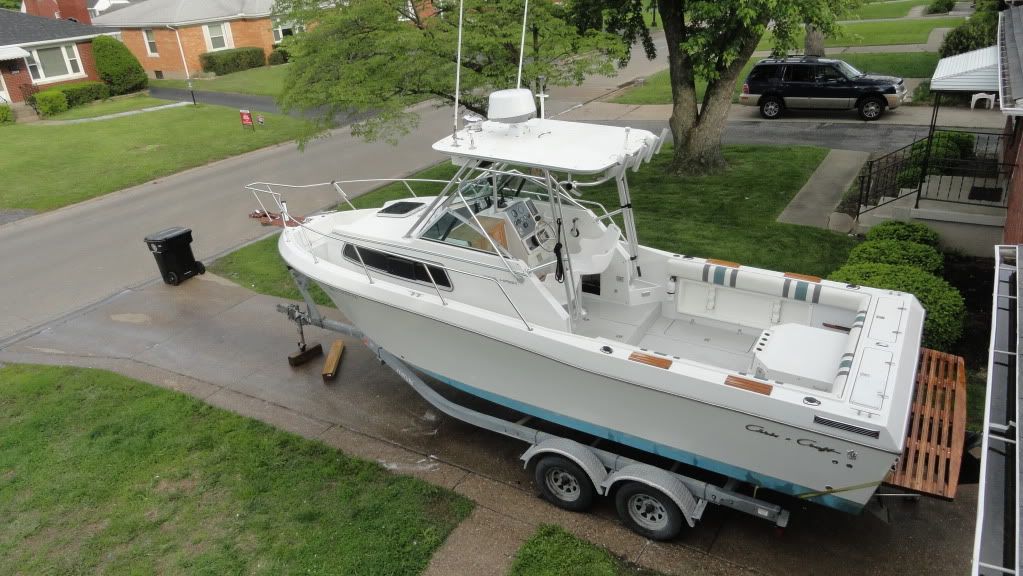
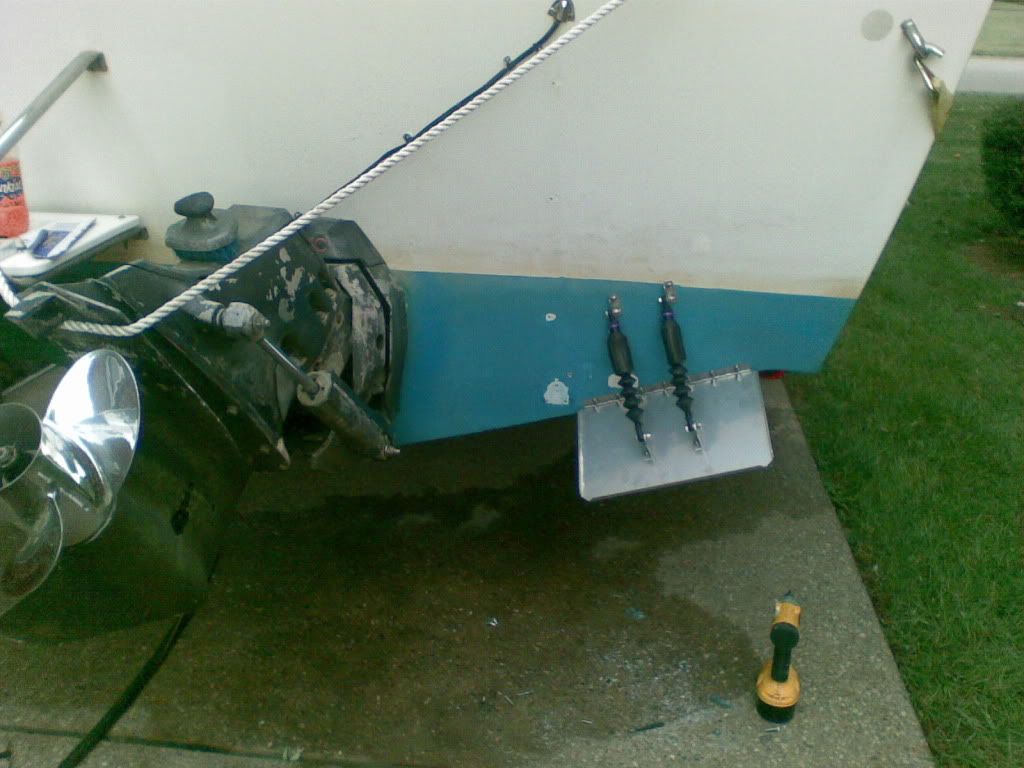
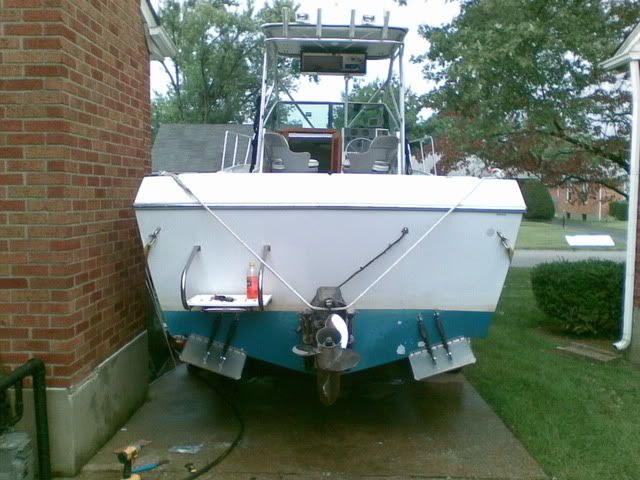
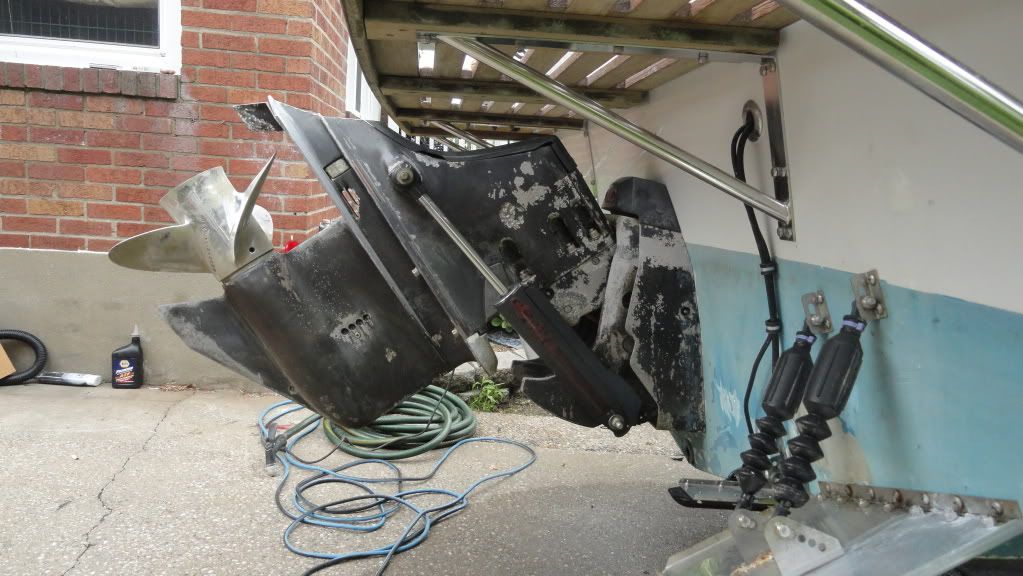
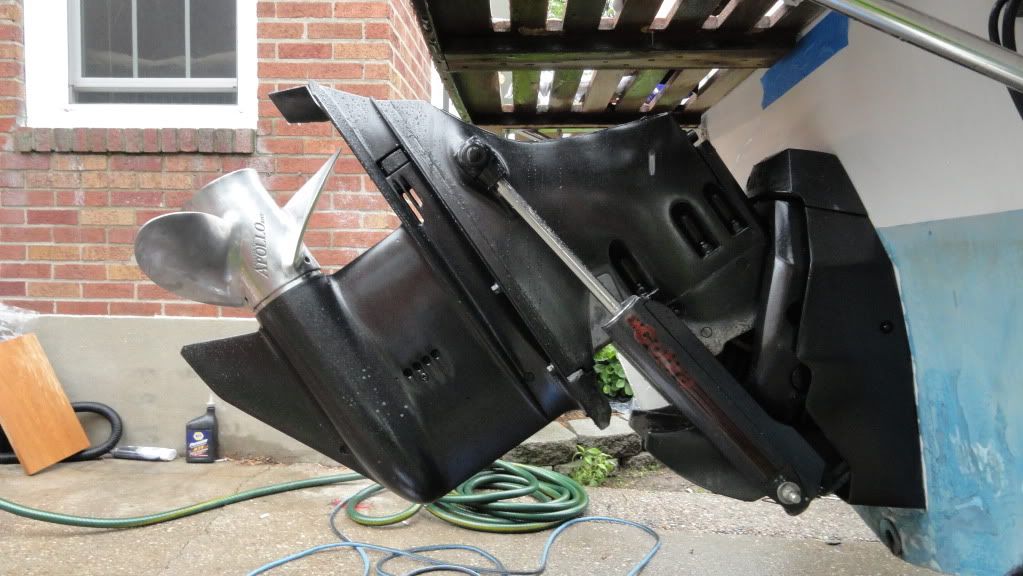
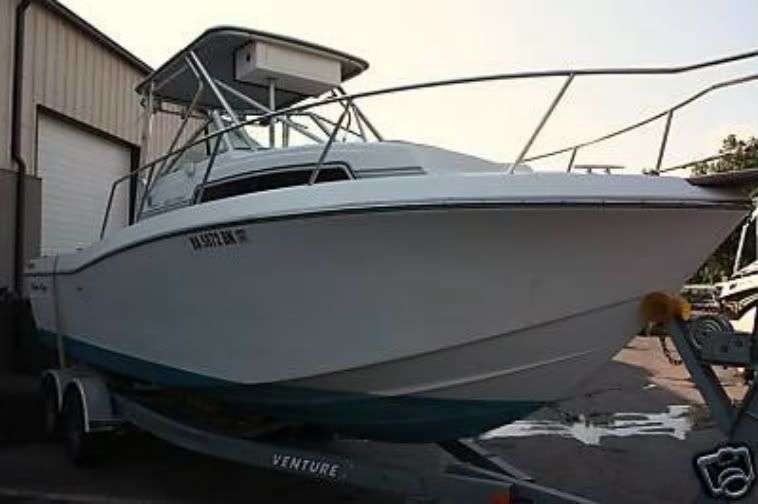
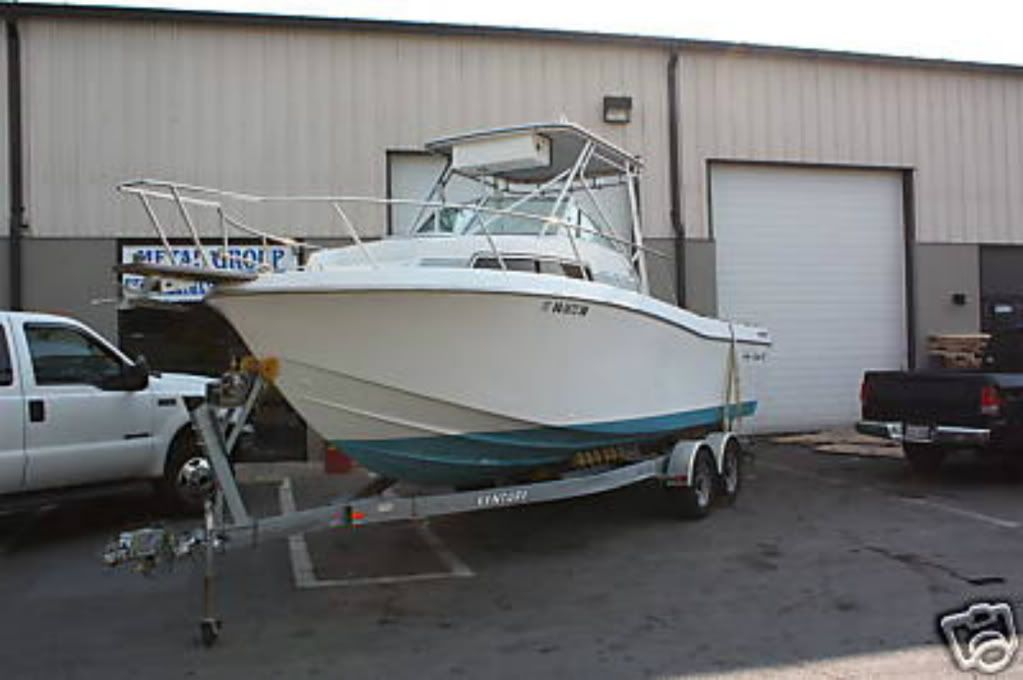
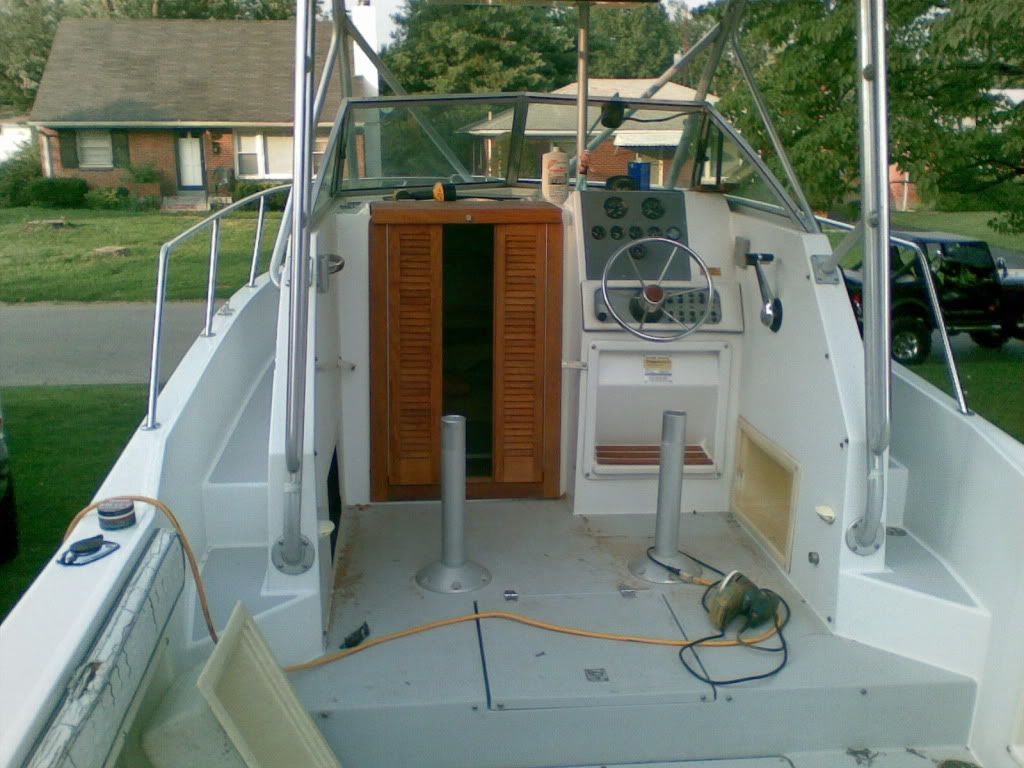
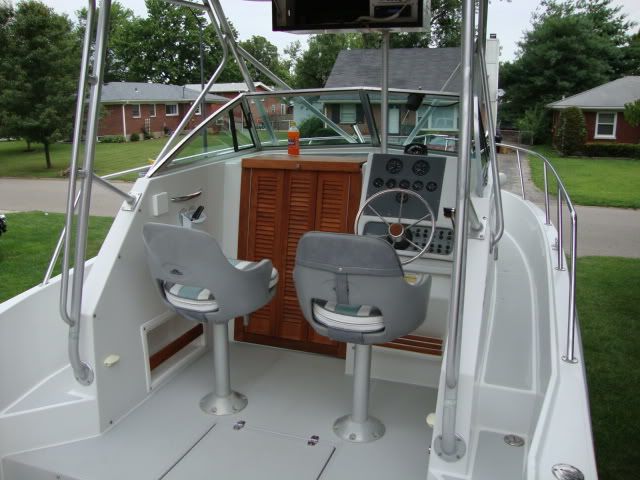
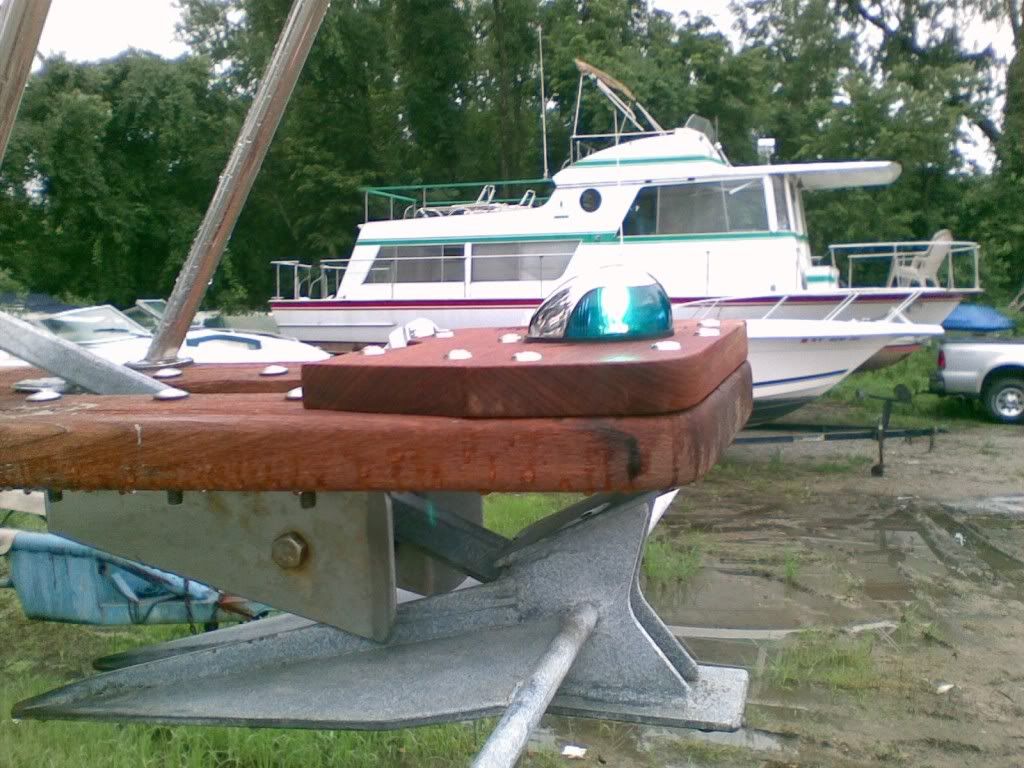
Boat when I purchased it. Had 2006 Venture roller trailer, and a Rebuilt pcm motor with 10 hours on it supposedly. I paid just at $5000.00 for the package. Boat measures about 26' 71/2"with the bow pulpit. does not include length with a swim platform. I definately think I got a deal. Boat has a hardtop also. This in itself is about $5000.00 if I were to have one made. Bonus!

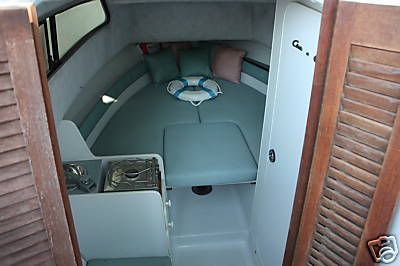
Pics of the boat when purchased in 2009.
BVekVQBWkKGrHgoH-EUEjlLl0EpmBKSpljtL6w_1.jpg


dde4_1.jpg


df1e_1.jpg


e30a_1.jpg


e1b5_1.jpg


e052_1.jpg
 
Last edited:

chriscraft254

Commander
Joined
Jun 4, 2011
Messages
2,445
Re: 1990 Chris Craft 254 Seahawk ( Refurb and upgrades)

Ok, so the boat was in rough shape cosmetically but was in pretty good shape overall. First thing I did when I got her home was took a long nap, it was a rough trip going to northern virginia to pick her up and a semi almost killed me on the way home. My truck did not appreciate the trip through the mountains at all! I got started by pulling off the coaming pads, they were original and just shot. You can see in the above pics all the teak had been dark stained for some reason by the previous owners. I took all the teak off and started sanding. I also bought some rough lumber teak to make some step pads for the gunnels. Bow pulpit, boxes under helm chairs, door for cuddy, and rear seat supports are all teak. I removed the side gunnel boxes and boxes under the helm seats to paint them because they were faded badly. Didn't have alot of cash to put into the boat at this point, so I was doing what I could afford. I am a big fan of teak and do realize its not for everyone because it does take constant maintenance to keep it looking good. I have thought about west systems or something comparable but for now teak oil will be the protectant.

Image051.jpg


Image049.jpg


Image047.jpg


Image003.jpg


Image002.jpg


Image052.jpg
 
Last edited:

chriscraft254

Commander
Joined
Jun 4, 2011
Messages
2,445
Re: 1990 Chris Craft 254 Seahawk ( Refurb and upgrades)

Got all the teak re-installed with new stainless screws and cleaned up the boat from bow pulpit to bilge. The bow pulpit got a new peice of teak added to the pulpit to strengthen the pulpit because it was splitting at the joints. I then mounted a new stainless bow light. Looks much better than the old black plastic one. The Interior really cleaned up nicely. Took cushions out because of a mold smell in them. Think I have a couple side window leaks to address later

0474.jpg


002-5.jpg


0372.jpg
 
Last edited:

chriscraft254

Commander
Joined
Jun 4, 2011
Messages
2,445
Re: 1990 Chris Craft 254 Seahawk ( Refurb and upgrades)

Wanted to sea trial, so off we went. Did not go real well, noticed boat was also listing a little to one side while out on boat. Pulled the boat and sent it to mechanic. Turned out to be spun bearings after motor was broken down, Uugh. Anyway, was impressed with the boat and how she rode regardless. Good news is she floated and the trailer worked awesome.:) Did move the trailer post forward while boat was off to get her farther up on the tongue.

First launch with my dad in tow.
100_3694.jpg

100_3699.jpg
 

chriscraft254

Commander
Joined
Jun 4, 2011
Messages
2,445
Re: 1990 Chris Craft 254 Seahawk ( Refurb and upgrades)

While motor was out of boat, I cleaned the bilge real good. Also installed the new bolsters that I had designed and then had made at a local upolstry shop. They bolsters changed the whole looks of the boat the way I designed them to look. Had them made thicker than the originals for comfort. They act as a back rest also for the stern seats when they are installed. Also installed two pvc pipes cut in half to the inside of hardtop so I can feed wires for my new halogen lights on the rear of hardtop and future electronic wiring.. Installed led overhead light for red and white lighting of helm area. A new Blue Seas switch panel for new elctronics in the future! I traded a 20 ft grady white center console rebuild for the new rebuilt motor. Should be installed soon. There is a pic of the grady next to the Chris Craft. Crafted and installed two new teak pads for the gunnels. These come up even with the lip on the gunnels. This really connected the teak theme that already looked good. Just kinda continued it through the boat with more balance.

gh.jpg


0352.jpg


022-3.jpg


023-5.jpg


0242.jpg


0042.jpg
 
Last edited:

chriscraft254

Commander
Joined
Jun 4, 2011
Messages
2,445
Re: 1990 Chris Craft 254 Seahawk ( Refurb and upgrades)

Got the motor in and running. Got the boat dropped in and fished a few days and realized I needed more tackle space/storage. Found these plano box inserts to fit the open storage under the helm chairs. These worked great, not cheap, but worth every penny. They mounted under the helm chairs where the useless storage was before. I marked all plano pull outs for quik visual on what they have in them. Also got a tackle box that fits under the stern seats perfectly. Pic of new switch panel also installed for extras. Only problem with these storage boxes is it cost me some money to fill them up with tackle! I also installed a new switch panel for upcoming electronics. Its nice because it matches the interior grey color.

062.jpg


boat025.jpg


boat024.jpg


boat023.jpg


boat022.jpg


boat021.jpg
 
Last edited:

chriscraft254

Commander
Joined
Jun 4, 2011
Messages
2,445
Re: 1990 Chris Craft 254 Seahawk ( Refurb and upgrades)

I am also a big fan of stainless. I replaced the rod holders on the engine cover. They were pvc before and just looked ugly. I ordered some stainless steel exuast pipe and cut it to length,then installed the rod holder to the engine cover. Also added some new stainless cup holders to the sides of engine cover for rear seated people that match the new rod holders. Replaced the rear access panels that were shot, with bigger clam type access panels. These make life much easier gaining access to the batteries on both sides of the stern and you can completly remove the door on them in two seconds. Also went ahead and replaced the gunnel rod boxes. I had painted the old ones and added speakers. Well, it was a bad location for the speakers to begin with and the old rod boxes were really brittle and was lacking the bungee tie downs. The new ones look sweet.

056.jpg


Hardtoppics086.jpg


Hardtoppics081.jpg


Hardtoppics078.jpg


boat030.jpg


001.jpg
 
Last edited:

chriscraft254

Commander
Joined
Jun 4, 2011
Messages
2,445
Re: 1990 Chris Craft 254 Seahawk ( Refurb and upgrades)

I moved on to the wiring and electronics box . The boat had a vhf and a radio in the over head with a bunch of wasted space. I installed two radio open storage boxes, the vhf, and the radio in a new starboard peice that fills the whole overhead box space now. Looks much better, and I left room for a second vhf eventually. Radio will be replaced later also. Installed a dual onboard battery charger mounted behind the motor up out of the way. This is going to be great to have, it has a green go light on it, so you know when the batteries are fully charged. Also including a pic of the motor installed and two new macerators are seen to the left and right of motor. Tight fit but it works.

Before
DSC02441.jpg

After
004-4.jpg


014.jpg

011-2.jpg
 
Last edited:

chriscraft254

Commander
Joined
Jun 4, 2011
Messages
2,445
Re: 1990 Chris Craft 254 Seahawk ( Refurb and upgrades)

Next was to add a forward spotlight with mounted remote control at the helm. The light is a go light. I also added step lights to the walkaround steps. Replaced the regular bulbs that came with them with led replacement bulbs. They are much brighter than the ones that came with the fixture. Replaced the existing light under the helm chairs to match the new step lights. Replaced the old grey helm seats with new white seats, what a difference! Also added two fire extingishers next to the walkaround steps. There is another one in the cabin right inside the door at easy reach.

011-3.jpg


023-3.jpg


026-3.jpg


013-2.jpg


005.jpg


Hardtoppics123.jpg
 
Last edited:

chriscraft254

Commander
Joined
Jun 4, 2011
Messages
2,445
Re: 1990 Chris Craft 254 Seahawk ( Refurb and upgrades)

Next was the electronics, and cleaning up wiring. It was a rats nest under and behind the helm. Luckily, everthing is very easy to get to on this boat when it comes to fishing wires. I added a new fuse panel and buss for all the new electronics. Its nice because I know exactly where to look if anything that I have installed goes haywire or quits workng. I installed two Hds-7 lowrance combos w/side scan and A BR-24 radar. The new switch panel is also for switching power to these.

Before pics
001-2.jpg


002-1.jpg


015-1.jpg
 
Last edited:

Friscoboater

Captain
Joined
Jul 3, 2009
Messages
3,095
Re: 1990 Chris Craft 254 Seahawk ( Refurb and upgrades)

That looks like the pile of wire after I did the Glastron. Nice work.
 

chriscraft254

Commander
Joined
Jun 4, 2011
Messages
2,445
Re: 1990 Chris Craft 254 Seahawk ( Refurb and upgrades)

Wiring and electronics continued. Got my electronics in the mail. Installed the side scan box under the helm. Great place for it, easy access and easy to wire. All the new electronics are being wired to the new fuse buss, this way I know exactly where to look if there is any issues down the road with what I have installed. keeps the systems seperate.

After pics
035.jpg


019-4.jpg


029-1.jpg


019-5.jpg


017-1.jpg


020-3.jpg
 
Last edited:

wnaplay

Petty Officer 3rd Class
Joined
Jul 6, 2010
Messages
95
Re: 1990 Chris Craft 254 Seahawk ( Refurb and upgrades)

That is awesome work.
 

chriscraft254

Commander
Joined
Jun 4, 2011
Messages
2,445
Re: 1990 Chris Craft 254 Seahawk ( Refurb and upgrades)

Electronics continued again,lol
Remodelpics003.jpg

Hardtoppics001.jpg

Hardtoppics072.jpg

Radar mounted on top.:D Can't wait to use it!
037-1.jpg
 
Last edited:

chriscraft254

Commander
Joined
Jun 4, 2011
Messages
2,445
Re: 1990 Chris Craft 254 Seahawk ( Refurb and upgrades)

I wanted the boat to drain faster than it did, so I attacked the drain thru hulls and hoses next. The boat came with plastic thru hulls that I had already replaced with stainless. I took the stainless ones out and replaced them with 1 1/8" instead of the previous 3/4". Replaced all the drain hoses with ribbed bilge hose and also replaced the thru hulls that drained to the outside of the hull. This made a huge difference in the draining quickness. I would say it sheds water out twice as fast as before with the old 3/4" Drains.

Before.
010-1.jpg

016.jpg

After
019-2.jpg

024-2.jpg

027-1.jpg

028-1.jpg
 

chriscraft254

Commander
Joined
Jun 4, 2011
Messages
2,445
Re: 1990 Chris Craft 254 Seahawk ( Refurb and upgrades)

As some have probably already noticed in the pic above, I bought a used swim flatform to extend the teak look a little farther and to extend the length of the boat a little farther. Should be nice when it come to hanging out at the party cove. I sanded it down twice and still have a little work to do but it cleaned up really well. I found a really good cheap connection for stainless steel swim brackets, I installed the platform with four of them. I really think this changed the whole look of the boat and just looks awesome. It is solid as a rock being that the brackets were throughbolted through the transom. The boat now measures 28' 3 3/4" total LOA. Teak oil will be the protectant for now.
Before pics
newpics260.jpg


newpics263.jpg


After
025-2.jpg


056-1.jpg


036-1.jpg


046.jpg
 
Last edited:

chriscraft254

Commander
Joined
Jun 4, 2011
Messages
2,445
Re: 1990 Chris Craft 254 Seahawk ( Refurb and upgrades)

Installed some underwater lights that I bought on ebay, got a good price with the auction in the middle of the winter. They are attwood lights and have 9 large led lights in each. They will make good under lighting for when we are using the swim platform. Want to use them to draw in bait as well. Got really lucky here because, when I installed/placed them, the wire drilled through the transom literally came out above both stringers by about a 1/4".They are very bright from what I can tell, still have not been in water since install.

Also installed trim tabs by Nauticus, simply put, the best thing I did to the boat. They made this boat a completely different boat performance wise!

Sanded down the outdrive, primed and painted with original oem color, amazing the difference in the before and after.

049-1.jpg


Hardtoppics067.jpg


067-1.jpg


033-1.jpg


045.jpg


048.jpg
 
Last edited:

chriscraft254

Commander
Joined
Jun 4, 2011
Messages
2,445
Re: 1990 Chris Craft 254 Seahawk ( Refurb and upgrades)

Trim tab pics. These took like 45 minutes to install! Also more pics of outdrive before and after. Got some over spray on the stern when I was trying to beat the rain, but it came off real easy with some hull compound. No problem! As you can see, some of these pics are out of order, the trim tabs were installed before the platform. Somewhere along the way, I also added a new stainless steel prop to replace the dinged up aluminum one.

143.jpg


146.jpg


Outdrive before, still had some to do in the pics where the drive was tilted up.
006-1.jpg


After
008-2.jpg


011-4.jpg


010-5.jpg
 
Last edited:

chriscraft254

Commander
Joined
Jun 4, 2011
Messages
2,445
Re: 1990 Chris Craft 254 Seahawk ( Refurb and upgrades)

When I added the full size swim platform, and the electronics I wanted to get all the wiring for the new transducers below the swim platform so when in the water you wouldn't see the wiring. They ran up really high before,why I don't know, it was just ugly. My brackets/platform sits pretty high on the transom to make it easy to get in the boat with the full height transom.

I drilled and installed a thru hull for the routing of the transducer wires to the helm. Only problem was, the connectors on the Lowrance stuff required a true 1" hole. I had bought an extra thru hull for this but it had what I call ears in the inside of the fitting for tightening I guess. I went to work on removing those from the inside of the thru hull fitting. Could have ordered a larger one, but this was already here and the money had already been spent. I have never seen anyone do this but man I really like the way it turned out. Not only is it below the platform, but it was easy to install and seal up with 5200, so no water intrusion to the transom ever. Once the wires are all ran I will use life seal inside of the thruhull around the wiring so water can not get through it to the engine compartment. Love it when a plan comes together. :)

Nice thing about this install, is the speedo, and both transducer wires come out the same location, so one hole for everything! Really made for a clean install.

Hardtoppics038-1.jpg


Hardtoppics033.jpg


Hardtoppics035.jpg


Hardtoppics165.jpg


045.jpg
 
Last edited:

chriscraft254

Commander
Joined
Jun 4, 2011
Messages
2,445
Re: 1990 Chris Craft 254 Seahawk ( Refurb and upgrades)

Ok, well, the next two things I think are very cool! I had been looking for some led interior lighting for under the new gunnel rod holders and a couple other places. I found what I wanted, they are Rgb lights, they can change 7 differnet colors and you can dim them as much as you want. I love that fact they dim because different conditions can call for different shades of light and brightness. I will be using the red mainly at night while underway. Red doesn't effect your night vision. I will be using the white at night while cleaning the boat, loading fish, or rigging Lines. Will use the other colors just because they are cool looking. lol They come with a remote and can flash, fade, dim, or static on each color. I am very pleased with the product and can't wait to use them on the water. The pics are of the boat sitting in the driveway, My camera does not do real well with the blue and red colors.

Install took time, but they were pretty easy to install. They have a control box that I mounted under the helm. The control box is where all your wiring goes to for the lights. I mounted this control box next to the side scan box for the lowrance. Again, easy access and the power is coming from the new buss teminal which has its own fuses.

You can see the install below, I simply scribed the light profile onto the rod holder, then with a zip router, carefully routed out the profile. Then all I had to do is run the lights all the way through, remove the self stick backing tape and apply. I then ran the wiring to the lights through the gunnels and up to the control box under the helm.

002-3.jpg


003-2.jpg


016-4.jpg


017-3.jpg


023-4.jpg


024-3.jpg
 
Last edited:
Status
Not open for further replies.
Top