Gelcoat delamination...DIY or pro territory?

thunder550

Petty Officer 3rd Class
Joined
Sep 6, 2017
Messages
83
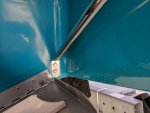
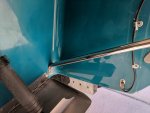
Found an area near the transom on my boat this past weekend where the gelcoat is cracked and starting to delaminate. There doesn't appear to be any damage to the underlying fiberglass, at least from what I can tell by looking at the inside of the hull. Is this DIY-able (never done gelcoat before), or better to seek professional help for something this size? It's probably 4-5 inches long in total.
 

Attachments

  • photo281769.jpg
    photo281769.jpg
    80.8 KB · Views: 0
  • photo281770.jpg
    photo281770.jpg
    131.1 KB · Views: 0

kcon

Petty Officer 1st Class
Joined
Dec 10, 2016
Messages
303
I've not worked with gelcoat much, but I've done so much research so I think I may have a bit of insight into the process and maybe others can chime in or critique what I think I know. I believe you'd have to sand down the bad areas, if necessary due to damage or pitting below grid down a bit and put down some CSM fiberglass with polyester resin, sand it all smooth, fair it a bit with thickened resin with an additive or fairing compound, then try to color match some fresh gelcoat using some dye.

I believe it can be achieved with a few hours of work over a weekend or two (cure time needed between some steps) - so if you have the tools to do so and have any experience in the aforementioned you can certainly accomplish it yourself.
 

alldodge

Moderator
Staff member
Joined
Mar 8, 2009
Messages
40,722
IMO, for something like that to happen the factory messed up big time, or your transom is soft. Coming loose at the edge of where the transom attaches tells me the transom is flexing. Take a small drill bit and drill some core samples closer in toward the drive and see if things are damp/wet
 

Scott Danforth

Grumpy Vintage Moderator still playing with boats
Staff member
Joined
Jul 23, 2011
Messages
47,499
a crack that large means something is rotten underneath. As AD stated, crawl in the bilge and start making test drills down low.

if the shavings are dark, wet and stink of rotten wood, you have a restoration ahead of you

if the shavings are light, dry and smell of fresh cut wood, seal them up with epoxy putty.
 

dingbat

Supreme Mariner
Joined
Nov 20, 2001
Messages
15,484
No need to drill holes. A few raps of a dead blow hammer on the transom will tell the story.

A “solid” area of the transom will resonate when tapped. A wet or rotten area will return a distinct thud.

Start tapping in a known solid area and work your way over to the suspected damaged area. Should be able to locate and narrow the damaged area to within a couple of inches
 

thunder550

Petty Officer 3rd Class
Joined
Sep 6, 2017
Messages
83
I'll check it out with the hammer, thanks for the tip. There's no wood under the actual crack itself, just fiberglass. Pretty sure the actual transom on the adjacent side is wood, from what I understand Cobalt didn't start using composite transoms until 97. I do have fiberglass stringers.

I received this information recently from a Cobalt customer service rep:

I have been here at the factory for over 35 years and spent 15 of it building the boats.
-We actually did not start using fiberglass stringers until the 252 came out in 1994. The composite liner floor came out at that time, but only on the 252.
-Every new model after that had the liner floor and fiberglass stringers with the exception of the 190 that came out in 1996.
-In 1997, we began to install a composite foam transom on our boats, replacing the wood transom.

We have always used marine grade plywood in the construction of our boats. It is supposed to be resistant to water intrusion, but we ignored that and covered it first with resin, and once it was installed in the boat, we covered it with fiberglass.
 
Last edited by a moderator:

JASinIL2006

Vice Admiral
Joined
Feb 10, 2012
Messages
5,541
I don’t put any stock in the hammer test (unless maybe you really know what to listen for). Even then...

Drill some holes. Then you will know for certain.
 

thunder550

Petty Officer 3rd Class
Joined
Sep 6, 2017
Messages
83
I'll give the hammer test a shot, but besides that are there any other good ways besides drilling holes? I'm not really up for drilling through the transom just to see what it's like in there.
 
Last edited:

chevymaher

Commander
Joined
Mar 29, 2017
Messages
2,915
I'll give the hammer test a shot, but besides that are there any other good ways besides drilling holes? I'm not really up for drilling through the transom just to see what it's like in there.

Hammer test is not a good way. I did that to the entire boat when I got mine thought it was fine. I had no clue what I was listening for obviously. It was wasted. I was encouraged to drill after I joined here like you are now. I got peanut butter looking wood coming out on the drill bit.

Other ways of telling are cracks in the gel coat. Dark stains around outdrive bilge plug or anything mounted into the wood. No water in the boat and alot of water drops on the inside of the cover in the morning. That was a real clue for me as it showed everything was soaking wet in the boat.

The signs are there for you to move deeper. Something is wrong with the gel coat. You have trim tabs and I don't see GM 4200 sealant all over them. That is water access into the wood.

Just drill it and set the depth so you don't go through to the outside skin. Instant verification and no confusion on result. If it is dry bondo fiberglass sold at any auto parts place. It is waxed resin and seal it back up. No harm no foul.

It is all part of the extended Egyptian vacation package that comes with boats. The trip down Denial. Just cancel your reservations. Not properly checking will not make it go away if it is there.
 

dingbat

Supreme Mariner
Joined
Nov 20, 2001
Messages
15,484
I'll give the hammer test a shot, but besides that are there any other good ways besides drilling holes? I'm not really up for drilling through the transom just to see what it's like in there.
a moisture meter willl work but as with the hammer method, you need to take “readings” at known dry spots to get a normal reference.

I would pull a screw or two from the trim tab hinge closest to the problem area to see what that turns up.

In reality, wet or not, you need to remove the damaged gel coat to make the repair. Once your down to the fiberglass, it will be pretty obvious what needs done
 

thunder550

Petty Officer 3rd Class
Joined
Sep 6, 2017
Messages
83
Decided to take it in for an estimate this morning, shop told me it's an air void, easy fix. Went ahead and left it for them to repair.
 

thunder550

Petty Officer 3rd Class
Joined
Sep 6, 2017
Messages
83
No Title

Got her back today :)
 

Attachments

  • photo282246.jpg
    photo282246.jpg
    141 KB · Views: 0
  • photo282247.jpg
    photo282247.jpg
    169.2 KB · Views: 0
Top