Does epoxy have any shrinkage as it cures? Or just due to it soaking into the wood?
Nice, I love working with marine ply, it even sounds different when the saw blade hits it. Looks like you two had fun in the process.
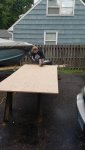
Great pics!!!!! Good to see all that glue ooze out. You know you have put enough on when that happens.
Some but it will be minimal. West System says it wont shrink once it cures. It will soak some into the wood, especially the end grain. End grain will absorb the most. Most people go back over the end grain a couple extra times because it keeps soaking it up (Which is a good thing)
On a side note, don't forget to make small batches of epoxy and don't make it all at once. Make sure you accurately measure out each cup per directions by West System as you do it and mix thoroughly. If you can get Admiral's help definitely a plus. This is one area you don't want to be rushed in. If you want to extend the working time slightly, you can put your little cup into ice. That way you can work it in and it wont kick so quickly. Also, don't forget to have plenty of extra gloves and chip brushes on hand. That way if they start to get gummy, you can switch them out for a fresh set.
Gluing transoms in your work clothes I see LOL
 Yeah, I never changed out of them, and she commented on that, too. I only got two drops of glue on me, though, one on each shoe and wiped it off easily. Other than that, nothing. I'm the annoying guy who can paint an entire room and not get a drop on me other than my hands. I may be fat, but I'm nimble and aware of where my large butt is at all times. ^_^ That skill helped when I was still driving a semi-truck.
. We need to pick up the foam rollers. I think I will go with the shorter rollers to reduce waste....
The Admiral will be helping me for sure. We'll be buying a couple of boxes of gloves to make sure we have enough. Last night was fun peeling the glue off my fingers. She's tired of doing that as she's dealt with it too much, but I still have fun like a little kid thinking, "I'm molting!"
Yeah that fir marine ply is nice but spendy as heck around here, you sure don't want to make a mistake cutting it. We have Roseburg ACX fir plywood here locally that is really nice stuff, just a few more voids than marine but half the price so I started using it. I had to pop on a plywood saw blade and for every cut I could make with it I used my table saw, it's fun free handing a 70+ Lb 4x8 sheet of 3/4 with a table saw!
So I see how you cut your ply without the 'wings' on the outside edges. I'm sure you know this already but as a reminder because of all the sealing talk, it will need formed then the 'wings' attached and with 15 degree bevels cut on the top edge of the wings before you seal it with the resin. I would also drill all the holes through first before sealing so the sealer gets in there too.
Harbor Freight. Best place to get one time tools. I get all of my gloves from there and always have a couple boxes of the 5 and 7 mm on hand for everything I do now. IMHO Suggest you look at chip brushes for the edges as it would be easier for the small vertical surface. Your flat surface you can easily pour and spread with your plastic straight edge.
If you really want to feel like your molting stick your hand in expanding foam.....:doh: I did that once and have always owned latex gloves ever since.... I couldn't scrub or peel that stuff off. I had to wait for my skin to shed it....:facepalm:
Just a little surface prep. We aren't doing that for the epoxy, though. Between coats to ensure a good bond, yes, but not before hand. Just sweeping it off to make sure it's clean enough.
Have you looked at doing the layers closer together so you don't have to sand? See below quote from another site
"[FONT="]If you're able to sand the epoxy, you're past the point of a chemical bond. If the epoxy has "set" so that it isn't runny, but still a little bit tacky when you press a fingernail or something into it, then you can put another coat of epoxy over it without sanding. That's the easiest and quickest method since you can avoid all that extra sanding. If you were using a blushing epoxy, recoating before the epoxy cures will save you from scrubbing with soap and water between coats, which agains saves you a lot of time."
I am sure if you look at other posts you will find similar comments[/FONT]
Okay, transom is almost finished. We were under a time crunch so I haven't been able to post updates, but I've been taking plenty of pictures to document the process. I'll try to get them uploaded tonight. Went to upload everything Sunday night, but the server went down when I hit post.