1974 Sea Ray SRV 240 Weekender - complete rebuild, refit, and who knows what else...

CrazyFinn

Petty Officer 1st Class
Joined
Dec 12, 2016
Messages
357
It was a productive day yesterday.

On Saturday, built most of the components to set up a gantry.
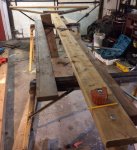
side-supports.JPG


Yesterday morning, removed the canvas from the boat, rolled it into position (my dad's old Jeep with a hitch on the front is great for moving it around). jeep.JPG


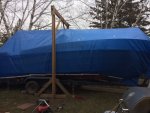
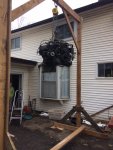
Set up the Gantry over the boat, unbolted and disconnected the engine... gantry-boat.JPG
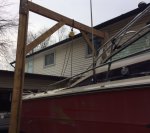
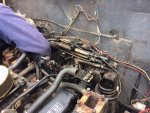
unbolting.JPG


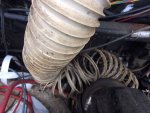
I think the vent hoses are done... they turned into slinky toys when I pulled on them. hose-slinky.JPG


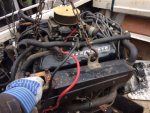
Engine on it's way out of the boat: engine.JPG


Once we got it clear, rolled the boat out from under it: gantry-engine.JPG


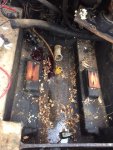
And this is the mess in the bilge once it we got the engine clear: bilge.JPG

Feels like the fun is beginning - although I won't be doing much to the boat itself until spring. I pushed it around the house to the back yard, where I will be doing most of the work once the weather warms up in a few months.
 
Last edited:

CrazyFinn

Petty Officer 1st Class
Joined
Dec 12, 2016
Messages
357
Day started out fairly nice - fairly warm for this time of the year. I was planning to get the tarp on the boat, decided to take a closer look at the gas tank while I was in there (and trying to get water to drain from the forward bilge).

Quickly became apparent that the gas tank has been replaced at some point with a custom aluminum version. I obtained an old survey of the boat from about 15 years ago, and the survey said it had a steel fuel tank at the time. The plywood over the tank was actually pretty easy to peel up.

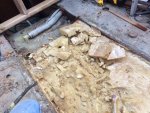
After that, this is what I was dealing with:
tank-foam.JPG

Connected a length of hose to the fuel line, ran that out through the transom hole, and drained at least 35 gallons of gas out of the tank. The gas is of unknown vintage, so not sure what to do with it now!

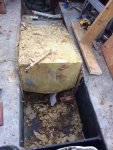
Slid an old hand saw down between the side of the tank and the stringers to release it from the foam. Cut the rotted bulkheads out, and a bit of prying and lifting, and it moved!

tank-loose.JPG

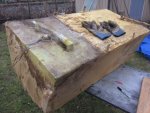
A bit more lifting, it was out! Looks good under the foam. I was concerned that I would need to get a new tank, but it looks like it will be fine.

tank-out.JPG

By the end of the day, got the boat covered up.

boat-tarp.JPG
 

oldrem

Commander
Joined
Nov 7, 2013
Messages
2,002
Old gas makes a great fire starter for burning piles of wet leaves - went through a lot of it this year.
 

jeredst1

Seaman Apprentice
Joined
Aug 25, 2013
Messages
46
Looks like a great project with the potential for an awesome cruiser. I like you engine pulling rig. I need to build one for mine. Her power plant is dead and the wrong one for the boat.
 

CrazyFinn

Petty Officer 1st Class
Joined
Dec 12, 2016
Messages
357
Looks like a great project with the potential for an awesome cruiser. I like you engine pulling rig. I need to build one for mine. Her power plant is dead and the wrong one for the boat.

I was originally going to rent a gantry set-up from the local rental place, but wasn't sure if it was quite tall enough. Then I did the math, and the lumber, as well as the chain hoist, cost me less to buy than it would have cost me for two rentals. It worked great!

And now my kids want me to set the thing up as a gallows with a mannequin hanging from it in the driveway for next Halloween...
 

jeredst1

Seaman Apprentice
Joined
Aug 25, 2013
Messages
46
How tall above the rails did you build the gantry, I have a some 6x6s that I can use. Interesting idea from the kids for for future use.
 

CrazyFinn

Petty Officer 1st Class
Joined
Dec 12, 2016
Messages
357
How tall above the rails did you build the gantry, I have a some 6x6s that I can use. Interesting idea from the kids for for future use.

The vertical posts are 12' tall. I used two 2x6's for each, bolted together with lag bolts in a "T" shape. Back rail of the boat is roughly 6' from the ground. Top beam is two 10' 2x6, laminated together with carriage bolts/washers/nuts. Scraps of 3/4" plywood used to create a "fork" to hold the top beam (and then bolted in place).
 

hvymtl939

Chief Petty Officer
Joined
Feb 6, 2017
Messages
495
So excited to see progress on this one again. For our next boat, I want a go fast, and the admiral wants a cabin cruiser, which means we'll be getting cabin cruiser. I love the lines on the older ones. Great to see this one getting new life.
 

jeredst1

Seaman Apprentice
Joined
Aug 25, 2013
Messages
46
The vertical posts are 12' tall. I used two 2x6's for each, bolted together with lag bolts in a "T" shape. Back rail of the boat is roughly 6' from the ground. Top beam is two 10' 2x6, laminated together with carriage bolts/washers/nuts. Scraps of 3/4" plywood used to create a "fork" to hold the top beam (and then bolted in place).

Thanks, that's about what I was thinking for a hieght, once I get it built I'll post some pic on my build page.
 

CrazyFinn

Petty Officer 1st Class
Joined
Dec 12, 2016
Messages
357
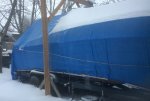
I have managed to accomplish virtually nothing on my boat this winter. The boat itself is in the back yard all covered up waiting for warmer weather, and the engine, transmission, and drive are all in the garage waiting to be looked at.

boat_snow.JPG

Problem is, I've been too busy working on other side projects to get some extra cash to pay for the boat rebuilds, visiting my cousin in the hospital (he's going through some serious health issues), and taking my dad out ice fishing for the first time in many years.

Still, despite that, I've managed to do some "boat related" tinkering. Went to the boat show in January, and started thinking I could save some serious dash space if I replaced the plethora of analog gauges with a multifunction screen (I also want to add some monitors that aren't already on the boat - such as transmission temp, fuel flow, etc.). I'm also planning to put a used radar unit in, so I need some dash space for that.

Buying an "off the shelf" system seems ridiculously expensive to me, and I'm one of those diehard do-it-yourself types... I started doing some online research, made a few purchases, and now have a prototype display (currently only on a 2.5" screen just for "proof of concept"). Built this using an Arduino, a small touch screen (will use a larger one when I install it in the boat), and various sensors and potentiometers to test if it will work. So far, I'm happy with the results, and the total cost will be less than a set of good analog gauges.

screen_prototype.JPG
 

mickyryan

Rear Admiral
Joined
Apr 18, 2016
Messages
4,210
looking forward to this rebuild i gotta make a Meme out of that mushroom pic:)
 

CrazyFinn

Petty Officer 1st Class
Joined
Dec 12, 2016
Messages
357
looking forward to this rebuild i gotta make a Meme out of that mushroom pic:)

I'm thinking of naming the boat after that mushroom... It is the previous occupant after all. Maybe use the latin name for those mushrooms or something fancy like that.
 

CrazyFinn

Petty Officer 1st Class
Joined
Dec 12, 2016
Messages
357

Love it. Funny thing is that the guy I got it from tried to tell me it was solid, "ready to go fishing". Meanwhile, I was worried the swim platform was going to fall off, the transom was flexing so much. And I got it anyway.

The panel holding the pump for the trim tabs fell off the transom - inside the boat - on the way home. The screws just wouldn't hold in the mush that used to be the transom. I have a sponge on my kitchen counter that has more structural integrity...

Looking forward to seeing how easy it is to vacuum out that "wood".
 

mickyryan

Rear Admiral
Joined
Apr 18, 2016
Messages
4,210
they are always ready to go fishing! but then again you have to wonder how many right at this very moment are out fishing on a waterlogged boat...
 

mickyryan

Rear Admiral
Joined
Apr 18, 2016
Messages
4,210
Finn in the end it dont matter how ya brought it home its how ya improved it... "that quote was taken from a women referring to husbands".. i figured it applied to boats too :)
 

CrazyFinn

Petty Officer 1st Class
Joined
Dec 12, 2016
Messages
357
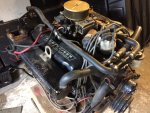
Finally managed to find some time yesterday afternoon to start pulling apart the engine. Wanted to make sure there is no water/moisture in there doing damage while it sits in storage. At the same time, I was curious to see what kind of shape it was really in!

IMG_4551.JPG

So... I started unbolting things. No broken bolts, everything came off as it should!

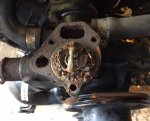
The thermostat would have been an issue if I didn't take it apart though...

IMG_4571.JPG

Six of the cylinders look perfect. One of the rear cylinders has a slight amount of pitting near the top - as if at some point it had some water sitting in it that caused some corrosion, with the piston near the top of the cylinder. One of the middle cylinders on the opposite side has some slight scoring. I'm thinking it will clean up pretty well with a hone. Seems like new rings/bearings/seals are going to be needed (although it looks like it would run fine as-is). And the thermostat should probably be replaced too...
 

Attachments

  • IMG_4562.JPG
    IMG_4562.JPG
    136.3 KB · Views: 0

CrazyFinn

Petty Officer 1st Class
Joined
Dec 12, 2016
Messages
357
Ok... this is ridiculous. It’s the end of April. Fresh snow on my boat this morning, still covered with a tarp. I have buckets of fresh polyester resin ready to go, about 35 yards of glass in the shed, and it’s still too cold to start working on it.

I have the engine disassembled in the garage, new rings, seals, etc sitting on the bench ready to go in and I can’t work on that either as my basement now has water coming in. First time in 8 years of living here...

So instead of working on important stuff like my old rotten boat, I have to waste my time cutting through the basement floor and installing sump pumps so my house will stop flooding. Priorities...
 

mickyryan

Rear Admiral
Joined
Apr 18, 2016
Messages
4,210
ugh man sounds like you need to move to florida:) hope nature starts working in your favor soon.
 
Top