2016 Weldbilt 2070 upgrade

blackd

Petty Officer 2nd Class
Joined
Sep 27, 2013
Messages
152
I had a 1979 Wellcraft Fisherman180 which I let get just too bad to make it worthwhile to rebuild. My fault, I know, but it happens. Just look at all the stories here. ;-)
My previous thread agonizing over the original decision: http://forums.iboats.com/forum/boat...-building-and-hull-repair/10219478-my-dilemma
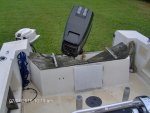
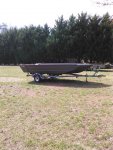
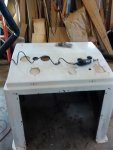
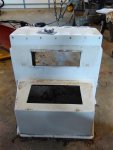
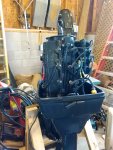
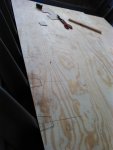
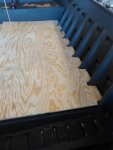
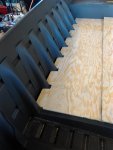
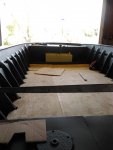
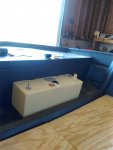
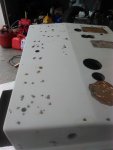
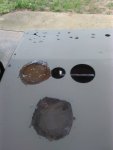
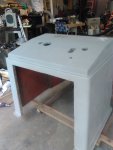
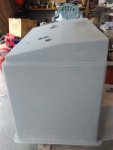
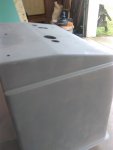
Included are some pics of the old Wellcraft, the new hull, and some of the pieces I wish to reuse.
 

Attachments

  • photo260303.jpg
    photo260303.jpg
    69.6 KB · Views: 1
  • photo260304.jpg
    photo260304.jpg
    74.3 KB · Views: 1
  • photo260306.jpg
    photo260306.jpg
    906 bytes · Views: 1

blackd

Petty Officer 2nd Class
Joined
Sep 27, 2013
Messages
152
I think I'll let the old thread lie idle/closed. Somewhat related to this one, it doesn't add much value.
 

jbcurt00

Moderator
Staff member
Joined
Oct 25, 2011
Messages
24,863
New topic about the Weldbilt and all the pix are of the old boat?

Wheres the Weldbilt pix?
 

blackd

Petty Officer 2nd Class
Joined
Sep 27, 2013
Messages
152
No Title

Let's try some pics again. As you can see much of the work will be to refurbish the center console. With the weather as cold as it has been it will take some time to finish that. In the interim getting the boat wired and cables run will fill the time. Still under consideration is where to put a fuel tank and the type of floor, ply or plank. Both have their advantages for me.
 

Attachments

  • photo260402.jpg
    photo260402.jpg
    164 KB · Views: 0
  • photo260403.jpg
    photo260403.jpg
    240.9 KB · Views: 0
  • photo260404.jpg
    photo260404.jpg
    209.6 KB · Views: 0
  • photo260405.jpg
    photo260405.jpg
    222.4 KB · Views: 0
  • photo260406.jpg
    photo260406.jpg
    267 KB · Views: 0
  • photo260407.jpg
    photo260407.jpg
    371.2 KB · Views: 0
Last edited:

strokendiesel002

Petty Officer 1st Class
Joined
May 15, 2012
Messages
283
What about an aluminum deck? I'm in the process of replacing a rotted wood deck with aluminum (albeit on hold until the weather breaks) on my in-laws boat. It doesn't look like any of those ribs are much further than a foot apart. 1/8" should be plenty thick. Final cost isn't much cheaper different than marine/exterior ply when you include the epoxy, not to mention the time saved! Anywho, just a thought. Awesome project btw!
 

blackd

Petty Officer 2nd Class
Joined
Sep 27, 2013
Messages
152
Strokendiesel002, hadn't considered Al. for floor as I have wood working tools and experience and none with Al. You are correct the ribs are ~12" CoC.
BTW, if I go with wood I will use WOG's sealer formula.

I noticed your comment re: the long term flu/infection. Wife has had it for ~10 days, and I had it twice in Jan. nasty bug.
 
Last edited by a moderator:

strokendiesel002

Petty Officer 1st Class
Joined
May 15, 2012
Messages
283
I am a very big fan of the advice and processes that WOG shares also! I must admit that I would not have been nearly as confident in the projects I have taken on this far had it not been for the wealth of knowledge shared on this forum!

Mind if I follow along? I'm curious to see how you integrate the center console!
 

blackd

Petty Officer 2nd Class
Joined
Sep 27, 2013
Messages
152
Made the decision on the flooring. It will be 1/2" plywood. I bought 4 sheets today, and it appears 3 would have been enough. I'm sure there will be plenty of opportunities to use that 4th. I also bought a 13 gallon fuel tank that I plan on mounting in the front of the boat. The weightiest decision still to be made is how to run/mount the cables back to the engine. I am considering running them in plastic pipe or build a wooden run for them. The 4th sheet of ply beckons, don'cha know. ;-)

Otherwise, with the cold weather I haven't done much except to move that hull into the garage/shop, and build a light weight dolly for moving the center console. The boat just barely fits with all my junk in there.
 
Last edited:

ezmobee

Supreme Mariner
Joined
Mar 26, 2007
Messages
23,767
I normally prefer 3/4" ply but that boat has TONS of structure so I'm sure it'll be pretty solid. I'd vote for the pipe idea for a wire run.
 

blackd

Petty Officer 2nd Class
Joined
Sep 27, 2013
Messages
152
Thanks ezmobee. Pipe will certainly be the quicker and cheaper solution. If I use pipe 1 medium or 2 smaller? How high up the side or through the ribs? Attached with small nut/bolts and epoxy???? Through the ribs (drilling) was suggested by the marine shop from which I bought it. They clearly had experience rigging CC boats. Decisions, decisions. At least these can wait a few days/weeks.

1st I need to make a template for notching around the side ribs.
 

ezmobee

Supreme Mariner
Joined
Mar 26, 2007
Messages
23,767
Looking closer at the pics they sure didn't make it easy to run controls and wiring in this boat did they? I don't think drilling out all those ribs is a possibility. Maybe run it under the console between some ribs and up to just along floor (like a baseboard) level and back so you aren't tripping on it. No gunnel up higher on this boat to run it under.
 

blackd

Petty Officer 2nd Class
Joined
Sep 27, 2013
Messages
152
No Title

Progress little by little. Two sheets are down and notched, but I still need to cut their width. At this point I am leaning to just cutting 1 piece as the scrap piece will fit nicely to close in the front up to the last rib where I intend to install a fuel tank and small anchor locker anyway.
 

Attachments

  • photo261139.jpg
    photo261139.jpg
    187.2 KB · Views: 0
  • photo261140.jpg
    photo261140.jpg
    204.6 KB · Views: 0
  • photo261142.jpg
    photo261142.jpg
    225.1 KB · Views: 0

blackd

Petty Officer 2nd Class
Joined
Sep 27, 2013
Messages
152
No Title

Some minor progress - fitting two of the sheets with notches. They still need to be trimmed to fit together. I am considering just cutting just one and having a bigger piece of scrap for installing in the front. That would mean using just 2 pieces for the floor. That would leave the area just aft of the front deck where I intend to install a fuel tank and a small anchor locker anyway.
 

Attachments

  • photo261139.jpg
    photo261139.jpg
    187.2 KB · Views: 0
  • photo261140.jpg
    photo261140.jpg
    204.6 KB · Views: 0
  • photo261142.jpg
    photo261142.jpg
    225.1 KB · Views: 0

blackd

Petty Officer 2nd Class
Joined
Sep 27, 2013
Messages
152
No Title

Update on progress - but 1st let me apologize for that double post. This week I laid out the floor and checked the fuel tank for location. today I got materials for the WoG sealer formula. Then sealed with 2 coats. Kept putting it on until it pooled, but didn't wipe it as it seemed to still absorb. My 1st batch/coat was light on linseed oil and that may be the cause for the need for 2 coats and continued absorption.

I need to let this dry for 72 hours, and then will test position the center console. I need to do this to determine which of the tabs between notches on the right side of the floor will be removed for the cables. I will then cut and seal the edges of the tab and access hole under the center console to run the cables.
 

Attachments

  • photo261395.jpg
    photo261395.jpg
    192.4 KB · Views: 0
  • photo261396.jpg
    photo261396.jpg
    171.1 KB · Views: 0
  • photo261397.jpg
    photo261397.jpg
    383.2 KB · Views: 0
  • photo261398.jpg
    photo261398.jpg
    387.2 KB · Views: 0

blackd

Petty Officer 2nd Class
Joined
Sep 27, 2013
Messages
152
No Title

Sorry for not updating sooner, but this is my super busy time of the year with equipment maintenance, starting the garden and getting started on the lawn. Anyway, some work has been done mostly on the center console, and some mistakes made. Mistake one has been with deciding which epoxy to buy? At this point I have 3 different kinds. Two of which have been used. The 2nd mistake was to wrongly mix the 2nd epoxy. It was supposed to be 5:1 not 5:4. 5:4 epoxy just won't cure..... So a lot of watching epoxy cure, which feels similar to watching paint dry. This was also true with the early glassing efforts since the weather turned cool, and it also took a long time to cure enough to sand.

Today I and the grandson painted the floor panels. Here are the latest pics.
 

Attachments

  • photo263209.jpg
    photo263209.jpg
    251.2 KB · Views: 0
  • photo263210.jpg
    photo263210.jpg
    260.3 KB · Views: 0
  • photo263211.jpg
    photo263211.jpg
    238.2 KB · Views: 0
  • photo263212.jpg
    photo263212.jpg
    295.7 KB · Views: 0
  • photo263216.jpg
    photo263216.jpg
    229.5 KB · Views: 0

strokendiesel002

Petty Officer 1st Class
Joined
May 15, 2012
Messages
283
That's a happy looking grandson! Great progress and thank you for sharing, hopefully the garden will be flush and the grass green!
 

blackd

Petty Officer 2nd Class
Joined
Sep 27, 2013
Messages
152
No Title

Some more S_L_O_W progress. I am nearly satisfied with the center console. I have filled ~75 holes and have it primed to see the imperfections. Imperfections in some of the holes filled don't matter, since the reason for filling was to improve/reinforce the backstop when I install the instruments. This has been my 1st time at using fiberglass, and a steep learning curve.Lots of do overs.
 

Attachments

  • photo264307.jpg
    photo264307.jpg
    203.8 KB · Views: 0
  • photo264308.jpg
    photo264308.jpg
    176.2 KB · Views: 0
  • photo264309.jpg
    photo264309.jpg
    169.7 KB · Views: 0
  • photo264310.jpg
    photo264310.jpg
    168.4 KB · Views: 0
Top