1965 Starcraft Jupiter Restore/Repurpose

Dabbler_E

Petty Officer 1st Class
Joined
Apr 20, 2009
Messages
338
Scratched my head trying to decide what to do with these holes, originally for the Starcraft name badge.


Decided to cover them up with white LED strips, which will be wired with front light bars.


Dabbler_E

Petty Officer 1st Class
Joined
Apr 20, 2009
Messages
338
Console progress!


For the dashboards, I'm making panels by pairing up the oak boards that used to support the "hood" over the bow.


Consoles are currently being glued together and then will get edges routered and then sealed. Haven't decided whether to paint or cover in carpet.
 

skyfisher

Seaman Apprentice
Joined
Feb 13, 2013
Messages
45
Dabler see your moving along. The rivet holes I had from the emblem I just mtek them tonight, getting new aluminum starcraft emblem made but holes were not going to match and not sure on delivery of the new emblem so sealing them before paint. My vote would be to paint then spar varnish the dash it will be very durable smooth and clean. Carpet on a dash just feels so 70ish not to mention another place to hold moisture. Have you thought about vinyl for the dash, you have a nice tight fit it would look good.
 

Dabbler_E

Petty Officer 1st Class
Joined
Apr 20, 2009
Messages
338
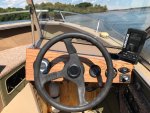
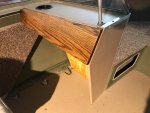
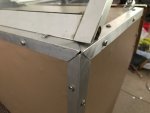
OK, y'all, I've seen the light and went with marine vinyl from Joann's for the consoles. It won't be a professional look, but I agree that it will be better than carpet. Sealed it with WOG's old timer mix (2 coats all over), let sit 3 days, then 3 coats spar varnish outside. No spar on the inside except along the bottom edge, so the wood can breathe. Going to protect the corners w/ AL angle.


Dash pieces pre-drilled, stained, & sealed w/ 3 coats spar


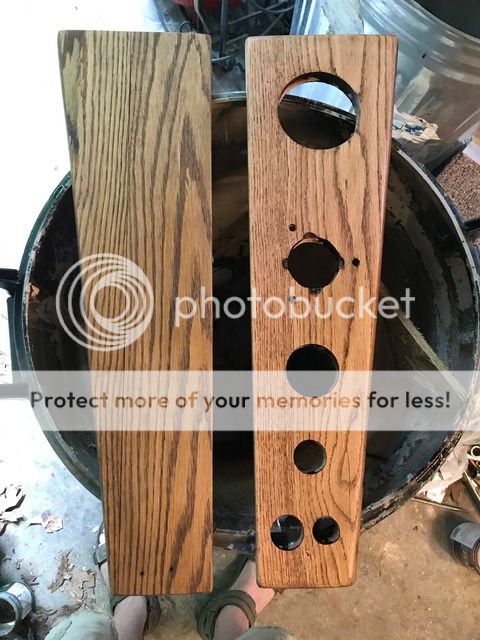
More major boxes ticked off:
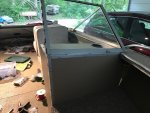
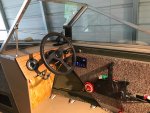
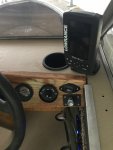
Side panels installed w/ controls & cutout for switch panel


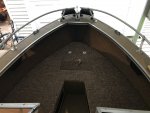
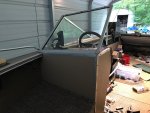
Splashwell is in! Threw out the 11,000 slotted screws that were securing the bottom lip and replaced them with self-drilling hex heads (left over from my carport) gooped w/ 5200


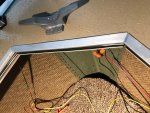
Rails cannibalized from the old Mark Twain plus some extra illumination


Currently working on wiring, inner rub rails, and prepping the motor for transfer. Progress is fun!
 

Watermann

Starmada Splash of the Year 2014
Joined
Jan 12, 2013
Messages
13,753
It's even fun to watch progress! and cheaper :heh:

Lookin' good, keep on keepin' on :thumb:
 

Dabbler_E

Petty Officer 1st Class
Joined
Apr 20, 2009
Messages
338
It's even fun to watch progress! and cheaper :heh:

Hah! I'm at the point now where I get to thinking that I've purchased everything I need to complete the resto, and then "whoops, nope."
OK, now I've REALLY purchased everything I need.......nope.
OK, now I've...nope.
OKnope
Nope.
 

skyfisher

Seaman Apprentice
Joined
Feb 13, 2013
Messages
45
That vinyl is going to be a good,choice will be nice and clean looking. Yeah seems like there is always something else that you need.
 

bwingler57

Petty Officer 3rd Class
Joined
Jun 24, 2017
Messages
79
Your boat look's awesome, hopefully one day i will get something that nice :)
 

Dabbler_E

Petty Officer 1st Class
Joined
Apr 20, 2009
Messages
338
Welcome aboard Bwingler57! Thanks for your kind words. It's coming along....would never have even considered a project like this without all the expertise & examples here on the forums.
 

skyfisher

Seaman Apprentice
Joined
Feb 13, 2013
Messages
45
Dabbler I like the rub rail lights did you embed them in the rub rail or is it something you bought. I think it was Waterman that mounted them below the rubrail. Wondering which way is more durable does it stick out past the rub rail. Either way like the look of yours.
 

Dabbler_E

Petty Officer 1st Class
Joined
Apr 20, 2009
Messages
338
No Title

Splash!!!!!!
 

Attachments

  • photo270076.JPG
    photo270076.JPG
    173.7 KB · Views: 2
  • photo270077.JPG
    photo270077.JPG
    114.7 KB · Views: 2
  • photo270078.JPG
    photo270078.JPG
    76.3 KB · Views: 2
  • photo270079.JPG
    photo270079.JPG
    86.8 KB · Views: 2
  • photo270080.JPG
    photo270080.JPG
    127.1 KB · Views: 2

Dabbler_E

Petty Officer 1st Class
Joined
Apr 20, 2009
Messages
338
There's definitely an issue with fuel delivery, probably getting air in the line. It jumped on plane enthusiastically even with a 19p prop, but could only go to about 3/4 throttle before it started surging badly. Still, it briefly sustained 35 mph on the gps and cruised very happily at 32 mph 5100 rpm. Very stable, handled wakes easily, carved a nice turn. Felt great to be on the water!
 

Dabbler_E

Petty Officer 1st Class
Joined
Apr 20, 2009
Messages
338
No Title

Catching up on work done to get it water-ready.
 

Attachments

  • photo270082.JPG
    photo270082.JPG
    113.8 KB · Views: 1
  • photo270083.JPG
    photo270083.JPG
    205.3 KB · Views: 1
  • photo270084.JPG
    photo270084.JPG
    279.8 KB · Views: 1

Dabbler_E

Petty Officer 1st Class
Joined
Apr 20, 2009
Messages
338
No Title

Here are the consoles in place:
 

Attachments

  • photo270085.JPG
    photo270085.JPG
    204.5 KB · Views: 2
  • photo270086.JPG
    photo270086.JPG
    215.3 KB · Views: 2
  • photo270087.JPG
    photo270087.JPG
    230.7 KB · Views: 2
  • photo270088.JPG
    photo270088.JPG
    186.7 KB · Views: 2
  • photo270089.JPG
    photo270089.JPG
    100.9 KB · Views: 2
  • photo270090.JPG
    photo270090.JPG
    156.6 KB · Views: 2
  • photo270091.JPG
    photo270091.JPG
    261.3 KB · Views: 2
Top