'76 Holiday i/o 18' Fishing Rebuild (pic heavy!)

ezmobee

Supreme Mariner
Joined
Mar 26, 2007
Messages
23,767
Your plan for the crack sounds good but I would drill the ends out with a small bit to keep it from spreading.
 

Watermann

Starmada Splash of the Year 2014
Joined
Jan 12, 2013
Messages
13,753
That's one of the know issues with these old boats when used with rot compromised decking, side panels and transom I always preach about that this damage needs to be inspected for. The other are rib end cracks which are way more common.

You can't just use goop to repair that all on it's own as that crack will not be stopped without some further work. My Chief is an IO and they are very susceptible to this sort of damage due to the weight of the motor and driveline. Starcraft came up with the solution but it was too late for the scores of older SC's out there. We call these braces by a couple different names, hull stiffeners that isolate that sprayrail chine where your crack developed and rib end braces that keep the cracks from forming at the ends of the ribs. I added them in between the ribs on my Chief so I would not have to worry about the side splitting out at that sprayrail and even though they aren't under the ribs like where the factory put them they will stiffen the bottom and sides considerably.

I've heard stories of guys going along in rough water and being able to see out through the side of their boat and when they came to shore the boat started taking on water and sunk in the shallows. This can happen, the boat can split down the side if not repaired correctly once it begins especially.

Here is my 70 Chief with them added to the hull, these 2 boats have basically the exact same hull. You can see how these braces isolate the rail and eliminate the flexing that causes the cracks to form. So where exactly is this crack at? Most of them are mid-ship that I've seen but I can't tell from your pic.

You'll need to stop drill the crack with a small bit, create a overlapping AL patch that is bent the same, fill the holes with Marine Tex, back butter the patch with 5200 and rivet it over the crack. That's the best way to repair your Holly so that so you shouldn't ever have to worry about it happening again.

IMAG1238.jpg
 

italianstal27

Chief Petty Officer
Joined
Feb 18, 2017
Messages
403
Do we need to apply the patches on all ribs, or just on the ones which are cracking? We're using 3/4" ply for deck and sidewalls. If we patch the hole with the aluminum sheet, are we low risk? Or would you say this is a high risk item now that we have a crack already
 

italianstal27

Chief Petty Officer
Joined
Feb 18, 2017
Messages
403
Did some work tonight!
IMG_20170323_211501.jpg
Got the third board epoxied! Only thing left to do is the top (deck) side twice, apply hardener epoxy on the edges (the stuff that comes in a tube), and we'll be ready to test fit the 3 pieces before we cut the fourth. (To ensure that they fit).

To you in the future reading this... start epoxying stuff right meow! It takes time for it to harden / cure!

IMG_20170323_192835.jpg
contemplating whether we can start sanding and pulling the vinyl off the interior now that we have a fully epoxied piece of decking! look at that new transom baby!

IMG_20170323_200937.jpg
Test patch with the orbital sander 5" (Harbor Freight!) with 220 grit sand paper. Seems to take the glue / epoxy off ok. It makes an enormous amount of noise so we can only do this during the day. I can see why everyone used multiple pieces of sand paper. It's going to take a while.

Has anyone else done this? Did you take it down to bare metal? Will primer go over the glue ok?

IMG_20170323_200947.jpg
Layed a tarp over the deck while attempting to sand so we don't get bits of epoxy/glue and aluminum grinding into the deck.

Big things happening this weekend including sanding down the hull!
-John
 

Watermann

Starmada Splash of the Year 2014
Joined
Jan 12, 2013
Messages
13,753
Do we need to apply the patches on all ribs, or just on the ones which are cracking? We're using 3/4" ply for deck and sidewalls. If we patch the hole with the aluminum sheet, are we low risk? Or would you say this is a high risk item now that we have a crack already

No you just need to patch what's cracked, the braces are up to you. The point of the rail > flexing over time is what caused the crack. I put the braces in because I didn't want to have any issues. Most guys don't do it but the factory saw it as a potential failure point.
 

italianstal27

Chief Petty Officer
Joined
Feb 18, 2017
Messages
403
Started sanding the hull now that we have some rigidity on the transom:
IMG_20170324_082548.jpg
You can see the color difference on the right side vs the left side.

Question for you experienced painters out there: how far down do you sand with 220 grit paper?

-Galati
 

italianstal27

Chief Petty Officer
Joined
Feb 18, 2017
Messages
403
Sanding Saturday. That's what we're calling today. Our buddy Will came over to help.

IMG_20170325_132211.jpg
Will went to pound town on cleaning the sidewells. Getting power tools in there is incredibly hard, so hand sanding was the name of the game. We also dropped the new deck in, with the waxy side still in tact. Thanks for the idea watermann.

IMG_20170325_134546.jpg
Look how clean that's getting though!

We're using the gunnels as a "test" for how we want to apply the paint on the hull a couple years from now.

IMG_20170325_134552.jpg
We pulled all the snaps off the gunnel by drilling out the rivets. We're going to patch all the holes with JB weld, post etching the surface with vinegar and acetone to get good adhesion. Some of the JB weld spots from the previous owner held up well! others came right off with the pressure washer.

IMG_20170325_141039.jpg
Hard to reach spots we used a drill with a 60 grit nylon brush attachment. It did ok for removing the sketchy paint...

IMG_20170325_143228.jpg
Used 120 grit on the palm sander, and 220 grit on the orbital sander to get stuff knocked off & cleaned up.

IMG_20170325_161617.jpg
End of the day having 3 guys going to town on the sanding. You can see we made decent progress getting that glue off! It's not easy work. Also, highly recommend getting new sand paper when you feel it's not sanding well. It'll save you time in the long run.

Our plan is to paint the exposed metal in the sidewell, not vinyl. We're also going to paint the old green arm rest some other color. Word on the street is that piece is structural, so we can't get rid of it.
 

italianstal27

Chief Petty Officer
Joined
Feb 18, 2017
Messages
403
Way more pics to come tomorrow. But sanding takes forever people. Believe me. We're hoping to have the entire interior + transom stripped of paint by tomorrow so we can start prepping the aluminum for painting by this weekend.
 

jbcurt00

Moderator
Staff member
Joined
Oct 25, 2011
Messages
24,863
You dont need to use vinyl on the side panels, but reconsider not putting the side panels back in. The side panels arent merely decorative.

They and the army green panel you mentioned tie the gunwales to the deck and help minimize hull flex at the chine rail.

Cracked chine (some call them spray rails) do happen and on a freshly rehab'd boat that would be depressing, and dangerous if they go un-noticed........

I dont recall, did you install rib end plates?
 

italianstal27

Chief Petty Officer
Joined
Feb 18, 2017
Messages
403
Rib end plates are coming for the bow this week. Need to get some flat stock at home Depot and rivet that in.

The side walls are 100% going back in.
 

sprintst

Commander
Joined
Apr 18, 2009
Messages
2,066
Not sure how much contact cement you have left. My came off with great effort. MEK Methyl Ethyl Ketone is supposed to eat it like candy. You could try a small tin of it. My bow needs to be done and I probably will give it a try. Wear a mask as the stuff has every skull and crossbones symbol on the can.

https://www.youtube.com/watch?v=dcglQVTCyHc
 

italianstal27

Chief Petty Officer
Joined
Feb 18, 2017
Messages
403
It looks like the bow has vinyl riveted to the hull....

Has anyone ever torn theirs off? Can't seem to find the correct google search on if removing that vinyl requires pop rivets into the hull?

IMG_20170220_165704.jpg
 

ezmobee

Supreme Mariner
Joined
Mar 26, 2007
Messages
23,767
I'd put the side panels back in. They look nice and do add some rigidity and hold things on the shelf that's there. When you patch the holes, buy a cheap small role of aluminum flashing from Lowes/HD. Cut little squares out of it with tin snips. Goop the sqaures with JB and stick 'em up under the gunnels or behind whatever hole you're patching. Don't push on them too much. When dry you may need to apply a little more JB from the top side / out side to but after that's dry you'll be able to sand it smooth and it'll look great. I have these kind of patches all over my boat including some larger holes that were patched up in my bow where the combing pads were once mounted. Look great and none have popped at all in 7 years.
 

italianstal27

Chief Petty Officer
Joined
Feb 18, 2017
Messages
403
PROGRESS TODAY. YUUGEEEE.

IMG_20170326_113000.jpg

First hour, back to home depot for closed cell foam, self etching primer (2 cans for 20 sq ft), and paint stripper.

IMG_20170326_152637.jpg

So.... citristrip... mehhhhhhhhh. Waited 45 minutes in 48F weather, and it did ok. Definitely needed a drill with 60 grit attachment to work it in to really strip the paint out. Avoided the holes so we didn't scuff up the epoxy on the transom.

IMG_20170326_154448.jpg
Wyatt got in there while i was laying down the citristrip with the shop vac to lay vacuum up before laying down some thick gluvit.

IMG_20170326_173701.jpg

So for this quart can of gluvit, hitting every seam and rivet, we only used 2/3. So we threw away $16 worth of gluvit... but what can you do? We should've mixed it little by little. For you in the future, on the 18' holiday or supersport, you'll need 2/3 of a can of gluvit to hit every seam!

IMG_20170326_170859.jpg

Transom stripped. You can see the scuff marks from where the orbital sander wacked it down with 220 grit paper... Need to research what grit you want the aluminum before applying vinegar/water (50/50), then self etch primer, then paint primer...

IMG_20170326_175803.jpg
Temps will be getting down to 41F over the next couple days, so we threw a 1100 watt space heater into the boat with a tarp covering it (covered the keyhole with styrofoam), to keep it above 52.

After this, we're basically ready to rivet the floor down in 2 days!

-John
 

Attachments

  • IMG_20170326_113000.jpg
    IMG_20170326_113000.jpg
    189 KB · Views: 1
  • IMG_20170326_152637.jpg
    IMG_20170326_152637.jpg
    138.2 KB · Views: 1
  • IMG_20170326_154448.jpg
    IMG_20170326_154448.jpg
    162.5 KB · Views: 0
  • IMG_20170326_173701.jpg
    IMG_20170326_173701.jpg
    184.6 KB · Views: 0
  • IMG_20170326_170859.jpg
    IMG_20170326_170859.jpg
    185.2 KB · Views: 0
  • IMG_20170326_175803.jpg
    IMG_20170326_175803.jpg
    127 KB · Views: 1

italianstal27

Chief Petty Officer
Joined
Feb 18, 2017
Messages
403
Attaching two more,

We had a small fracture on the port side of the bow, so while we had the gluvit open, we drilled out the ends of the crack with a 5/64" drill bit, and put gluvit on the inside. It flowed from inside to out, and will undoubtedly form a water tight seal :)

IMG_20170326_191504.jpg
It's hard to see the gluvit, but those little drips of liquid right eblow the drilled out holes are gluvit that came from the inside to the outside.
IMG_20170326_191521.jpg
Also attached, space heater keeping the inside of the boat warm while the gluvit cures.
 

Attachments

  • IMG_20170326_191521.jpg
    IMG_20170326_191521.jpg
    171.9 KB · Views: 1

italianstal27

Chief Petty Officer
Joined
Feb 18, 2017
Messages
403
IMG_20170328_174226.jpg
Started working on patching "a few" of the holes the previous owner left. Using .1" aluminum in the back with JB-Weld and/or Loctite 5 min epoxy. Doing some experimenting what method works best. Will keep y'all posted on the progress.

IMG_20170328_173313.jpg
the gluvit set up nicely. It's hard and appears to have flowed well into the areas we wanted it to! Our low temp was 41, but having the 1000 watt heater in there kept things warm enough with the tarp covering it.

IMG_20170328_203941.jpg
Drilled the final holes into the transom now that the 1/4" bolts arrived. I used the flat side of a 2x4 to get the drill straight as perpendicular to the hull as possible, and then matched the angle of the stern/port as well as I could. The block helped a ton, and only missed 2/8 on the first try.

IMG_20170328_202636.jpg
And we're back to the harbor freight screwdrivers! They're a tool that can do it all! Applied a decent chunk of epoxy to the screwdriver tip, and put it through both holes of the transom to try and seal up the interior as best as possible. Also re-coated the transom where the drill bit had blown through the plywood.

We'll let that set up over night, redrill the holes quickly, and then screw in the bolts with 5200.

IMG_20170328_205633.jpg
All of the rivets are being drilled out that attach the stringers to the ribs. The previous owner had used a rivet size slightly too large, and there is way too much movement in the stringers. After only putting in 4 rivets, we saw huge gains in rigidity!

Unfortunately, our 4th 3/16" drill bit fractured, and we're now taking donations! We'll have to wait till tomorrow to get another 6. To you in the future, you'll need TONS of 3/16 bits.

-John
 

Attachments

  • IMG_20170328_174226.jpg
    IMG_20170328_174226.jpg
    138 KB · Views: 1
  • IMG_20170328_173313.jpg
    IMG_20170328_173313.jpg
    185.4 KB · Views: 1
  • IMG_20170328_203941.jpg
    IMG_20170328_203941.jpg
    195.3 KB · Views: 0
  • IMG_20170328_202636.jpg
    IMG_20170328_202636.jpg
    125.9 KB · Views: 0
  • IMG_20170328_205633.jpg
    IMG_20170328_205633.jpg
    146.1 KB · Views: 1

Watermann

Starmada Splash of the Year 2014
Joined
Jan 12, 2013
Messages
13,753
I have a 3/16" bit that has gone through 2 restorations and still is just as sharp as the day I bought it. I lost it twice and found it again but in the meantime broke off 2 lesser bits.

Dewalt titanium pilot point.

141119_K_L.jpg
 

italianstal27

Chief Petty Officer
Joined
Feb 18, 2017
Messages
403
Huge progress over the last couple days. Lots of late nights!

IMG_20170330_173135.jpg
Getting the stainless hardware bolted through the transom. Used a generous glob of 5200 so that the threads touching the transom wood would also seal up to prevent water intrusion.

IMG_20170330_192919.jpg
Riveted all the stringers down again. Drilled out the old rivets with a 3/16 bit and put new 1/4" grip rivets from home depot in there! Went pretty quick and the rigidity was enormous! IMG_20170330_193530.jpg
Had a cracked stringer, so we put a piece of 1/10" aluminum above and below it. Then we riveted the sides (laterally from where the previous holes were drilled to help tie it into the rib.

IMG_20170330_194405.jpg


Sandwiched together!

More to come :)
 

Attachments

  • IMG_20170330_173135.jpg
    IMG_20170330_173135.jpg
    124.2 KB · Views: 1
  • IMG_20170330_192919.jpg
    IMG_20170330_192919.jpg
    201.9 KB · Views: 1
  • IMG_20170330_193530.jpg
    IMG_20170330_193530.jpg
    174.4 KB · Views: 1
  • IMG_20170330_194405.jpg
    IMG_20170330_194405.jpg
    161.5 KB · Views: 1

italianstal27

Chief Petty Officer
Joined
Feb 18, 2017
Messages
403
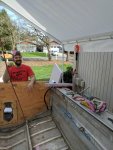
More progress. Hours people. Hours.

IMG_20170331_160900.jpg
Laughing is good for the soul. After sanding for hours we finally said screw it. Moving onto something else to give our ears a break.
IMG_20170331_163010.jpg
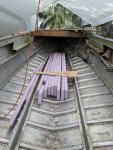
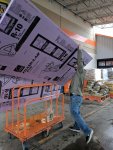
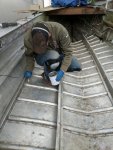
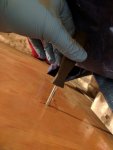
Cutting 8' rectangles for the foam. Riemann Sums anyone?!? Where my engineers at! This was a painsticking process as the boat isn't a flat surface. So the initial math got thrown out the window. Word from the experienced, put an 8" tall section in the middle, and start cutting from there. Also, a lot of foam shavings make their way into the boat. We tried scuffing them up a bit before placing them in there, but expect to flush the boat and take a coat hanger to clean the under passage ways after doing foam.

IMG_20170402_162458.jpg
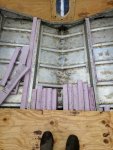
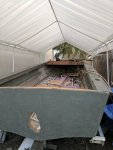
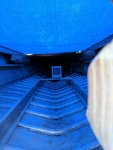
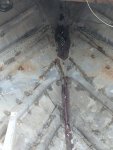
Foam in. We fit 2 2" wide sections of foam under the floor and may put a third sheet behind the sidewalls and bow. (budget and time permitting). we used the new deck to provide stability as we walked around.
IMG_20170401_124117.jpg
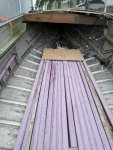
FOAM. this is 2 sheets worth. not bad :) Any further to the side, and we would have been cutting 1" thick chunks. No thank you. We may stop by home depot for a couple 1"ers though...

IMG_20170402_095025.jpg
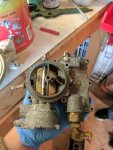
Part of the carb after a 1 hour soak in carb cleaner. Seems to be helping a ton. Back into the carb cleaner with you! Going to do 8 hours soak. See what happens...

IMG_20170402_101858.jpg
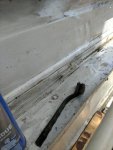
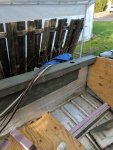
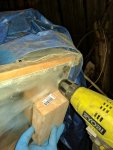
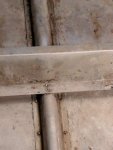
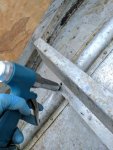
aaaand back to removing that stupid freaking glue from the sidewells. Today, we used a harbor freight steel brush and acetone. That seemed to take care of the "impossible to get" spots with the sander and used a shop vac to vaccuum up the crud. Actually worked really well!
IMG_20170402_170113.jpg
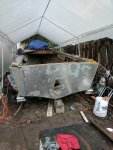
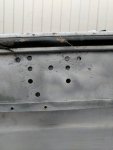
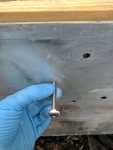
LOOK HOW CLEAN THAT GUNNEL AND SIDEWELL IS!!!!! IT'S BEAUTIFUL! We patched the holes in the gunnel with JB weld, and flattened the back side to form a 'rivet' like seal in the holes. Before applying the JB, we sanded with 220, and wiped down with acetone.

IMG_20170402_172621.jpg
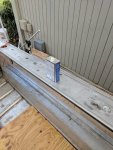
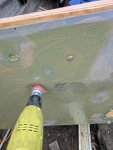
After sanding down the JB after a 4 hour cure, we mixed 50/50 vinegar & water, waited for it to dry (went real quick), and then sprayed it down with self etching primer!
IMG_20170402_172625.jpg
Sprayed in the sidewells as well! We're going to paint those instead of vinyl. Vinyl is OUT. OUT. OUT!

IMG_20170402_174233.jpg

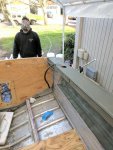
We also did the transom. We're running a science experiment here... Transom and gunnels are sanded down to bare metal, hull is sanded, rinsed, vinegar'd in the exposed spots, and primed. We will see what holds up best!

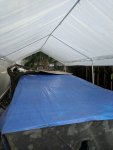
Next on the list is 2 coats of rustoleum metal primer once we get 2 days of no rain. Hard to do here in Oregon.
 

Attachments

  • IMG_20170331_160900.jpg
    IMG_20170331_160900.jpg
    215.6 KB · Views: 1
  • IMG_20170331_163010.jpg
    IMG_20170331_163010.jpg
    243.1 KB · Views: 0
  • IMG_20170402_162458.jpg
    IMG_20170402_162458.jpg
    232.5 KB · Views: 0
  • IMG_20170401_124117.jpg
    IMG_20170401_124117.jpg
    225 KB · Views: 0
  • IMG_20170402_095025.jpg
    IMG_20170402_095025.jpg
    165 KB · Views: 0
  • IMG_20170402_101858.jpg
    IMG_20170402_101858.jpg
    180.2 KB · Views: 0
  • IMG_20170402_170113.jpg
    IMG_20170402_170113.jpg
    210.5 KB · Views: 0
  • IMG_20170402_172621.jpg
    IMG_20170402_172621.jpg
    211.2 KB · Views: 0
  • IMG_20170402_172625.jpg
    IMG_20170402_172625.jpg
    226.5 KB · Views: 0
  • IMG_20170402_174233.jpg
    IMG_20170402_174233.jpg
    162.9 KB · Views: 1
Top