More Time Than Money

pckeen

Commander
Joined
Jun 20, 2012
Messages
2,067
If you want vintage, go with the chrome trim dash. For a more modern look, go with the black trim. But make sure whatever you pick will work with your motor.
 

Jeff-n-Gail

Petty Officer 3rd Class
Joined
Aug 10, 2016
Messages
99
No Title

I have decided to go with the gauges I went looking for with the white face. I guess I didn't give it a lot of thought, but I think I imagined them with chrome trim. Oh well I do have little time to finalize my decision and all the big gauges are the same size as are the small ones. In an effort to make some progress, I got a start on carpeting the seat boxes. I had one of the carpet pieces kinda cut out so that is where I started.I ended up with just one visible corner joint so I cut and polished a piece of 1" by 1" aluminum angle and screwed it in place to also help to protect the carpet at that corner. The adhesive I had in the garage had in fine print not to use in prolonged wet conditions. Dang. I found a can of contact cement and it qualified. Turned out to work great. I was able to roll the carpet around the corners and got excellent adhesion. Did a trial fit in the boat and so far my guesstimate calculations are right on.
 

Attachments

  • photo262558.jpg
    photo262558.jpg
    127.9 KB · Views: 0
  • photo262559.jpg
    photo262559.jpg
    138.9 KB · Views: 0
  • photo262560.jpg
    photo262560.jpg
    140.5 KB · Views: 0
  • photo262561.jpg
    photo262561.jpg
    137.8 KB · Views: 0
  • photo262562.jpg
    photo262562.jpg
    140.7 KB · Views: 0

Jeff-n-Gail

Petty Officer 3rd Class
Joined
Aug 10, 2016
Messages
99
No Title

I did some preliminary layout of the dash design by drawing the dash shape on my next to nice fresh white work surface. The top trim, bottom tray, and the steering column are "definite" non negotiable items to work around. Also after laying on my back and studying the back side of the dash, I found more things I won't be able to ignore. I had originally looked at the gauges like a kid looks at candy, the more the merrier. I have reduced my dream dash to a nice compromise between desire and reality. I am going to try to have a Speed, Rpm, and Volts for gauges. I haven't quite decided on a red light or a temp gauge. The temp gauge has a black face which doesn't match the other gauges. I think i'm kinda leaning towards a light that will get the drivers attention faster than a needle on a gauge. I have a good selection of retro chrome pull switches for the main lights, the search light, and the interior LED (mood) lights. Also have a push in spring out button for the dual trumpet horns. Also have several accessory plugs for charging the ever important media devices that we can't live without.(remember when we used to call these cig lighters)
 

Attachments

  • photo262986.jpg
    photo262986.jpg
    55.7 KB · Views: 0
Last edited:

Patfromny

Lieutenant Junior Grade
Joined
Dec 2, 2012
Messages
1,197
Sorry to hear about the lack of space. I too am dealing with a dash about the size of the side of a mailbox (probably smaller) I had to forgo the tach due to no more room. I regret it though. I'm trying to figure a way to move the multi function behind the wheel without blocking it completely so the tach can go where the multi. Resides now.
 

Jeff-n-Gail

Petty Officer 3rd Class
Joined
Aug 10, 2016
Messages
99
I did a lot of sitting and thinking, trying to figure it all out and it dawned on me that there is no correct way to do this stuff. I had a vision and I actually don't know where it came from. THAT being said, I have decided that my opinion is all that matters. DAMN THE TORPEDOES, FULL SPEED AHEAD. The gauges are not something that we will be constantly looking at so a passive yet accurate display of the facts is all that we are looking for.
 

Jeff-n-Gail

Petty Officer 3rd Class
Joined
Aug 10, 2016
Messages
99
No Title

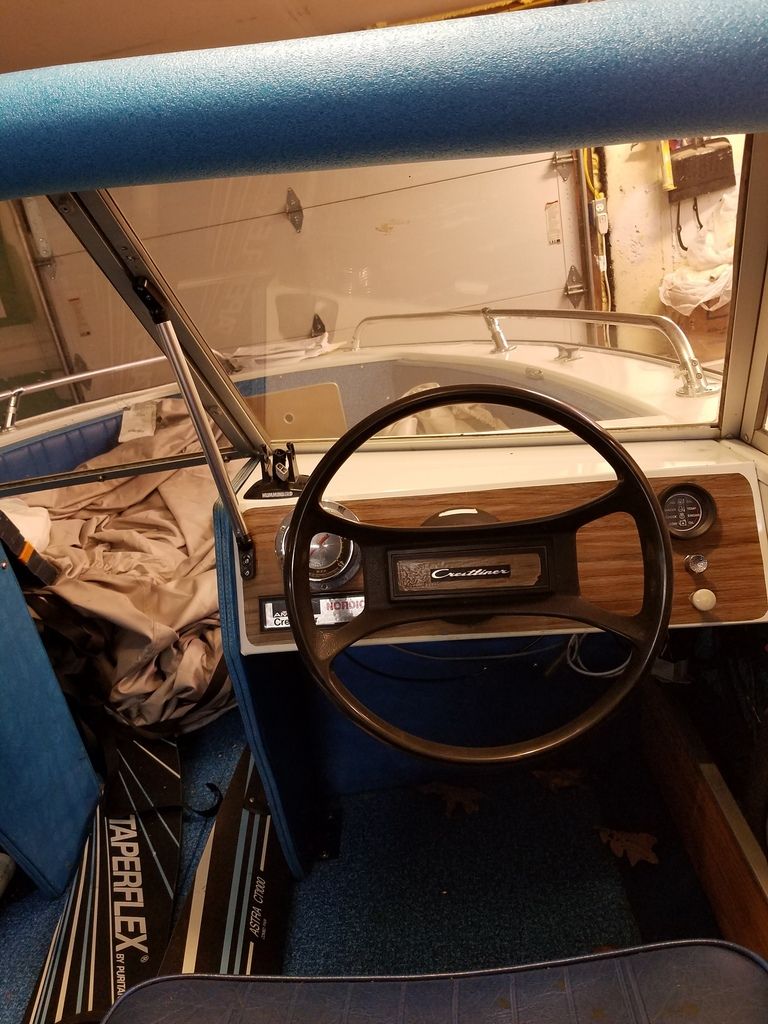
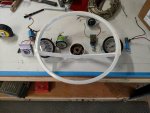
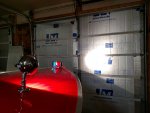
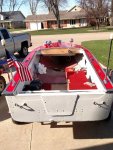
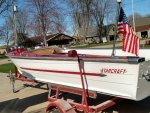
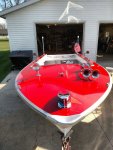
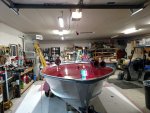
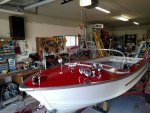
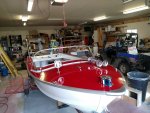
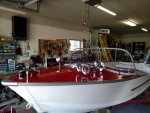
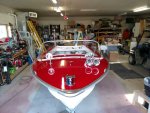
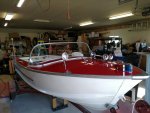
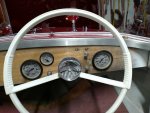
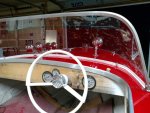
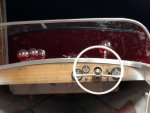
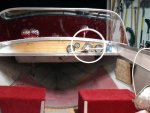
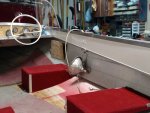
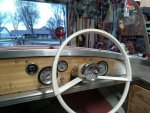
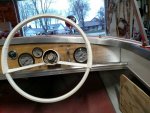
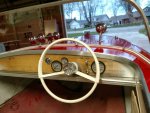
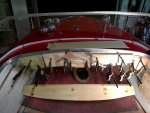
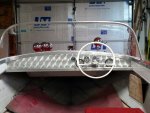
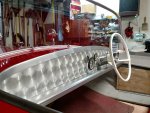
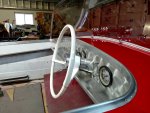
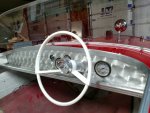
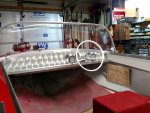
Had a super productive Fri(half day) and today, because I had decided to get some reassembly done. Putting the stuff back on doesn't take all that long but the wiring doesn't come natural to me like walking does. My theory that as long as you don't kink the wires, the juice will still flow turned out to be unreliable. Anybody who says doing electrical stuff in a boat ain't strenuous hasn't done any or actually knew what they were doing when they did it. I climb into the boat, no prob, grab all the stuff I need then lay down, slide under the dash area to do some electrical stuff and realize I don't have the correct tools and supplies I need to do the simple job I thought I was going to quick take care of. So I shimmy out from under the dash area, get up and go climb down the ladder, get what I think " IS" every thing I needed to do the simple task in front of me, climb back into the boat, shimmy back under the dash and realize I still need something. Me And Old Murphys Law Are Gunna Renotigate our agreement. Anyway. Got the Bow light, Search Light, duel Horns, and the matching Stern Lights all wired and operable upon command. Had good luck with hardware assembly on the boat body and now have only the windshield and complete dash to tackle.
 

Attachments

  • photo263347.jpg
    photo263347.jpg
    138.5 KB · Views: 0
  • photo263348.jpg
    photo263348.jpg
    142.4 KB · Views: 0
  • photo263349.jpg
    photo263349.jpg
    142.3 KB · Views: 0
  • photo263350.jpg
    photo263350.jpg
    167.1 KB · Views: 0
  • photo263351.jpg
    photo263351.jpg
    171.7 KB · Views: 0
  • photo263352.jpg
    photo263352.jpg
    191.7 KB · Views: 0

BWR1953

Vice Admiral
Joined
Jan 23, 2009
Messages
5,862
Looking good! :thumb:.

I hear ya about having all the stuff needed. I'm fortunate that I have "The Boy" to help me gather those goodies. He also fits underneath stuff a lot better than I do! :lol:
 

Jeff-n-Gail

Petty Officer 3rd Class
Joined
Aug 10, 2016
Messages
99
No Title

Had a super productive day today. Put on my big boy pants and took on the windshield project head on. When I started the acrylic bend month's ago, I had no idea what to expect, how much heat to use, and how far to go with each little part of the bend. I have been super curious since day 1 about how the protective coating held up to the direct heat from the heat gun. All those questions were answered today. I had previously pre-mounted everything prior to painting so I felt it would easily reassemble without to many problems. When I started to peel the coating back as I was installing the hardware I noticed some areas were pretty brittle and had stuck to the clear windshield in an ugly way. Turns out that it was mostly a coating residue and was easily rubbed out with a piece of clean bed sheet material. ( I'm pretty sure she'll get over this if I buy her new sheets) The windshield has a couple of Manufacturer defects but I'm happy with my first attempt and won't be going after the company for defect issues. Got this major issue behind me and am now looking forward to drilling 3 and 3/8 holes in an "all to small" dash area for installation of MPH and RPM gauges and 2 1/16" holes for temp and amp gauges. Looks like I may end up with quite a few switches and buttons to find a place to install.
 

Attachments

  • photo263432.jpg
    photo263432.jpg
    189.5 KB · Views: 0
  • photo263433.jpg
    photo263433.jpg
    184 KB · Views: 0
  • photo263434.jpg
    photo263434.jpg
    165.2 KB · Views: 0
  • photo263435.jpg
    photo263435.jpg
    176.2 KB · Views: 0
  • photo263436.jpg
    photo263436.jpg
    236.6 KB · Views: 0

Tnstratofam

Commander
Joined
Aug 18, 2013
Messages
2,679
The windshield looks great. She is coming along nicely and looking really sharp.:encouragement:
 

Watermann

Starmada Splash of the Year 2014
Joined
Jan 12, 2013
Messages
13,753
Nice! she looks great with the new windshield. :thumb:

fetch
 

Jeff-n-Gail

Petty Officer 3rd Class
Joined
Aug 10, 2016
Messages
99
No Title

Hey, bowling season is over. I had some spare time tonite and after re looking at my placement decision on the gauges I ended up sticking with my decision and did the large hole drilling. After the first hole is drilled all the way through, the window for second guessing oneself is past. Ended up with Tach, Speedometer, and Amp for Gauges. I may add the TEMP gauge if its nonexistence on the dash bothers me enough. The Horn bottom, Main lights, and Spotlight are drilled and fitted. The last switch which is for the Sidewall lights is pending my Temperature Gauge decision.
 

Attachments

  • photo263521.jpg
    photo263521.jpg
    248.9 KB · Views: 0
  • photo263522.jpg
    photo263522.jpg
    272.3 KB · Views: 0
  • photo263523.jpg
    photo263523.jpg
    146.3 KB · Views: 0

Patfromny

Lieutenant Junior Grade
Joined
Dec 2, 2012
Messages
1,197
It looks great. You have plenty of room for another gauge or two. I'd put the temp gauge up above the speedo next to the amp gauge. The three will sort of look like Mickey mouse but will help with the symmetry of the dash. JMHO.
 

Jeff-n-Gail

Petty Officer 3rd Class
Joined
Aug 10, 2016
Messages
99
No Title

It looks great. You have plenty of room for another gauge or two. I'd put the temp gauge up above the speedo next to the amp gauge. The three will sort of look like Mickey mouse but will help with the symmetry of the dash. JMHO.
I'm thinking you may be right with that suggestion. I was for some reason trying to keep everything in front of the steering wheel. That location doesn't make it to the center of the dash and still leaves lots of unused dash space. I can't put it on the other side of the steering wheel because of a mounting angle plate behind the dash. Thanks for the input, I'll probably go that route when I locate a white faced black trimmed gauge to match the others. In the mean time I found out tonite that next Tues morning I have to take the boat to the shop for motor installation. Now new issues come to light like what to mount the controls to, where to mount the controls and what else did I not think ahead about. I mounted the tray under the dash and a wooden plate to the sidewall where the controls should be mounted. Then I took a few pics of the conditions the shop will be dealing with and sent them to the shop for man to review. Hopefully ill be ready for the install. Like the rest of the project, I really don't know what's actually next in this journey.
 

Attachments

  • photo263604.jpg
    photo263604.jpg
    130.7 KB · Views: 0
  • photo263605.jpg
    photo263605.jpg
    128.5 KB · Views: 0

Jeff-n-Gail

Petty Officer 3rd Class
Joined
Aug 10, 2016
Messages
99
No Title

I did it! Drilled the temperature gauge hole and only had a small piece of aluminum mount bracket to cut thru. I disassembled every thing in the dash, lightly sanded the bare wood dash and spread on the glue. I used flooring adhesive that was approved for wood and metal( aluminum to me ). The finished dash aluminium face slid into place under the upper aluminum trim and the bend at the bottom seemed to shut up nicely to the bottom if the wood dash, so I clamped it all in place and shut off the lights till Fri afternoon.
 

Attachments

  • photo263665.jpg
    photo263665.jpg
    275.3 KB · Views: 0
  • photo263666.jpg
    photo263666.jpg
    286.4 KB · Views: 0
  • photo263667.jpg
    photo263667.jpg
    223.3 KB · Views: 0
  • photo263670.jpg
    photo263670.jpg
    135.5 KB · Views: 0

Patfromny

Lieutenant Junior Grade
Joined
Dec 2, 2012
Messages
1,197
Very nice. I like the extra gauge. You have plenty of room on that dash. This is what I'm dealing with. I'm trying to sink a tach in somewhere and just don't have the room. The wheel hogs up most of the space behind it as far as site lines go


Jeff-n-Gail

Petty Officer 3rd Class
Joined
Aug 10, 2016
Messages
99
Very nice. I like the extra gauge. You have plenty of room on that dash. This is what I'm dealing with. I'm trying to sink a tach in somewhere and just don't have the room. The wheel hogs up most of the space behind it as far as site lines go

Nice ride. I see a lot of unused dash there that is hidden by the wheel as you say. I will check out your site but as of now with no knowledge of your direction, I would tend to lean toward a wheel that doesn't restrict your view as much. I'm lucky that the original wheel gives me the best view possible. Keep in touch.
 

Patfromny

Lieutenant Junior Grade
Joined
Dec 2, 2012
Messages
1,197
Yep, I was thinking about changing the wheel. That would solve an issue I was having with the throttle control as well. Time to browse the other part of this site I guess.
 

Jeff-n-Gail

Petty Officer 3rd Class
Joined
Aug 10, 2016
Messages
99
No Title

Its been an anxious and curious little project, but finally the dash is ready to wire. Got started with the LED side wall lights tonite. I got the word that the Motor is getting installed on Tuesday and I should have it back by Thurs. Now I got to rack my brains to make sure I did all I needed to so the install will go as planed.
 

Attachments

  • photo263831.jpg
    photo263831.jpg
    128.4 KB · Views: 0
  • photo263832.jpg
    photo263832.jpg
    163.6 KB · Views: 0
  • photo263833.jpg
    photo263833.jpg
    165.3 KB · Views: 0
  • photo263834.jpg
    photo263834.jpg
    155 KB · Views: 0
  • photo263835.jpg
    photo263835.jpg
    164.5 KB · Views: 0
Top