proshadetree
Lieutenant Commander
- Joined
- Jul 19, 2008
- Messages
- 1,887
Yep flebay has almost every color known to man. I have had very good luck matching existing colors or the admirals wishes.


Yeah I've tried several places with no luck. I just ordered some samples that match my seats so I can send them off to trimjobber or others to have them try and match with what they have.Yep flebay has almost every color known to man. I have had very good luck matching existing colors or the admirals wishes.
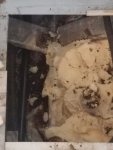
Personally I don't see the need for a 2nd pump to recirculate the water in the well especially if you have the timer running the aerator with fresh water intake. You would still need an overflow thru hull no matter what, otherwise how would the water be drained? If you used the pump to recirculate and pump out the well you would still need a thu hull outlet.

Thanks.I see the aerator pump over took the drains ability to keep the well from over flow. Now that could be a problem alright. You could add a shut off valve and close it down some to reduce the flow from the pump.
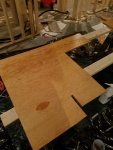
Nice forward deck area you have laid out, I like that. :thumb:
")
2 coats on the flats would be 4 on the edges and I believe that is good and just do nice even coats. I don't know about the second application of resin as far as times go, the manufacturer should have that info though. I wouldn't bother with using a primer, I see nothing to gain from coating sealed wood with primer since it's going to be covered with vinyl.