Chaparral 2000 SL Sport floor, and more?? [SPLASHED Sept 2017]

Baylinerchuck

Commander
Joined
Jul 29, 2016
Messages
2,726
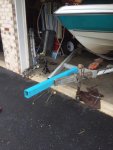
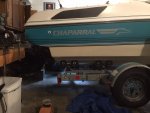
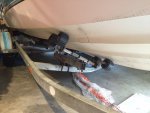
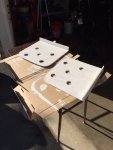
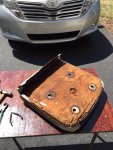
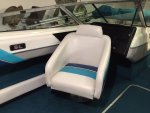
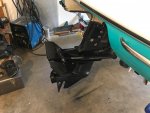
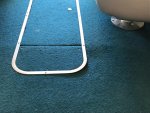
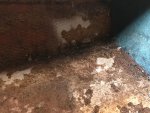
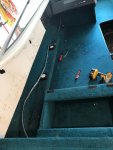
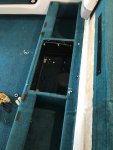
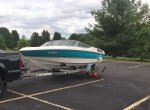
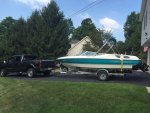
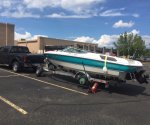
So I decided to start a repair thread for my 1990 20' Chaparral bow rider. I purchased the boat in Virginia. The boat spent the vast majority of its time on Lake Anna, and only had one owner. Though the PO claimed to have taken very good care of her, there were several issues I saw right off the bat that would need addressed. Since this boat was exactly what I wanted as far as motor, design, and price, I made the purchase. I spent about 6 weeks trying to make her run right, seeking advice at times from this forum. Everything I replaced was what I would consider basic maintenance. Oil, filter, plugs, wires, distributor cap, rotor, thermostat, exhaust shutters, and retimed it. I cleaned the fuel pump, installed a new fuel filter, fuel lines and checked the tank. While cleaning the carb I found a blockage that could not be cleared. I purchased a remanufactured carb. While all this was going on I gave the trailer some attention. New tires, rebuilt the master cylinder, new brakes, bearings and seals, and new wobble rollers. The PO had the boat positioned so far back on the trailer that every time I hit a bump, the surge brakes activated. I extended the tongue a foot and pulled the boat forward, repositioning the wobble roller brackets. New LED lights, soldered and heat shrunk connections completed the trailer work. I have had the boat since early July and even thought it didn't run perfectly, we still managed to use it every weekend. Now that the motor runs strong and is reliable, and trailer is safe, it's time to begin focusing on some other things. The floor has a soft spot right in the area above the fuel tank. It's a plastic fuel tank, so I'm sure condensation has a lot to do with the floor. Stringers in that area don't look great either. There are some other wood related issues such as the backers to the port side vinyl. I'm sure I'll uncover more as I progress. I plan on using her a few more times before digging into the floor. I really want to take in some autumn scenery at Raystown Lake before I start. I'll have a few more posts of things I've already done in the coming days or weeks.
 

Attachments

  • photo253327.JPG
    photo253327.JPG
    277.9 KB · Views: 31
  • photo253328.JPG
    photo253328.JPG
    368.2 KB · Views: 32
  • photo253329.JPG
    photo253329.JPG
    329.4 KB · Views: 30
Last edited by a moderator:

SeaDooSam

Chief Petty Officer
Joined
Feb 15, 2016
Messages
575
It looks great from the outside! Wow sounds like a boatload of work. Don't forget to enjoy it too!
 

tpenfield

Moderator
Staff member
Joined
Jul 18, 2011
Messages
17,597
Tagging along. looking forward to updates. Post some pictures of the soft spots, the fuel tank bay and the stringers that don't look so good, along with any other areas of the structure.

Funny thing about fiberglass boats (at least of that era) . . . Only the outside of the hull is fiberglass, the rest is organic and even with good care can absorb moisture and rot.
 

Baylinerchuck

Commander
Joined
Jul 29, 2016
Messages
2,726
It looks great from the outside! Wow sounds like a boatload of work. Don't forget to enjoy it too!

Thanks!! I thought she was a looker too. The gelcoat is in real good shape. One thing the PO did well was waxing. He wasn't much of a mechanic, (nor was the marina apparently), but he kept the outside nice. The vinyl is still in good shape too. Much of the wood backing needs replaced as you'll see in future posts.
 

Baylinerchuck

Commander
Joined
Jul 29, 2016
Messages
2,726
Tagging along. looking forward to updates. Post some pictures of the soft spots, the fuel tank bay and the stringers that don't look so good, along with any other areas of the structure.

Funny thing about fiberglass boats (at least of that era) . . . Only the outside of the hull is fiberglass, the rest is organic and even with good care can absorb moisture and rot.

Thanks Ted, I'll try to keep them coming enough to keep you wanting more....lol. Thanks for following.
 

Baylinerchuck

Commander
Joined
Jul 29, 2016
Messages
2,726
No Title

The PO had mentioned how he took great care of this boat. Like I stated, it looked great. Mechanically, not so much. As part of the "new to me" maintenance I do on all my new toys I found many things that needed immediate attention. According to the PO, the marina did all his mechanical work as he was not very mechanical inclined.

The fuel filter was completely stopped up with aluminum corrosion from the fuel pump. Blocked passages in the carb meant buying a remanufactured carb. I opted to retain the carb instead of using it for a core. These quadrajet marine bodies for the 4.3L are getting harder to find. The carb I bought is actually a V8 quadrajet due to the diameter of the primary bores. It was jetted down to work on a 4.3L.
 

Attachments

  • photo253401.JPG
    photo253401.JPG
    176.8 KB · Views: 6
  • photo253402.JPG
    photo253402.JPG
    225.6 KB · Views: 6
  • photo253403.JPG
    photo253403.JPG
    244 KB · Views: 6
  • photo253404.JPG
    photo253404.JPG
    267.2 KB · Views: 6

tpenfield

Moderator
Staff member
Joined
Jul 18, 2011
Messages
17,597
Yea, lots of folks think washing and waxing is taking good care of their boats. Good thing that you are digging into it and finding the issues.
 

Baylinerchuck

Commander
Joined
Jul 29, 2016
Messages
2,726
No Title

It looks great from the outside! Wow sounds like a boatload of work. Don't forget to enjoy it too!
We were enjoying with our friends as much as possible in the little time we had. This is my Chaparral, a 20' Rinker and an 18' Sea Ray. We like to meet up on the Potomac river for water sports or a little relaxing. As it starts to get colder, I'm already missing summer! Some great memories are made every year.
 

Attachments

  • photo253520.JPG
    photo253520.JPG
    321.5 KB · Views: 13
Last edited:

drewm3i

Petty Officer 1st Class
Joined
Dec 31, 1969
Messages
279
On one of my old Chaparral's (a '95 2130 SS) that was immaculate, it had the "soft spot" in the floor above the fuel tank. I initially thought rot, but it was far from any other piece of wood, so I got a closer look and saw that there was a large stress crack in the plywood because there was no cross member installed under the deck. Keep in mind this is a high trafffic area and over time the wood flexes and will crack because it has no support (stringers are too far apart).
 

Baylinerchuck

Commander
Joined
Jul 29, 2016
Messages
2,726
On one of my old Chaparral's (a '95 2130 SS) that was immaculate, it had the "soft spot" in the floor above the fuel tank. I initially thought rot, but it was far from any other piece of wood, so I got a closer look and saw that there was a large stress crack in the plywood because there was no cross member installed under the deck. Keep in mind this is a high trafffic area and over time the wood flexes and will crack because it has no support (stringers are too far apart).

Thanks Drew. I agree with you as far that area being a highly stressed part of the deck. I plan on feinforcing that area when I lay down the new deck.
 

Baylinerchuck

Commander
Joined
Jul 29, 2016
Messages
2,726
No Title

Some of the first projects I've done on this restoration is trailer work. I tow with an F250 diesel, so though not overly concerned with trailer braking for a 2500 lb boat, I like to have everything working. I have the surge brakes all straightened out with a master cylinder restoration, an new drum brake backer plates. The most important thing for me was getting the boat positioned properly on the trailer for safe towing. The PO had shortened the tongue and moved the boat back. The result placed all the weight behind the axle. I could lift the tongue with one hand. This meant the surge brakes would activate with every bump in the road. What an aggravating trailer to tow. I needed to keep this trailer short so t his 20' bow rider will fit in my garage. I was able to source a 3 X 5 X 1/4" wall rectangular tube steel for the tongue. The length I chose would add 12" to the length of the trailer. I moved the rear wobble roller bracket to the next hole forward in the frame. I was able to move the boat forward about 16". This distributed a lot of weight forward on the trailer. Now I am unable to lift the tongue of the trailer, and the whole rig is much more tow friendly. I got a heck of a deal on factory second EZ Loader wobble rollers. Most places have them for 7.99 and above each. I got mine for 3.99, and though slightly blemished, you can't really tell. I needed 32 of these bad boys, so I was happy to save some money. New, wheel bearings, wiring and LED lighting finished off the trailer.
 

Attachments

  • photo253576.jpeg
    photo253576.jpeg
    253.8 KB · Views: 9
  • photo253577.jpg
    photo253577.jpg
    110.7 KB · Views: 8
  • photo253578.jpeg
    photo253578.jpeg
    226.6 KB · Views: 9
  • photo253579.jpeg
    photo253579.jpeg
    257.8 KB · Views: 9
Last edited:

Baylinerchuck

Commander
Joined
Jul 29, 2016
Messages
2,726
No Title

One of the first restoration projects I did to wet my whistle was replacing the seat bases. The vinyl was stapled to plywood then attached to a plastic frame that is attached to the pedestal. I removed the vinyl from the rotten wood as carefully as possible to ensure I had a good pattern. I drilled additional weep holes and painted the wood with Rustoleum Top Side paint. I had to use a heat gun to soften the vinyl enough to reattach it to new plywood. Anyone know of any products that soften old vinyl? I current use 303 vinyl protectant.
 

Attachments

  • photo253906.JPG
    photo253906.JPG
    287.7 KB · Views: 12
  • photo253907.jpg
    photo253907.jpg
    149.4 KB · Views: 13
  • photo253909.jpg
    photo253909.jpg
    185.7 KB · Views: 12
  • photo253908.JPG
    photo253908.JPG
    271.8 KB · Views: 12
  • photo253910.JPG
    photo253910.JPG
    233.7 KB · Views: 12
  • photo253911.JPG
    photo253911.JPG
    255.9 KB · Views: 11

gsxrdan

Petty Officer 1st Class
Joined
Aug 28, 2016
Messages
317
looking good, i got a bunch of wobble rollers and brackets second hand, the trailer was 1 of the first jobs on my build, but buying that stuff new was out of the question!
 

Baylinerchuck

Commander
Joined
Jul 29, 2016
Messages
2,726
looking good, i got a bunch of wobble rollers and brackets second hand, the trailer was 1 of the first jobs on my build, but buying that stuff new was out of the question!

I know, it's insane what those rollers cost. If I wouldn't have found those blemish rollers, I would have surely converted to bunk. I see how some folks fight with heavy boats on bunks at the ramp, so I'm really happy to have the wobble rollers.
 

79_banshee

Petty Officer 2nd Class
Joined
Sep 2, 2016
Messages
176
Wow man you got lots done to it already can't wait to see you start ripping into the floor. Nice looking boat too
 

Baylinerchuck

Commander
Joined
Jul 29, 2016
Messages
2,726
No Title

Today I got started on some demo. First I had to clean out my garage. I took a couple of "before pictures", and measurements of key areas. This post will contain just a few before pictures. On the surface it doesn't look too bad. As I dig in you'll see the soft spots.
 

Attachments

  • photo254304.JPG
    photo254304.JPG
    256.7 KB · Views: 24
  • photo254305.JPG
    photo254305.JPG
    258 KB · Views: 23
  • photo254306.JPG
    photo254306.JPG
    293.3 KB · Views: 21
  • photo254307.JPG
    photo254307.JPG
    278 KB · Views: 22

Baylinerchuck

Commander
Joined
Jul 29, 2016
Messages
2,726
No Title

Here are some of the issues. A soft floor just aft of the ski locker. Seat pedestal screws pulling out of the floor. A stinky fuel fill line and vent that will need to be replaced. Soft stringers in the aft area of the ski locker and next to the fuel tank.
 

Attachments

  • photo254308.JPG
    photo254308.JPG
    302.7 KB · Views: 11
  • photo254309.jpg
    photo254309.jpg
    149.8 KB · Views: 10
  • photo254310.jpg
    photo254310.jpg
    186.9 KB · Views: 11

Baylinerchuck

Commander
Joined
Jul 29, 2016
Messages
2,726
No Title

I got the port side panels off. Much of the plywood backer is rotted. Also started taking out the rear couch. Much of this was already loose from the floor, as the screws were pulled out. More to come. I just don't understand why stainless steel hardware wasn't used, and for crying out loud.....paint bare plywood!!!!
 

Attachments

  • photo254326.JPG
    photo254326.JPG
    384.1 KB · Views: 23
  • photo254327.jpg
    photo254327.jpg
    188.6 KB · Views: 23
  • photo254328.jpg
    photo254328.jpg
    188.2 KB · Views: 22
Top