1983 Sea Ray Seville Restoration Begins

Joined
Sep 15, 2016
Messages
15
Your typical neglected boat, saved from an unknown fate at a truck accessory parking lot. Out of the lake for a couple of years, hull oxidized but otherwise sound. All decals toast. Carpet poor to OK. Deck soft in a couple of places. Instrumentation sketchy and seat upholstery bad. No major surprises yet. 3.0L reported to be running but overheats in water...likely impellor issue. Just got it towed home a couple of days ago, no teardown or floor/stringer inspection yet. Wish me luck...I'll try to post progress here. Comments welcomed. Spent a lot of time restoring cars, this is my first boat, motor and trailer...and I can't stand to see something neglected.
 

Attachments

  • boat.jpg
    boat.jpg
    97.4 KB · Views: 1
Joined
Sep 15, 2016
Messages
15
So, I saw a dude on ebay trying to sell a couple of Seville script hull emblems for abt $95. Uh-huh...sure...did some research and found the Seville script was in an identical locale as the regular Sea Ray 13" oval. Soooo, guess the $95 emblems get replaced with $36 emblems...yup, ya gotta be careful.
 
Joined
Sep 15, 2016
Messages
15
No Title

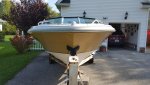
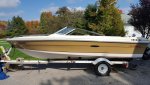
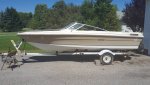
Did a little research on the Seville series. Seems it was a trim package (think cars) that was a popular equipment group. It offered things like a convertible top, cooler and a few other standard goodies. Appears Seville was Sea Ray's move to a cost-effective product so they wouldn't loose market share to cheaper brands. Turns out the boat I have was available in 2 styles, cuddy and bowrider. It is marketed as their 5.6M series (for meters) around the planet. I finished the starboard side of the hull and was pleased it matched the port side after about a week of time off. Here's some things I've found:

1. The original cleats were flat-top with open base and were likely made by Schaefer, a high-end supplier. Problem is, the have a non-standard hole spacing of 2.0 inches (51mm). No aftermarket parts readily available. Schaefer sells 2.0 inch for a high price. They are chrome over bronze probably like mine which are only slightly pitted. Probably keep them.

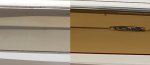
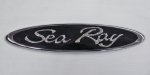
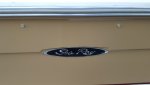
2. The guy trying to sell the 2 Seville hull emblems for about $100 made me order regular 13 inch sea ray adhesive emblems for 1/3 the price. They fit great and seal up the 3 mounting holes for the cheap plastic Seville emblem. The height is bigger on the new emblems so it needs to be heated slightly and formed over the hull seam. Its a very small angle and the horizontal bend and it looks fine. I'll take pics later.

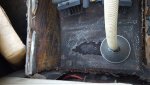
3. Wetness in the flooring below the starboard side jump seat next to the motor. Only about 8 inches long by 5 inches wide. Fiberglass had worn through because of the weight of the factory supplied cooler rubbing the flooring over the years. Stringer is probably OK but am doing water extracting then resin injection. Not enough other mess in this area to justify stringer replacement...yet. Side and back board of cooler in bad shape, will replace. Not impressed with factory material...reminds me of coarse particle board. Pretty sure its original.

4. Removing a very heavy ski ladder & platform off the back. I'll save it for the next owner if they want it. Seems like a lot of extra weight. Original steps were replaced with a longer bi-fold ladder. Platform and ladder in OK shape, ready to re-use someday.

p.s. Am retired engineer and love to restore things such as this "old" boat. I tend to get geeky on descriptions and materials, so bear with me. I am doing this for fun. Next Spring, I'll splash this beast in Lake Erie and make sure it passes my shakedown tests. After that, I'll sell it and pick out another one. Crazy? Yep...
 

Attachments

  • photo253551.jpg
    photo253551.jpg
    74.9 KB · Views: 0
Joined
Sep 15, 2016
Messages
15
No Title

Here's the emblem on the boat. New SS snaps and de-oxidized aluminum rub rail.
 

Attachments

  • photo253570.jpg
    photo253570.jpg
    61.6 KB · Views: 1
Last edited:
Joined
Sep 15, 2016
Messages
15
No Title

Water extraction...under the cooler box starboard side stern. The heavy cooler box sat on the floor for too many years, rubbing through the fiberglass and allowing water to be absorbed on the stringer. Although this is not a critical load point, I still want it fixed. Running a funnel to shop vac to begin drying process, removing heavy moisture. Also began drying wood @ 190F with commercial heat gun. Always monitor temp! Will drop in some salts, "rinse and repeat", then should end up with a really dry stringer. Haven't decided 100% on resin injection, reading up on several techniques. Fortunately the port stringer on the opposite side with the battery is nicely sealed with no problems. Haven't messed with rest of deck yet, it seems nice and solid walking around except for soft ski locker cover. That cheap wood will be replaced with something far more suitable.

Having watched dozens of boat restoration vids, I think people undertake complete stringer and floor replacement when it may not be necessary. This boat so far seems to have isolated problems not needing a labor intensive restoration...we'll see.
 

Attachments

  • photo253571.jpg
    photo253571.jpg
    184.9 KB · Views: 2
Joined
Sep 15, 2016
Messages
15
Update, the drying simply revealed more floor rot under the jump seat next to the engine. Fortunately, this is a small area and the rotten wood was removed leaving a fiberglass and foam cavity about 1 foot total area and 3/8 high. The foam is in great shape...good stuff. Enlarged hole slightly and plan to use injection technique replacing wood with my favorite resin. Will show pics later. Too bad Seacast is over-priced. Maybe a decent competitor will offer something more affordable.

Also, Sea Ray used cheap particle board for the flooring and boat seat box. Fiberglass was relatively thick and survived the wood rot...except in the area where the water first got access to it due to rubbing of the factory cooler box. This heavy monstrosity will have to go. Thinking live well or 12V cooler under the seat. Fish or beers...tough decision.

With today's technology, there's no excuse for replacing rotted wood with more wood (unless its a historical restoration). This just kicks the problem down the road for someone else. Wood is good, but this is the 21st century and boats deserve better IMO.
 

goin70

Cadet
Joined
Oct 6, 2007
Messages
19
I will be following along as I enjoy watching folks have adult fun! What material are you planning to use as a replacement for the rotten wood? Many choices?
 
Joined
Sep 15, 2016
Messages
15
dsc05705.jpg
I will be following along as I enjoy watching folks have adult fun! What material are you planning to use as a replacement for the rotten wood? Many choices?

Its a combination of fiberglass boards like FR4 for electronics sandwiched with layers of thick resin. I hesitate to give other details until I complete the roughly 1 ft square area and do a strength test. I'm about 1/2 way done with it. Its a new technique I want to try...have got high expectations.

After studying this problem a while, decided composite boards and stuff like Seacast are just not cost-effective enough, plus, I didn't want to go back to old technology...wood. That's the engineer in me speaking and I certainly understand those who do this. So far, this method is only from small area work, a full deck is a different story.

Found another soft spot elsewhere, haven't investigated it until I complete this one...plus the rehab of the upper hull. Making progress on that as well.
 
Last edited:
Joined
Sep 15, 2016
Messages
15
There are many ways to replace wood flooring and box panels. If you are doing a 1x2 ft area, consider using recycled plastics, HDPE. Melt enough plastic milk jugs and you can make your own :D

I'm not a seller of this, so its not a commercial. Just some ideas to replace wood with something more appropriate.
 
Last edited:
Joined
Sep 15, 2016
Messages
15
Done with the experiment, patching the floor underneath the jump seat where about a 1 square foot area went bad. I used exterior grade liquid nails resin to sandwich about 3-4 layers of electronic PC boards (fiberglass) as the primary material. It worked fine but the resin took several days to fully set up. For this area which is not going to see foot traffic I could recommend using this technique. LN is cheap, water resistant and bonds nicely to the boards. I had spare boards lying around and decided to try them rather than casting them into the dumpster. Probably not something I would do on a structural area unless is was smaller. I will fiberglass over the top to finish it off.
 
Joined
Sep 15, 2016
Messages
15
No Title

Top deck done with new 2 NM Nav led, bilge vents, striping and hole plugging. Will have some original parts to sell on ebay: ski platform and steps, Nav light, 4 Cleats, cooler and a few other things I probably forgot. These will be weathered but restorable for those wanting OEM Sea Ray stuff for their project.
 

Attachments

  • photo254415.jpg
    photo254415.jpg
    354.5 KB · Views: 2
  • photo254416.jpg
    photo254416.jpg
    160.7 KB · Views: 2
Top