1985 Sea Nymph CC-191 Striper Rebuild / Restore

Status
Not open for further replies.

Acpics80

Seaman Apprentice
Joined
Mar 17, 2016
Messages
41
Hello All,
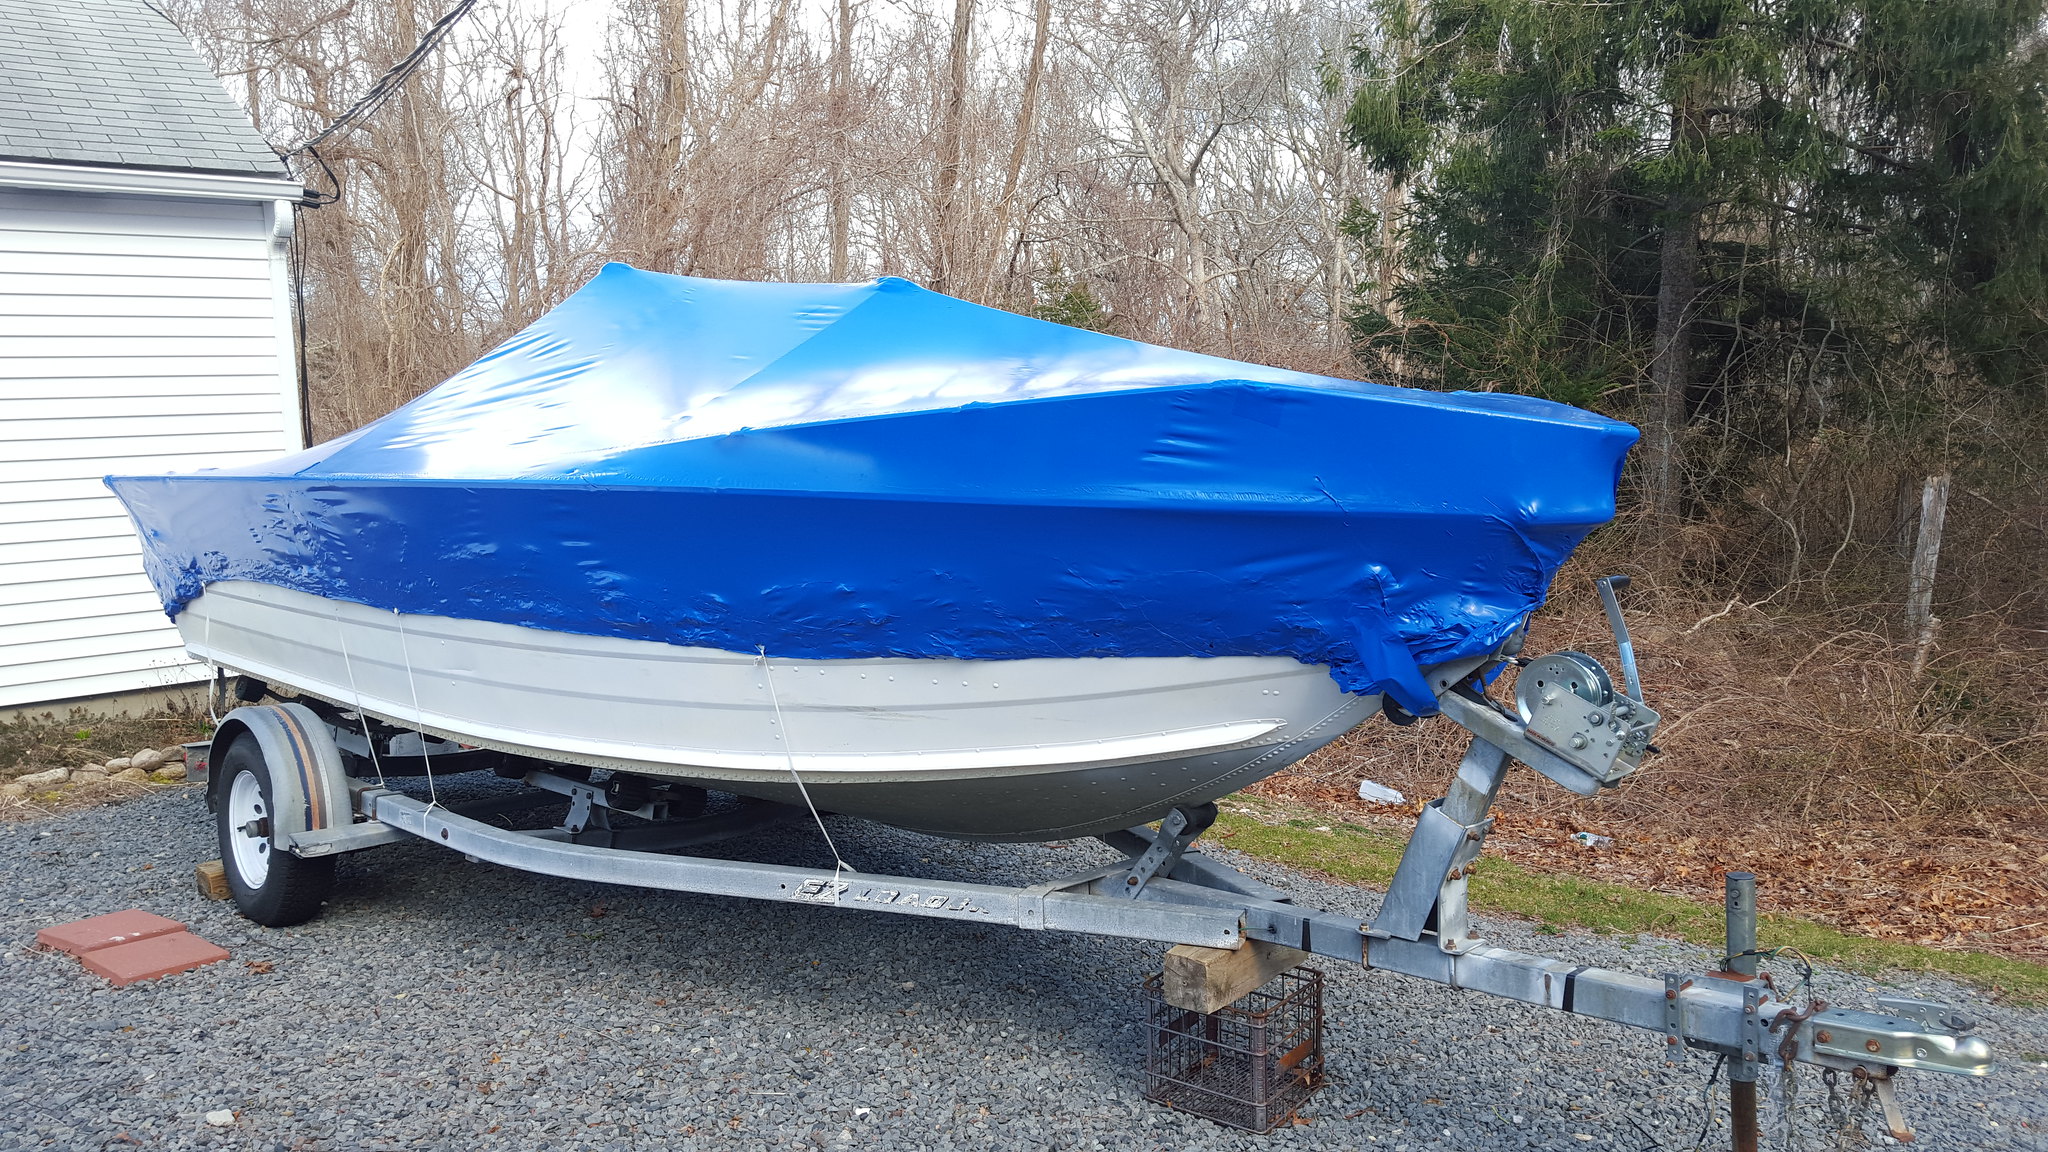
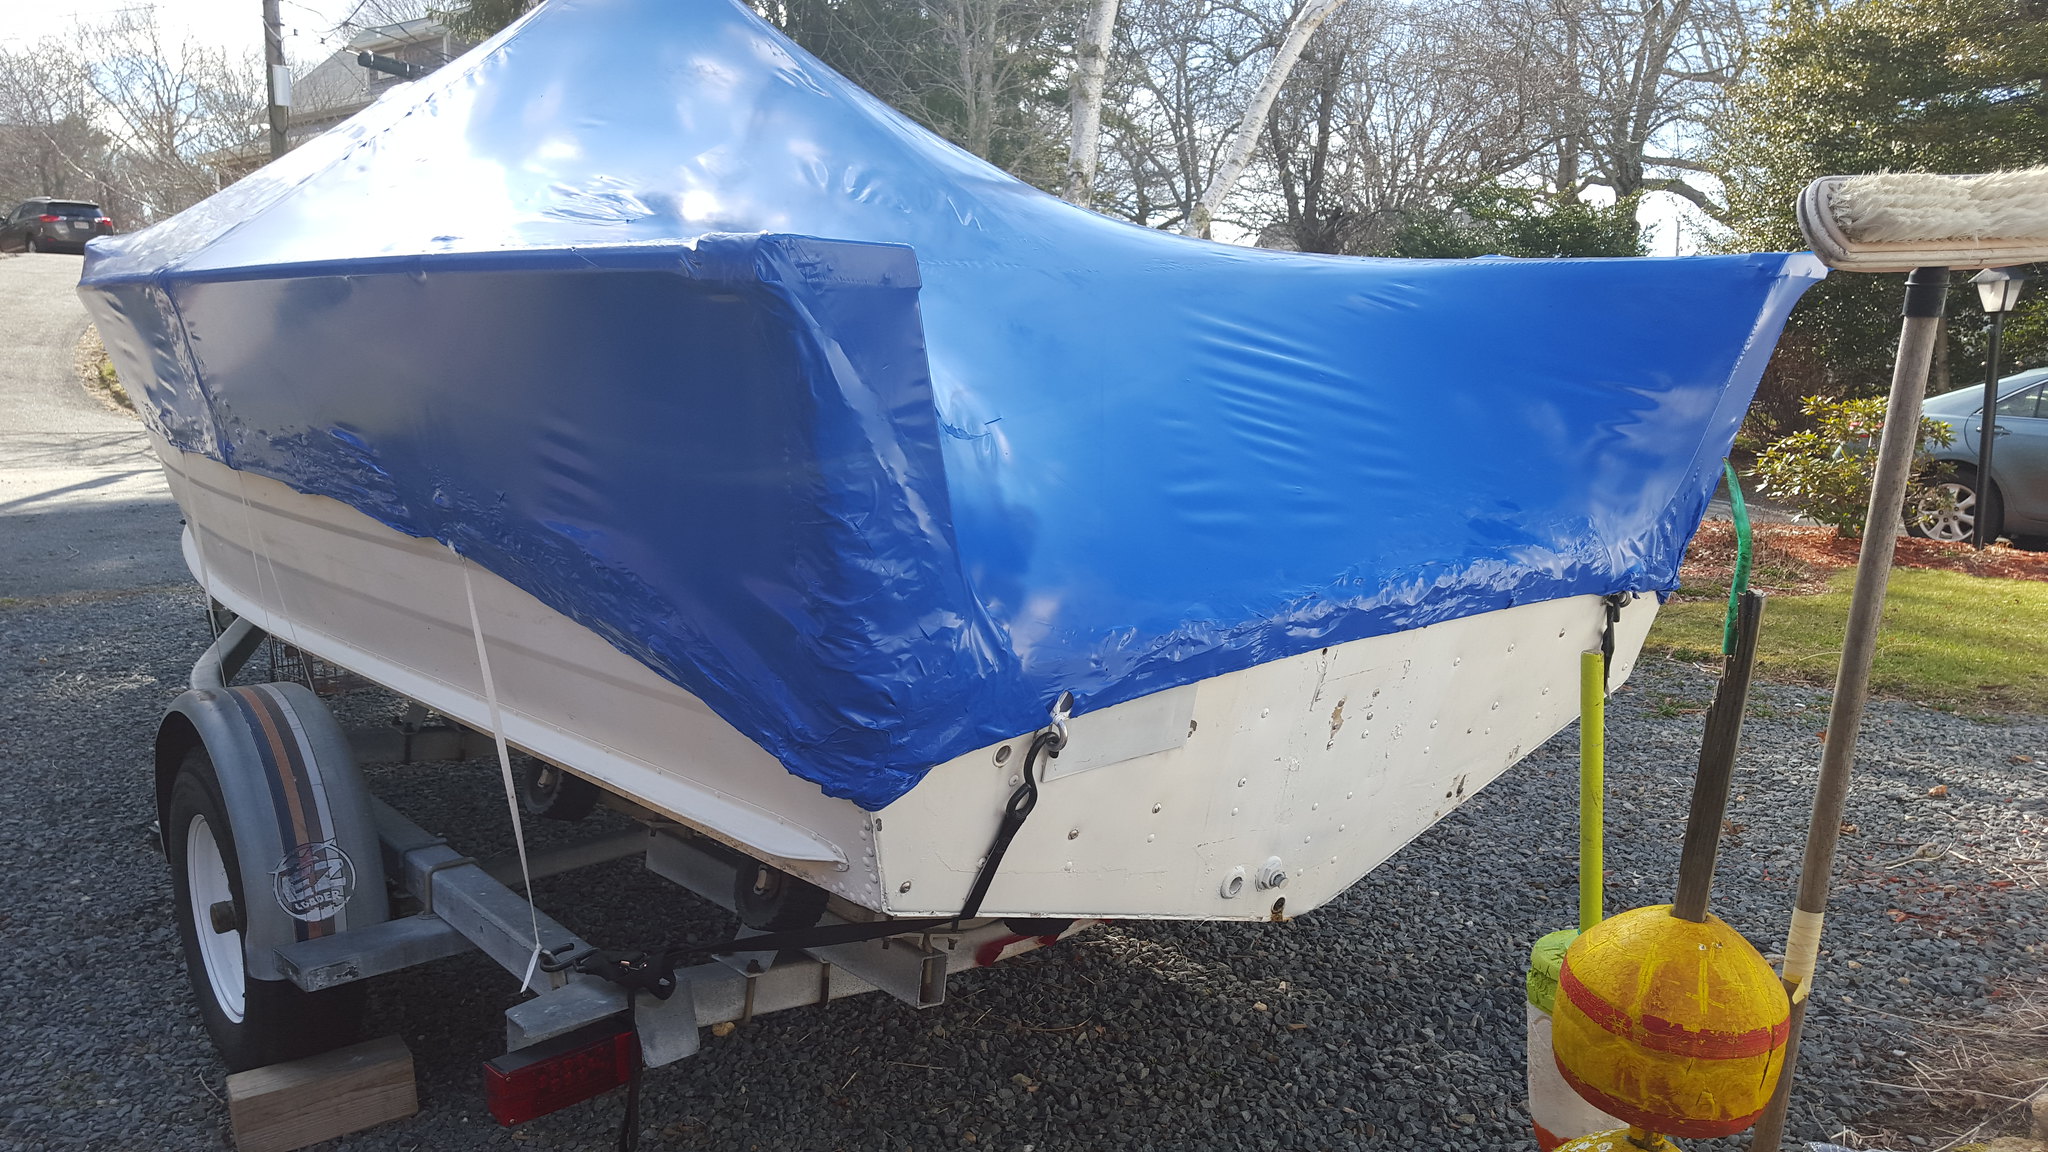
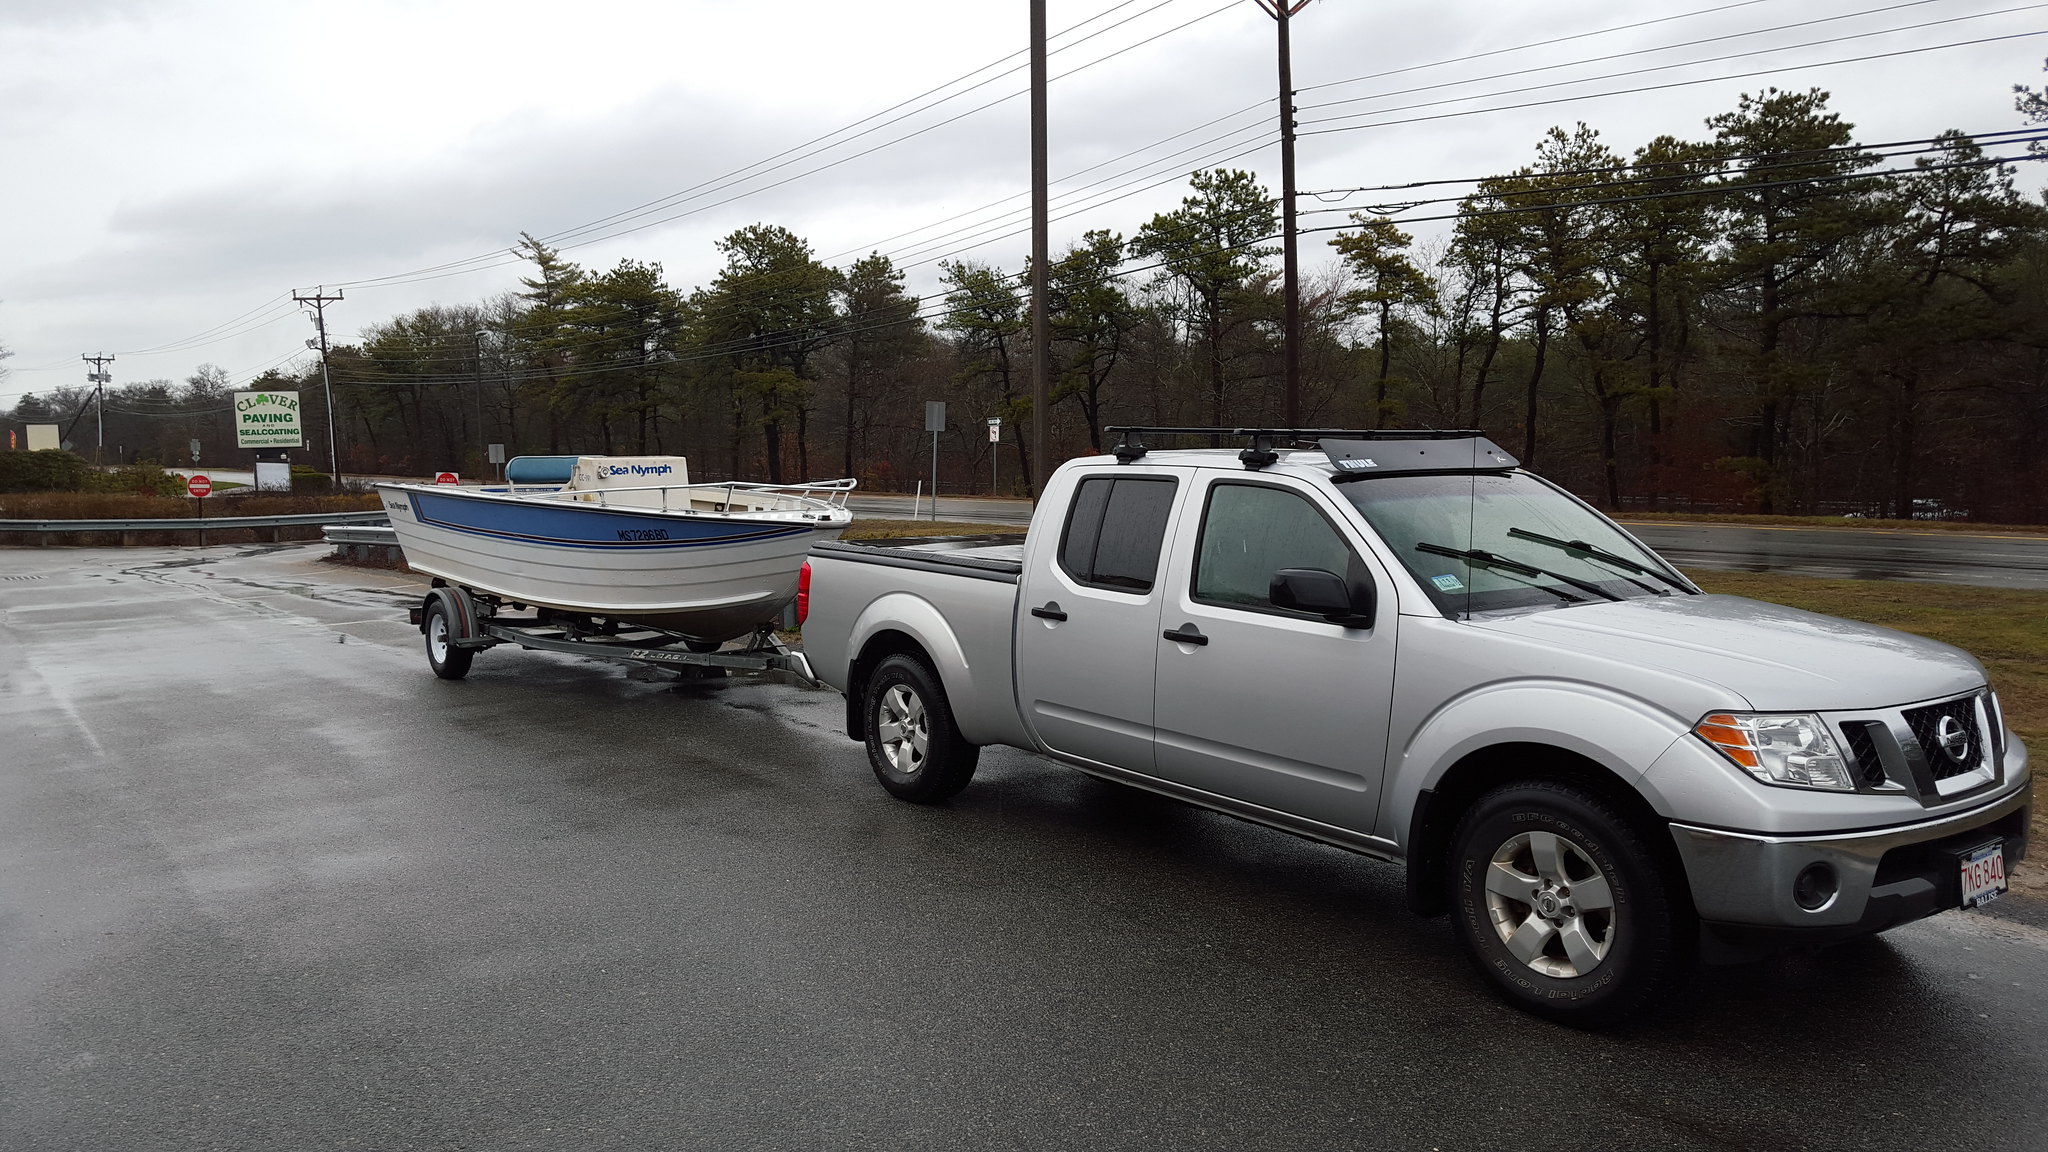
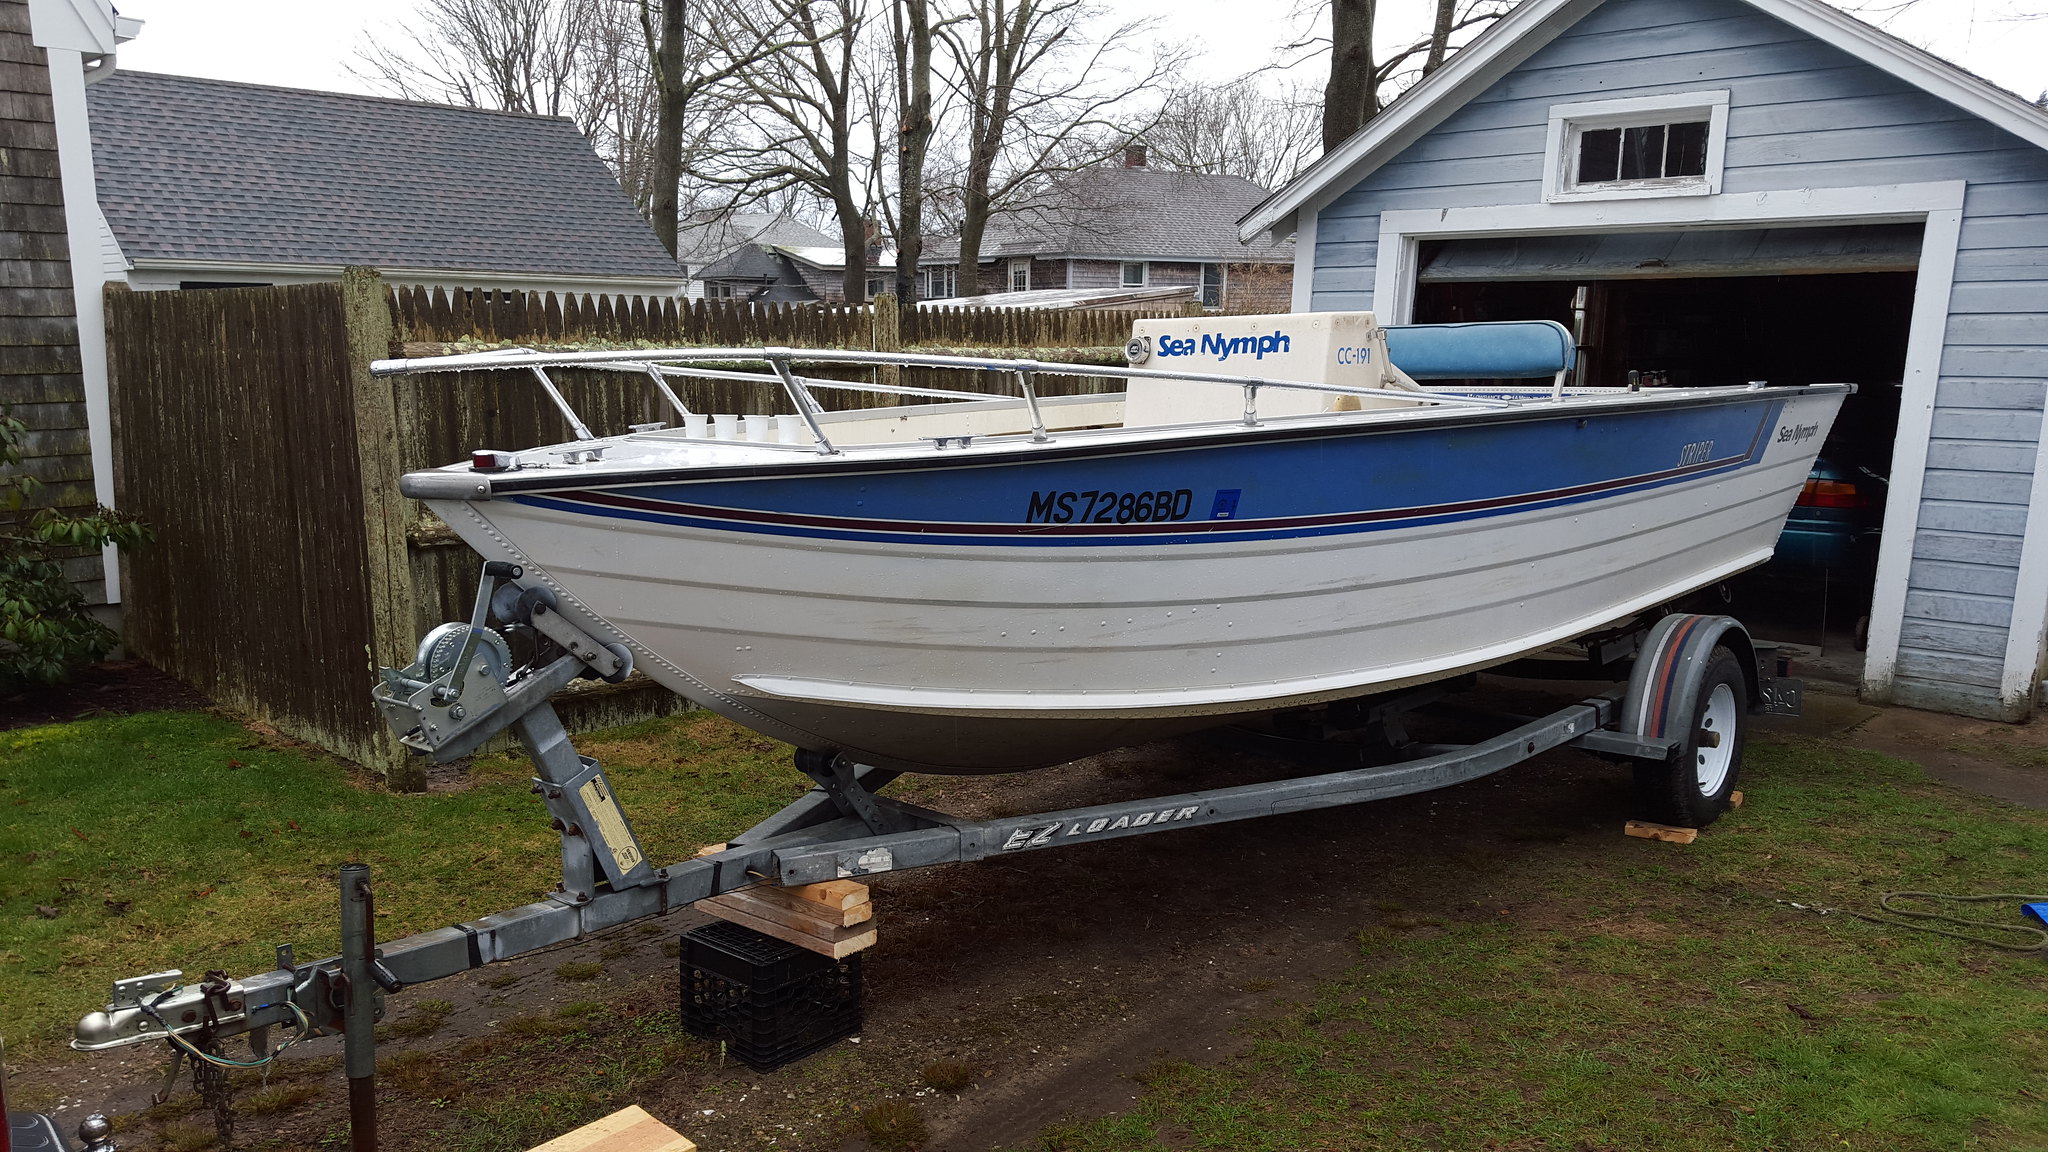
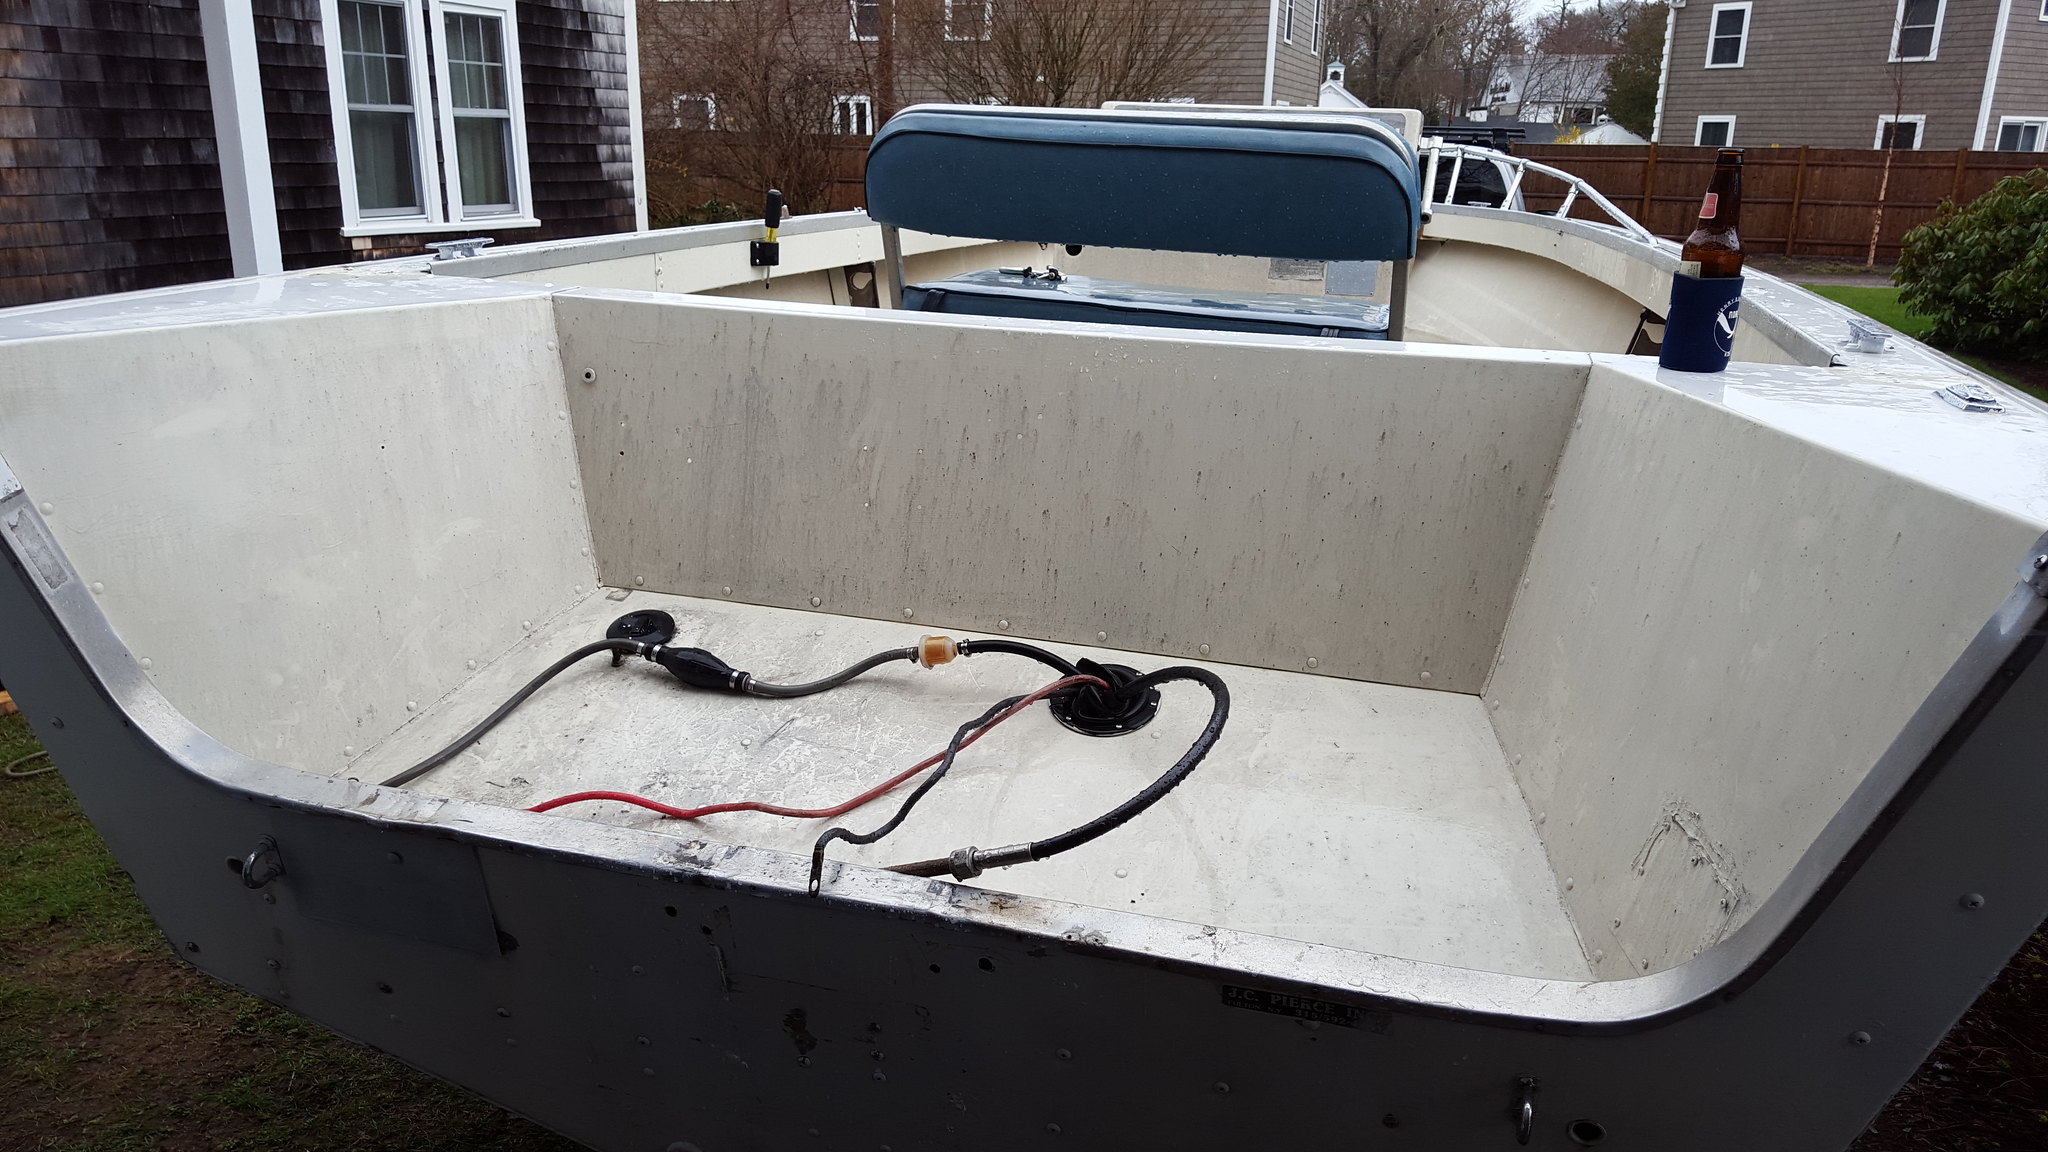
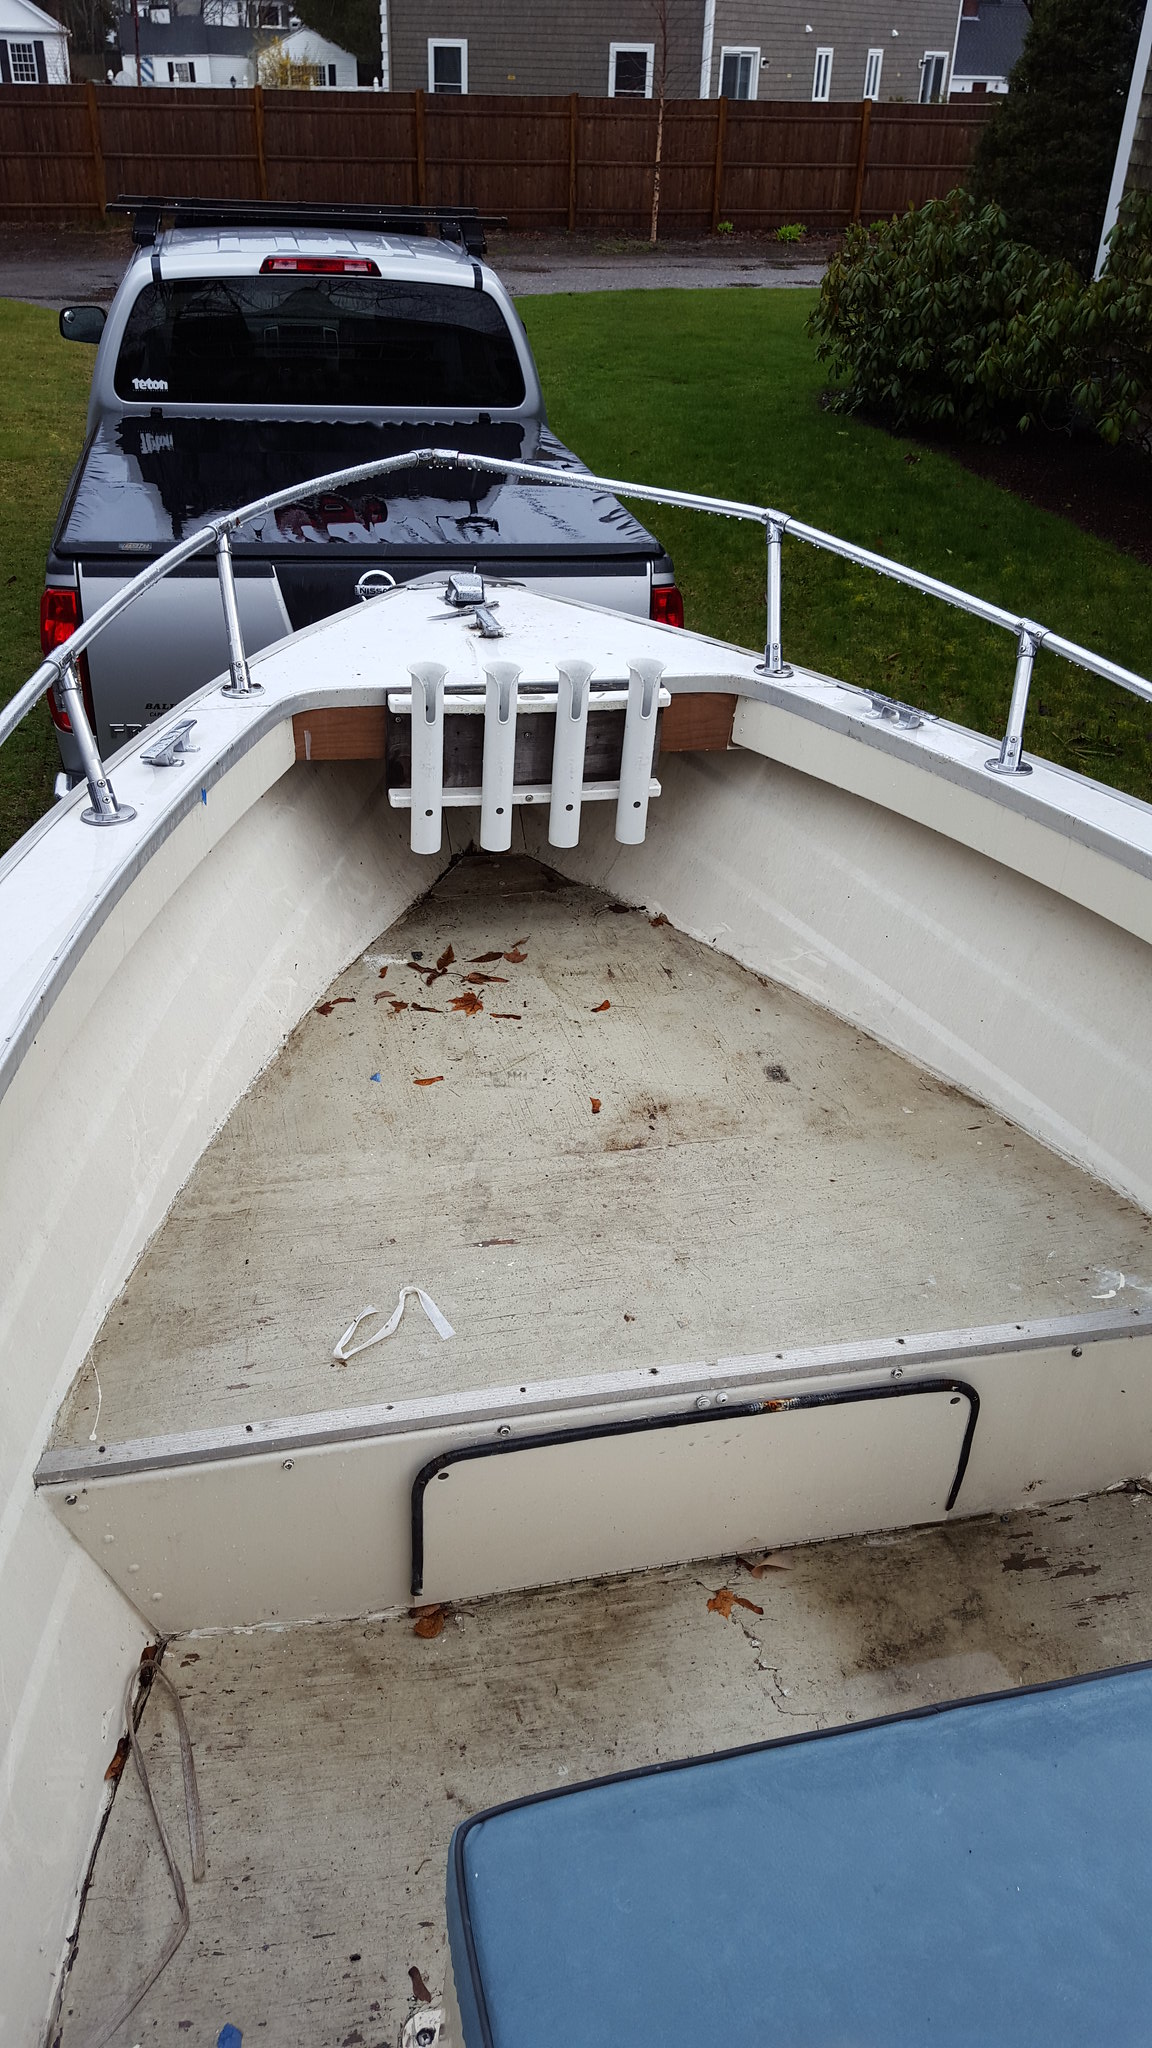
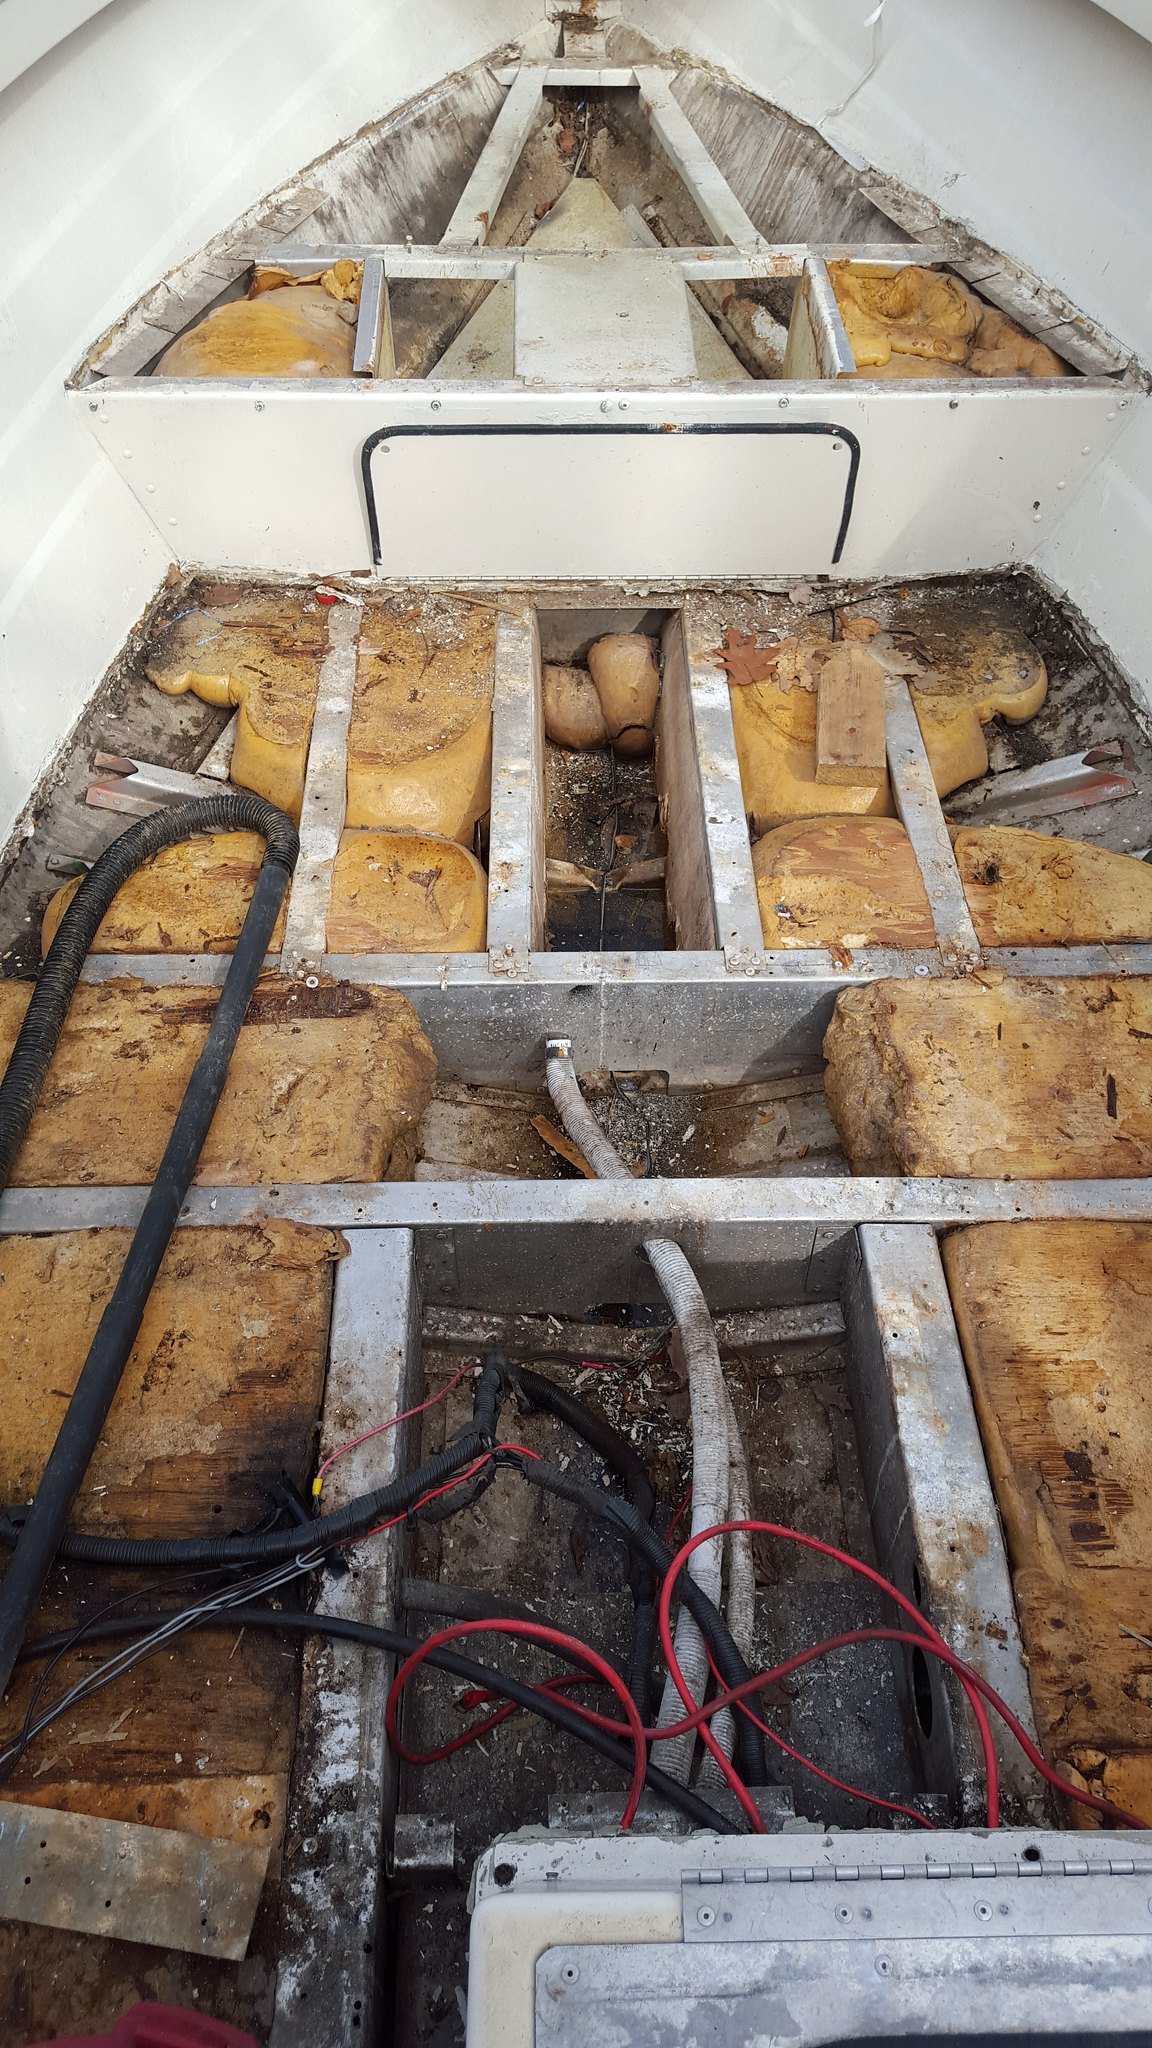
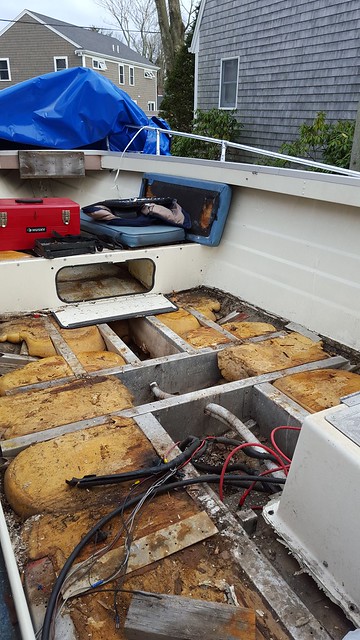
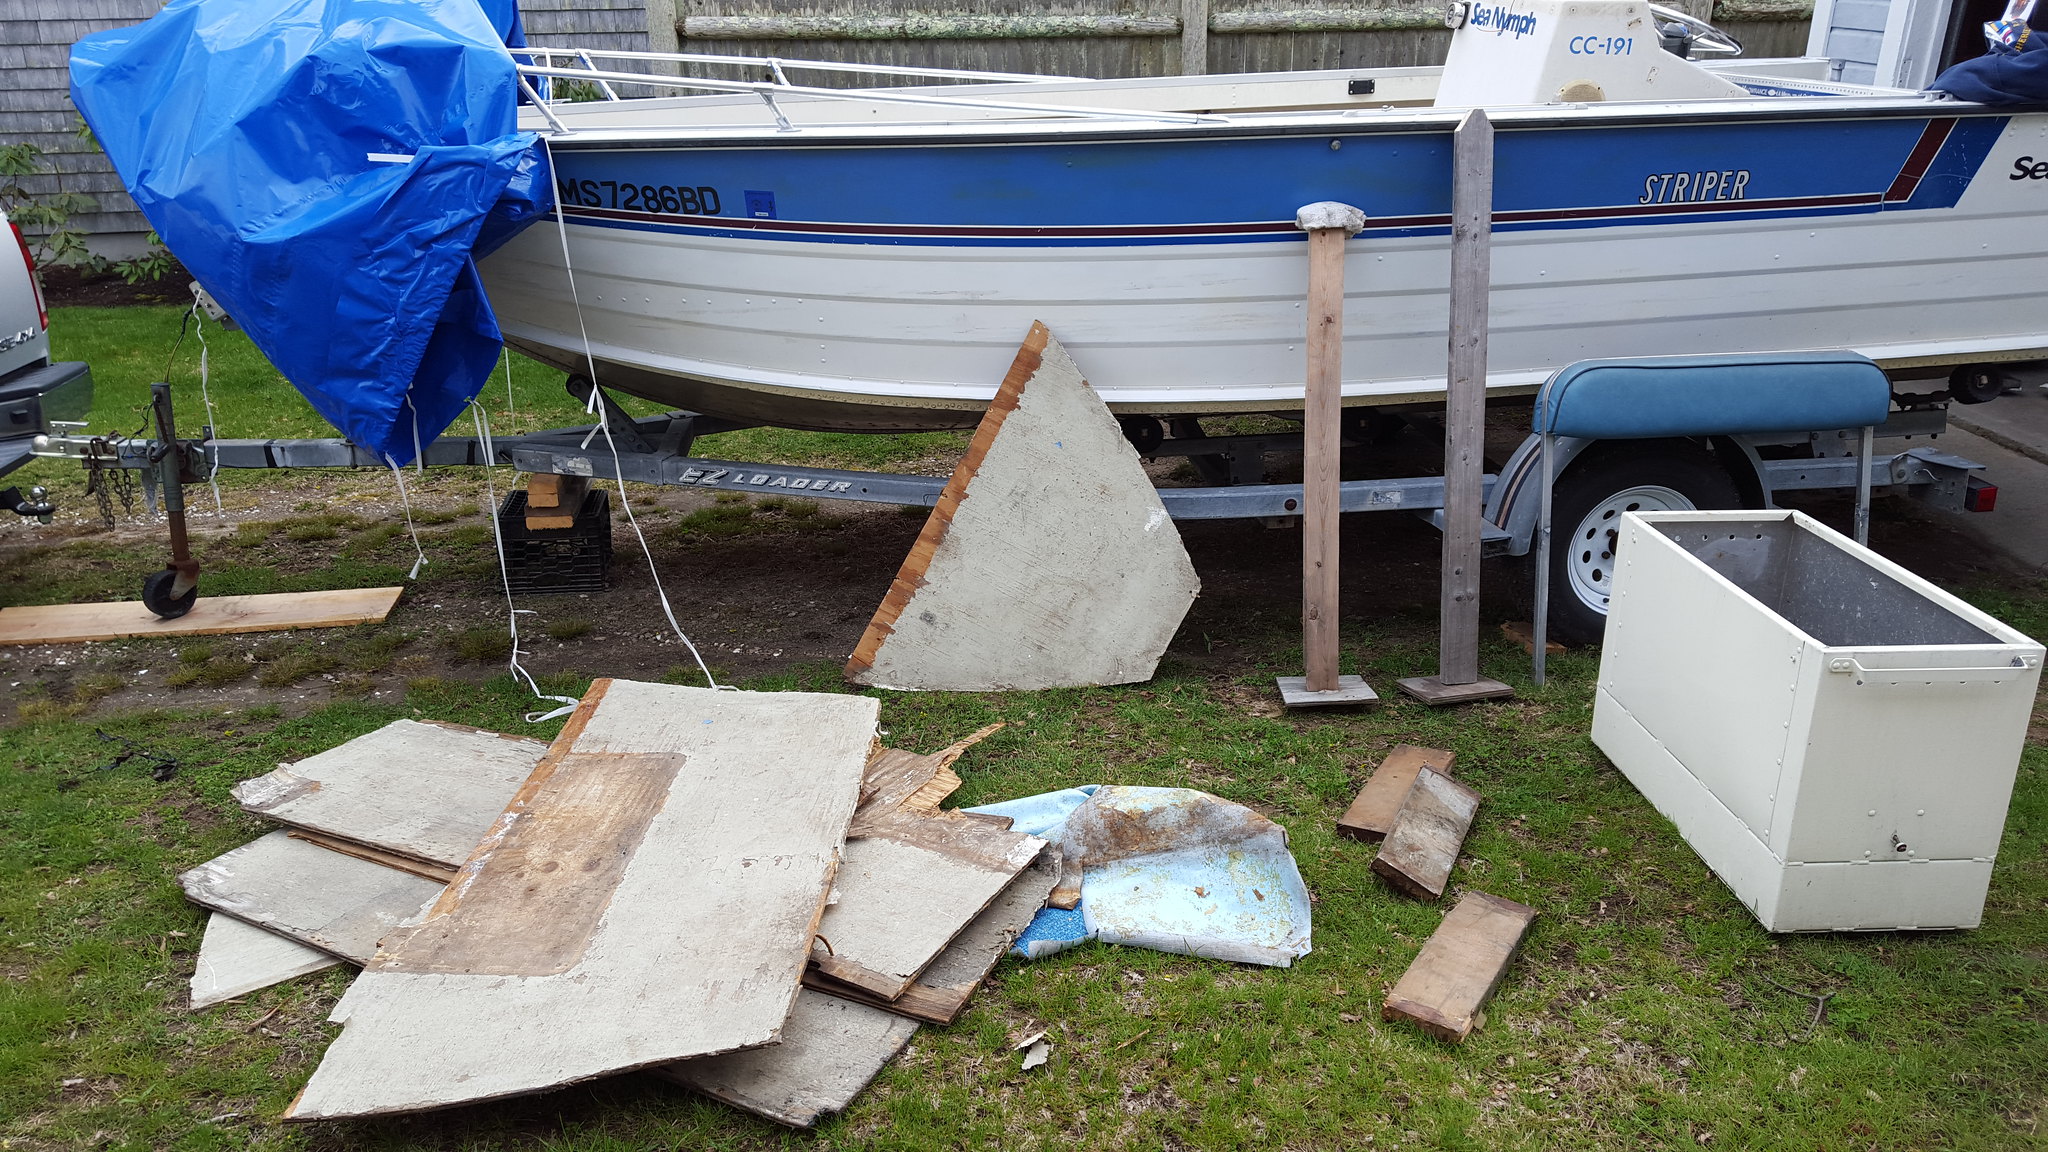
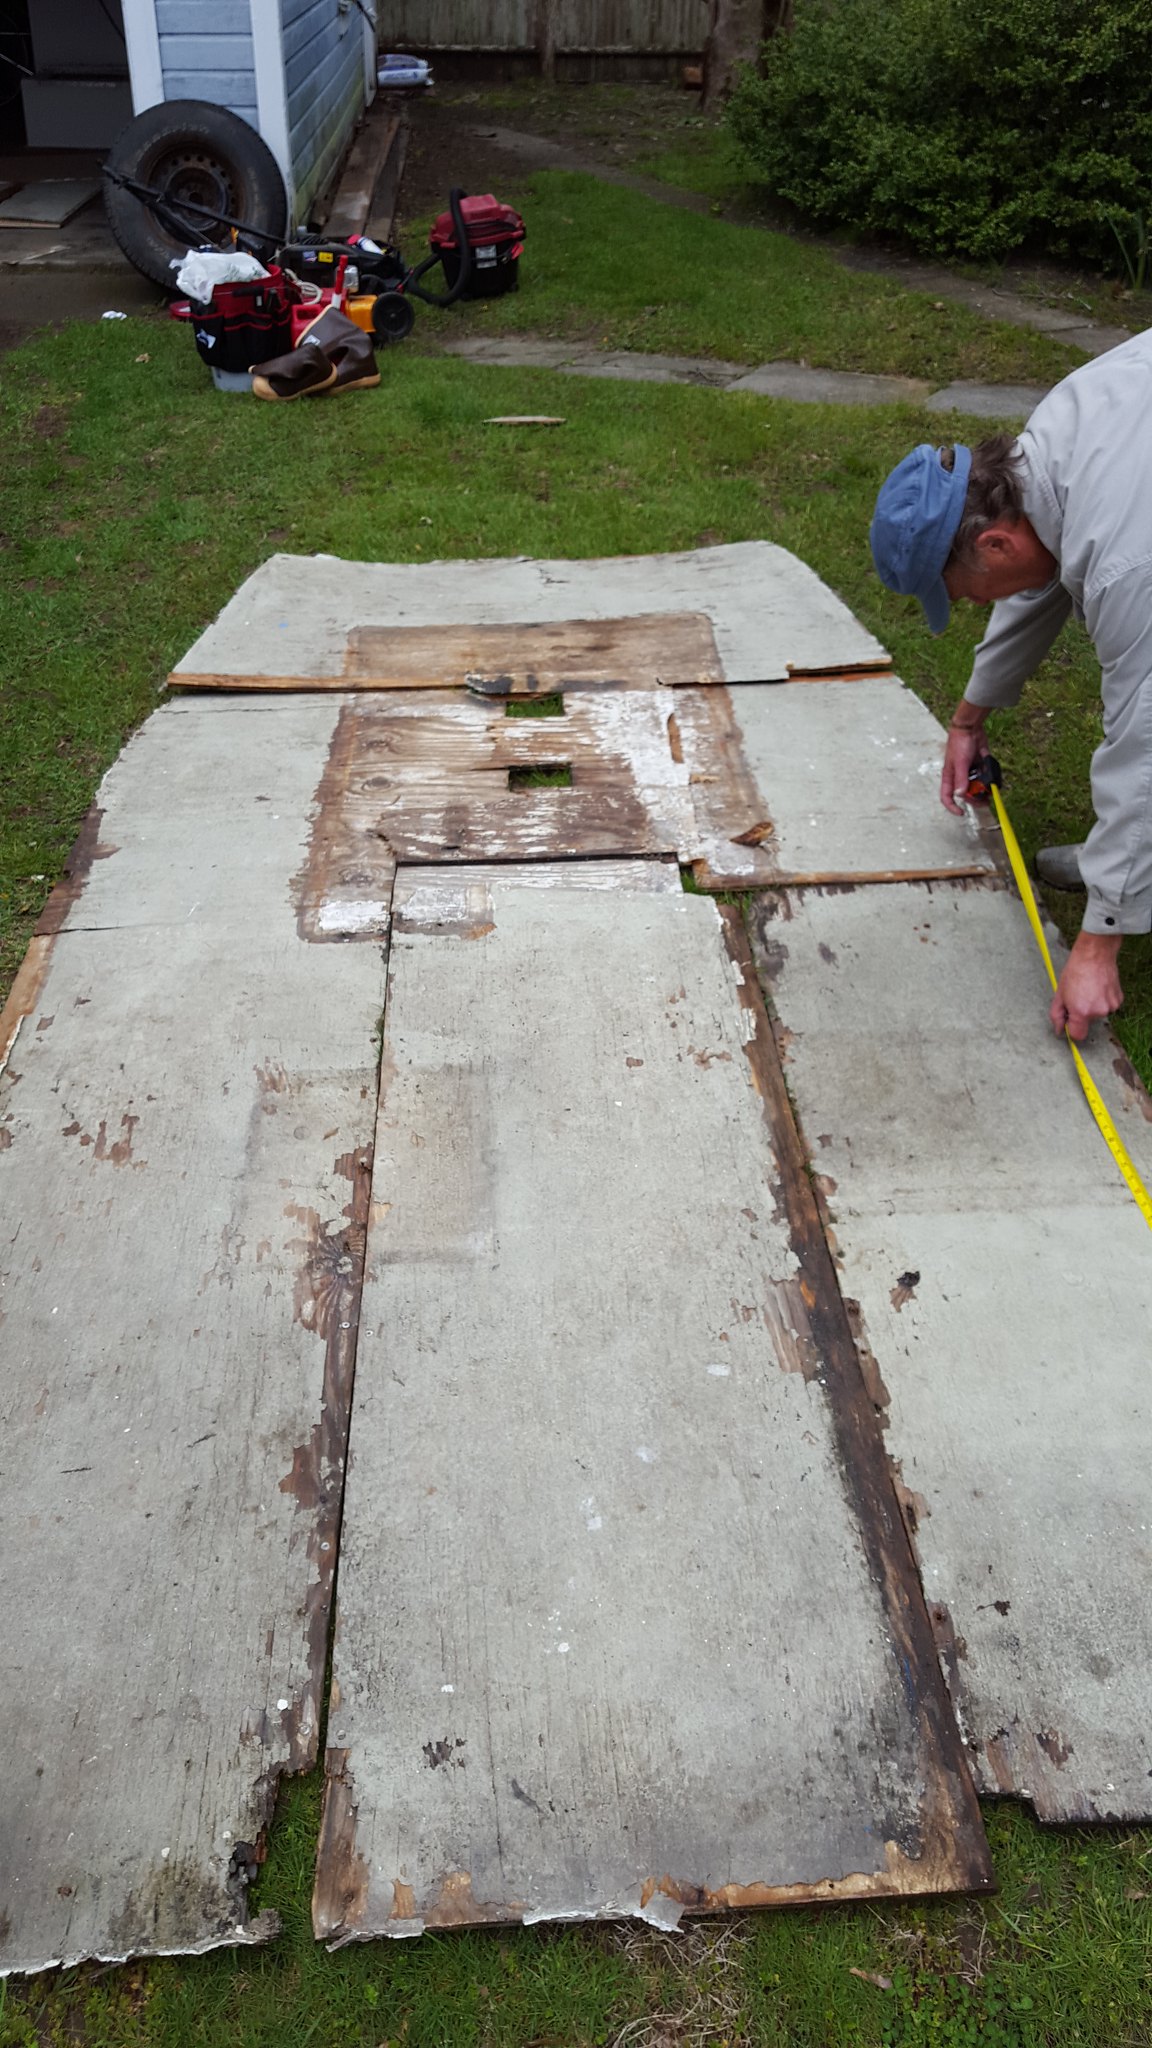
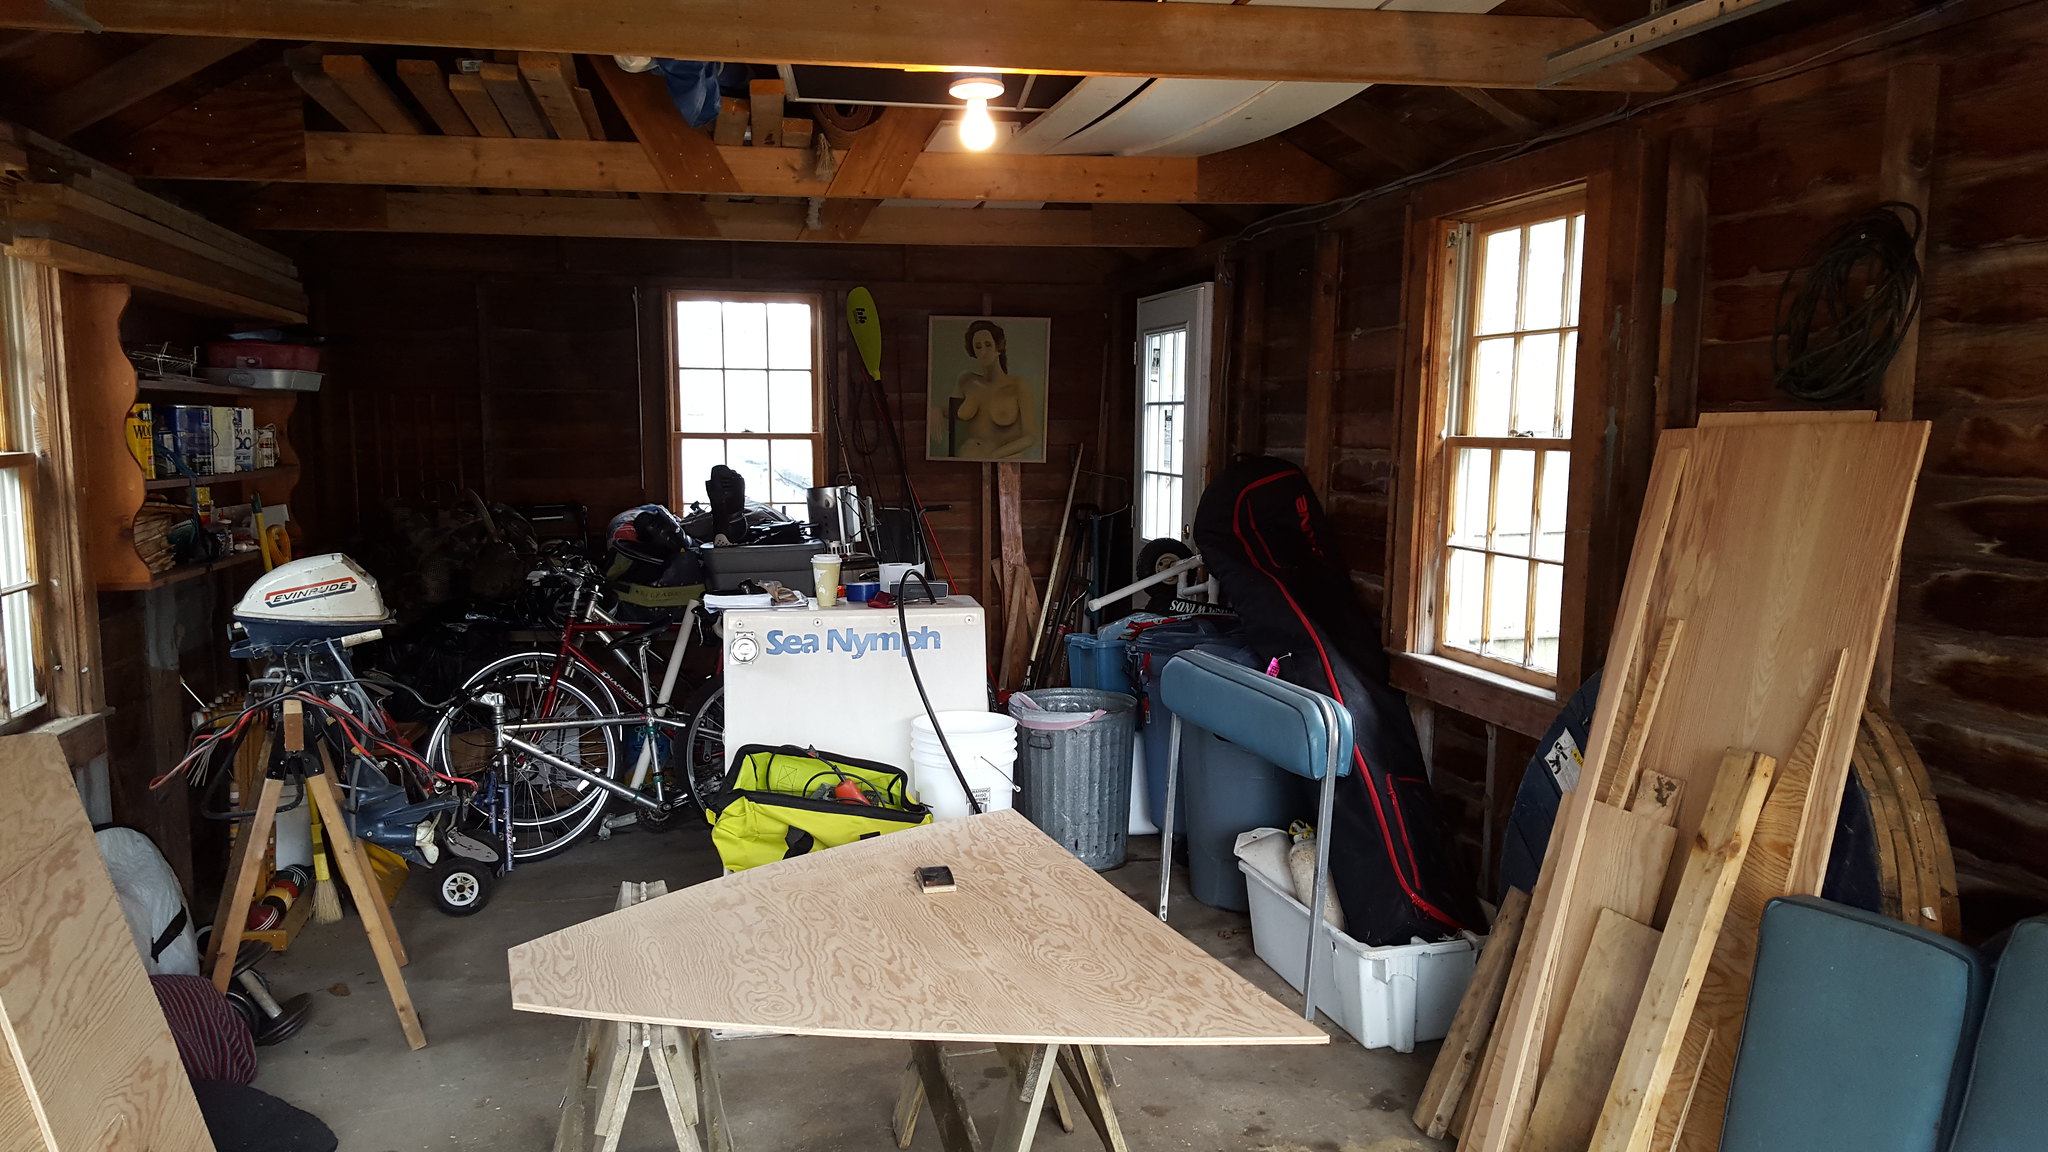
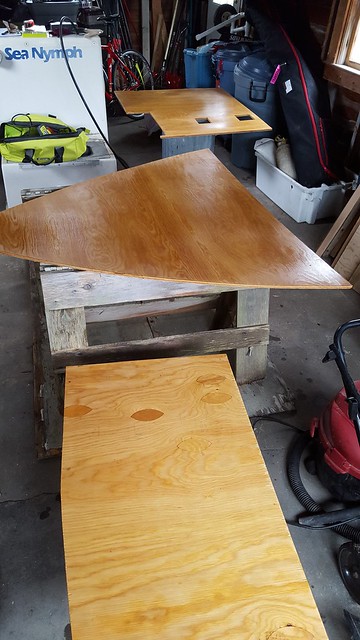
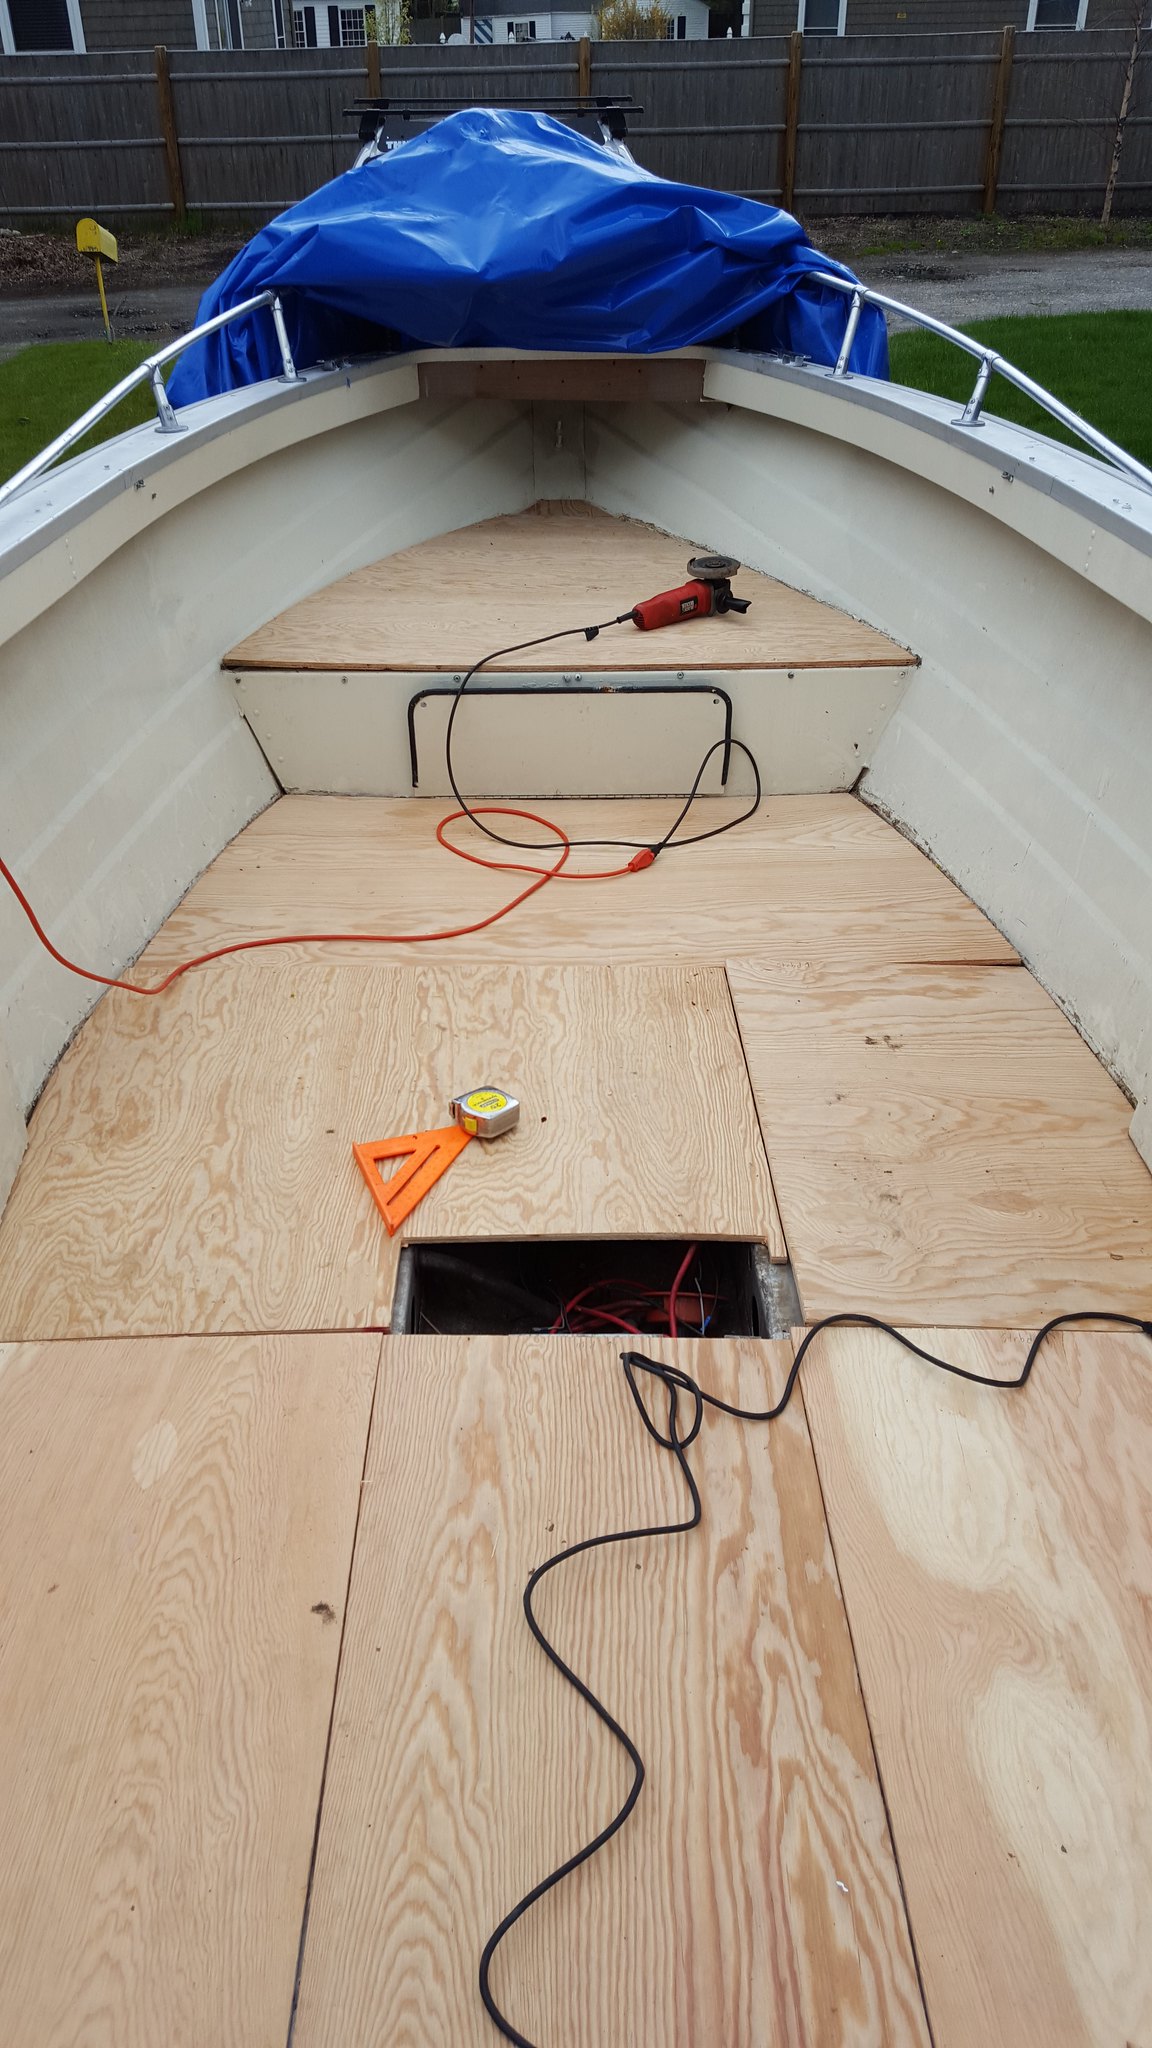
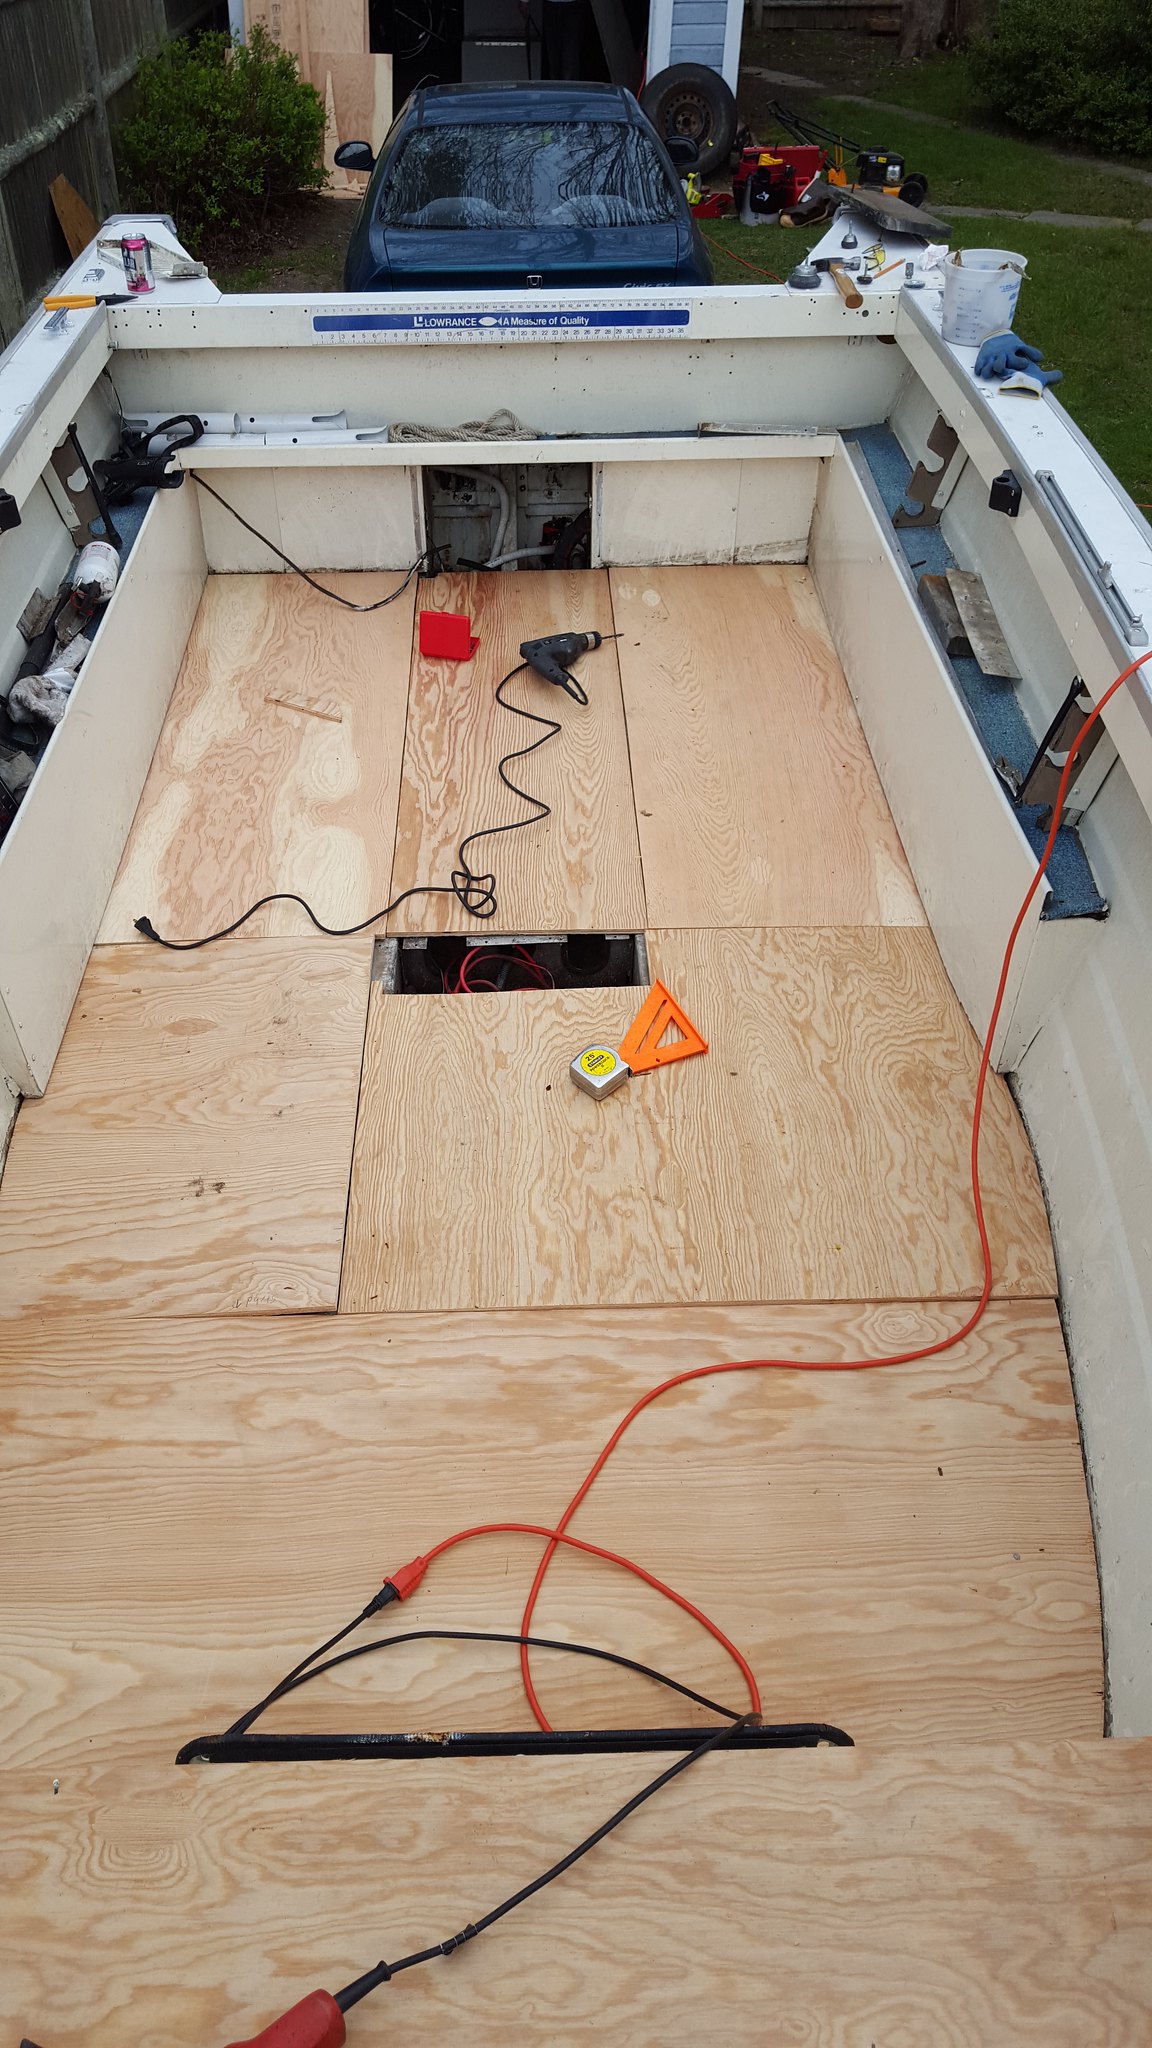
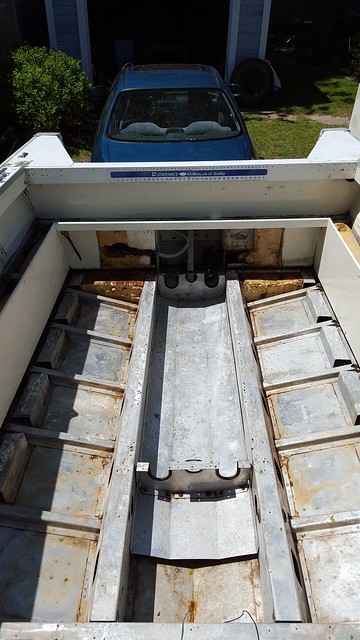
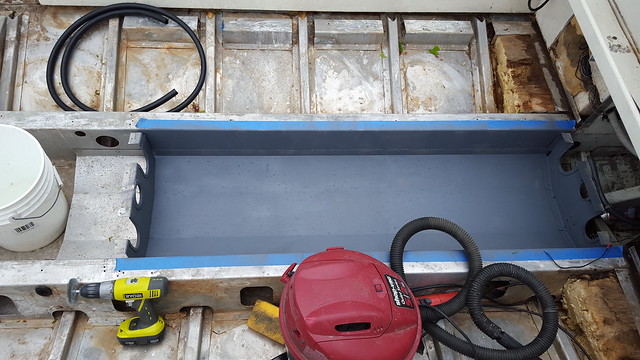
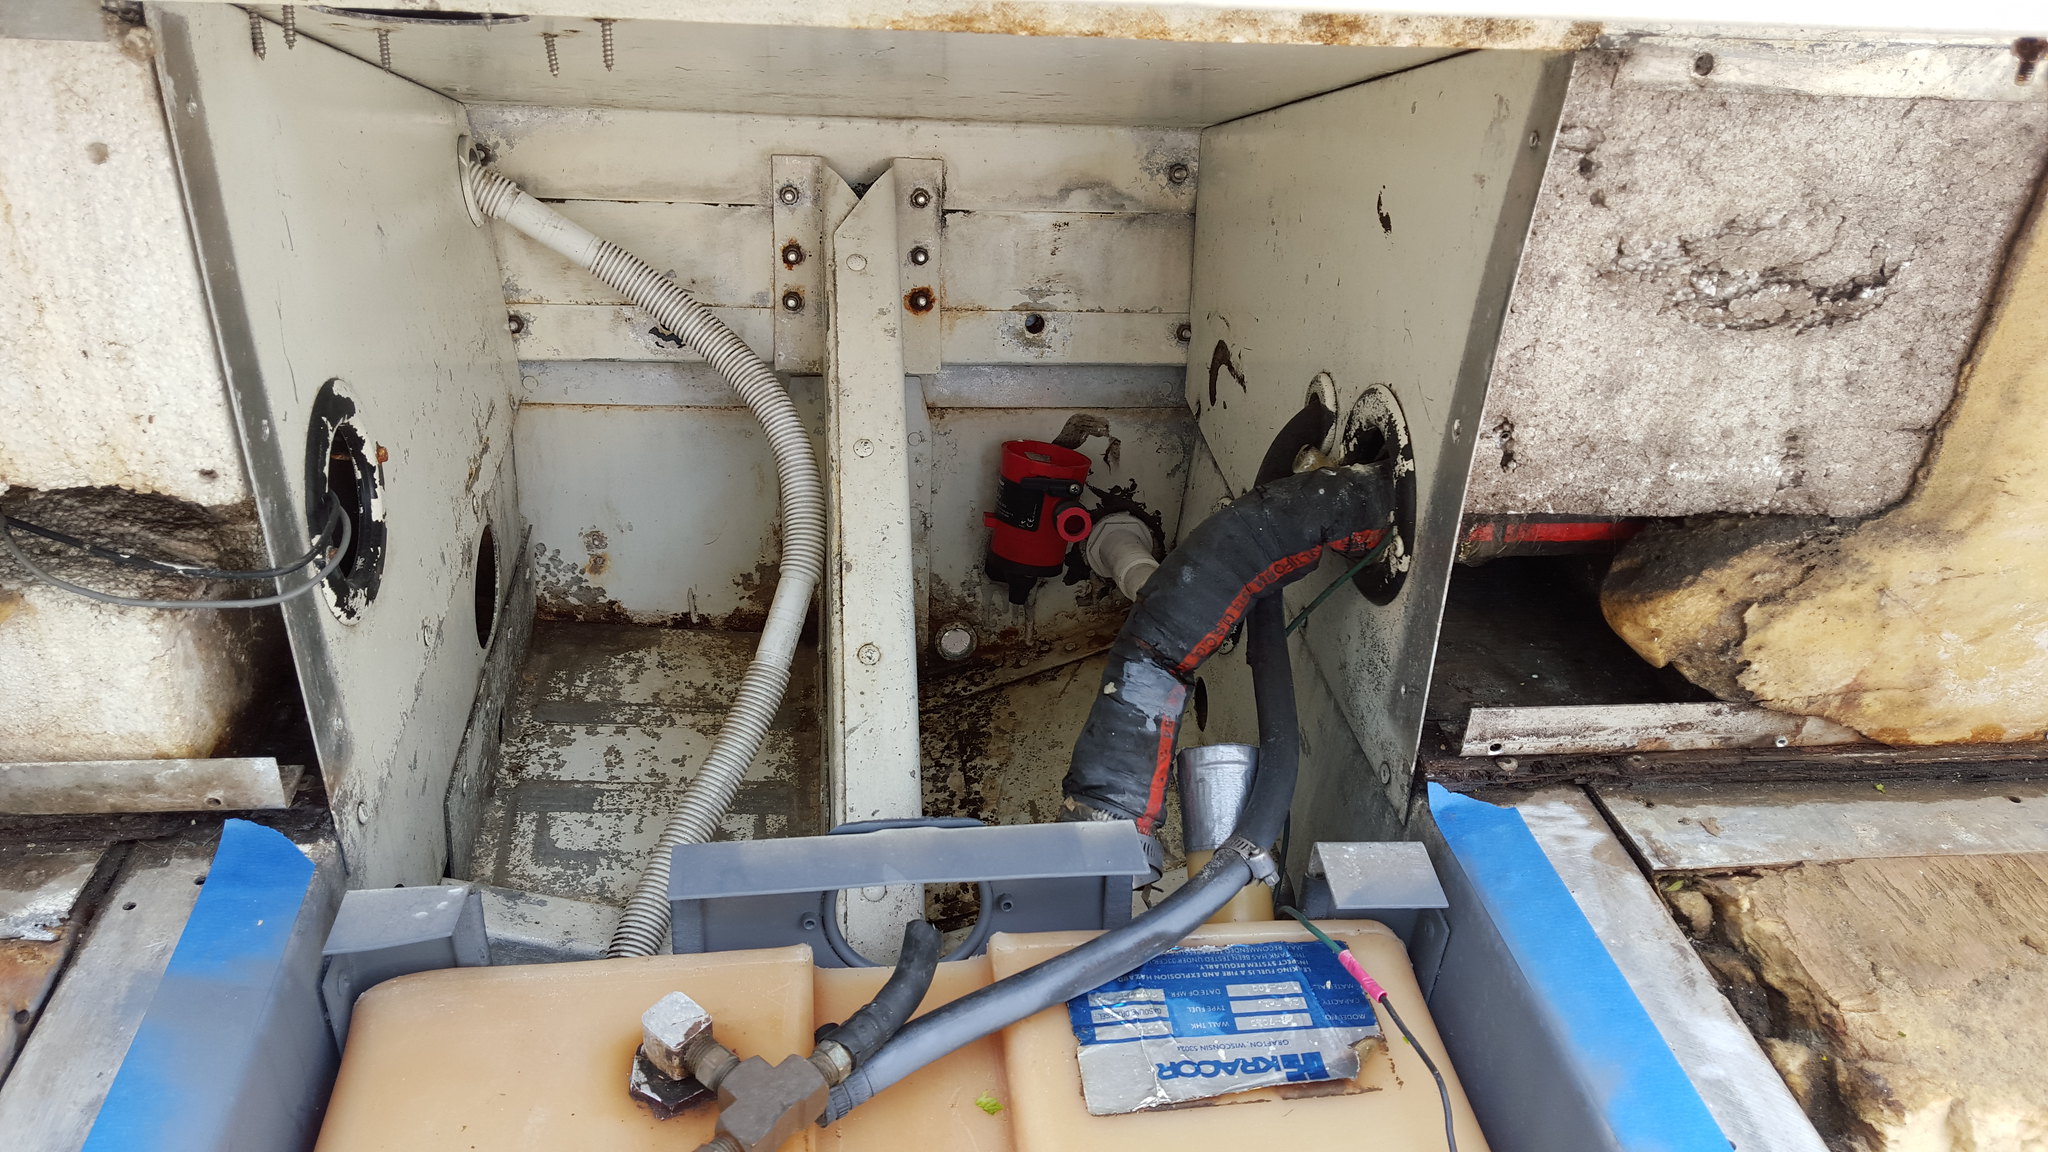
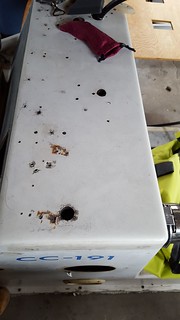
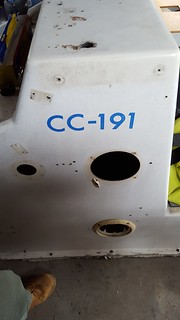
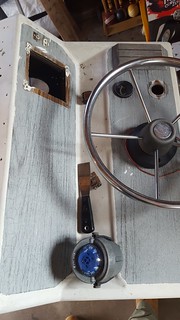
First I want to express how happy I am to have found the iboats community! I'm a member of several online fishing forums and while most provide some tips and help, they are generally only good for the occasional laugh and entertainment. The amount of knowledge and things that I have already learned from this group is staggering, and it is mostly to blame for the reason I decided to buy a project boat instead of a turn-key! So thanks in advance for all of your pictures, tutorials and tips, it has been a pleasure. That being said, I've decided a few months back to pull the trigger on a 1985 Sea Nymph CC-191. I've been searching for a long time now on an affordable boat, in a style that would fit my boating / fishing needs and when I saw this boat online I knew I had to have her! I currently live and do most of my boating on Cape Cod and although tin boats aren't hugely popular in my area I'm particularity fond of them and I'm excited to get her out on the water. Going into the purchase I knew there was going to be some work required but I contemplated for a short bit whether to start the work ASAP or use the boat for this season and tear into it during the off season. However, upon spending the first day with her inspecting from bow to stern, I decided to get right to work, even if it meant shortening my boating season this year. It has also been killing me that since I bought the boat, I've only had 2 weekends at home, the rest being spent 200 miles offshore on my "other" boat, a 208' fisheries research ship. So in my downtime offshore I've been devouring the iboats forums and trying to learn all that I can so that I can hit the ground running when I get back to shore. So that's a brief intro, as soon as I get another post I'll start adding pictures and I hope some of you will tag along during this rebuild to lend a hand, I can certainly use it!

Cheers!
Acpics80
 

Frey0357

Petty Officer 1st Class
Joined
Mar 13, 2014
Messages
313
Hello there Acpics! Welcome to the forum. Exciting another Sea Nymph! I recommend starting a Photobucket account (which is free) to make the photos easier to see and manage.... you simply open the photo to view it in photo bucket and then Copy/Paste right into your post space here in your forum. You can then resize the photos if you wish, they are nice and big that way and fellow iboaters can easily view them.

Good luck and feel free to reach out to us....I will tag along, this will be great!

Frey
 

Acpics80

Seaman Apprentice
Joined
Mar 17, 2016
Messages
41
Thanks Frey! I will first try to use my Flickr account, if that doesn't work I'll start up a photobucket account. I know pictures are what keeps me interested when I'm following a post.
 

Acpics80

Seaman Apprentice
Joined
Mar 17, 2016
Messages
41
Here we go, starting at the beginning from when I first went to look at the boat:

I was pretty impressed at the condition of the hull from a first glance, it seemed in great shape!


After another trip to view the boat I decided to pull the trigger and bring her home. Of course we had to stop to pick up some celebratory beverages! The windshield was removed when the boat was shrink wrapped the previous winter.
 

Acpics80

Seaman Apprentice
Joined
Mar 17, 2016
Messages
41
Finally back at the garage and ready to be torn apart.
27237891965_9d356f48d9_k.jpg


A view of that giant Sea Nymph splash well.


First look inside and of the floors and casting deck.
 

Frey0357

Petty Officer 1st Class
Joined
Mar 13, 2014
Messages
313
Hello Acpics, she looks nice! The condition of the hull does seem very good for an '85! In your 1st post you mentioned working on her and making it your own, this is a good plan. I would recommend that you inspect very closely, especially under decks! I can see from the last pic that there is a crack in the flooring and what might look like a slight warp, and while replacing the flooring is a good start it is the foam and whatever else might be lurking under there that is likely compromised. Oh and then there is always the famous transom check....If the floors and foam is compromised likely the transom needs replacing.

Likely you know all of this already....just thought I would share my experiences...

She's got 'good bones' tho, and seems like she would make a great fishing vessel! :D


Frey
 

Acpics80

Seaman Apprentice
Joined
Mar 17, 2016
Messages
41
The floors were in pretty rough shape, buckled and cracked in some places, as you can see from the picture above, and really soft. They were also peeling off from the sides of the hull, opening up large gaps so I knew it was going to be pretty wet below. After removing the deck I got my first glimpse at the dreaded foam.....


I was pretty nervous about this moment, knowing that if the foam was wet, it had to go. Fortunately after digging around, cleaning and taking some core samples throughout the boat, only a few blocks of the foam showed any moisture, mostly in the stern and some small pieces from under the gunnel rod racks. Besides the stern the worst spot was around the fuel tank vent hose, seen on the port side. Knowing that I was going to replace that hose anyways I simply dug a channel in the foam in order to get to the hose and be able to remove it. This also serves as a channel for drainage in the future. Other than that it was in good shape. I was also happy that I was able to removed the foam all in large chunks, essentially in the shape that you see it, and that I'm able to easily place it back into place and reuse it.

So here is my first question I guess. Since the foam is mostly in good shape and reusable, is there a way to seal the foam for extra protection? I think I read in previous posts that some members have sealed theirs with varnish? If that is an option I'll take a piece that I have removed, hit it with some spar varnish to make sure it doesn't dissolve in front of my eyes and maybe consider this as an option. I also plan on cutting some drainage channels into the bottom of these pieces to aid in drainage to the center of the boat and to the stern.

Thanks for reading, hope to hear some feedback.

-Acpics80
 

Acpics80

Seaman Apprentice
Joined
Mar 17, 2016
Messages
41
Thanks Frey, I'm playing catch up right now so there is certainly more to the story! I'll try to post pics and updates as quickly as possible to get to the current state of the boat because I certainly have a lot of questions now! Thanks for reading and for the advice!
 

Frey0357

Petty Officer 1st Class
Joined
Mar 13, 2014
Messages
313
Acpics....As for sealing the foam I am not sure, to be totally transparent. I have seen some members post that they replaced the pour in style foam with the sheet foam cut to the proper size, taped or glued the pieces in blocks, then placed them into plastic bags to prevent moisture from soaking into them. As the foam starts to break down, it loses its ability to resist moisture and soaks it up. I personally replaced all the foam in my boat for this reason, but that was my decision. Maybe others will chime in with their experiences?

Here is a pic of my replaced foam and installation: Certainly not pretty, covered up and functional! :)
IMG_1717_zpsyfl4xsao.jpg


Frey
 

Acpics80

Seaman Apprentice
Joined
Mar 17, 2016
Messages
41
Here is a pic of my replaced foam and installation: Certainly not pretty, covered up and functional!
Frey

Hey as long as it provides flotation in a worst case scenario that's all that is important!

How was cutting all that foam to fit, a bear of a job? It looks like yours would also provide additional drainage and sound dampening which would be welcomed. Hmmm, I'll have to think about this one, I know that some of mine will definitely need to be replaced, especially just forward of the splash well. The remaining wood under there is rotten and needs to go, meaning the foam must go too so I can access that space. Maybe I'll replace the foam in that area with something similar to yours, glued together into blocks. I'll try to find a pic of that area that I'm speaking of.
 

Frey0357

Petty Officer 1st Class
Joined
Mar 13, 2014
Messages
313
Acpics,
The foam job at first was challenging, but after a bit I learned there were some ways to make it go faster and easier on myself! I chose to use the 1" 4x8' sheets mainly because they were on sale at the time, but that turned out to be a blessing because I found that I could easily score with a utility knife about 1/2 way into the material and then simply snap it and it came right apart. I have to work on my project at night when the family goes to bed..lol..so I would say after about 4-5 days I foamed the whole boat! I didn't find it to be terrible, just needed to measure every once in a while because as you move forward in the boat the dimensions change. I am happy that I did it, turned out well and now that I am moving onto replacement of my flooring I have piece of mind, in case of emergency!

Frey
 

Frey0357

Petty Officer 1st Class
Joined
Mar 13, 2014
Messages
313
I have one more addition.....

Based on my experience and my "developed" hatred for the expansion foam, and your boat was my boat, I personally would replace it all. My foam was similar to yours in look, but was loaded with water and removing it has emptied several hundred pounds I was pushing around in my boat!

Hey what motor you plannin' on placing on your boat?

Frey
 

Acpics80

Seaman Apprentice
Joined
Mar 17, 2016
Messages
41
Based on my experience and my "developed" hatred for the expansion foam, and your boat was my boat, I personally would replace it all. My foam was similar to yours in look, but was loaded with water and removing it has emptied several hundred pounds I was pushing around in my boat!

Hey what motor you plannin' on placing on your boat?

Frey

Well I think you're right Frey, as much as I would like to save the work and money on replacing the foam I think it's the right move. At least then I'll know that everything below my decks is new, dry and sound. I'll be heading to one of the big box stores as soon as I get back to land to pick some up.

As far as an engine goes I broke the bank. I have very little mechanical skills and knowledge on how to fix an older outboard so after searching around with no luck I decided to go new. I visited all the dealers in my area and after seeing my options and what kind of deals I could get I settled on a new 90 hp Tohatsu. I'm pretty excited about this engine and can't wait to get it hung on the back of this boat, but first I still have a ton of work to complete!

Sitting in the showroom waiting for me to finish the work! I'll need to pick up many more sea days to pay this baby off.
27262847175_c94bf1913a_k.jpg
 

Acpics80

Seaman Apprentice
Joined
Mar 17, 2016
Messages
41
As I mentioned before, my deck came off in solid pieces so I was able to use it as a template, thank god. I enlisted the help of my dad and with his help we got the new floors cut and began sealing them. The original decks were 1/2" and because they fit under parts of the gunnels I went with the same thickness, although I would have like to go thicker. I know marine grade is best but I couldn't get my hands on any locally and after further research I settled on 1/2" A/C exterior grade. To seal them I used the "old timers formula" found here on iboats. Each piece received three coats, top, bottom and sides and was allowed to dry between coats. I think these will last for a long time as long as I take care of them.

Console moved and the decks and bench seat removed:
26987077310_082dff5318_k.jpg


Laying the old decking out and with the help of my dad, planning on how many sheets we will need to buy. It's been great working with my dad on this and picking his brain on the best way to go about this. I was lucky enough to grow up on boats so I'm really excited to finally have one of my own and be able to take him out fishing!
27193152811_c2ce4a34c1_k.jpg
[/url]20160507_111319
 

Acpics80

Seaman Apprentice
Joined
Mar 17, 2016
Messages
41
With the cold, wet spring we had here in the Northeast I needed to bring part of this project inside so that I could keep working. First, the car in the garage had to be moved out but since it hasn't been driven in months you guessed it, the battery was dead.....

Had to bring the truck up into the yard and jump the car through the garage window :lol:. With the car out of the way I was able to set up shop and start sealing the decks.

27193314681_f077ab6f1e_k.jpg


Acpics80

Seaman Apprentice
Joined
Mar 17, 2016
Messages
41
With a few adjustments the new decking fit in nicely. Don't mind that weird tab on the center piece, it has since been cut and squared off....I'm not sure what I was thinking there!


After these pictures were taken the decks were removed again so that I could sand and seal them and continue working inside the hull.
 

Frey0357

Petty Officer 1st Class
Joined
Mar 13, 2014
Messages
313
Nice decision on the motor Acpics! A 90 4 stroke should really push that aluminum hull nicely! That wasn't a choice for me, but congrats for you!!! I know you are getting us caught up, but project is moving along nicely! Nice painting in the background in the garage there! Is that a Picasso? Lol.

Yeah replacing the foam is not that bad and if you do it you will feel better knowing that all is well below, and hey you might find some surprises that you might not have otherwise found, I know I did! :eek:

Keep checking that hull for loose rivets and any potentials for water ingress, I found many and some where the factory simply missed with the rivet installation.

Keep moving forward really looking good. :D

Frey
 

Acpics80

Seaman Apprentice
Joined
Mar 17, 2016
Messages
41
Nice decision on the motor Acpics! A 90 4 stroke should really push that aluminum hull nicely!

Frey

Thanks Frey, I'm beyond excited about that engine!

Haha I forgot that painting was hanging up........found it in the back of the garage and figured it was a nice touch to the shop.

So between coats on my decks and waiting for them to dry I got to work cleaning up the hull and looking for trouble spots. With the exception of the foam below the casting deck and the remaining blocks in the stern, all the foam was removed. I then repeatedly washed and used the shop-vac to try and get all the crap that had accumulated below the deck over the years. It seemed that no matter how many times I washed the inside more junk would reveal itself and ultimately clog up my limber holes. I think I have it cleaned out pretty good at this point though, maybe a few more rinses and it should be good to go.


I had to do some grinding and scrubbing on a few spots to remove some light corrosion but for the most part the hull is in good shape. The areas with corrosion I cleaned up real good and then filled with JB Weld.

After removing the belly tank, which I was happy to see is plastic, I cleaned up the false floor that the tank sits on and for some reason sprayed it with an aluminum primer. I just felt it need to be cleaned up a bit!


The foam to the right in the picture above still needs to come out, along with the rotten deck above it and most likely the foam above so that I can access that area. I'll post a pic of that area in another post because I definitely have some questions.
 

Acpics80

Seaman Apprentice
Joined
Mar 17, 2016
Messages
41
Here's a shot of that area I mentioned above:


If you look to the right, the foam below the deck is going to come out, along with that small remaining piece of decking and the expanding foam and white crumbling crap above it. My question is what should I replace that foam with. I'm assuming it would be wise to put flotation back into that space but what would be best? Cut some foam boards up and makes blocks?
 

Acpics80

Seaman Apprentice
Joined
Mar 17, 2016
Messages
41
Between working on the decks and cleaning the hull I also started working on the center console. The model has a fairly large console for this size boat, including a live well / bench seat in the front which I will probably turn into a fish cooler. I really don't have any use for a live well in this type of boat. The console was full of all sorts of holes, from top to bottom and on the sides, turned into Swiss cheese.


The gauges were patched in with an uneven piece of plastic, there were 2 6" speaker holes on each sides and worst of all, that faux wood paneling....it all had to go. The plan is to patch all of the holes and cracks, sand off the decals and fake wood paneling and eventually prime and paint white. Then the new Tohatsu gauges and throttle control unit will be installed. Finally a radio and sounder / GPS unit.

 
Status
Not open for further replies.
Top